Struggling to keep track of everything discussed in your remote team meetings? You’re not alone.
Recording and sharing these meetings can transform how you collaborate, making sure no detail slips through the cracks. Imagine having every important conversation saved and ready to share with your team—no more frantic note-taking or missed updates. You’ll discover simple, effective ways to record your remote meetings and share them easily with your team.
Whether you use Microsoft Teams, Zoom, or other platforms, these tips will help you capture and distribute your meetings effortlessly. Ready to boost your team’s productivity and communication? Let’s dive in.
Choosing The Right Recording Tool
Choosing the right recording tool is key to capturing clear and useful remote meeting videos. Different tools offer various features that suit team needs and technical skills. Selecting a tool depends on the meeting platform, recording quality, and sharing options.
Ease of use and compatibility with your devices also matter. The right tool saves time and effort while keeping the meeting content accessible to all team members.
Built-in Teams Recorder
Microsoft Teams has a built-in recording feature. It records audio, video, and screen sharing during meetings. Recordings are saved in Microsoft Stream or OneDrive for easy access. This tool is simple to start and stop during a meeting. It also notifies all participants when recording begins.
The built-in recorder fits well for teams already using Microsoft Teams. It requires no extra software and keeps files organized within the Microsoft ecosystem. Limitations include less control over recording settings and editing options.
Third-party Screen Recorders
Third-party screen recorders offer more flexibility and features. Tools like OBS Studio, Bandicam, and Vmaker capture any screen activity, including meetings. They allow selecting specific windows or full screens to record. Audio from the microphone and system can be recorded separately or together.
These recorders often provide editing tools, custom file formats, and various video quality settings. They work well if you need advanced control or want to record meetings outside Microsoft Teams. Some third-party tools require installation and learning time.
Comparing Popular Options
The built-in Teams recorder is easy and integrates well but has limited features. Third-party tools offer more control and flexibility but may be complex for beginners. Consider your team’s tech comfort and meeting needs before choosing.
For simple recordings, use the built-in Teams recorder. For detailed or multi-source capture, pick a third-party screen recorder. Test a few tools to find the best fit for your remote meetings.
Credit: riverside.com
Setting Up Screen Recording Software
Setting up screen recording software is the first step to capturing remote team meetings. Choosing the right tool and configuring it properly ensures clear video and audio. This setup helps share meeting content easily with team members who cannot attend live.
Follow simple steps to install and configure your screen recorder. Adjust settings to match your needs. Select the exact part of the screen to record for a focused and professional result.
Installing The Recorder
Start by downloading a trusted screen recording program. Popular options include OBS Studio, Bandicam, and Vmaker. Visit the official website to get the latest version. Run the installer and follow the on-screen instructions. After installation, open the software to begin configuration.
Configuring Audio And Video
Open the settings menu in your screen recorder. Enable system audio to capture sounds from the meeting. Turn on microphone input to record your voice. Check video quality options and set a resolution that matches your computer’s power. Test the audio and video to confirm they work well together.
Selecting The Recording Area
Decide which part of your screen to capture. Choose full screen to record everything visible. Select a specific window, like your meeting app, for a clean video. Some programs allow custom areas to focus on just the meeting window. This helps keep recordings clear and relevant.
Recording Remote Meetings Step-by-step
Recording remote meetings is vital for keeping track of discussions and decisions. It helps team members who miss the meeting catch up quickly. The process is simple when you follow clear steps. This guide breaks down how to record remote meetings easily and effectively.
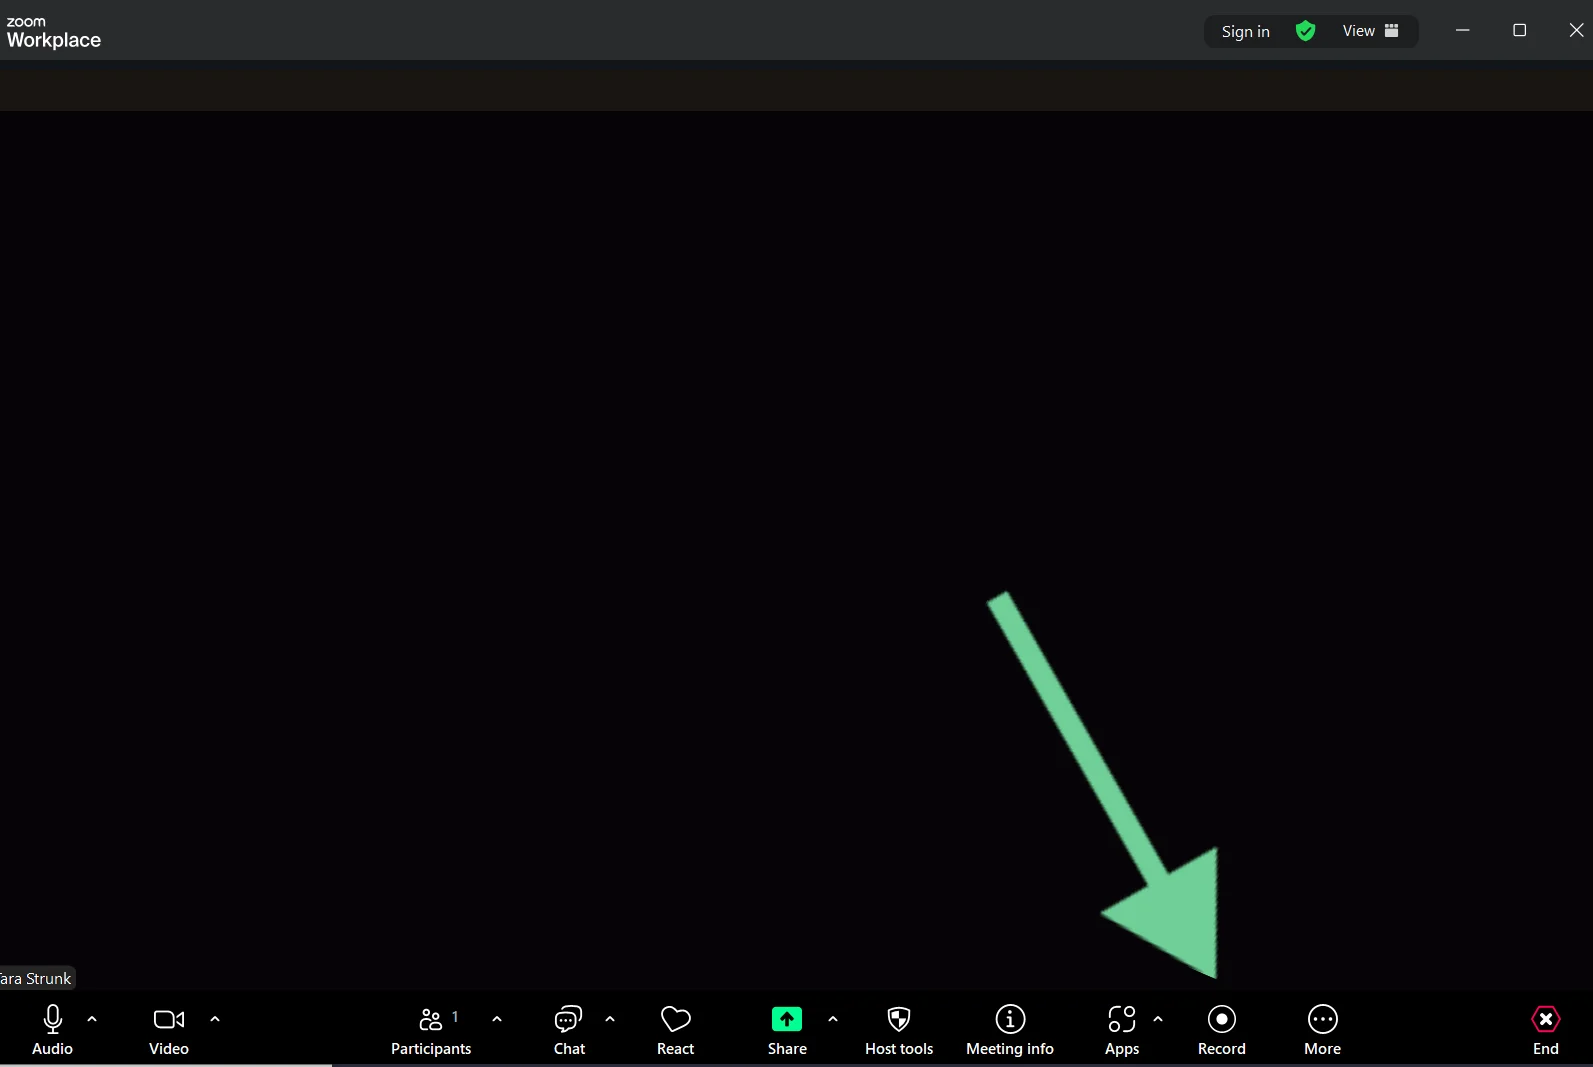
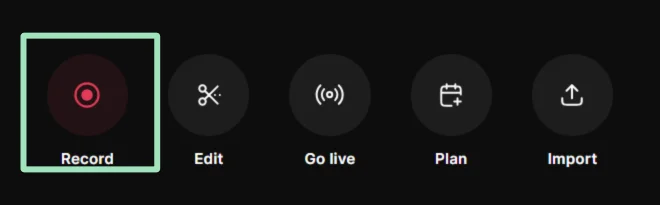
Starting The Recording
First, open your screen recording software or the meeting app. Check that your microphone and system audio are working. Select the area of the screen to record. This can be the full screen or just the meeting window. Click the record button to start capturing the meeting.
Joining The Meeting
After starting the recording, join the remote meeting. Use your usual app or web browser to connect. Make sure your camera and microphone are on if needed. The screen recorder will capture everything on your screen and the audio from the meeting. Speak clearly and stay engaged.
Stopping And Saving The File
When the meeting ends, stop the recording in your software. Save the file to a folder you can easily find. Name the file with the meeting date or topic for quick reference. Now, you can share the recording with your team or keep it for later review.
Sharing Your Meeting Recordings
Sharing your meeting recordings helps keep everyone informed and aligned. It allows team members who missed the meeting to catch up easily. Sharing recordings also creates a reference for future tasks and decisions. Using the right tools simplifies this process and saves time.
Cloud Storage Platforms
Cloud storage platforms offer an easy way to store and share recordings. Services like Google Drive, Dropbox, and OneDrive let you upload large files quickly. You can organize recordings in folders for easy access. These platforms support sharing links with your team or clients. They also sync files across devices, so recordings are always available.
Email And Messaging Apps
Email remains a simple method for sharing meeting recordings. Attach the file directly or include a download link from cloud storage. Messaging apps like Slack, Microsoft Teams, or WhatsApp allow instant sharing. These apps support quick communication and feedback. Sharing recordings here keeps discussions in one place.
Access Permissions And Security
Setting proper access permissions protects your recordings from unauthorized viewers. Most platforms let you control who can view, edit, or download files. Use password protection or link expiration for added security. Avoid sharing recordings publicly unless necessary. Regularly review permissions to maintain privacy and compliance.
Legal And Ethical Considerations
Recording and sharing remote team meetings can boost productivity and communication. Still, legal and ethical rules must guide this process. Ignoring these rules can cause trust issues and legal trouble. Understanding these rules helps keep meetings safe and respectful for everyone involved.
Obtaining Consent
Always get permission before recording any meeting. Inform all participants that the meeting will be recorded. Consent can be verbal or written but must be clear. Recording without consent can lead to legal penalties. Respecting consent builds trust and openness in your team.
Notification Requirements
Notify participants at the start of the meeting about recording. Use a clear announcement or a message in the chat. Some platforms show automatic alerts when recording starts. This helps avoid surprises and respects participants’ rights. Proper notification ensures transparency and fairness.
Respecting Privacy Laws
Follow privacy laws that apply to your region and team members’ locations. Laws like GDPR or CCPA protect personal data and communication. Avoid sharing recordings without permission or outside agreed channels. Secure storage and limited access keep data safe. Respecting privacy laws shows care for your team’s rights.
Advanced Tips For Better Recordings
Recording remote team meetings is simple, but improving those recordings takes skill. Advanced tips help create clear, professional videos. This boosts understanding and engagement for all team members. Follow these practical ideas to enhance your meeting recordings.
Improving Audio Quality
Clear audio is vital for good recordings. Use a quality microphone instead of built-in laptop mics. Position the mic close to your mouth to reduce background noise. Mute participants when they are not speaking to avoid distractions. Test audio levels before starting the meeting. Consider using noise-canceling headphones for better sound clarity.
Using Transcription Services
Transcriptions make meetings easy to follow. Use automated tools like Otter.ai or Rev to convert speech to text. Share transcripts with your team for quick review. This helps team members who speak different languages or have hearing difficulties. Transcripts also improve searchability of recorded content. Edit transcripts for accuracy before sharing.
Editing And Enhancing Videos
Editing improves video quality and focus. Trim unnecessary parts to keep recordings concise. Add captions to support understanding and accessibility. Use simple video editors like iMovie or Windows Video Editor. Adjust brightness and contrast for clearer visuals. Highlight key points with text or graphics to guide viewers.
Troubleshooting Common Issues
Troubleshooting common issues during remote team meeting recordings saves time and stress. Knowing how to fix problems quickly keeps meetings productive and smooth. Below are frequent issues and easy fixes to help you record and share meetings without hassle.
Audio Sync Problems
Audio and video may not match during playback. This issue makes it hard to follow conversations. To fix this, check your recording software settings. Ensure your microphone and system audio are set to the same sample rate.
Close other apps that use audio to avoid conflicts. Restart the recording software before the meeting starts. Testing a short recording beforehand helps catch sync issues early.
Storage Space Management
Meeting recordings use a lot of storage space. Running out of space can stop recordings unexpectedly. Clear unused files from your device regularly. Use cloud storage options like Google Drive or OneDrive to save space.
Adjust recording quality to lower settings if storage is limited. Compress large video files before sharing to save bandwidth and space. Always check available storage before starting a recording.
Recording Failures
Sometimes recordings fail to start or stop unexpectedly. This can happen due to software glitches or permissions issues. Make sure your screen recorder has access to your microphone and screen.
Update your recording software to the latest version. Restart your computer before important meetings to clear temporary bugs. Keep backup recording options ready, like a second recorder or app, to avoid losing content.

Credit: www.nextiva.com

Credit: riverside.com
Frequently Asked Questions
Is There A Way To Record A Teams Meeting Outside Of Teams?
Yes, you can record a Teams meeting outside Teams using screen recording software like OBS Studio, Bandicam, QuickTime, or PowerPoint. These tools capture audio and video by recording your screen during the meeting. Always ensure you have permission before recording.
How Do I Automatically Record And Transcribe Teams Meetings?
Enable meeting recording and transcription in Teams settings. Start the meeting, click “Record,” and turn on live transcription. Save files automatically after the meeting ends.
How To Record A Teams Meeting If You Are Not The Organizer?
Use third-party screen recording software like OBS Studio, Bandicam, or QuickTime to capture the meeting. Configure audio settings, start recording before joining, and save the file afterward. Ensure you have permission to record and follow legal guidelines.
Can Microsoft Teams Meeting Recap Be Shared As A Link?
Microsoft Teams meeting recaps cannot be shared directly as a link. Users must share the file or email recap manually.
Conclusion
Recording and sharing remote team meetings can boost teamwork and clarity. Use simple tools like OBS Studio or QuickTime to capture meetings easily. Always check permissions before recording to respect privacy. Sharing recordings helps team members stay updated and review important points.
Keep your process smooth by preparing your software ahead of time. This way, every team member benefits from clear communication and better collaboration.

Everett Ashford is a tech reviewer at mytechgrid.com specializing in SSDs, cameras, TVs, earbuds, headphones, and other consumer electronics. He provides honest, data-driven reviews based on hands-on testing and real-world performance analysis. Everett simplifies complex tech details to help readers make smart, confident buying decisions.