Installing an SSD involves opening your PC, mounting the drive, connecting the necessary cables, and then cloning or installing an operating system.
If you are looking to dramatically boost your computer's performance, learning how to install an SSD in a PC is one of the most impactful upgrades you can make. As someone who has built and upgraded numerous systems over the years, I can tell you firsthand that moving from a traditional hard drive to a solid-state drive is like switching from a bicycle to a sports car. This guide is designed to demystify the entire process. We will walk you through every step, from choosing the right drive and gathering your tools to the physical installation and software setup, ensuring you have the confidence to successfully install an SSD in your PC.

Before You Begin: Gathering Your Tools and Parts
Preparation is the key to a smooth installation. Before you even think about opening your PC case, let's make sure you have everything you need. A little planning here will save you a lot of potential headaches later. Rushing into the process without the right components is a common mistake that I've seen lead to frustration. Taking just ten minutes to gather these items will make the entire guide on how to install a SSD in a PC much easier to follow.
Choosing the Right SSD
Your first decision is what type of SSD to buy. There are two main types you will encounter:
- 2.5-inch SATA SSD: This is the most common type and resembles a small, thin version of a traditional hard drive. It connects to your motherboard using a SATA cable and is compatible with almost every desktop PC made in the last decade. It offers a massive speed improvement over old mechanical drives.
- M.2 NVMe SSD: This type looks more like a stick of RAM and plugs directly into a special M.2 slot on the motherboard. NVMe drives are significantly faster than their SATA counterparts, making them ideal for the primary operating system drive if your motherboard supports them. Always check your motherboard's manual to confirm compatibility before purchasing.
Essential Tools
You do not need a massive toolkit for this job. In most cases, all you will need is:
- A Phillips-head screwdriver: This will be used to open your PC case and secure the SSD in its drive bay.
- An anti-static wrist strap (recommended): This is a safety precaution to prevent static electricity from your body from damaging sensitive computer components. While you can get by with periodically touching the metal part of your case to ground yourself, a wrist strap is a cheap and effective form of insurance.
- SATA data cable (for 2.5-inch SSDs): Your new 2.5-inch SSD will not always come with a SATA data cable. Check the box, and if one is not included, you will need to purchase one separately. Your motherboard likely came with a few extras, so check that box as well.
Preparing Your Data
Before you unplug anything, you need a plan for your operating system and personal files. You have two main options:
- Clone Your Existing Drive: This method involves creating an exact copy of your old hard drive onto the new SSD. This is a great option if you want to keep all your programs, files, and settings exactly as they are.
- Perform a Fresh Installation: This involves installing a brand new, clean version of your operating system (like Windows) onto the SSD. This is my preferred method as it gets rid of clutter that has accumulated over the years and can result in a snappier system.
Regardless of which path you choose, you must back up your important data to an external drive or cloud service. This is a critical step. Things can go wrong, and having a backup ensures your precious photos, documents, and files are safe.
The Physical Installation: A Step-by-Step Guide
With your parts gathered and your data backed up, it is time for the hands-on part of how to install an SSD in a PC. This may seem intimidating, but it is a very straightforward process. We will break it down into simple, manageable steps. Just take your time, be gentle with the components, and follow along.
-
Power Down and Prepare Your Workspace. Shut down your computer completely. Unplug the power cord from the back of the PC and any other connected cables. Move the tower to a well-lit area with plenty of room to work, like a desk or table. Put on your anti-static wrist strap and clip it to a bare metal part of the PC case.
-
Open Your PC Case. Most desktop cases have a main side panel held on by two thumbscrews on the back. Unscrew these and gently slide the panel off to expose the computer's internal components.
-
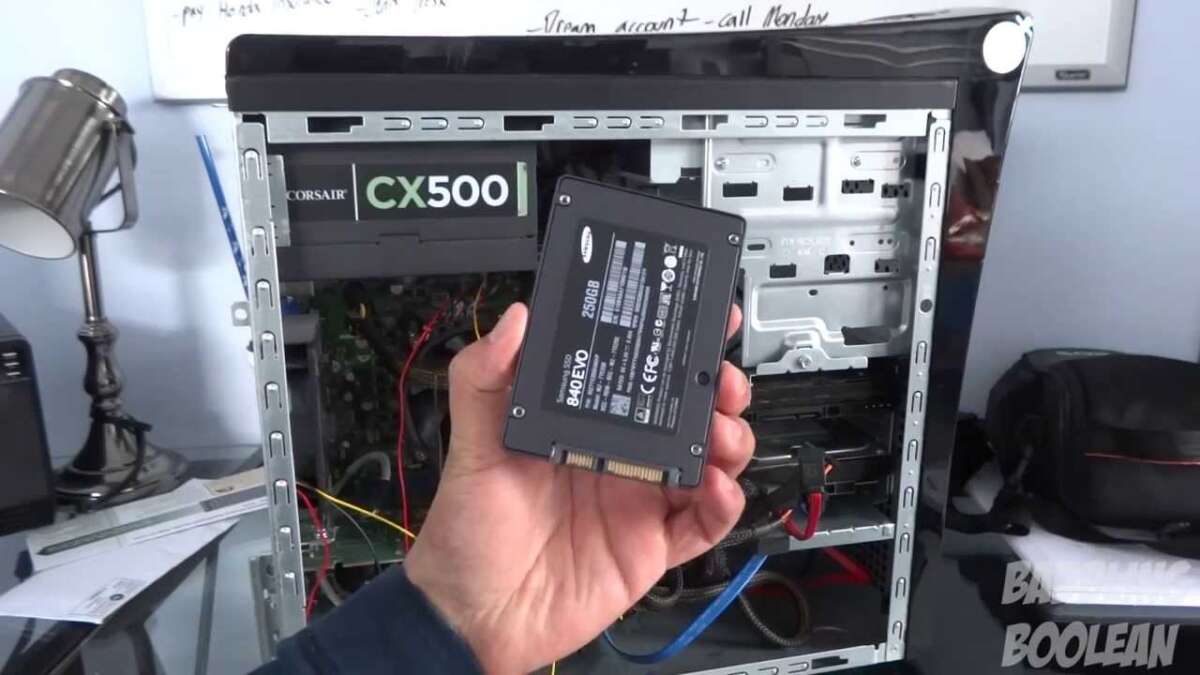
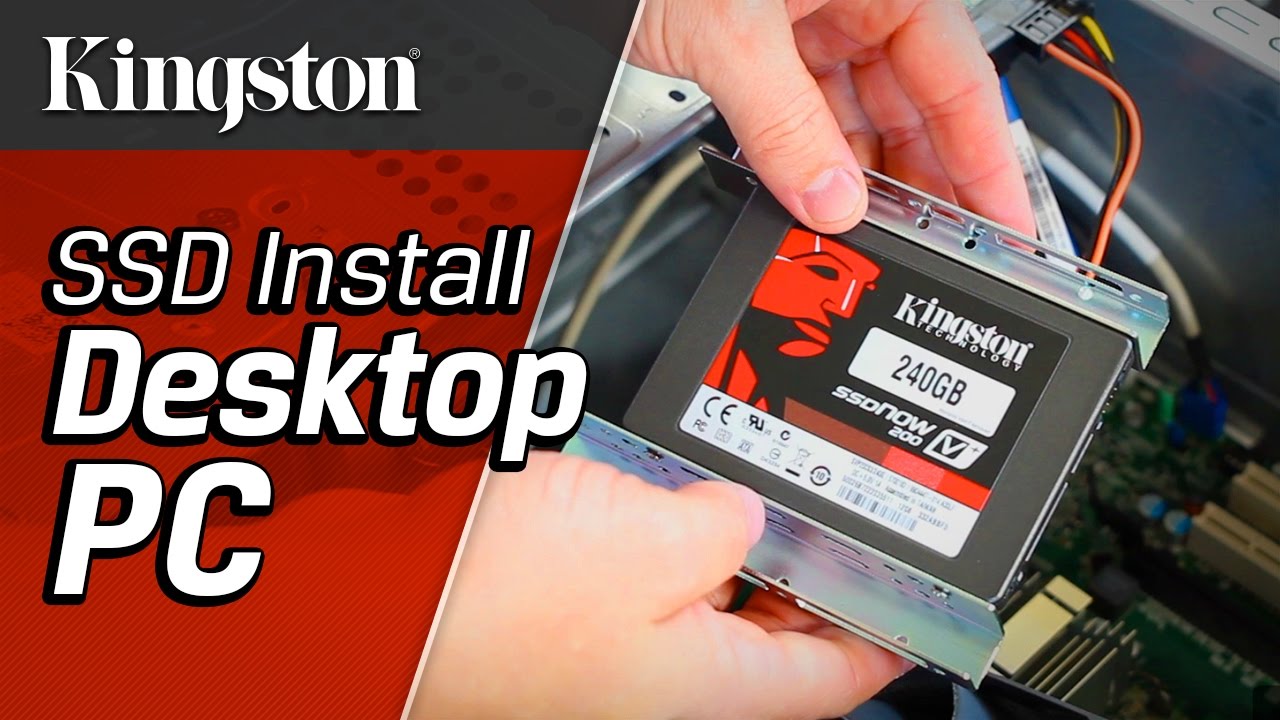
Locate a Drive Bay (for 2.5-inch SATA SSDs). Look for a metal cage, usually near the front of the case, designed to hold hard drives. Some cases have specific 2.5-inch bays perfect for SSDs. If your case only has larger 3.5-inch bays, you may need a simple adapter bracket to make the smaller SSD fit securely.
-
Mount the SSD. Slide the SSD into an empty bay and align its screw holes with the holes on the bay. Use the screws that came with your SSD or case to secure it in place. You want it to be snug, not rattling around inside.
-
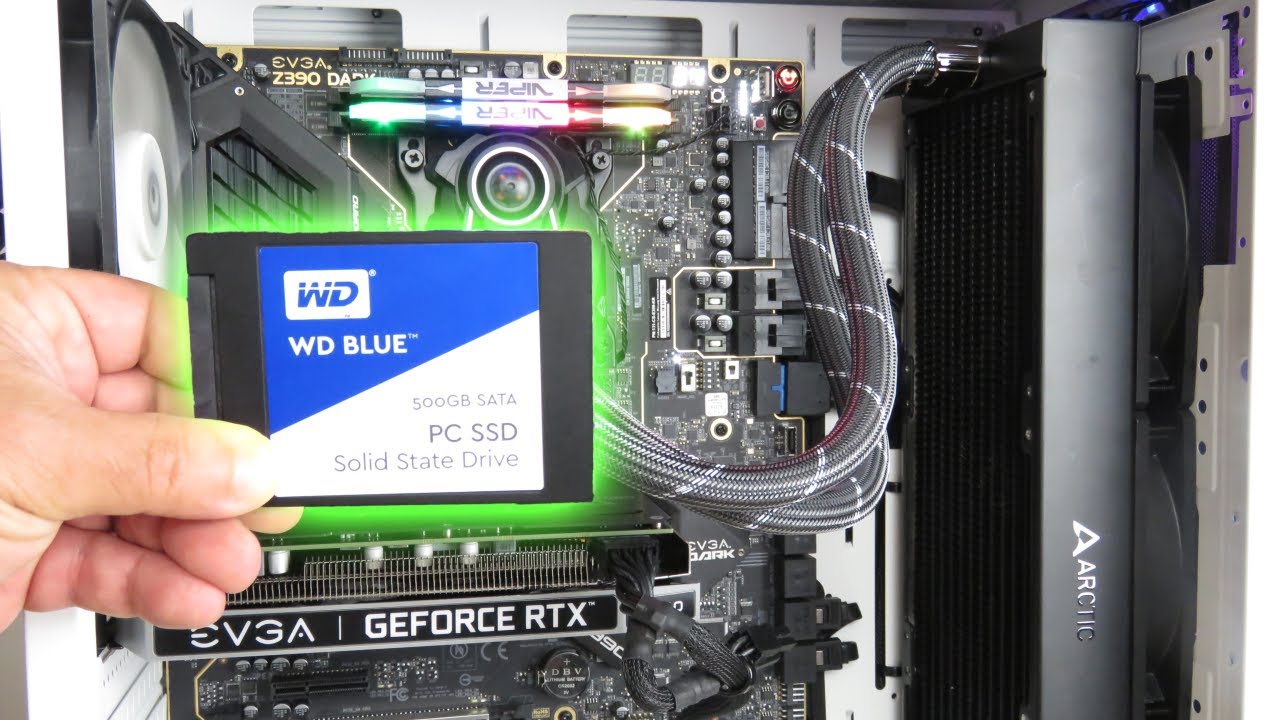
Connect the Cables. For a SATA SSD, you need to connect two cables. First, take the L-shaped SATA power cable coming from your computer's power supply and plug it into the larger port on the SSD. Next, take your SATA data cable, plug one end into the smaller port on the SSD, and plug the other end into a free SATA port on your motherboard. These ports are usually grouped together and clearly labeled.
-
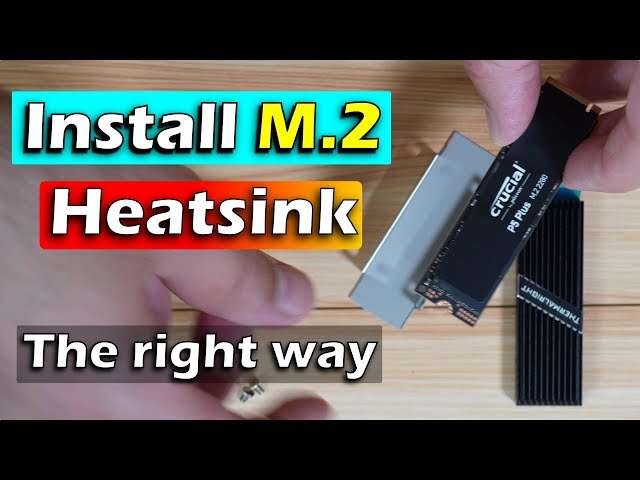
Installing an M.2 NVMe SSD. If you are using an M.2 drive, the process is different. Locate the M.2 slot on your motherboard (check your manual if you cannot find it). Remove the small mounting screw from the motherboard. Insert the M.2 SSD into the slot at a slight angle, then gently press it down so it lies flat. Use the screw you just removed to secure the end of the drive to the motherboard. Do not overtighten it.
-
Close Up Your PC. With the drive securely installed and connected, it is time to put the side panel back on your case. Reconnect your power cord, monitor, and other peripherals. You have completed the physical portion of how to install an SSD in a PC.

Software Setup: Getting Your New SSD Running
The hardware is installed, but your work is not quite done. Your computer does not yet know what to do with this new, empty drive. Now we move on to the software side of things, where you will either copy your old system over or start fresh. This final phase is what brings your speedy new upgrade to life.
Option 1: Cloning Your Old Drive
If you decided to clone, you will need cloning software. Many SSD manufacturers offer a free version of software like Acronis True Image, or you can use a popular free tool like Macrium Reflect. The general process is as follows:
- Reconnect your old hard drive and boot your computer from it one last time.
- Install and run the cloning software. You may need to connect your new SSD via a USB-to-SATA adapter if you only have one set of internal connections.
- Follow the software's wizard, selecting your old drive as the "source" and your new SSD as the "destination."
- Start the cloning process. This can take some time depending on how much data you have.
- Once complete, shut down the PC, remove the old hard drive, and ensure the new SSD is the primary boot device in your BIOS/UEFI settings.
Option 2: Performing a Fresh Windows Installation
For a clean start, you will need to create a bootable USB drive with the Windows installer on it. You can do this using the official Microsoft Media Creation Tool.
- Create the bootable USB on another computer if necessary.
- Plug the USB drive into your PC with the new SSD installed.
- Turn on the PC and enter the BIOS/UEFI settings (usually by pressing DEL, F2, or F12 during startup).
- Set the boot order to prioritize the USB drive.
- Save and exit. Your PC will now boot into the Windows installer.
- Follow the on-screen prompts, selecting the "Custom: Install Windows only" option.
- When asked where to install Windows, select your new SSD (it will likely be listed as "Unallocated Space") and proceed. Windows will handle the formatting and installation from there.
Initializing the SSD as a Secondary Drive
If you are keeping your old drive and simply adding the SSD for more storage, Windows will not see it automatically. You need to initialize it first.
- Right-click the Start button and select "Disk Management."
- You will see a prompt to initialize the new disk. Choose GPT (GUID Partition Table) as the partition style.
- Right-click the "Unallocated" space on your new drive and select "New Simple Volume."
- Follow the wizard to assign it a drive letter and format it with the NTFS file system. Your SSD will now appear in File Explorer, ready to use.
Frequently Asked Questions
Can I install an SSD myself?
Absolutely. While it may seem technical, installing an SSD is one of the easier PC upgrades. By following a detailed guide and taking basic precautions, even a beginner can successfully complete the process in under an hour.
Do I need to buy extra cables for my new SSD?
For a 2.5-inch SATA SSD, you will need a SATA data cable, which often does not come in the box. Your motherboard may have included an extra one, but it is wise to check beforehand. M.2 NVMe SSDs do not require any cables as they plug directly into the motherboard.
Should I clone my old drive or do a fresh install?
Cloning is faster and keeps all your files and programs intact, making it a convenient option. A fresh install is cleaner, getting rid of old junk files and potentially improving performance, but requires you to reinstall all your applications.
What is the difference between a SATA and NVMe SSD?
A SATA SSD uses an older, slower interface but is compatible with nearly all PCs. An NVMe SSD uses the much faster PCIe interface and plugs into an M.2 slot, offering a significant performance advantage if your motherboard supports it.
My PC does not recognize the new SSD. What should I do?
First, double-check that both the power and data cables are securely connected to the SSD and the motherboard. If it is a secondary drive, you may need to go into Disk Management in Windows to initialize and format it before it becomes visible.
Conclusion
You have successfully navigated the process of how to install an SSD in a PC. From selecting the right drive and preparing your workspace to completing the physical installation and configuring the software, you are now equipped with a significantly faster and more responsive computer. The difference in boot times, application loading, and overall system snappiness is something you will appreciate every single day.
Take a moment to enjoy the fruits of your labor. You have not only upgraded your computer but also gained valuable hands-on experience. Now that you have seen how simple it can be, do not hesitate to explore other ways to improve your system. Feel free to share your success story or ask any lingering questions in the comments below

Everett Ashford is a tech reviewer at mytechgrid.com specializing in SSDs, cameras, TVs, earbuds, headphones, and other consumer electronics. He provides honest, data-driven reviews based on hands-on testing and real-world performance analysis. Everett simplifies complex tech details to help readers make smart, confident buying decisions.