Initialize the drive in Disk Management, then create a GPT partition and format.
If Windows will not see your new SSD, you are not alone. I have helped many users fix this in minutes. This guide shows how to get Windows to recognize new SSD, step by step, with simple checks and pro tips you can trust.
Quick checklist before you start
Most SSD issues are simple. A missing cable, a wrong slot, or an uninitialized disk can be the cause. Follow this quick list to save time and avoid guesswork.
- Confirm power and data connections are tight on SATA drives. Use a known-good cable.
- For M.2 SSDs, seat the drive flat, tighten the screw, and use the right slot.
- Boot to BIOS and check if the SSD shows under Storage. If not, re-seat or swap ports.
- In Windows, open Disk Management. Initialize the disk, create a new volume, and format.
- Update Windows, chipset, storage, and NVMe drivers to ensure full support.
If you want to know how to get Windows to recognize new SSD the fast way, this list often fixes it. In my lab, this solves nine out of ten cases in under ten minutes.
Step-by-step: Initialize and format the SSD in Windows
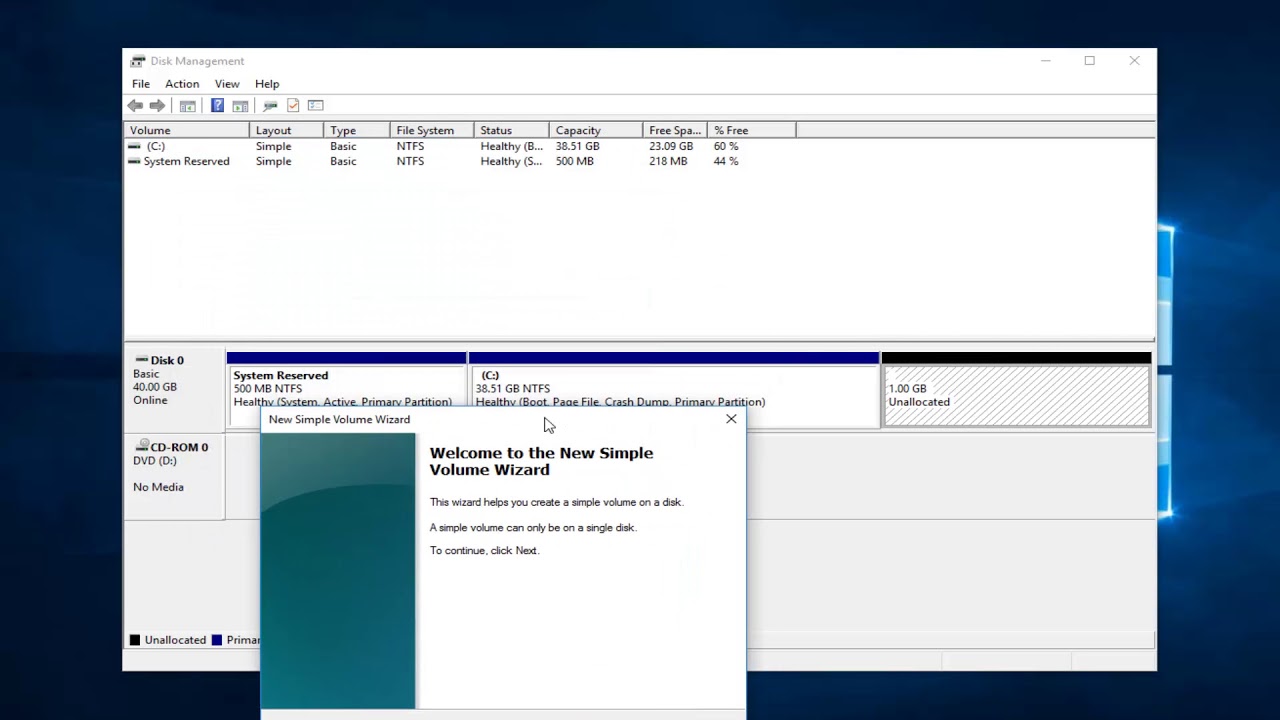
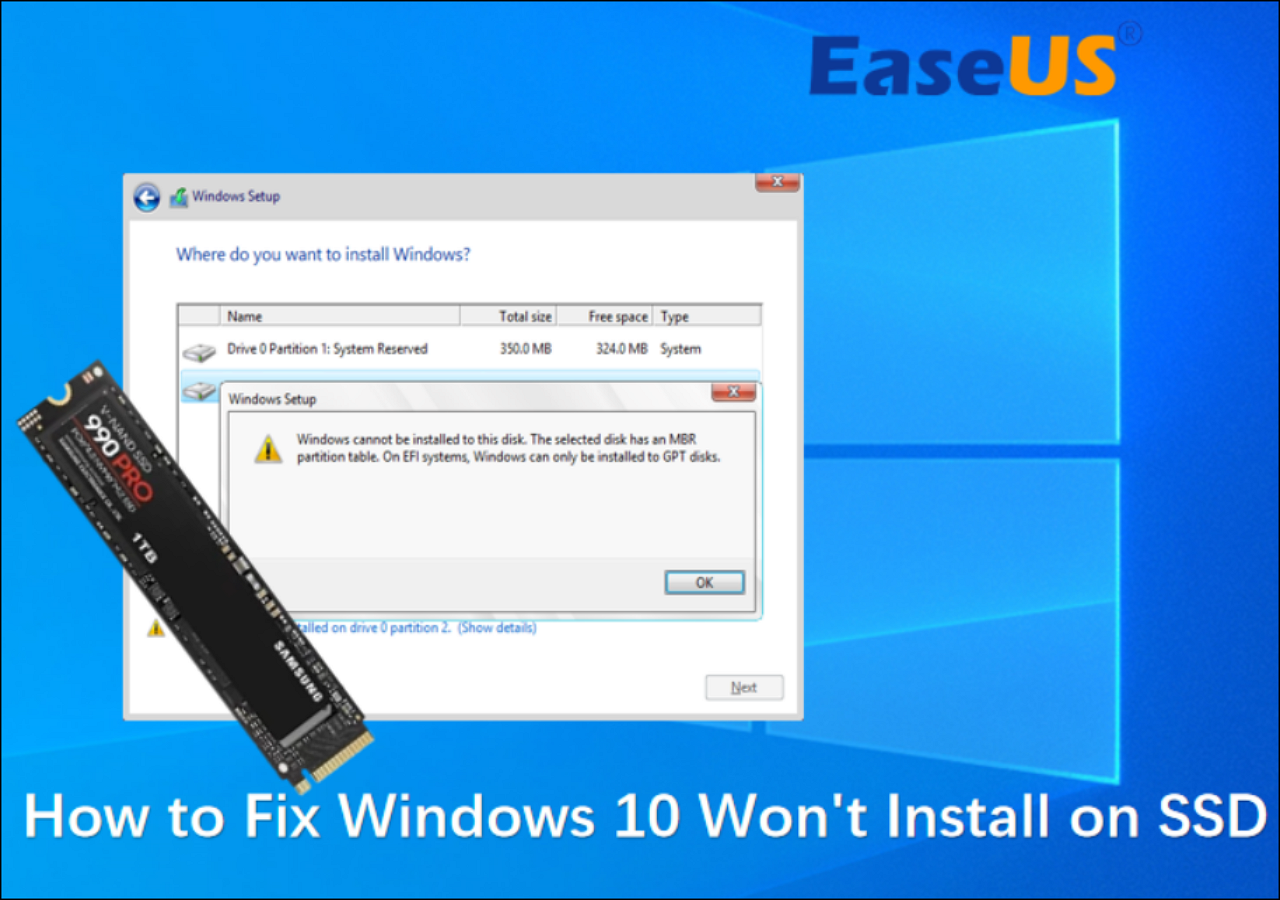
If the SSD is new, Windows may see it as unallocated. You must initialize and format it before it shows in File Explorer. This is the top fix for how to get Windows to recognize new SSD.
- Open Disk Management
- Press Windows key + X. Click Disk Management.
- If you see a disk as Not Initialized, a prompt will open.
- Initialize the disk
- Choose GPT for modern PCs and drives larger than 2 TB.
- Choose MBR only for old systems or legacy boot.
- Create a new volume
- Right-click the unallocated space. Click New Simple Volume.
- Assign a drive letter. Choose NTFS. Use default allocation size.
- Name the volume. Finish the wizard and wait for the format.
- Check File Explorer
- The drive should now appear with the letter you picked.
- If not, refresh or reopen File Explorer.
I use this process when clients ask how to get Windows to recognize new SSD after a fresh install. It works on Windows 10 and Windows 11.

If Disk Management does not show the drive
No drive in Disk Management? That means Windows cannot talk to it. We will check cables, slots, BIOS, and drivers. This is a common part of how to get Windows to recognize new SSD on desktops and laptops.
Try these fixes in order:
- Power down fully. Unplug the power cable. Hold the power button for 10 seconds.
- Reseat the SSD. For SATA, use a different SATA port and a new cable.
- Move the SATA SSD to a port enabled by the chipset, not a third-party controller.
- For M.2, confirm the slot supports NVMe or SATA, matching your drive type.
- Boot to BIOS. If the SSD is not listed, check “Storage,” “NVMe,” or “Information.”
If BIOS does not see it, Windows cannot. When I see this, the cause is often a loose M.2 seating or a disabled SATA port shared with an M.2 SATA stick. That tip alone can crack how to get Windows to recognize new SSD in tricky builds.

BIOS/UEFI settings to verify
Wrong firmware settings can hide a good drive. A fast BIOS check can fix how to get Windows to recognize new SSD without any tools. Keep changes small and safe.
Review these settings:
- Storage mode: Use AHCI for most systems unless you run RAID on purpose.
- NVMe list: Confirm the drive shows under NVMe Configuration.
- CSM and Secure Boot: Try enabling UEFI boot if you use GPT.
- SATA port map: Some boards disable ports when an M.2 SATA SSD is installed.
- Save and exit. Then boot to Windows and recheck Disk Management.
On many motherboards, M.2 Slot 1 can disable SATA Port 2. I have seen this surprise many builders. A quick port change can solve how to get Windows to recognize new SSD instantly.

Drivers, updates, and firmware
Drivers and firmware unlock full support. They can also fix detection bugs. This matters for how to get Windows to recognize new SSD on new chipsets and laptops.
Do the following:
- Run Windows Update. Install all optional driver and firmware updates.
- Install the latest chipset drivers from your motherboard or laptop maker.
- Update storage drivers. Intel RST or AMD RAID may apply if you use RAID.
- For NVMe SSDs, install the vendor tool to update SSD firmware.
- Reboot and recheck Disk Management and Device Manager.
Device Manager tips:
- Open Device Manager. Expand Disk drives and Storage controllers.
- If you see Unknown device, right-click and Update driver.
- If the SSD shows with a warning, uninstall the device, then Scan for hardware changes.
I rely on vendor tools to keep firmware fresh. It is a small step that helps with how to get Windows to recognize new SSD and can boost performance and stability.

Special cases: NVMe, M.2, and RAID
Some SSDs need special care. NVMe runs on PCIe lanes, not SATA. M.2 slots can be SATA or NVMe. RAID modes can mask drives. These details shape how to get Windows to recognize new SSD on modern hardware.
Watch for these cases:
- NVMe not listed: Use an M.2 slot wired for PCIe. Some secondary slots are slower or disabled.
- M.2 SATA drive in NVMe-only slot: It will never show. Use a slot that supports SATA.
- PCIe adapter cards: Check BIOS for PCIe bifurcation. Use a full-length slot if needed.
- RAID mode enabled: Windows may not show single drives. Disable RAID or install RST/RAID drivers.
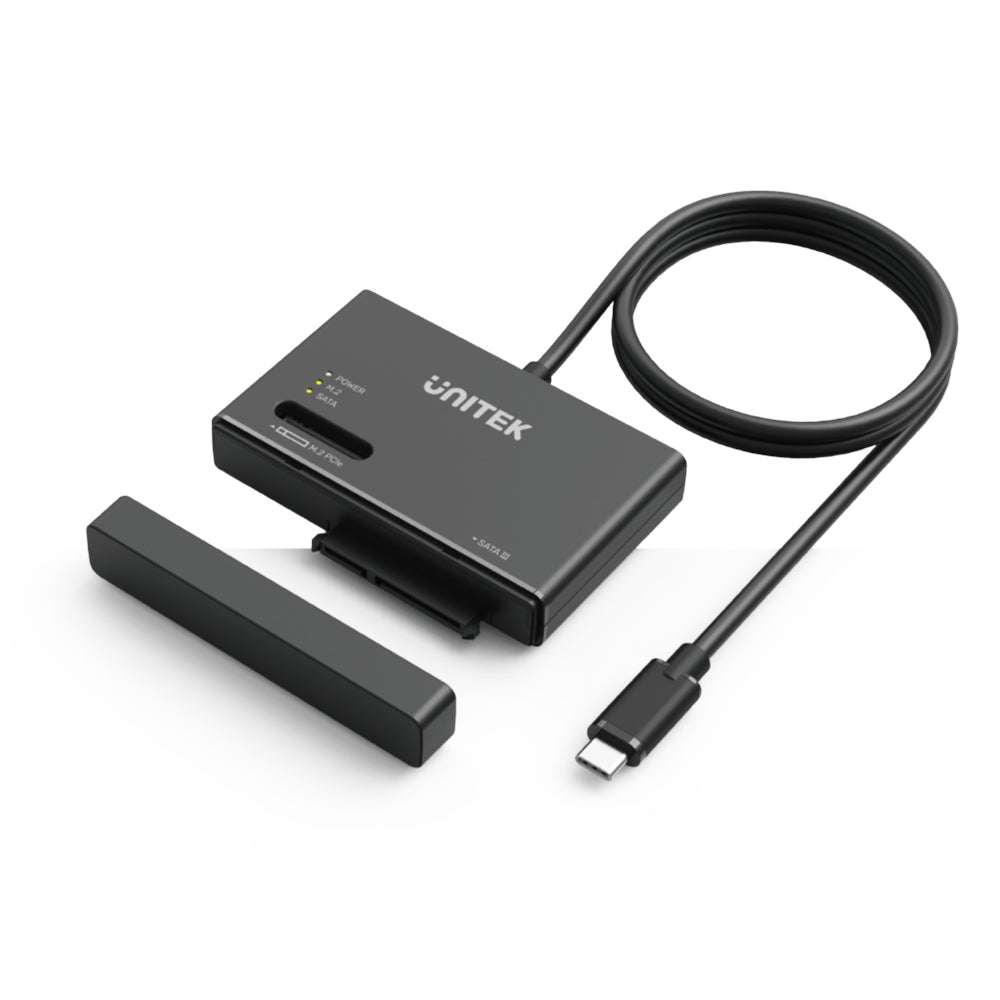
- USB enclosures: Some cheap adapters do not support NVMe. Use a known NVMe-capable USB bridge.
When clients bring me mixed M.2 drives, I label slots and types on the case. It prevents confusion and speeds up how to get Windows to recognize new SSD during upgrades.
Move Windows or files to the new SSD (optional)
Once the SSD shows in Windows, you can move data. For many, the next step after how to get Windows to recognize new SSD is cloning or a clean install. Pick the safer path for your needs.
You have two options:
- Clean install: Best for a fresh start. Fastest and most stable.
- Clone the old drive: Keeps all apps and settings. Use trusted cloning software.
Cloning checklist:
- Shrink old partitions if needed to fit the new SSD.
- Clone only used space. Align partitions to 1 MB for best speed.
- After cloning, shut down. Remove the old drive or change boot order to the SSD.
I do a clean install for mission-critical systems. It takes longer but avoids old driver clutter. Either path works after you master how to get Windows to recognize new SSD.

Common mistakes and how to avoid them
Small mistakes can cost hours. Avoid these traps so you do not redo work. This list sums up key points from how to get Windows to recognize new SSD across many builds.
Top mistakes:
- Forgetting to initialize the disk in Disk Management.
- Mixing M.2 SATA and NVMe in the wrong slot.
- Loose SATA data or power cables. Replace old cables if in doubt.
- Leaving the SSD in a USB dock that does not support NVMe.
- RAID mode enabled by default. AHCI is the safe default for single drives.
If you must ask how to get Windows to recognize new SSD more than once, check cables first and slots second. These two cause most pain and are easy to fix.
Performance and health tips after setup
Once the SSD is visible, keep it fast and healthy. A few tweaks go a long way. This phase comes right after how to get Windows to recognize new SSD and sets you up for years.
Do this next:
- Confirm TRIM is on. Run: fsutil behavior query DisableDeleteNotify. Result 0 means on.
- Leave 10 to 20 percent free space for best write speed and life.
- Enable write caching in Device Manager if your system supports it.
- Update SSD firmware every few months with the vendor tool.
- Avoid full-drive “defrag.” Use Optimize Drives, which sends TRIM for SSDs.
These steps are simple but effective. They fit well with best practices from vendor guides and help prevent future slowdowns.
Frequently Asked Questions of how to get windows to recognize new ssd
Why does my SSD not show up in File Explorer?
It is likely not initialized or not formatted. Open Disk Management, initialize the disk as GPT, create a new volume, and format it as NTFS.
Should I use GPT or MBR for a new SSD?
Use GPT for almost all modern systems, especially with UEFI. Use MBR only for old hardware or when a legacy boot setup demands it.
Can BIOS see my SSD but Windows cannot?
Yes, if drivers are missing or the disk is not initialized. Install chipset and storage drivers, then use Disk Management to create and format a volume.
How do I fix an NVMe SSD not detected on a laptop?
Check the M.2 slot type and compatibility in the manual. Update BIOS, reseat the drive, and ensure the slot supports NVMe, not only SATA.
Will a USB enclosure work for an NVMe SSD?
Only if the enclosure supports NVMe. Many enclosures are SATA-only, so pick one that lists NVMe PCIe support.
Does RAID mode stop Windows from seeing a single SSD?
It can. Switch to AHCI if you do not use RAID, or install the RAID driver so Windows can detect the controller and the drive.
Is it safe to use diskpart clean to fix detection issues?
Yes, but it wipes all data on that drive. Use diskpart clean only on the correct disk and then re-initialize it in Disk Management.
Conclusion
You now have the full path for how to get Windows to recognize new SSD. Check physical connections, confirm BIOS detection, initialize the disk, and install the right drivers. This flow solves the problem in most cases with little stress.
Take action today. Run through the checklist, set up the drive, and enjoy faster load times. If you found this helpful, subscribe for more hands-on PC fixes or leave a comment with your setup and results.

Jamie Lee is a seasoned tech analyst and writer at MyTechGrid.com, known for making the rapidly evolving world of technology accessible to all. Jamie’s work focuses on emerging technologies, product deep-dives, and industry trends—translating complex concepts into engaging, easy-to-understand content. When not researching the latest breakthroughs, Jamie enjoys exploring new tools, testing gadgets, and helping readers navigate the digital world with confidence.