Best camera settings for northern lights: f/1.8, 2–8s, ISO 800–3200, RAW.
You packed your warmest boots, drove into the dark, and looked up. The sky explodes into green and purple bands—and your first shot turns out black or blurry. I’ve been there, and it’s frustrating. The best camera settings for northern lights turn chaos into a clear plan, so you stop guessing and start getting sharp, bright, color-true images you’re proud to print. In this guide, I’ll share my real-world settings, field tricks, and simple checks I use from Alaska to Iceland to nail each frame.
Google Nest Cam with Floodlight
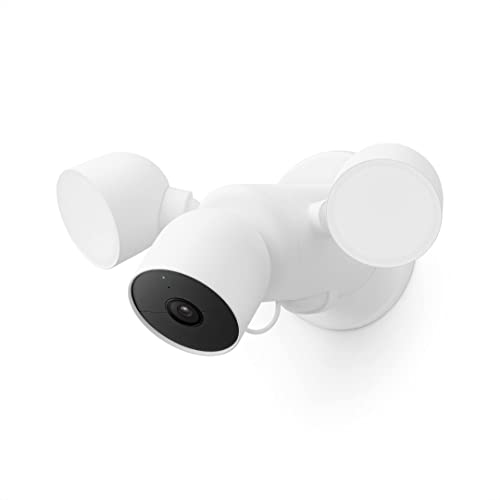
The Google Nest Cam with Floodlight blends a crisp smart camera with a bright outdoor light. I use units like this around my home and cabin. They are great for safety and remote checks while I chase aurora. The app is simple, the alerts are clear, and the footage is sharp.
For aurora photographers, there’s a bonus. You can schedule the floodlight to stay off during your shoot. That means less glare on snow and less light pollution in your yard. When I return, I switch the light back on with one tap. It’s neat and it works.
Pros:
- Smart alerts and clear 1080p HDR video with good night vision
- Easy scheduling so the light stays off while you shoot
- Two-way talk for doorstep control while you’re on a photo trip
- Strong app support and familiar Google Home integration
- Built-in floodlight can deter unwanted visitors
Cons:
- Bright floodlight can wreck dark adaptation if it triggers mid-shoot
- Requires hardwiring and a strong Wi‑Fi signal outside
- Cloud features may need a subscription for full value
My Recommendation
If you shoot from your driveway or patio, this is a smart pick. Set schedules so the floodlight stays off while you dial in the best camera settings for northern lights. That reduces stray light and keeps your exposures clean. It’s also great for peace of mind while you travel to darker skies.
Best use is a mixed home setup. Keep the camera armed, keep the light off during aurora hours, and flip it back on when you’re done. The balance between safety and darkness is the real win. The value is strong if you already use Google Home and want an outdoor camera with control.
| Best for | Why |
|---|---|
| Home shooters near their yard | Schedule the floodlight off to protect night shots |
| Smart home users (Google) | Easy app control and familiar alerts |
| Traveling photographers | Remote monitoring while chasing aurora miles away |
eufy Permanent Outdoor Lights E22 (50ft)

The eufy Permanent Outdoor Lights E22 add clean, bright RGBWW light to your eaves. The strip looks tidy all year and handles snow and rain with IP67-level protection. The color control is flexible. I use schedules and presets for holidays and quiet evening tones.
For aurora nights, control is the key. You can set a “dark window” every clear night so your yard stays dim. That helps when you dial in the best camera settings for northern lights and want a pure sky. When you finish, bring the lights back for safety and style.
Pros:
- Permanent, tidy fit with tough weather resistance (IP67)
- RGBWW LEDs with warm whites for natural outdoor tones
- Scheduling and scenes for no-fuss nightly control
- Works with select eufy cameras to automate scenes
- Good brightness for daily use and holiday themes
Cons:
- Setup time is longer than plug-in string lights
- App ecosystem works best if you own other eufy gear
- Not a low-cost choice for short-term renters
My Recommendation
If you care about light control and curb appeal, this is a strong pick. Set a nightly dark schedule so nothing spills into your lens while you use the best camera settings for northern lights. Your sky stays clean. Your home stays safe and stylish the rest of the time.
It’s ideal for homeowners in snow-prone areas who shoot in the yard or driveway. The permanent fit keeps the look neat and the app keeps control simple. It’s worth it for a blend of beauty, control, and long-term value.
| Best for | Why |
|---|---|
| Homeowners who shoot at home | Set dark hours to protect night sky images |
| Four-season climates | IP67 build handles snow, rain, and wind |
| App-first lighting control | Scenes and schedules for zero-fuss use |
The Ultimate Guide to the Best Camera Settings for Northern Lights
I learned to keep things simple in the cold. Batteries drain fast. Fingers go numb. So I use a short checklist to dial in the best camera settings for northern lights in seconds. Then I fine-tune with a few test shots and the histogram. That routine saves the night when the sky moves fast.
The Fast Recipe (Use This First)
- Mode: Manual (M). Shoot RAW. Turn off flash.
- Aperture: f/1.4 to f/2.8. Use your lens’s widest sharp f‑stop.
- Shutter speed: 2 to 8 seconds for most aurora.
- ISO: 800 to 3200. Start at ISO 1600.
- White balance: 3500K to 4000K. Or Auto and fix in RAW.
- Focus: Manual. Magnify a bright star and focus until tack sharp.
- Stabilization: Turn off IBIS/IS on a tripod.
- Noise reduction: High-ISO NR low or off; Long Exposure NR off.
- Drive: 2-sec timer or remote release.
That is the heart of the best camera settings for northern lights. It gets you 90% there. From that base, you adjust one thing at a time. Keep it simple and you will land the shot.
Aperture: Let In Light, Keep It Sharp
Open the lens wide. f/1.4 to f/2.8 is the sweet spot. I test at home to find the sharpest open f‑stop for my lens. Many fast primes are best at f/1.8 or f/2 for corners.
On zooms, I often use f/2.8. If stars look smeared at the far edges, try f/3.2. That small stop adds a bit of crispness. It still keeps shutter times short.
Shutter Speed: Match the Aurora’s Speed
Fast curtains and “needles” call for 1 to 4 seconds. Slow, smooth bands can handle 6 to 10 seconds. If you go longer, the aurora will blur and lose texture. You want structure and detail.
Watch the sky. If it pulses faster, shorten the time. If it drifts slow, extend a bit. For very bright outbursts, I lock at 1 to 2 seconds and lower ISO. That keeps highlights in check.
ISO: Balance Brightness and Noise
Modern sensors handle ISO 1600 to 3200 well. I set ISO 1600 for normal bands. I go ISO 800 if the moon is bright or the aurora is strong. I push to ISO 3200 in dark skies with weak arcs.
Check the histogram. Keep the peak off the far left. Expose to the right without clipping. That cuts noise and keeps color rich. The best camera settings for northern lights always consider noise and detail together.
White Balance: Make the Colors True
Shoot RAW so white balance is flexible. I like 3500K to 4000K for natural greens and violets. Auto WB can work, but it shifts frame to frame. That makes batch edits slower.
If you must shoot JPEG, fix WB to around 3800K. That gives you a consistent look. You can tweak in post within a smaller range.
Focusing at Night: Do This Every Time
- Switch to manual focus.
- Use live view and 10x magnification.
- Point at a bright star or distant light.
- Adjust until the point is the smallest speck.
- Lock focus with tape if your lens creeps.
Do not trust the infinity mark. Many lenses are off at temperature. Recheck focus every hour if the temperature drops. A tiny shift can blur your entire set.
Lens Choices: Go Wide and Fast
Full-frame: 14mm to 24mm at f/1.4 to f/2.8 is ideal. Popular picks include 14mm, 20mm, and 24mm primes. Fast zooms at f/2.8 are great for framing options.
APS‑C: 10mm to 16mm wide. Micro Four Thirds: 7mm to 12mm. Keep it fast when you can. A fast lens reduces ISO and preserves detail.
Tripod and Stability: Small Tweaks Matter
Use a sturdy tripod. Extend the thicker legs first. Hang a bag from the hook if it’s windy. Turn off stabilization when on a tripod. It can cause blur as it hunts.
Use a remote, intervalometer, or 2‑second timer. Avoid touching the camera. If your camera has electronic front curtain shutter, turn it on. It reduces vibrations.
When the Moon Helps (And When It Hurts)
A small moon can light the foreground. That helps your scene. It adds depth and context. But a bright, high moon can wash out faint aurora.
If the aurora is weak, look for a new moon or thin crescent. If it is strong, a quarter moon can be a gift. It shapes mountains and trees without killing color.
The Weather and Forecasts You Need
Clear skies are king. Cloud breaks matter too. A 20-minute hole can deliver your best frame of the season. Check local clouds and wind at low levels.
Use aurora alerts and solar wind data. Focus on Bz (south is good), speed, and density. But remember: the sky can surprise you. Stay flexible and patient.
Compose with Purpose
Give the aurora a story. Add a cabin, trees, a snowy track, or a mountain. Use leading lines. Place the horizon lower to show the sky’s dance.
I shoot a few frames for foreground context. Then I zoom out for full-sky drama. The best camera settings for northern lights are only half the win. Composition sells the emotion.
Smartphone Settings That Work
Today’s phones can catch the aurora. Use a tripod. Use the native night mode or a “Pro” app with manual controls. Keep the lens clean.
- iPhone: Use Night mode. Tap to focus at infinity. Lock exposure if the scene pumps.
- Android: Use Night or Pro mode. Set ISO 800–1600, shutter 2–8s if Pro allows.
- Save in RAW if offered. Edit later to reduce noise and fix color.
Even with a phone, the best camera settings for northern lights still apply. Short exposure if the aurora moves fast. Lower ISO if it’s bright. Keep it steady.
Common Mistakes (And Easy Fixes)
- Blurry stars: Refocus with magnified live view. Use a sturdier tripod.
- Black frames: Raise ISO, open aperture, or lengthen shutter slightly.
- Washed color: Shorten exposure or lower ISO when a burst hits.
- Smudged aurora: Use faster shutter (1–4s) on fast beams.
- Weird WB shifts: Set a fixed Kelvin value and shoot RAW.
Exposure by Scene: Quick Reference
- Weak arc, dark sky: f/1.8, 8s, ISO 3200.
- Moderate bands: f/2, 4s, ISO 1600.
- Bright fast burst: f/2, 1–2s, ISO 800–1600.
- Moonlit snow: f/2.8, 4s, ISO 800–1600.
These are safe starting points. The best camera settings for northern lights change with speed and brightness. Watch, test, and adjust.
Histogram and Blinkies: Your Truth Meter
Use the histogram. Keep the curve off the left wall. If highlights blink, reduce exposure. Aim to fill the midtones. That gives you rich color and detail.
On very bright bursts, I shorten the shutter first. Then I lower ISO. Aperture is my last change at night.
Noise Reduction Settings
Turn off Long Exposure NR. It doubles time per frame and misses action. Set High ISO NR low or off. Fix noise in post with better control.
Stacking sequences can reduce noise if the aurora is not moving much. But for fast action, single frames with clean exposure win.
Battery, Cards, and Cold
Cold kills batteries fast. Bring extras and keep them warm. Swap as soon as the meter dips. Use big, fast cards to keep the camera writing smoothly.
Gloves with removable finger tips help. Practice your focus routine indoors. That muscle memory helps outside when the wind bites.
Safety and Etiquette
Do not point headlights at other photographers. Dim your phone. Call out if you plan to walk in front of someone’s shot.
Tell someone where you go. Bring a headlamp with red light. Keep a small first-aid kit and traction aids in winter. The shot is not worth a slip.
Post-Processing: Clean, Natural, True
- White balance: 3500K to 4200K. Adjust tint to tame green cast.
- Exposure: Lift shadows gently. Avoid over-bright snow.
- Noise: Moderate luminance NR. Keep detail sliders balanced.
- Clarity/Texture: Light touch to reveal structure.
- Dehaze: Small bump for contrast. Do not crush stars.
I export two versions if needed: one for print with fine detail and one for web with a hint more contrast. The best camera settings for northern lights make editing easy. You are refining, not rescuing.
Full-Frame vs Crop Bodies
Full-frame sensors handle ISO better. You get cleaner shadows and more latitude. But crop bodies today still do great at ISO 1600–3200 with good exposure.
Pick the camera you have and know it well. A practiced routine beats a new body you do not understand yet.
Live View vs EVF at Night
I use live view or an EVF to focus with magnification. It saves the day. Set display brightness low so it does not fool your exposure sense.
Turn on a level if you have one. A crooked horizon is a classic night mistake. Fix in camera if you can.
A Simple Field Workflow I Trust
- Scout in daylight. Plan your composition.
- Arrive early, set tripod, tape focus ring once sharp.
- Start with the fast recipe: f/1.8, 4s, ISO 1600, 3800K.
- Shoot a test, check histogram, adjust one setting.
- Lock into a sequence when the show peaks.
This rhythm keeps you calm when the sky roars. The best camera settings for northern lights mean little if you panic. A steady plan means steady shots.
Edge Cases and Creative Twists
Want silky clouds with a static aurora arc? Try 10–15 seconds on a very slow night. Want sharp beams that leap? Lock to 1–2 seconds and accept higher ISO.
Add a subtle foreground light only if needed. A low-power, diffused, warm LED from the side avoids a flat look. Keep it brief and gentle.
Checklist to Keep in Your Bag
- Camera, wide fast lens, spare body if you have one
- Tripod, remote/intervalometer, gaffer tape
- Extra batteries, warmers, fast cards
- Headlamp with red mode
- Lens cloth, hand warmers, microspikes in winter
A small kit, set up right, beats a heavy pack you do not use. The best camera settings for northern lights start with what you can deploy fast in the cold.
FAQs Of best camera settings for northern lights
What aperture should I use for aurora?
Use f/1.4 to f/2.8. Open wide for light, then stop down one-third if you need sharper corners.
How long should my shutter be?
Use 2–8 seconds for most scenes. Use 1–2 seconds on fast bursts and 6–10 seconds on slow bands.
What ISO gives clean results?
Start at ISO 1600. Drop to 800 when it’s bright or moonlit. Push to 3200 in very dark scenes.
How do I focus at night?
Use manual focus. Magnify a star in live view and focus until it’s a tiny point. Tape the ring if needed.
What white balance is best?
Set 3500K to 4000K for natural color. Shoot RAW so you can fine-tune later.
Final Verdict: Which Should You Buy?
The Nest Cam with Floodlight is best if you want a smart, strong security light you can schedule off during shoots. The eufy E22 lights are best if you want clean, permanent lighting with tight app control.
Both support clean night work near home, so you can focus on the best camera settings for northern lights. Set your yard dark, set your exposure right, and enjoy the show.

Jamie Lee is a seasoned tech analyst and writer at MyTechGrid.com, known for making the rapidly evolving world of technology accessible to all. Jamie’s work focuses on emerging technologies, product deep-dives, and industry trends—translating complex concepts into engaging, easy-to-understand content. When not researching the latest breakthroughs, Jamie enjoys exploring new tools, testing gadgets, and helping readers navigate the digital world with confidence.