Slide the mic into the camera’s shoe mount, secure it, plug in the cable, set input levels, and monitor with headphones.
If you want a clean, pro sound fast, you’re in the right place. I’ve mounted hundreds of mics on DSLRs, mirrorless bodies, cinema cameras, and action rigs. In this guide on how to attach a microphone to a camera, I’ll show you simple steps, common mistakes, and pro tricks that save shoots. You’ll learn exactly how to attach a microphone to a camera the right way, every time.
What You Need Before You Start
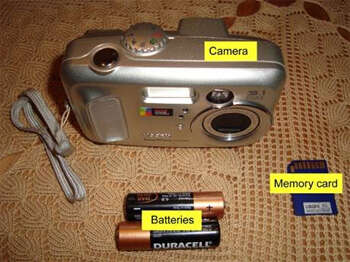
Before we get into how to attach a microphone to a camera, gather the right gear. The goal is a secure mount, a clean signal, and the right power.
You may need:
- Microphone type Shotgun, on-camera compact, lavalier, wireless kit, or XLR handheld.
- Mount A shock mount that fits your mic. Use the camera’s hot shoe or a cold shoe on a cage.
- Cables TRS 3.5 mm for cameras, TRRS for phones, XLR for pro rigs. Match the plugs.
- Adapters TRS to TRRS, XLR to 3.5 mm, mini XLR, or locking TRS. Keep at least one spare.
- Power Phantom power 48V for XLR mics, or plug-in power 2–5V for some 3.5 mm mics. Check your camera.
- Wind protection Foam indoors, deadcat outdoors. It matters a lot.
- Headphones Wired, closed-back. Always monitor your audio.
A quick check saves headaches. Confirm that your camera has a mic input. Many mirrorless and DSLRs do. Some action cams need an adapter. If you plan on how to attach a microphone to a camera with XLR, you may need a preamp, interface, or an XLR-to-camera module.
Pro tip from the field: toss a short right-angle TRS cable in your bag. Straight plugs stick out and get snagged.
Step-by-Step: How to Attach a Microphone to a Camera
Here is the simplest, repeatable method for how to attach a microphone to a camera. I’ll cover four common setups.
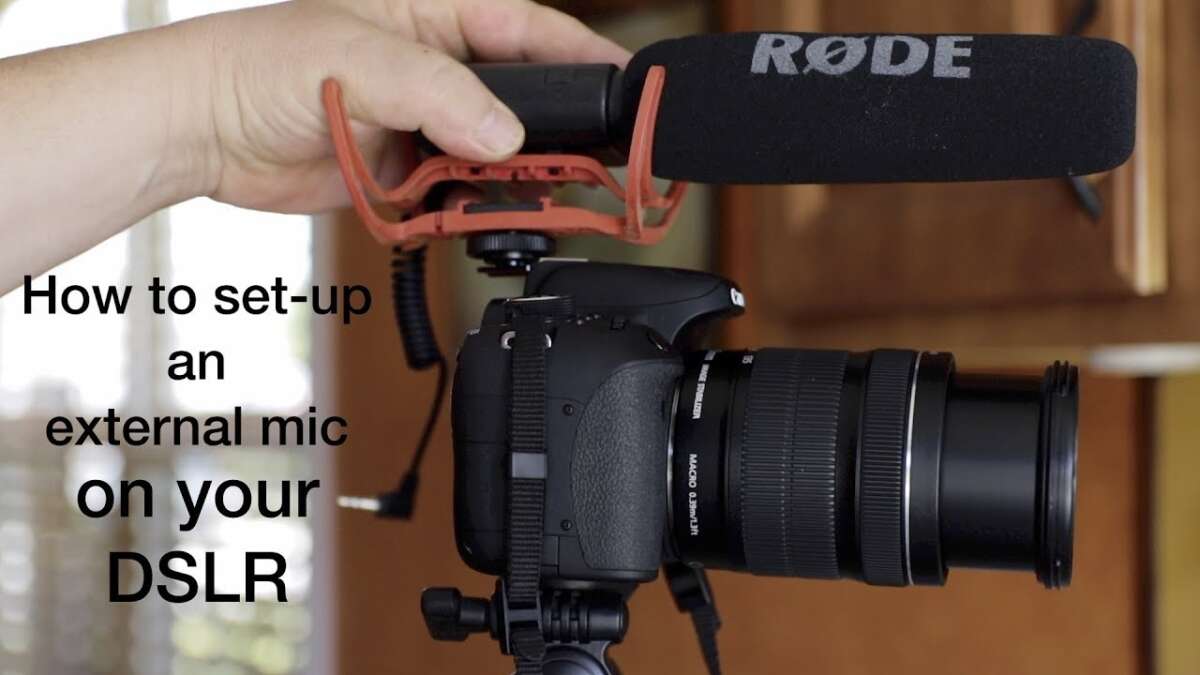
On-camera shotgun mic
- Slide the mic’s shock mount into the hot shoe. Tighten until snug.
- Aim the mic forward. Keep it clear of the lens and your forehead.
- Plug the mic’s 3.5 mm TRS cable into the camera’s mic input.
- Turn on the mic if it has a switch. Set low-cut if you are outdoors.
- Open the camera’s audio menu. Set manual levels. Aim for peaks around −12 dB.
- Wear headphones. Record a test clip. Listen for hiss, hum, or wind.
Wired lavalier into camera
- Clip the lav on the chest. Aim at the mouth. Hide the cable under clothes.
- Route the cable to the camera. Avoid rubbing or sharp bends.
- Plug into the mic input. If the lav needs plug-in power, enable it in the menu.
- Set levels with the talent speaking at normal volume. Watch the meters.
- Do a rustle test. Have the talent move and speak. Fix cable noise.
Wireless lav system to camera
- Clip the lav to the talent. Plug into the bodypack transmitter. Lock the cable.
- Mount the receiver on your camera’s shoe or cage. Tighten well.
- Use the output cable from the receiver to the camera’s mic input.
- Match gain on both devices. Keep the transmitter’s gain moderate. Set camera input lower to avoid hiss.
- Scan or set a clean RF channel. Do a range test. Listen for dropouts.
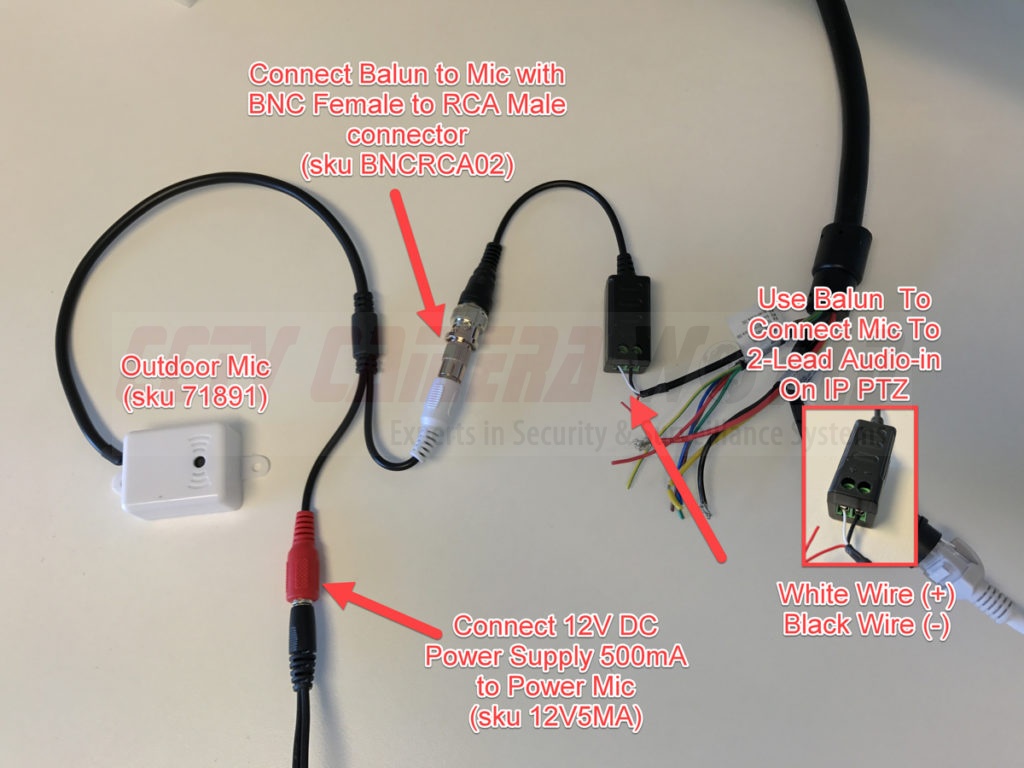
XLR microphone with a preamp or interface
- Mount an XLR adapter, preamp, or audio module to your camera or rig.
- Plug the mic’s XLR into the preamp. Turn on 48V only if the mic needs it.
- Set the preamp’s gain. Keep the camera input low or line-level if supported.
- Record a test. Watch for clipping on both meters.
- Secure cables with a loop so nothing tugs on the ports.
These steps cover 90% of real-world uses. If you ask how to attach a microphone to a camera in a busy event, I suggest a compact shotgun mic and a safety track at −10 dB. It has saved me more than once.
Mounting Options Explained
You have several ways to physically attach a mic. Pick the one that keeps the mic steady and the cable safe.
- Hot shoe mount Most on-camera mics slide right in. This is the fastest way.
- Cold shoe on a cage Great for extra gear like a wireless receiver or light.
- Side or top handle mounts Keeps weight balanced and reduces bumps.
- Boom pole on a stand Best sound when you can get the mic close but off frame.
- Adhesive or clamp mounts Useful for action cams, cars, or tight spaces.
Avoid loose mounts. A wobbly mic transmits handling noise. Use a shock mount. It isolates bumps. When I shoot handheld in crowded streets, I add a rubber band backup around the shock mount. It prevents a mic from flying off if it gets hit.
Cable Types, Adapters, and Power
Many issues arise from the wrong cable or power. This is a key part of how to attach a microphone to a camera without noise or silence.
Know your plugs
- TRS 3.5 mm Standard for cameras. One click into the jack. Left and right channels.
- TRRS 3.5 mm Standard for phones and laptops. Needs a TRRS-to-TRS adapter for cameras.
- XLR Balanced, pro-grade. Needs an XLR input on the camera or an adapter.
- Mini XLR Found on some cinema cameras. Use the correct mini XLR cable.
Mind the power
- Phantom power 48V For many XLR condenser mics. Only enable it when needed.
- Plug-in power 2–5V For some 3.5 mm mics and lavs. Check the spec sheet.
- Self-powered mics Some shotgun mics run on internal batteries. Switch them on.
Helpful adapters
- TRRS to TRS For phone mics going into cameras.
- XLR to TRS For pro mics into 3.5 mm inputs. Use an impedance-matched cable or adapter preamp for best quality.
- Attenuator pad If the mic or receiver output is too hot and causes clipping.
- Locking TRS To prevent accidental unplugging on run-and-gun shoots.
A quick test for how to attach a microphone to a camera the safe way is to push the plug until you feel and hear a click. Many people stop halfway and only get one channel. I did that once in a paid interview. Never again.
Camera Audio Settings and Best Practices
Once mounted, you still need to dial in the sound. The right settings are as key as the physical mount. This is where many people who ask how to attach a microphone to a camera slip up.
Set levels
- Switch to manual audio.
- Speak at your loudest. Set peaks around −12 dB. Leave headroom.
- If your camera allows, record a safety track 6–10 dB lower.
Tame the noise
- Turn off aggressive auto gain. It pumps the sound and raises hiss in quiet parts.
- Use low-cut high-pass at 75–150 Hz to reduce rumble and wind.
- Keep preamp gain low on noisy cameras. Use a cleaner preamp or wireless receiver to boost before the camera.
Monitor and test
- Wear headphones. Always.
- Do a room tone check. Listen for hum, HVAC, or traffic.
- Roll a 10-second test. Play it back. If you are learning how to attach a microphone to a camera for the first time, this test is your best friend.
Placement, Wind Control, and Handling Noise
Mic placement beats fancy gear. If you master this, you win most battles.
Placement basics
- Get the mic close. Closer mic means less room echo and less noise.
- Aim at the mouth or sound source. Direction matters a lot.
- Avoid clothing rub for lavs. Use tape or a vampire clip to keep it still.
Wind and handling
- Indoors Foam is fine. Use a low-cut if you hear rumble.
- Outdoors Use a deadcat. Big wind needs a blimp for shotgun mics.
- Handling Use a shock mount and a light touch. Secure cables with a loop.
I once shot on a boardwalk with nonstop wind. The deadcat saved the day. Without it, the audio was trash. When someone asks me how to attach a microphone to a camera for outdoor travel, I say deadcat first, every time.
Troubleshooting Common Problems
If something sounds off, here is a fast fix list. Keep this in your kit brain.
- No audio Check if the mic is on, the plug is fully seated, and the camera input is set to external.
- Hiss Lower the camera preamp. Raise the mic or receiver output instead.
- Distortion Peaks past 0 dB. Add an attenuator. Lower gain at the source.
- Sound only on one side You might have a mono mic feeding the left channel. Set the input to dual mono or duplicate in post.
- RF dropouts Move away from Wi-Fi and metal. Rescan channels. Keep line-of-sight.
- Ground hum Use balanced XLR where possible. Break ground loops with proper adapters.
- Out-of-sync audio If recording to a separate recorder, clap a slate and sync by waveform or timecode.
People who seek how to attach a microphone to a camera often miss one thing. Cable strain relief. Add a small loop and tape or a clip. It stops pops when you move.
Real-World Setups and Quick Recipes
These are simple recipes that I use or recommend. They are fast, solid, and proven.
Vlogging walk-and-talk
- Compact shotgun on hot shoe.
- Short right-angle TRS cable to camera.
- Manual levels at −12 dB. Low-cut on. Deadcat outside.
Sit-down interview, solo shooter
- Wireless lav to camera.
- Receiver on cold shoe. Safety track at −10 dB if possible.
- Hide the lav cable with a loop under clothing. Monitor with headphones.
Run-and-gun event
- On-camera shotgun plus a pocket audio recorder on the podium as backup.
- Handheld dynamic mic for quick interviews into a wireless plug-on transmitter.
- Keep spare batteries and one spare TRS cable.
Live music or loud venues
- Dynamic mic on a stand into an XLR preamp. Use a pad.
- Set levels at −18 dB to keep headroom.
- Capture board feed to a recorder when allowed. Sync in post.
Action camera or gimbal rig
- Use the camera’s mic adapter.
- Small compact mic on a cage cold shoe to avoid motor hits.
- Use a coil cable to prevent snags.
If someone asks how to attach a microphone to a camera in a low-light party, I tell them to value sound even more. People will forgive grain. They will not forgive bad audio.
Frequently Asked Questions of how to attach a microphone to a camera
Do I need a special mic, or will any mic work?
Most cameras accept 3.5 mm TRS mics. XLR mics need an adapter or a camera with XLR inputs. Check the camera manual to confirm compatibility.
What is the best gain setting for clean audio?
Aim for peaks at about −12 dB on the meter. Keep the camera preamp moderate and boost the mic or receiver output if needed.
How do I stop wind noise outdoors?
Use a deadcat windscreen and a high-pass filter. Point the mic away from the wind when you can, and keep the mic stable.
Why is my wireless audio cutting out?
You may be on a crowded RF channel or have a blocked line-of-sight. Rescan for a clean channel and keep the antennas clear and upright.
Can I record stereo with a mono shotgun mic?
Yes, but it will feed one channel unless you set dual mono in the camera. You can also duplicate the channel in post to fill both sides.
Do I need phantom power for a lavalier?
Only if it is an XLR condenser lav that requires it. Many 3.5 mm lavs run on plug-in power or the transmitter’s bias power.
How do I avoid cable noise with lavs?
Create a broadcast loop and tape the cable under clothing. Use soft mounts or tape pads to reduce rub on fabric.
Is a separate audio recorder better than going into the camera?
Often yes, due to better preamps and features. But it adds sync work. For simple shoots, a clean direct feed into the camera is faster.
Conclusion
Clean audio starts with a secure mount, the right cable, and smart levels. You now know how to attach a microphone to a camera, test it fast, and fix common issues before they ruin a take. Keep your kit simple, monitor with headphones, and use wind control when you step outside.
Put this guide to work on your next shoot. Try one of the quick recipes above and refine it to your style. If this helped, subscribe for more hands-on guides, or drop a question in the comments so we can solve it together.

Jamie Lee is a seasoned tech analyst and writer at MyTechGrid.com, known for making the rapidly evolving world of technology accessible to all. Jamie’s work focuses on emerging technologies, product deep-dives, and industry trends—translating complex concepts into engaging, easy-to-understand content. When not researching the latest breakthroughs, Jamie enjoys exploring new tools, testing gadgets, and helping readers navigate the digital world with confidence.