Enable it via Windows Camera privacy and Device Manager, Lenovo Vantage, or BIOS toggle.
I’ve fixed cameras on many Lenovo models, from ThinkPad to IdeaPad and Yoga. This guide explains how to enable camera in Lenovo laptop step by step, with clear checks, hands-on steps, and troubleshooting tips you can use right now. Read on to restore your camera fast, safely, and confidently.
:max_bytes(150000):strip_icc()/001-how-to-fix-it-when-a-lenovo-laptop-camera-is-not-working-850fa2d56fc34ef1899ca68a11b9ab9e.jpg)
Why the camera may be disabled on your Lenovo laptop
Cameras can stop working for simple reasons. Sometimes camera access is turned off in Windows privacy settings. Other times a hardware shutter, function key, or BIOS setting blocks the camera. Drivers can be missing, outdated, or corrupted. Security software or a broken cable can also cause failure.
Common signs a camera is disabled:
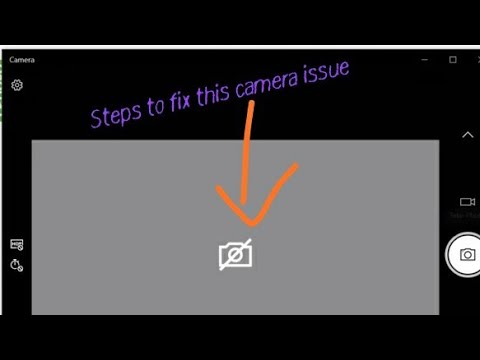
- Camera shows a black screen in apps.
- Windows reports “No camera found.”
- A physical shutter or LED stays off.
- Device Manager lists the camera as disabled.
Knowing the likely causes helps you decide how to enable camera in Lenovo laptop quickly and safely. Start with simple checks and move to more advanced steps only if needed.

Quick checklist before you begin
Before deep troubleshooting, try these fast checks. They solve most problems in under five minutes.
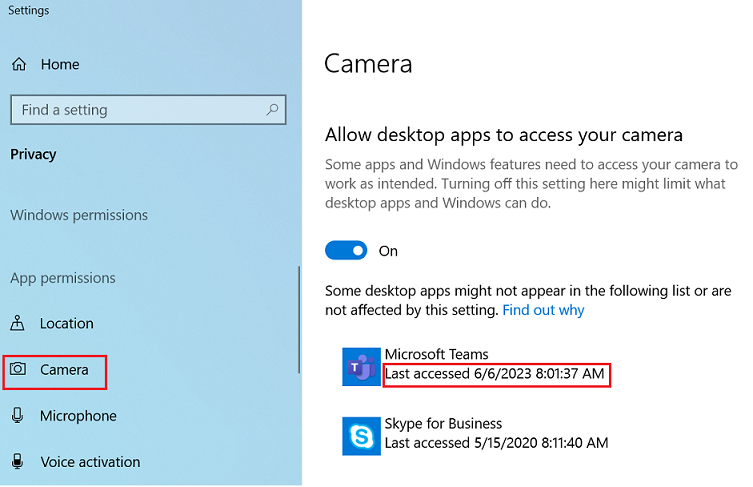
- Verify camera privacy: Open Windows Settings > Privacy & security > Camera.
- Look for a physical shutter: Slide it open if present.
- Press the camera function key: Often Fn + F8 or a camera icon key.
- Restart your laptop: A reboot can restore drivers and permissions.
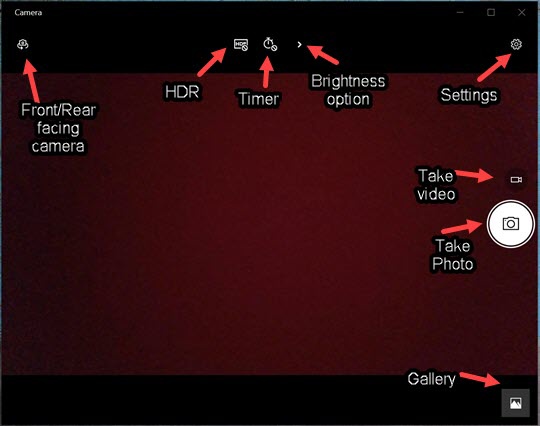
- Test with Camera app: Use the built-in Camera app to confirm behavior.
This checklist reduces false alarms and tells you whether to proceed to driver or BIOS fixes. Use it before complex steps to save time.
How to enable camera in Lenovo laptop
Follow these step-by-step methods. Work top to bottom. Each method increases in complexity.
Enable camera via Windows Settings
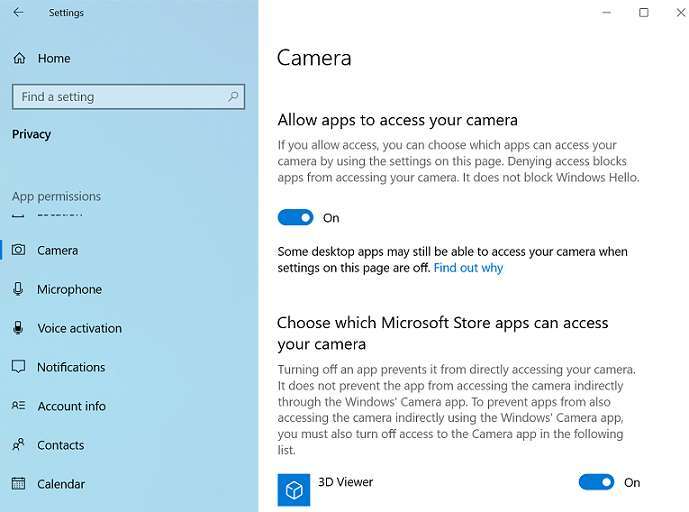
- Open Settings. Choose Privacy & security.
- Select Camera. Turn on “Camera access” for the device.
- Turn on “Let apps access your camera” and grant access to specific apps.
- Test using the Camera app.
This is the most common fix when apps can’t see the camera. If the camera still fails, try the Device Manager steps below.
Enable camera via Device Manager
- Right-click Start and open Device Manager.
- Expand Cameras or Imaging devices.
- If the camera shows a downward arrow, right-click and choose Enable device.
- If the camera is missing or shows an error, right-click and choose Update driver.
- If Update doesn’t help, choose Uninstall device, then restart to let Windows reinstall.
Device Manager often reveals driver issues that block the camera. Reinstalling or enabling the device usually resolves the problem.
Use Lenovo Vantage or system utilities
- Open Lenovo Vantage (preinstalled on many Lenovo laptops).
- Go to Hardware Settings > Audio/Visual or Camera.
- Ensure the camera is enabled and privacy options are off.
- Run any available system updates.
Lenovo Vantage can toggle built-in privacy features that Windows Settings won’t show. It also installs vendor drivers that improve compatibility.
Check physical shutter and function keys
- Inspect the camera area for a sliding shutter or privacy switch.
- If your laptop has a camera icon key, press it or press Fn + camera key.
- Some models show a camera LED when active. If the LED is off, the shutter may be closed.
A closed shutter is a physical block. It’s fast to miss and easy to fix.
Enable camera in BIOS / UEFI
- Restart the laptop and press the BIOS key (often F1, F2, or Delete).
- Find Integrated Peripherals or Security settings.
- Look for an entry like “Integrated Camera” or “Camera” and enable it.
- Save and exit BIOS, then boot to Windows and test.
Use BIOS only if Windows methods don’t work. Changing BIOS settings affects system-level access and can fix cameras disabled at firmware level.
Enable camera on Linux
- Check ls /dev/video* to confirm the kernel sees the device.
- Use sudo dmesg | grep -i camera to check kernel messages.
- Install or update udev rules and drivers if needed.
- Use cheese or a browser app to test the camera.
Linux steps vary by distribution, but the general pattern is to confirm the device node, check kernel logs, and install needed drivers.
Following these steps covers almost every scenario for how to enable camera in Lenovo laptop.
Troubleshooting and driver reinstallation
If enabling doesn’t fix it, try deeper troubleshooting. These steps address drivers, conflicts, and software blocks.
-
Reinstall camera drivers:
- Use Device Manager to uninstall the camera device.
- Restart to let Windows reinstall the driver automatically.
- Or download the latest camera driver from Lenovo Vantage.
-
Roll back drivers:
- In Device Manager, open camera Properties and choose Roll Back Driver if available.
-
Windows Update:
- Install pending updates. Some Windows updates include camera fixes.
-
Antivirus and privacy apps:
- Disable third-party privacy tools temporarily. Some apps block the camera.
-
Check cables and hardware:
- On models with removable display bezels or modular cameras, ensure connectors are seated.
-
Test apps and permissions:
- Confirm camera permissions per app in Settings. Close apps that might hog the camera.
Personal tip: I once fixed a ThinkPad camera by rolling back a camera driver installed by a third-party update tool. The laptop had the camera listed but apps showed black. Rolling back restored the original Lenovo driver and the camera worked again.
If none of these work, contact Lenovo support or a trusted technician. Hardware failure is rare but possible.
Tips, best practices, and privacy advice
Keep your camera working and secure with these simple habits.
- Keep drivers updated via Lenovo Vantage or Windows Update.
- Use a physical shutter when not using the camera.
- Limit camera access to needed apps only.
- Test the camera after major Windows updates.
- Keep a backup plan like an external USB webcam for urgent calls.
Practical note from experience: I always keep Lenovo Vantage installed. It alerts me to firmware fixes and driver updates that Windows Update may miss. A small routine saves time and prevents last-minute video-call headaches.
Regular checks make enabling the camera less stressful. Follow the checklist whenever you notice issues.

Frequently Asked Questions of how to enable camera in lenovo laptop
Why can’t I find the camera in Device Manager?
If the camera is missing, the driver may be uninstalled or the camera is disabled in BIOS. Run Windows Update, check BIOS settings, and use Device Manager to scan for hardware changes.
How do I enable the camera if the function key doesn’t work?
Try pressing the Fn key plus the camera key or look for an Fn Lock. Update keyboard and system drivers via Lenovo Vantage. If that fails, check BIOS for keyboard function settings.
Will a Windows update disable my camera?
Occasionally a Windows update can change drivers or settings and disrupt the camera. Reinstalling drivers or rolling back the update often resolves the problem.
Can antivirus software block my Lenovo camera?
Yes. Some privacy-focused antivirus or security apps block camera access. Temporarily disable the software to test the camera and adjust its settings to allow camera access.
How do I enable camera in BIOS on a Lenovo laptop?
Restart, press the BIOS key (often F1 or F2), navigate to Security or Integrated Peripherals, find the camera entry, enable it, and save changes. Boot back to Windows and test.
Conclusion
You now have a clear, practical roadmap for how to enable camera in Lenovo laptop. Start with privacy settings, check physical shutters and function keys, then move to Device Manager, Lenovo Vantage, or BIOS if necessary. If drivers or software block the camera, reinstall or roll back drivers and test again.
Take action now: run the quick checklist, try the Windows Settings and Device Manager steps, and keep Lenovo Vantage installed for ongoing updates. If this guide helped, leave a comment with your model and the fix that worked for you — it helps others and builds a practical knowledge base.

Everett Ashford is a tech reviewer at mytechgrid.com specializing in SSDs, cameras, TVs, earbuds, headphones, and other consumer electronics. He provides honest, data-driven reviews based on hands-on testing and real-world performance analysis. Everett simplifies complex tech details to help readers make smart, confident buying decisions.