Use a secure erase tool from the drive maker or ATA Secure Erase to restore factory state safely.
I have reset dozens of SSDs across laptops and servers. I will show clear, tested steps for how to reset SSD to factory settings safely. This guide covers reasons to reset, backup rules, tools for Windows, macOS, and Linux, step‑by‑step instructions, verification, and common problems. Read on to learn safe methods, avoid data loss, and complete a reliable factory reset for your SSD.
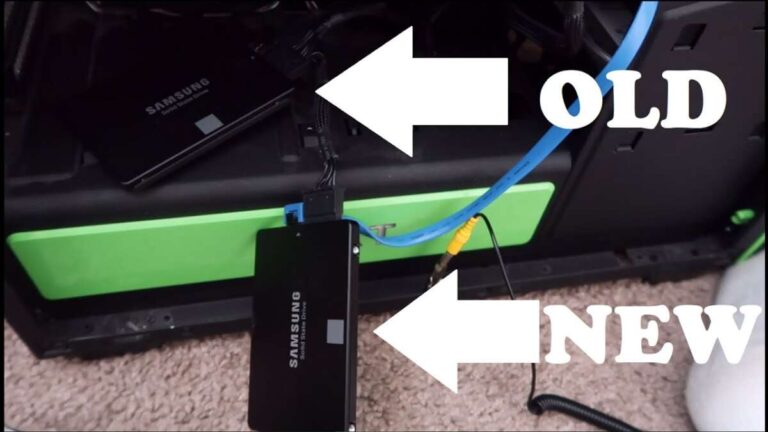
Why reset an SSD?
Resetting an SSD clears data, restores performance, and removes user data. Many people think wiping works like HDD zeros. SSDs work differently. You need an SSD-safe method so the controller and flash get returned to factory state.
Reasons to reset include:
- Prepare the drive for resale or reuse.
- Fix wear-leveling or slow write issues.
- Remove sensitive data securely.
- Restore factory firmware default state before diagnostics.
If you want to know how to reset SSD to factory settings safely, pick a method that uses the drive’s own secure erase, not just file deletion. That prevents leftover fragments and avoids ruining the SSD.

Before you begin: safety, backups, and checks
Plan first. Resetting an SSD typically destroys all data. Back up everything you need. Use at least two backups if the data matters.
Checklist before you reset:
- Backup important files and system images.
- Note drive model and firmware. You may need it for vendor tools.
- Charge laptops and connect a stable power supply for desktops.
- Update firmware only if recommended by the vendor before reset.
- Disable drive encryption or record the keys; a reset may make encrypted data unrecoverable.
If you are learning how to reset SSD to factory settings safely, these steps reduce risk. A safe reset starts with good backups and correct tool choice.
Methods to reset SSD to factory settings safely
There are a few safe, widely used methods. Choose the one that matches your SSD brand and OS.
- Manufacturer secure erase tools (recommended)
- ATA Secure Erase (hdparm or similar)
- Parted Magic (commercial boot tool)
- NVMe format and sanitize commands (for NVMe drives)
- Full-disk encryption re-provision (if drive uses hardware encryption)
Each method is explained below with short steps and safety notes.

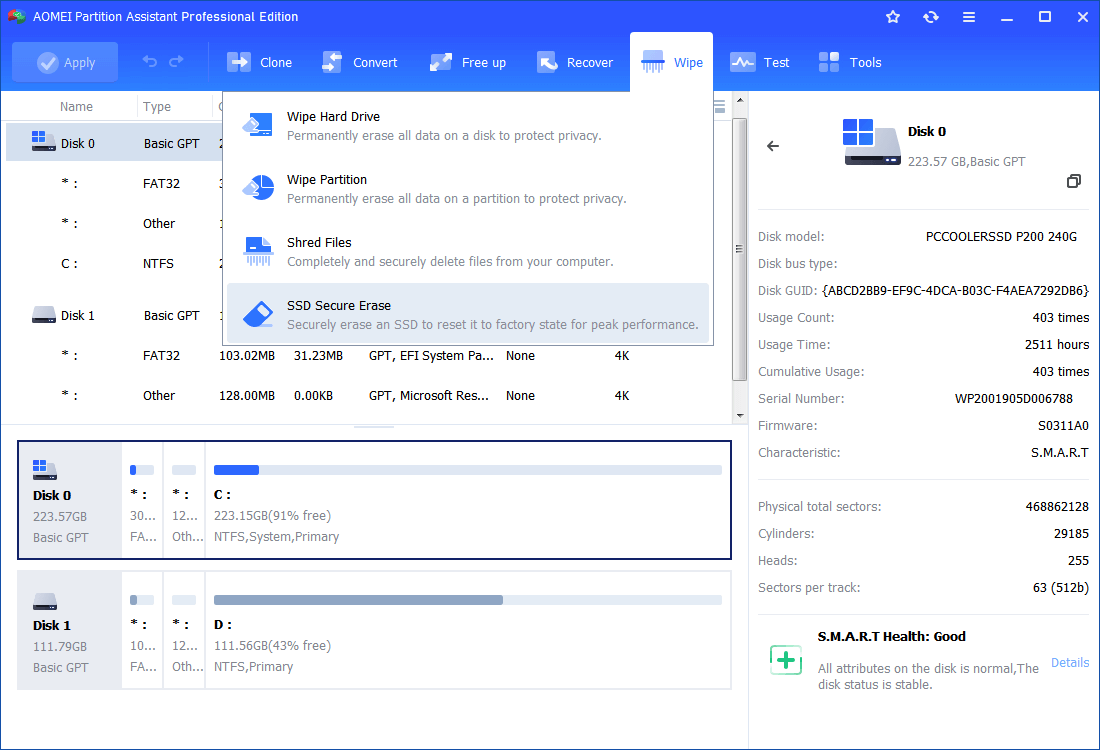
Manufacturer secure erase tools
Most major SSD makers supply an official utility. These tools use built-in secure erase commands tailored to the drive. That is the safest option in most cases.
Steps:
- Download the vendor tool for your drive model.
- Read the vendor instructions and release notes.
- Back up data and plug into AC power.
- Run the secure erase feature and follow prompts.
Using the vendor tool for how to reset SSD to factory settings safely reduces risk of firmware mismatch or incorrect erase commands. Vendor tools also handle drive-specific quirks.
ATA Secure Erase (SATA SSDs, via hdparm)
ATA Secure Erase is a standard command that instructs the SSD controller to wipe all user-accessible flash. This is safe when done correctly.
High-level steps:
- Boot a Linux live USB with hdparm.
- Identify the drive device (such as /dev/sda).
- Set a temporary password and issue the secure erase command.
- Wait until the process completes and verify.
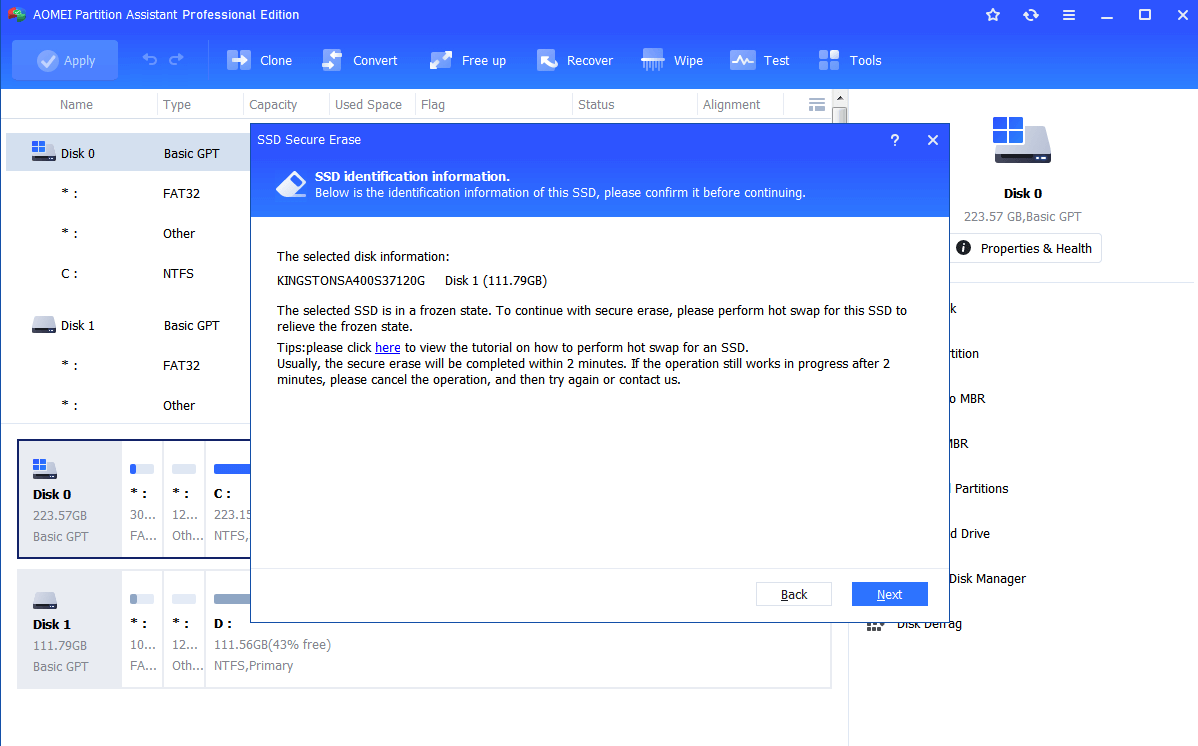
If you use ATA Secure Erase to learn how to reset SSD to factory settings safely, make sure the drive is not frozen. If the drive is frozen, you may need to suspend/resume or use a different connection to unfreeze it.

NVMe sanitize and format (NVMe SSDs)
NVMe disks use their own secure commands. Modern NVMe tools support sanitize or format options.
Steps:
- Use nvme-cli on Linux or vendor NVMe utilities for Windows.
- Run nvme sanitize or nvme format with secure parameters.
- Confirm the operation and wait for completion.
When you follow the NVMe path to reset SSD to factory settings safely, use sanitize first if you need cryptographic erase. Format may be faster but less thorough on some models.

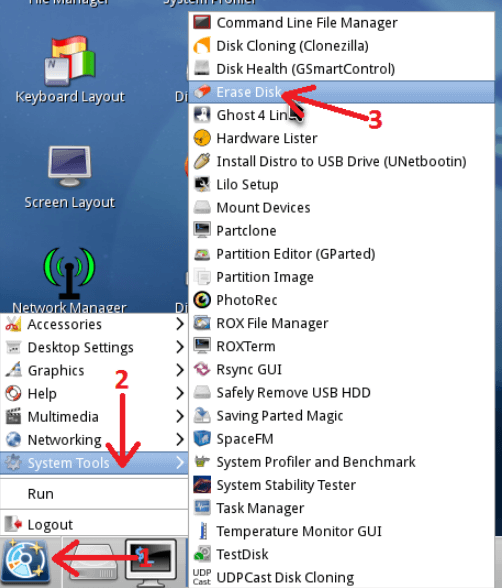
Parted Magic (bootable utility)
Parted Magic is a popular bootable toolkit that includes secure erase routines for SATA and NVMe. It wraps vendor and standard commands in a user interface.
Steps:
- Boot Parted Magic from USB.
- Run the "Erase Disk" tool and pick the secure erase option.
- Follow prompts to complete the erase.
Parted Magic simplifies how to reset SSD to factory settings safely if you prefer a GUI and cross-platform support.

Detailed step-by-step: ATA Secure Erase with hdparm (example)
This hands-on example shows the Linux hdparm method for SATA SSDs. Follow carefully.
Steps:
- Create a Linux live USB and boot to the live session.
- Install hdparm if not present.
- Run: sudo hdparm -I /dev/sdX to verify drive identity and frozen state.
- If frozen, try suspend-resume or hot-plug from a different port.
- Set a temporary password: sudo hdparm –user-master u –security-set-pass p /dev/sdX
- Issue secure erase: sudo hdparm –user-master u –security-erase p /dev/sdX
- Wait; do not interrupt. Check status with hdparm -I again.
This example shows how to reset SSD to factory settings safely via standard ATA commands. Always check drive docs first.
How to verify the reset worked
After the erase, verify the drive state. Simple checks help you confirm a factory reset.
Verification steps:
- Reboot and run drive identification and SMART data.
- Use hdparm -I or nvme list to see secure erase status.
- Check free space and try writing a full pass of test data.
- If the drive supported hardware encryption and you removed keys, confirm data is unrecoverable.
Verification is a key part of how to reset SSD to factory settings safely. Don’t skip it.
Common pitfalls and troubleshooting
People make predictable mistakes. Knowing them avoids disaster.
Common issues:
- Drive is "frozen" and won't accept secure erase. Fix with suspend-resume or hot-swap.
- Power loss during erase can corrupt firmware or data. Use AC power.
- Using disk utilities that only delete file system pointers instead of secure erase.
- Forgetting to remove encryption keys, which can leave data inaccessible or insecure.
If you run into trouble while learning how to reset SSD to factory settings safely, stop and consult vendor docs. Repeating risky commands without reading can brick a drive.
Personal experience: tips and lessons I learned
I have reset client drives and my own laptops many times. Here are honest lessons.
My tips:
- Use vendor tools first; they tend to be the least risky.
- Always make two backups. I once lost photos after assuming a cloud backup had finished.
- Avoid overwriting flash with repeated zero-writes. That adds wear.
- For drives with hardware encryption, a crypto-erase can be the fastest and most secure option.
- Test one drive before mass-wiping many drives.
These real-world notes reflect direct practice on how to reset SSD to factory settings safely. They save time and frustration.
Best practices and limitations
Follow these practices for safe resets:
- Keep firmware current but only update if recommended for erase fixes.
- Use verified tools and read prompts carefully.
- Prefer secure erase or sanitize commands over file deletions.
- Keep logs of steps if you manage multiple drives.
Limitations to know:
- Some older SSDs do not fully support secure erase standards.
- Wear-leveling may leave remnant data in rare cases unless the drive supports secure sanitize.
- Physical damage may prevent a full reset.
Understanding limits helps you set realistic expectations about how to reset SSD to factory settings safely.
Frequently Asked Questions of how to reset ssd to factory settings safely
What is the safest way to reset an SSD?
The safest way is to use the drive maker’s secure erase tool or the ATA/NVMe secure erase commands. These use built-in controller functions and avoid extra wear.
Will a full format or delete reset the SSD?
No. A full format or delete usually removes file system pointers but does not trigger the drive’s secure erase. Use secure erase or sanitize commands for a true factory reset.
Can a secure erase damage the SSD?
When done correctly, secure erase does not damage the SSD. Risk rises if power is lost mid-process or if you use unsupported commands on older drives.
How long does a secure erase take?
Time varies by drive size and method. Most modern SATA and NVMe SSDs finish in minutes. Larger drives and sanitize operations can take longer.
Do I need to remove encryption before reset?
Record or disable encryption first. If you reset without keys, encrypted data may become permanently inaccessible. Crypto-erase is an option for hardware-encrypted drives.
Is a sanitize command better than secure erase?
Sanitize can be stronger, especially for NVMe drives with cryptographic erase support. Use sanitize if you need extra assurance, but check vendor docs.
Conclusion
You can safely reset an SSD by preparing backups, choosing vendor or standard secure erase tools, and verifying results. Follow clear steps, use stable power, and prefer controller-based erase commands rather than file-level deletes. Take care with encrypted drives and always test a single drive before mass actions. Now try a safe reset with confidence, and share your experience or questions below — subscribe for more step-by-step guides.

Everett Ashford is a tech reviewer at mytechgrid.com specializing in SSDs, cameras, TVs, earbuds, headphones, and other consumer electronics. He provides honest, data-driven reviews based on hands-on testing and real-world performance analysis. Everett simplifies complex tech details to help readers make smart, confident buying decisions.