Yes — most M.2 SSDs should be secured with a screw for stability and proper contact.
If you’ve ever asked “do i have to screw in my m 2 ssd,” this guide answers that question clearly and practically. I’ve installed dozens of M.2 drives in desktops and laptops, and I’ll walk you through why the screw matters, when you can skip it, how to install properly, and how to avoid mistakes that can cost time or hardware. Read on for a hands-on, expert-backed explanation that makes the decision simple and safe.
Why the screw matters for M.2 SSDs
Securing an M.2 module with a screw keeps the drive stable in its slot. Loose modules can wobble, lose electrical contact, or bend under stress. Proper physical contact prevents intermittent connection issues that cause boot failures or data errors.

How M.2 SSDs mount: common types and standoffs
M.2 slots use a keyed edge connector and a mounting point at one end. Most motherboards and laptops include a tiny screw and a standoff to lock the drive flat. Some devices use captive screws, clips, or retention brackets instead of a simple screw. Knowing your motherboard or laptop mounting type helps answer “do i have to screw in my m 2 ssd” for your system.

Do i have to screw in my m 2 ssd — typical scenarios
When you build a desktop, the standard process is to insert the M.2 and fasten the screw. This is the safest approach for long-term reliability. On thin laptops, the module may be held by a clip or bracket; follow the OEM method rather than skipping fastening. If you skip the screw in a desktop or consumer laptop, the drive can lift under vibration or when moving the chassis.

When you can safely skip the screw
There are a few limited cases where you might not need a screw:
- If the system uses a pressure clip or retention arm that secures the M.2, the clip can replace the screw.
- If the drive is being temporarily tested on a powered-off bench and will be secured later, you can place it gently without screwing.
- If a board has an alternative locking mechanism explicitly designed by the manufacturer.
Even in these cases, treat the placement as temporary. The safest long-term answer to “do i have to screw in my m 2 ssd” is to secure it by the recommended method.

Step-by-step: install and screw an M.2 SSD correctly
- Power off and unplug the system. Work on a static-free surface.
- Locate the M.2 slot and the matching screw standoff. Confirm the key (M or B+M) matches the drive.
- Insert the M.2 at a shallow angle into the slot until it seats.
- Press the drive down toward the standoff and fasten with the supplied screw. Tighten gently — do not overtighten.
- Reassemble and boot to verify the BIOS/OS recognizes the drive.
Following these steps answers “do i have to screw in my m 2 ssd” with a clear, safe routine.
 performance considerations”
style=”max-width: 100%; height: auto; border: 2px solid black; border-radius: 10px; display: block; margin: 0 auto;”
loading=”lazy”
/>
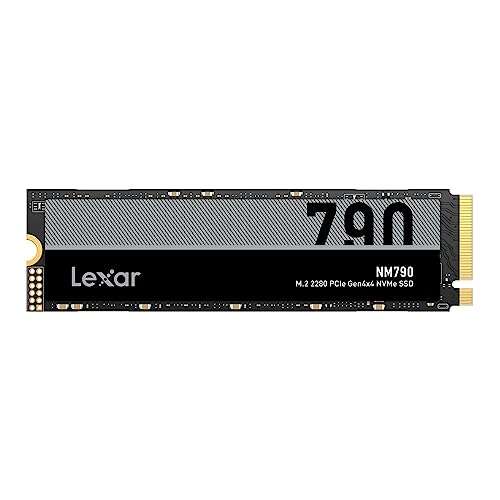
Thermal and performance considerations
A properly seated and screwed M.2 SSD can have better thermal transfer to heatsinks or shield plates. Some motherboards include M.2 heatsinks that rely on the drive being flat and secure to work efficiently. Poor seating may cause throttling under load because of higher temperatures. If you’re concerned about performance, secure mounting is a small but meaningful part of the solution to keep sustained speeds high.
Troubleshooting and safety tips
If the drive is not detected after installation:
- Check the screw and retainer; ensure the module is fully inserted in the connector.
- Try reseating the drive or testing it in another slot.
- Inspect for bent pins, debris, or misaligned standoffs.
Safety tips:
- Use the correct size screw; too long can damage the PCB.
- Ground yourself or use an anti-static wrist strap to avoid ESD.
- Avoid overtightening; a snug fit is sufficient.
These checks will help you avoid the common pitfalls related to “do i have to screw in my m 2 ssd.”

My experience: lessons learned from installing M.2 SSDs
I once built a compact PC and forgot to fasten the M.2 drive, thinking the case foam would hold it. After shipping the build, the system failed to boot due to a slightly dislodged module. Refastening the screw fixed it immediately. From that and many other installs, I learned:
- Always use the screw or OEM retention system.
- Keep the original screws and standoffs in a labeled bag for future upgrades.
- If you hear rattling, recheck M.2 mounts first.
Personal mistakes like these are common and easy to avoid by following the simple rule: when in doubt, secure the drive.
Best practices summary
- Always use the screw or OEM retention method for long-term installs.
- Use the right screw length and a light torque.
- Verify BIOS/OS detection after installation.
- Use heatsinks or thermal pads if the board recommends them.
If someone asks you “do i have to screw in my m 2 ssd,” the short, practical answer is yes—unless your device explicitly uses a clip or bracket designed to replace the screw.
Frequently Asked Questions of do i have to screw in my m 2 ssd
Do all M.2 slots require a screw to stay secure?
Most M.2 slots are designed to use a screw or standoff to keep the drive flat and stable. Some devices use clips or brackets instead, but the OEM retention method should always be followed.
Can I damage the M.2 SSD by screwing it in too tight?
Yes, overtightening can bend the PCB or strip threads. Tighten the screw just until the drive is snug and flat against the standoff.
What if I lost the M.2 screw?
You can often use a small M.2 screw from a replacement kit or motherboard parts pack, but ensure correct thread size and length. Avoid makeshift screws that are too long.
Will a loose M.2 SSD cause data corruption?
A loose connection can cause intermittent disconnects and potential write errors, which may lead to data issues. Secure mounting reduces this risk.
Is a thermal pad or heatsink necessary for M.2 drives?
High-performance NVMe drives benefit from heatsinks to reduce throttling under sustained load, especially when installed and secured properly.
Conclusion
Securing your M.2 SSD is a small step with big benefits. A proper screw or OEM retention method prevents intermittent connections, reduces vibration, and improves thermal contact for more reliable performance. Take a moment during installation to fasten the drive correctly, use the right screw, and confirm detection in BIOS or your OS. Try these steps on your next build or upgrade, and share your experience or questions below — subscribe or comment to get updates and practical tips on PC upgrades.

Everett Ashford is a tech reviewer at mytechgrid.com specializing in SSDs, cameras, TVs, earbuds, headphones, and other consumer electronics. He provides honest, data-driven reviews based on hands-on testing and real-world performance analysis. Everett simplifies complex tech details to help readers make smart, confident buying decisions.