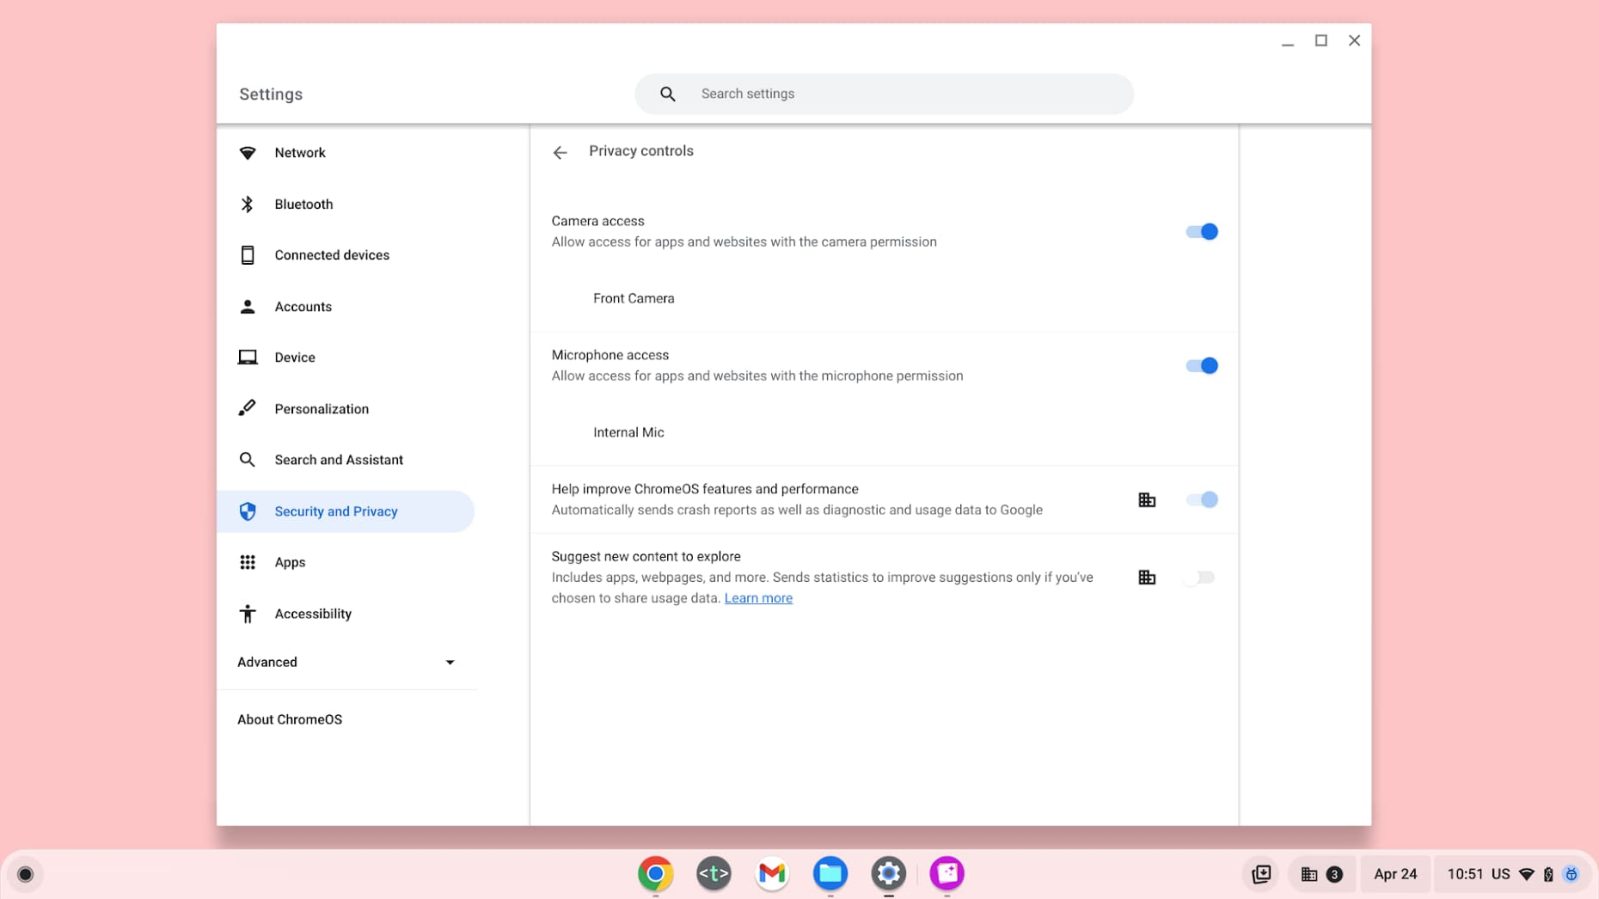
Open Settings, check site or app permissions, then allow camera access on Chromebook.
You want fast, clear steps that work the first time. I’ve set up and fixed hundreds of Chromebooks, from home devices to school fleets. In this guide, I’ll show you how to allow camera on Chromebook in simple steps, plus deeper fixes if the prompt never shows or your admin blocks it. Stick with me to get your camera working for calls, class, and creators.

How camera permissions work on a Chromebook
Chromebooks use two layers of permissions. The Chrome browser controls sites like Google Meet and Zoom on the web. The system also controls Android apps and Linux apps.
When a site or app asks for your camera, you must allow it. If you block it once, Chrome or the app remembers that choice. You can change it at any time in Settings.
Quick steps: how to allow camera on Chromebook
Here is how to allow camera on Chromebook in the fastest way possible.
- Open the site or app that needs the camera.
- If you see a prompt, pick Allow.
- If you do not see a prompt, check the lock icon in the address bar. Then set Camera to Allow.
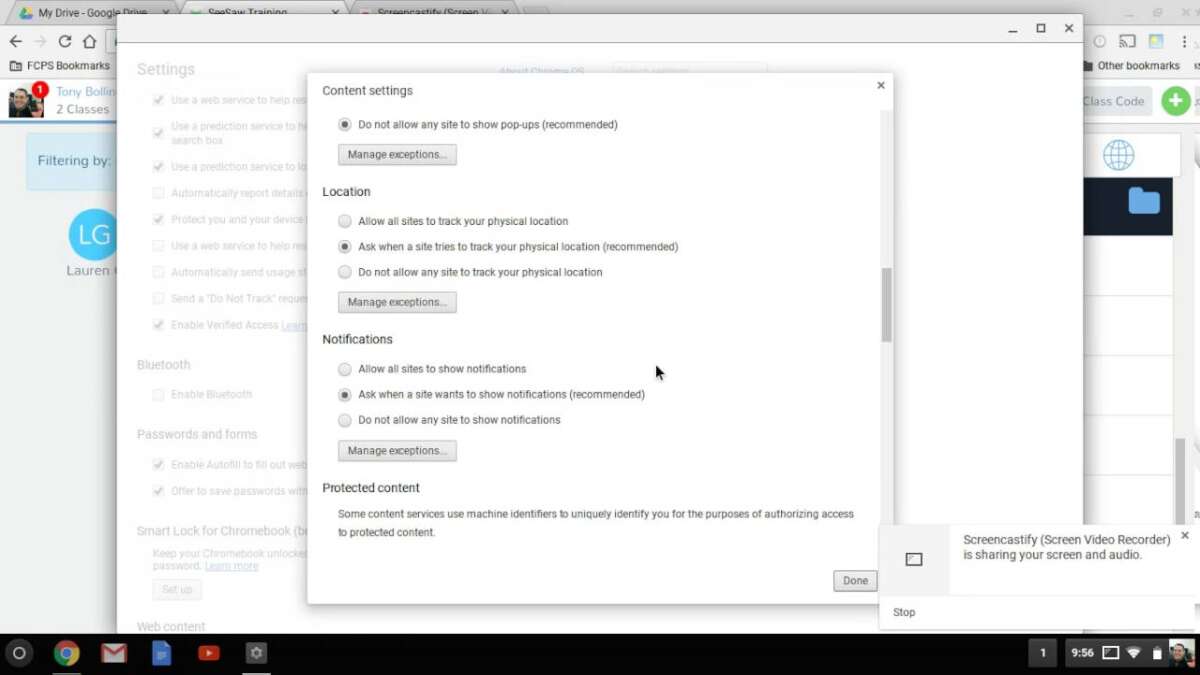
- Open Settings. Go to Privacy and security. Open Site settings. Then set Camera to Sites can ask to use your camera.
- Test the built‑in Camera app to confirm the camera works.
Tip from the field: If a call app cannot see your camera, open the Camera app once. Close it. Then try the call again. This often resets the device access.

Allow camera for specific websites in Chrome
Many readers ask how to allow camera on Chromebook for one site only. Use these steps.
- Open the site, like meet.google.com.
- Click the lock icon at the left of the address bar.
- Find Camera. Choose Allow. Reload the page.
Change your default camera and global setting:
- Open Chrome.
- Go to Settings. Select Privacy and security.
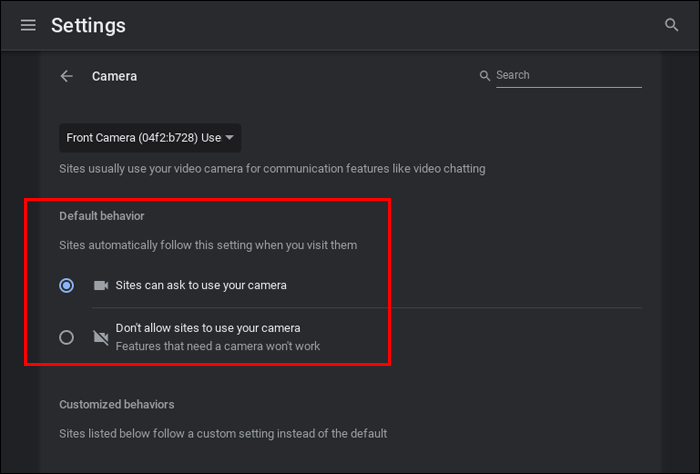
- Pick Site settings. Select Camera.
- Set Sites can ask to use your camera.
- If you have more than one camera, choose the right one from the drop‑down.
Clear a site that you blocked by mistake:
- Go to Settings. Open Privacy and security.
- Select Site settings, then Camera.
- In Blocked, find the site. Click the trash icon to reset. Reload the site and allow again.
This path is the cleanest way for how to allow camera on Chromebook when the prompt no longer shows.
Allow camera in Android apps and Linux apps
Some apps on Chromebook are Android apps. Others can run in Linux. The permission steps are not the same as the browser.
Android apps
- Open Settings.
- Select Apps. Open Manage your apps.
- Pick the app, like Zoom or WhatsApp.
- Tap Permissions. Tap Camera. Choose Allow.
- Open the app and test the camera.
You can also go to Settings, then Privacy and security, then App permissions, then Camera. Toggle each app as needed. This also solves how to allow camera on Chromebook when only a specific Android app is blocked.
Linux apps
Linux camera support depends on your model and ChromeOS version.
- Open Settings.
- Select Developers.
- Under Linux development environment, open Manage.
- If you see Camera or Microphone toggles, turn them on.
- Restart the Linux app and test.
Note: Not all Linux apps can access the webcam on every device. If the toggle is missing, this feature may not be available yet.

If your camera is still blocked: step-by-step fixes
Sometimes how to allow camera on Chromebook needs extra care. Work through these checks.
- Check for a physical shutter or switch. Some Chromebooks have a small slider near the webcam. Open it.
- Close other apps that use the camera. Only one app can use it at a time.
- Update ChromeOS. Go to Settings. Select About ChromeOS. Click Check for updates. Restart.
- Test the built‑in Camera app. Open the Launcher. Search Camera. If it does not show your image, the issue is system or hardware, not the site.
- Reset site access. Go to the site. Click the lock icon. Click Site settings. Clear permissions. Reload and allow.
- Pick the right device. In meeting apps, open settings and choose the correct camera.
- Restart your Chromebook. A quick reboot fixes many device access issues.
- Check admin policy. If your device is managed, your admin may block the camera. You might see a message like Camera disabled by your administrator. You cannot bypass this. Ask your IT admin.
- Powerwash as a last step. This resets your device. Back up files first. Then go to Settings, Reset settings, and Powerwash.
Use these steps in order. They solve most cases of how to allow camera on Chromebook without guesswork.

Privacy and safety tips when you allow camera
Allow only what you trust. Block the rest. Here is a safe setup.
- Keep the default to Sites can ask to use your camera. Do not set Allow by default.
- Use the lock icon each time. Allow only sites you know.
- Review permissions often. Go to Site settings and check Allowed and Blocked lists.
- Use a webcam cover if you like a hard stop.
- In Android apps, review App permissions every few months.
This balance lets you master how to allow camera on Chromebook while staying safe.

Real-world tips and mistakes to avoid
I have helped many families and schools with video calls. Here is what works.
- Always test with the Camera app first. If that fails, the browser steps will not help.
- When switching between Zoom and Meet, quit one before opening the other. They fight over the camera.
- On dual‑camera models, name them in your head. Try both in the drop‑down until you see a good image.
- If your screen is black in low light, raise screen brightness. The glow helps the sensor.
- Avoid covering the light sensor near the camera. It can confuse exposure.
These small habits make how to allow camera on Chromebook quick and stress free.
Frequently Asked Questions of how to allow camera on chromebook
Why is my Chromebook camera not working in the browser?
Another app may be using it, or the site is blocked. Close other apps, then check the lock icon and set Camera to Allow.
How do I change which camera my Chromebook uses?
Open the site or app settings and choose the camera from the drop‑down. You can also pick the device in Chrome’s Site settings under Camera.
Can I allow the camera for one site but block others?
Yes. Set the global setting to Sites can ask. Then allow trusted sites and leave the rest blocked or unset.
What if my school Chromebook says the camera is disabled?
That is an admin policy. You cannot override it. Ask your IT team if camera use is allowed for your class or app.
How do I allow the camera for Android apps on Chromebook?
Open Settings, Apps, Manage your apps, pick the app, then Permissions. Set Camera to Allow and relaunch the app.
Does Linux on Chromebook support the camera?
Sometimes. Check Settings, Developers, Linux, and enable the camera if the toggle exists. Not every model supports this feature.
How do I fix a black screen in video calls?
Test the Camera app, improve lighting, and close other camera apps. If the browser still shows black, reset site permissions and reload.
Conclusion
You now know how to allow camera on Chromebook for sites, Android apps, and even Linux apps. Start with the lock icon and Site settings, then check app permissions and simple device fixes. When in doubt, test with the Camera app and update ChromeOS.
Put these steps to use on your next call. If this helped, share it with a friend, subscribe for more Chromebook guides, or leave a comment with your question.

Jamie Lee is a seasoned tech analyst and writer at MyTechGrid.com, known for making the rapidly evolving world of technology accessible to all. Jamie’s work focuses on emerging technologies, product deep-dives, and industry trends—translating complex concepts into engaging, easy-to-understand content. When not researching the latest breakthroughs, Jamie enjoys exploring new tools, testing gadgets, and helping readers navigate the digital world with confidence.