Want to take full control of your AI teammates in Ready or Not? Knowing how to change their loadouts can give you a serious edge on every mission.
Imagine customizing their weapons, armor, and gear exactly how you want, making your squad unstoppable. If you’ve ever struggled to switch up your AI teammates’ setups or felt stuck with default options, this guide is for you. Keep reading, and you’ll learn simple, step-by-step tips to customize your AI loadouts like a pro—plus how to fix common bugs that might be holding you back.
Your perfect squad is just a few clicks away!
Credit: gamerant.com
Access Loadout Menu
Accessing the loadout menu is the first step to customize AI teammates in Ready or Not. The menu lets you change weapons, gear, and armor for each teammate. You can do this either before a mission at headquarters or during a mission using the PDA. Both methods give you control over your team’s equipment to fit your play style.
Understanding how to open the loadout menu helps you quickly adjust your AI squad. This guide explains the two main ways to access the menu and start customizing.
Navigate From Headquarters
Start at the SWAT Unit room in the headquarters. This room holds the loadout menu for your team. Walk up to the loadout station and interact with it. The menu will open, showing your character’s gear first.
Find the dropdown labeled “Self” at the top-left of the screen. Click it to see a list of AI teammates. Select one to change their loadout. You can switch weapons, tactical items, armor, and headgear here. Adjust each teammate to fit your mission needs before you deploy.
Open Pda In Mission
During a mission, press the Tab key to open your PDA. Then hold down the Left Tab key to access the loadout menu. This method works in single-player mode when you need to make quick changes on the go.
The loadout screen will appear with the same “Self” dropdown. Choose an AI teammate to customize. Change their gear while staying in the mission. This helps adapt your team’s equipment based on evolving situations.
Select Ai Teammate
Selecting an AI teammate is the first step to changing their loadout in Ready Or Not. This lets you pick which officer’s gear you want to customize. The game offers a simple way to choose your AI teammates before adjusting their weapons and equipment. Understanding how to select the right AI teammate helps you prepare your squad effectively for missions.
Use Dropdown Menu
Open the loadout menu during a single-player mission or at headquarters. Look for the dropdown menu labeled “Self” at the top-left of the screen. Click this menu to see a list of all AI teammates available. The dropdown makes it easy to switch between officers without leaving the loadout screen. Select the teammate whose loadout you want to change from this list.
Choose Specific Officer
After opening the dropdown, pick a specific officer by name or call sign. Each officer can have a unique set of gear and weapons. Choosing the right officer lets you tailor their loadout to their role in the team. This ensures your AI teammates are ready for different mission needs. Customize each officer one by one for best results.
Modify Equipment
Modifying your AI teammates’ equipment in Ready or Not lets you tailor their gear to match your strategy. Adjusting their loadouts improves team balance and combat effectiveness. Each change you make impacts how your AI performs during missions.
Focus on weapons, armor, headgear, and ammo to prepare your team for different challenges. Small tweaks can make a big difference in firefights and stealth operations alike.
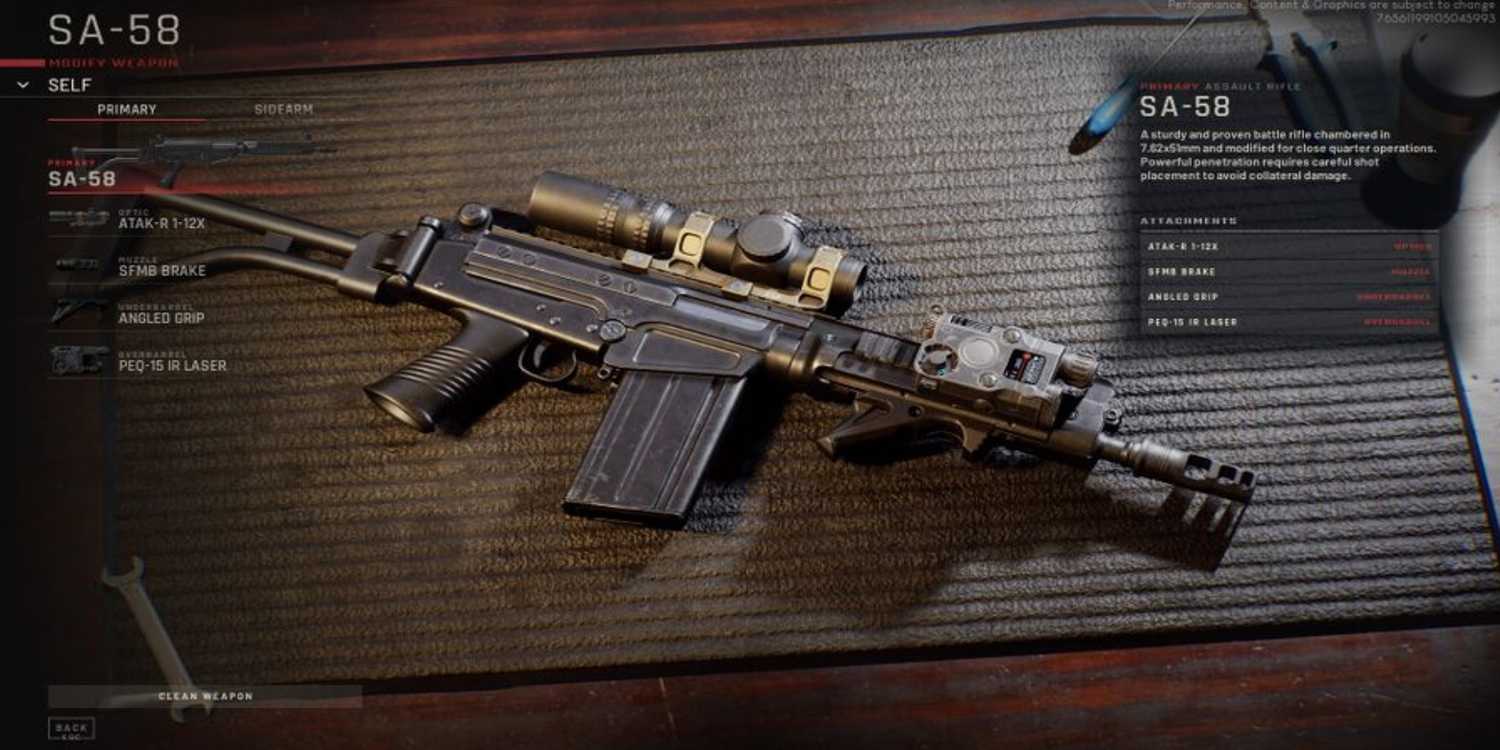
Change Primary Weapons
Pick the main weapon your AI teammate will use in battle. Options include rifles, shotguns, and submachine guns. Choose a weapon that fits the role you want them to play. For close quarters, a shotgun works well. For long-range, select a rifle with good accuracy. Changing primary weapons helps balance your team’s firepower.
Adjust Secondary Weapons
Secondary weapons act as backup for your AI teammates. Pistols and less powerful guns are common choices. They provide a quick option when the primary runs out of ammo or during tight fights. Adjust these to match the primary weapon or mission needs. This ensures your AI is ready for any situation.
Select Armor Type
Armor protects your AI from enemy fire and affects their speed. Heavy armor offers better protection but slows movement. Light armor lets them move faster but offers less defense. Pick armor based on the mission’s risk level and the AI’s role. Proper armor selection keeps your team alive longer.
Pick Headgear
Headgear adds protection and can include helmets or tactical hats. Some helmets provide extra defense against headshots. Others may improve visibility or communication. Choose headgear that balances safety with comfort for your AI teammates. This small change can reduce casualties during intense combat.
Customize Ammunition
Ammunition type affects weapon performance and damage. Standard rounds are common, but special ammo like armor-piercing or hollow points can improve effectiveness. Match ammo to the mission and enemy type. Customizing ammo helps your AI handle tough targets more efficiently.
Save Loadout Changes
Saving loadout changes for AI teammates in Ready or Not ensures your settings stay. Without saving, your custom gear resets after missions or game restarts.
It is important to follow the correct steps to save properly. The game’s preset system can sometimes be buggy, so extra care is needed.
Apply Presets
After selecting your AI teammate and changing their gear, use the “Apply Preset” button. This saves your chosen loadout to the preset slot.
Applying presets helps the game remember your settings for each AI teammate. Do this for every teammate you want customized.
Reopen Menu To Confirm
Close the loadout menu after applying presets. Then, reopen it to check if your changes saved correctly.
If the changes do not appear, reapply the preset and repeat. This step confirms the game has stored your new loadout.
Saving changes individually for each AI teammate avoids losing your adjustments during gameplay.
Fix Saving Issues
Fixing saving issues is key to customizing AI teammates effectively. Sometimes changes don’t save properly. This can cause frustration and wasted time. Follow simple steps to ensure your loadout changes stick.
Apply And Re-enter Menu
After customizing an AI teammate’s loadout, always hit the apply button. Wait a few seconds. Then exit the loadout menu completely. Reopen the menu to check if changes saved correctly. This refresh helps the game register your edits.
Customize Officers Individually
Set loadouts for each AI teammate one at a time. Avoid changing multiple officers all at once. Focus on one officer, apply changes, then move to the next. This method reduces errors and improves saving reliability.
Remove Conflicting Mods
Some mods interfere with the saving system. Disable or uninstall mods that alter AI behavior or loadouts. Test saving after removing these mods. This often fixes issues caused by mod conflicts.
Credit: gamerant.com
Best Loadout Tips
Choosing the best loadout for your AI teammates in Ready Or Not improves their performance. A well-balanced setup helps them handle threats and support your mission. Focus on weapons, armor, and tactical gear to create effective squads. This section shares tips to build smart loadouts for AI teammates.
Optimize Weapon Choices
Select weapons that match each AI’s role. Use assault rifles for balanced firepower and range. Shotguns work well in close quarters. Give snipers to AI positioned for long-distance support. Avoid heavy weapons that slow teammates down. Keep ammo types consistent for easy resupply.
Balance Armor And Mobility
Heavy armor offers more protection but reduces movement speed. Light armor allows faster reactions and better positioning. Choose medium armor to balance safety and mobility. Match armor level with mission type and threat level. Ensure AI can move quickly without sacrificing defense.
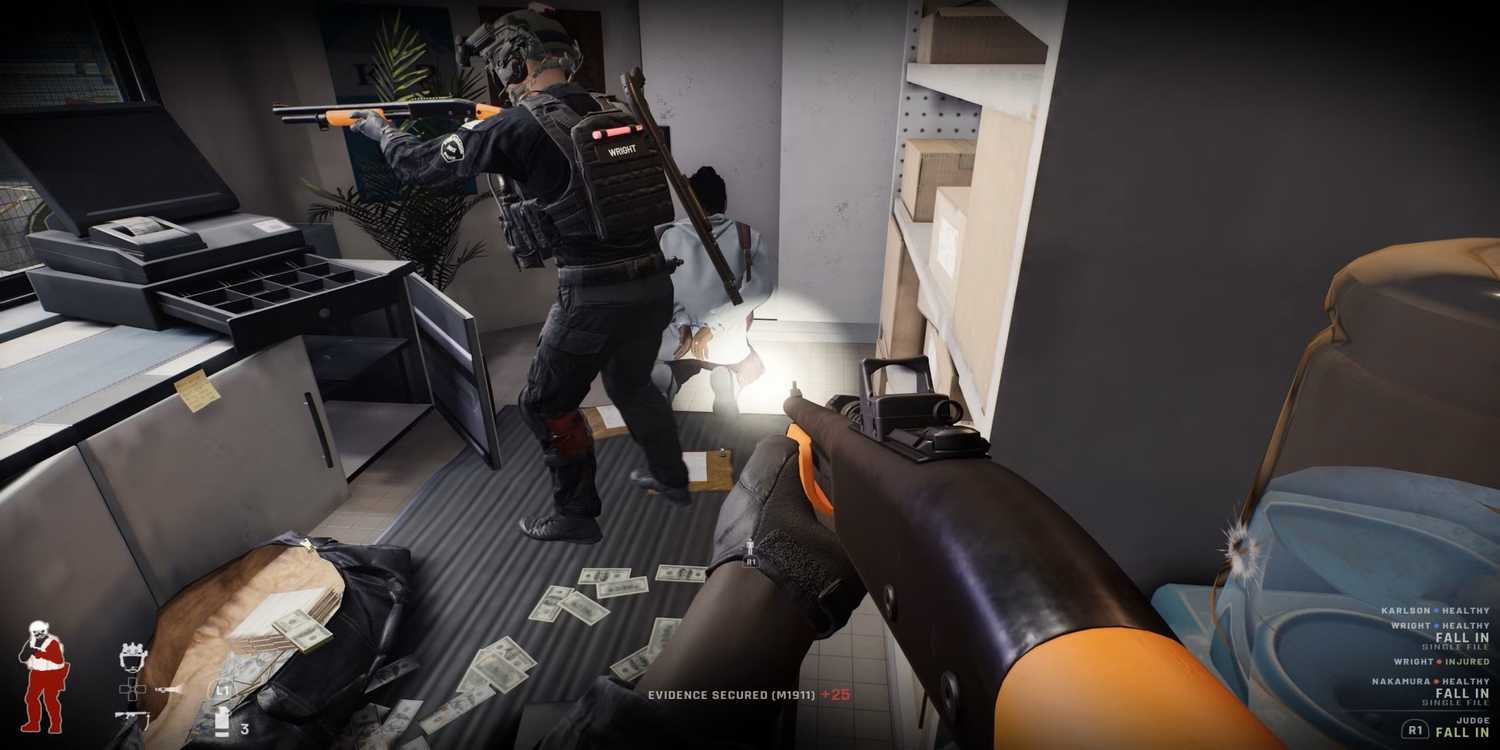
Select Tactical Gear
Equip AI with useful tactical gear for mission success. Flashbangs and smoke grenades help control crowds and create cover. Breaching tools assist in entering locked rooms quickly. Medkits keep teammates alive longer. Tailor gear choices to mission objectives and team roles.

Credit: gamerant.com
Frequently Asked Questions
How To Change Ai Loadout Ready Or Not?
Open the loadout menu in headquarters or during a mission (press Tab + hold Left Tab). Select an AI teammate from the dropdown next to “Self. ” Change their weapons, armor, and gear. Save changes. If saving fails, reapply presets or customize each AI individually to ensure updates.
How Do You Change Your Team Members In Ready Or Not?
Open the loadout menu during a single-player mission by pressing Tab and holding Left Tab. Select an AI teammate from the dropdown next to “Self. ” Customize their weapons, armor, and gear, then save. Re-enter the menu if changes don’t save properly.
How To Control Ai In Ready Or Not?
Open the loadout menu during a mission by pressing Tab and holding Left Tab. Select an AI teammate from the dropdown next to “Self. ” Customize their weapons, armor, and gear. Save changes, and if issues occur, re-enter the menu or customize each AI individually to ensure updates apply.
Can You Change Your Gun In Ready Or Not?
Yes, you can change your gun in Ready or Not. Open the loadout menu, select your AI teammate, and customize their weapons. Save your changes, but apply and re-enter the menu if the game doesn’t save immediately. Customize each teammate individually for best results.
Conclusion
Changing AI teammates’ loadouts in Ready or Not is simple and useful. Customize weapons, armor, and gear to fit your mission style. Remember to save changes carefully, as the preset system can be buggy. Re-enter the menu if your changes don’t stick at first.
This way, your AI teammates perform better and support you effectively. Practice these steps to improve your gameplay experience. Small adjustments make a big difference during missions. Keep experimenting with different setups to find what works best.