Plug the camera into USB or pair it via Wi-Fi, then allow macOS to access the camera and folder.
I have helped dozens of users connect DSLR, mirrorless, webcams, and IP cameras to macOS. This guide explains how to connect to a camera on mac in clear, practical steps. I will show USB, Wi-Fi/Bluetooth, and network methods, plus troubleshooting tips I use every day.
Types of cameras and how they connect to a Mac
Knowing your camera type makes how to connect to a camera on mac simple and fast. Most cameras fall into three groups: local USB webcams and DSLRs, wireless cameras with vendor apps, and network cameras using RTSP or IP. Pick the method that matches your camera and skip what does not apply.
Common connection types:
- USB direct connect: simple plug-and-play for webcams and many cameras.
- Wireless vendor apps: connects via Wi-Fi or Bluetooth and often needs a companion app.
- RTSP/IP network stream: used by security cameras and IP cams for live feeds.
I often start by identifying the camera model and mode. That step saved me time and prevented errors on shoots and remote installs.
Prepare your Mac for camera connections
A small prep routine avoids common issues when you want to know how to connect to a camera on mac. Update macOS to the latest stable version. Check System Settings for camera and microphone permissions.
Checklist before connecting:
- Update macOS and camera firmware if available.
- Restart your Mac to clear stuck services.
- Open System Settings > Privacy & Security and allow Camera access for the app you will use.
In my workflow, a quick restart and permission check solve most access problems. It is a good habit before live streams or downloads.

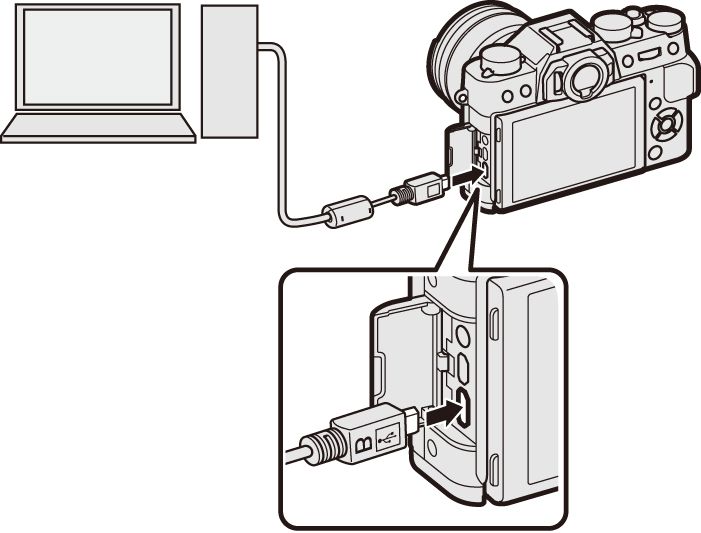
How to connect to a camera on mac via USB
USB is the most reliable method for how to connect to a camera on mac. Most webcams and many DSLRs work by USB or via a USB card reader for memory cards. macOS usually recognizes the device automatically.
Step-by-step USB connect:
- Turn off the camera if the manual recommends it.
- Connect the camera or card reader to a USB port or hub.
- Turn on the camera and set it to the correct mode (PC, Mass Storage, or Camera).
- Open Finder, Photos, or Image Capture to view and import files.
If macOS does not detect the camera, try a different cable or port. I once fixed a client’s import issue by switching to a data-capable cable rather than a charge-only cable.
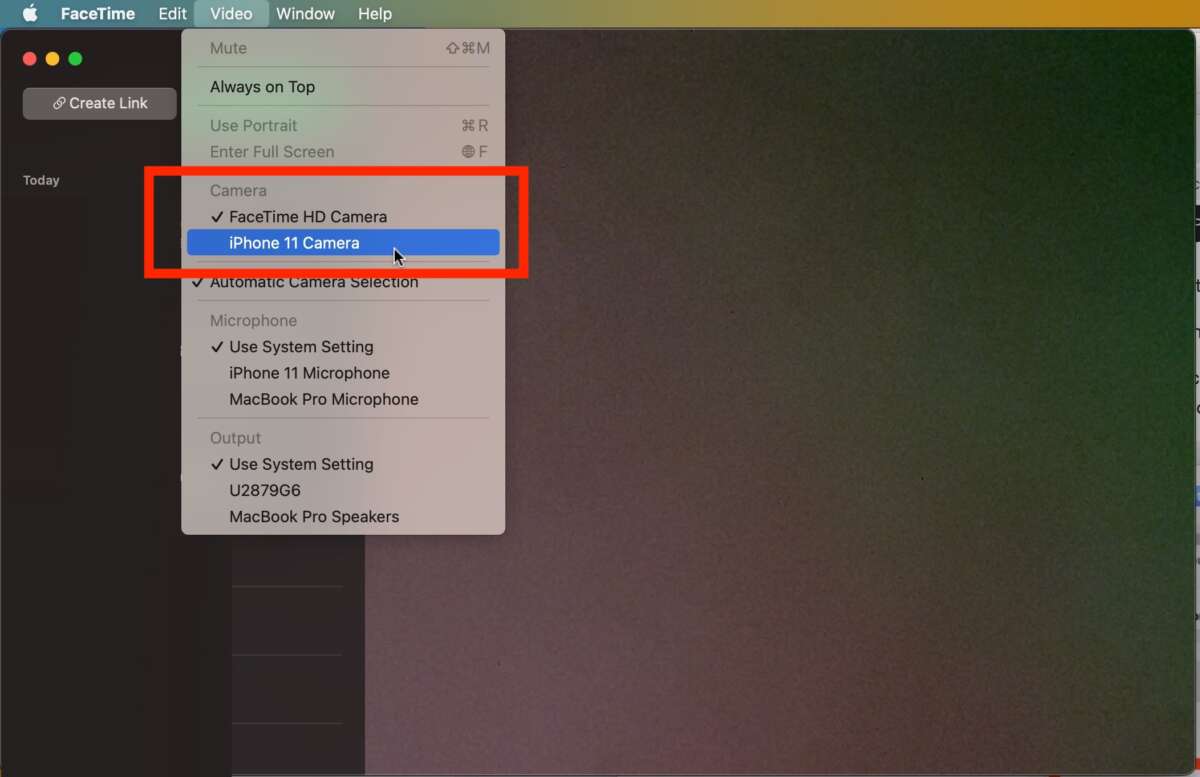
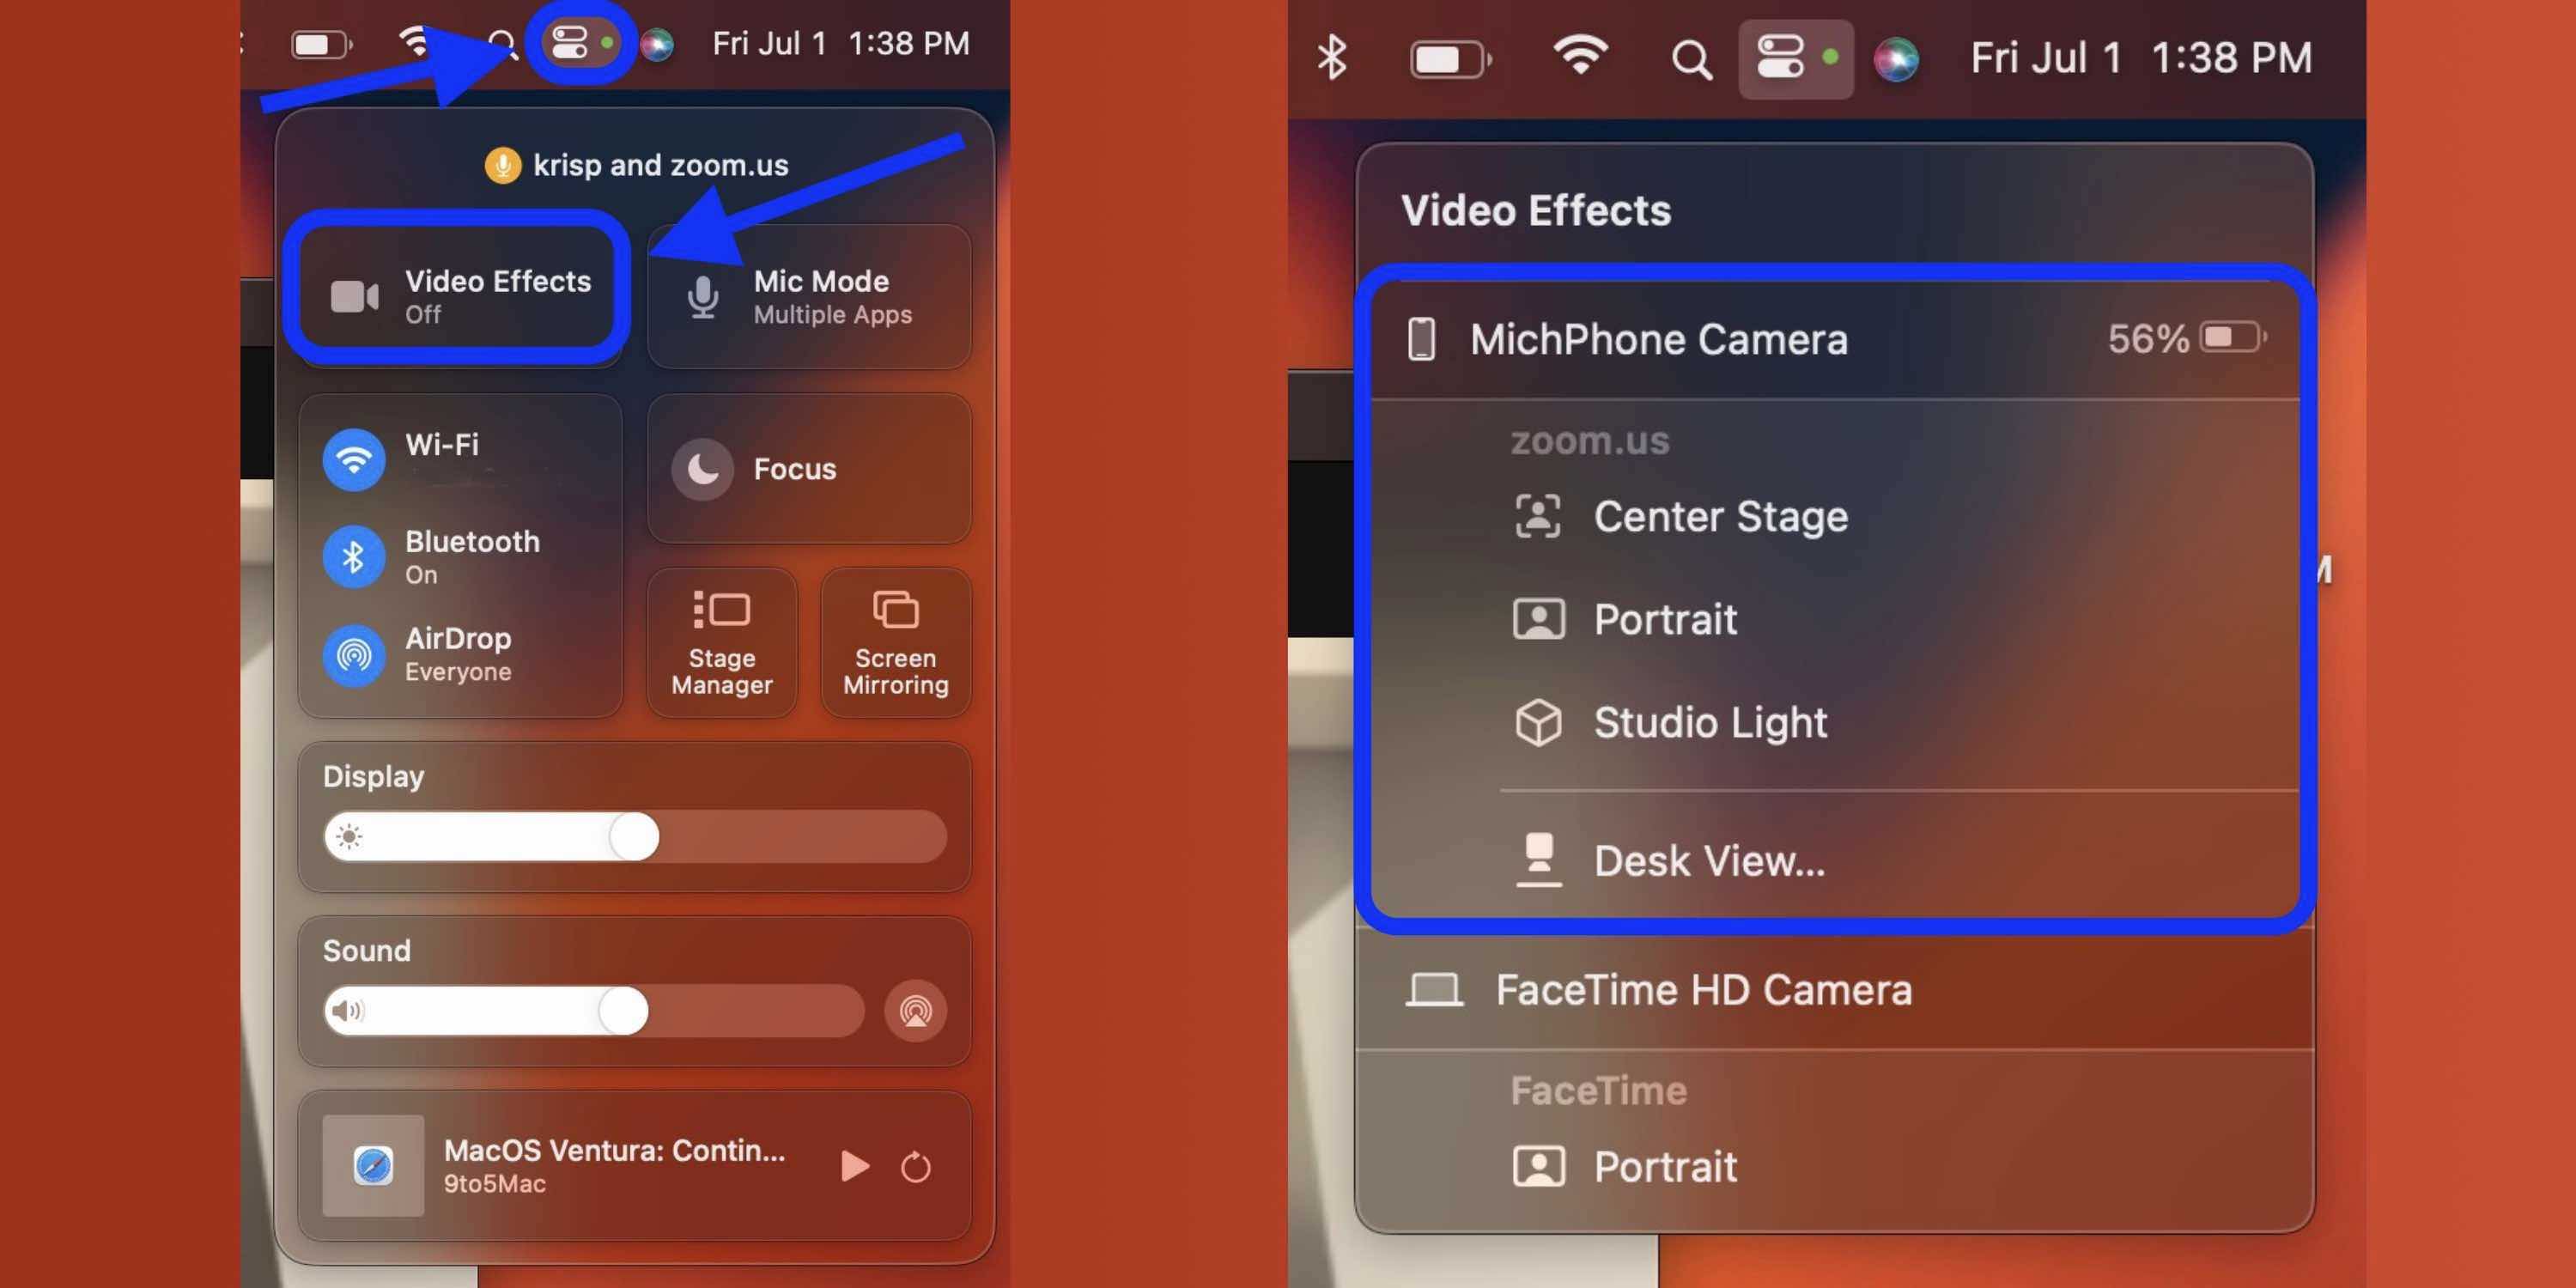
How to connect to a camera on mac wirelessly (Wi‑Fi / Bluetooth)
Many modern cameras and webcams offer wireless modes. Wireless explains how to connect to a camera on mac without cables. You can use the camera’s hotspot, a shared network, or a vendor app.
Wireless connection options:
- Camera hotspot: join the camera’s Wi‑Fi network from your Mac.
- Same local network: both camera and Mac on the same router network.
- Bluetooth pairing: used for remote control and limited file transfer.
- Vendor apps: install the camera maker’s macOS app or use browser access.
Tip: Use the vendor app for initial pairing. I pair once via hotspot, then switch to the home network for faster transfers.
How to connect to a camera on mac as an IP/RTSP stream
Security cameras and some prosumer cameras use RTSP or HTTP streams. This method tells you how to connect to a camera on mac for live viewing and recording using apps like VLC or OBS.
Steps for RTSP/IP:
- Find the camera’s IP address from your router or camera display.
- Get the stream URL (RTSP or HTTP format) from the camera settings or manual.
- Open VLC, choose Open Network, and paste the stream URL.
- For recording or live use, add the stream to OBS as a Media Source.
I used this setup for remote monitoring and it ran stable when the router and firmware were current. If a feed lags, check network bandwidth and router QoS settings.

Apps and tools that make it easy
macOS offers built-in tools, and third-party apps expand what you can do when learning how to connect to a camera on mac. Choose the tool that fits your workflow.
Useful apps and tools:
- Finder and Photos: import photos and videos from cameras or memory cards.
- Image Capture: simple import and device control with options.
- VLC: view network streams and test RTSP links.
- OBS Studio: capture camera feeds for streaming and recording.
- Vendor apps: offer tethering, live view, and special features.
My go-to is Image Capture for fast downloads and OBS for live streams. These two cover most needs from simple imports to broadcast setups.
Troubleshooting common problems
When things go wrong, a clear checklist helps fix issues quickly. This section focuses on practical fixes for how to connect to a camera on mac problems.
Common problems and fixes:
- Camera not detected via USB: try a different USB cable, port, or a powered hub.
- App cannot access camera: check System Settings > Privacy & Security and enable Camera.
- Slow wireless transfer: move closer to the camera or use the camera’s hotspot.
- RTSP stream fails: verify IP, port, username, password, and network firewall rules.
- Files fail to import: use a card reader and import directly to Finder or Photos.
I once spent an hour on a Mac not recognizing my tethered camera. A simple camera mode change fixed it. These small checks save time on shoots.

Tips and best practices from experience
These are practical tips I use daily. They improve reliability when you need to connect to a camera on mac under pressure.
Best practices:
- Carry a spare certified data cable and a card reader.
- Use a dedicated app for tethering to avoid unexpected sleep or power issues.
- Keep camera firmware current and note compatibility with macOS versions.
- Use wired connections for reliability during live streams.
- Backup files immediately after import to two locations.
My rule: never rely on a single connection method at an important event. Have a backup plan ready.
Frequently Asked Questions of how to connect to a camera on mac
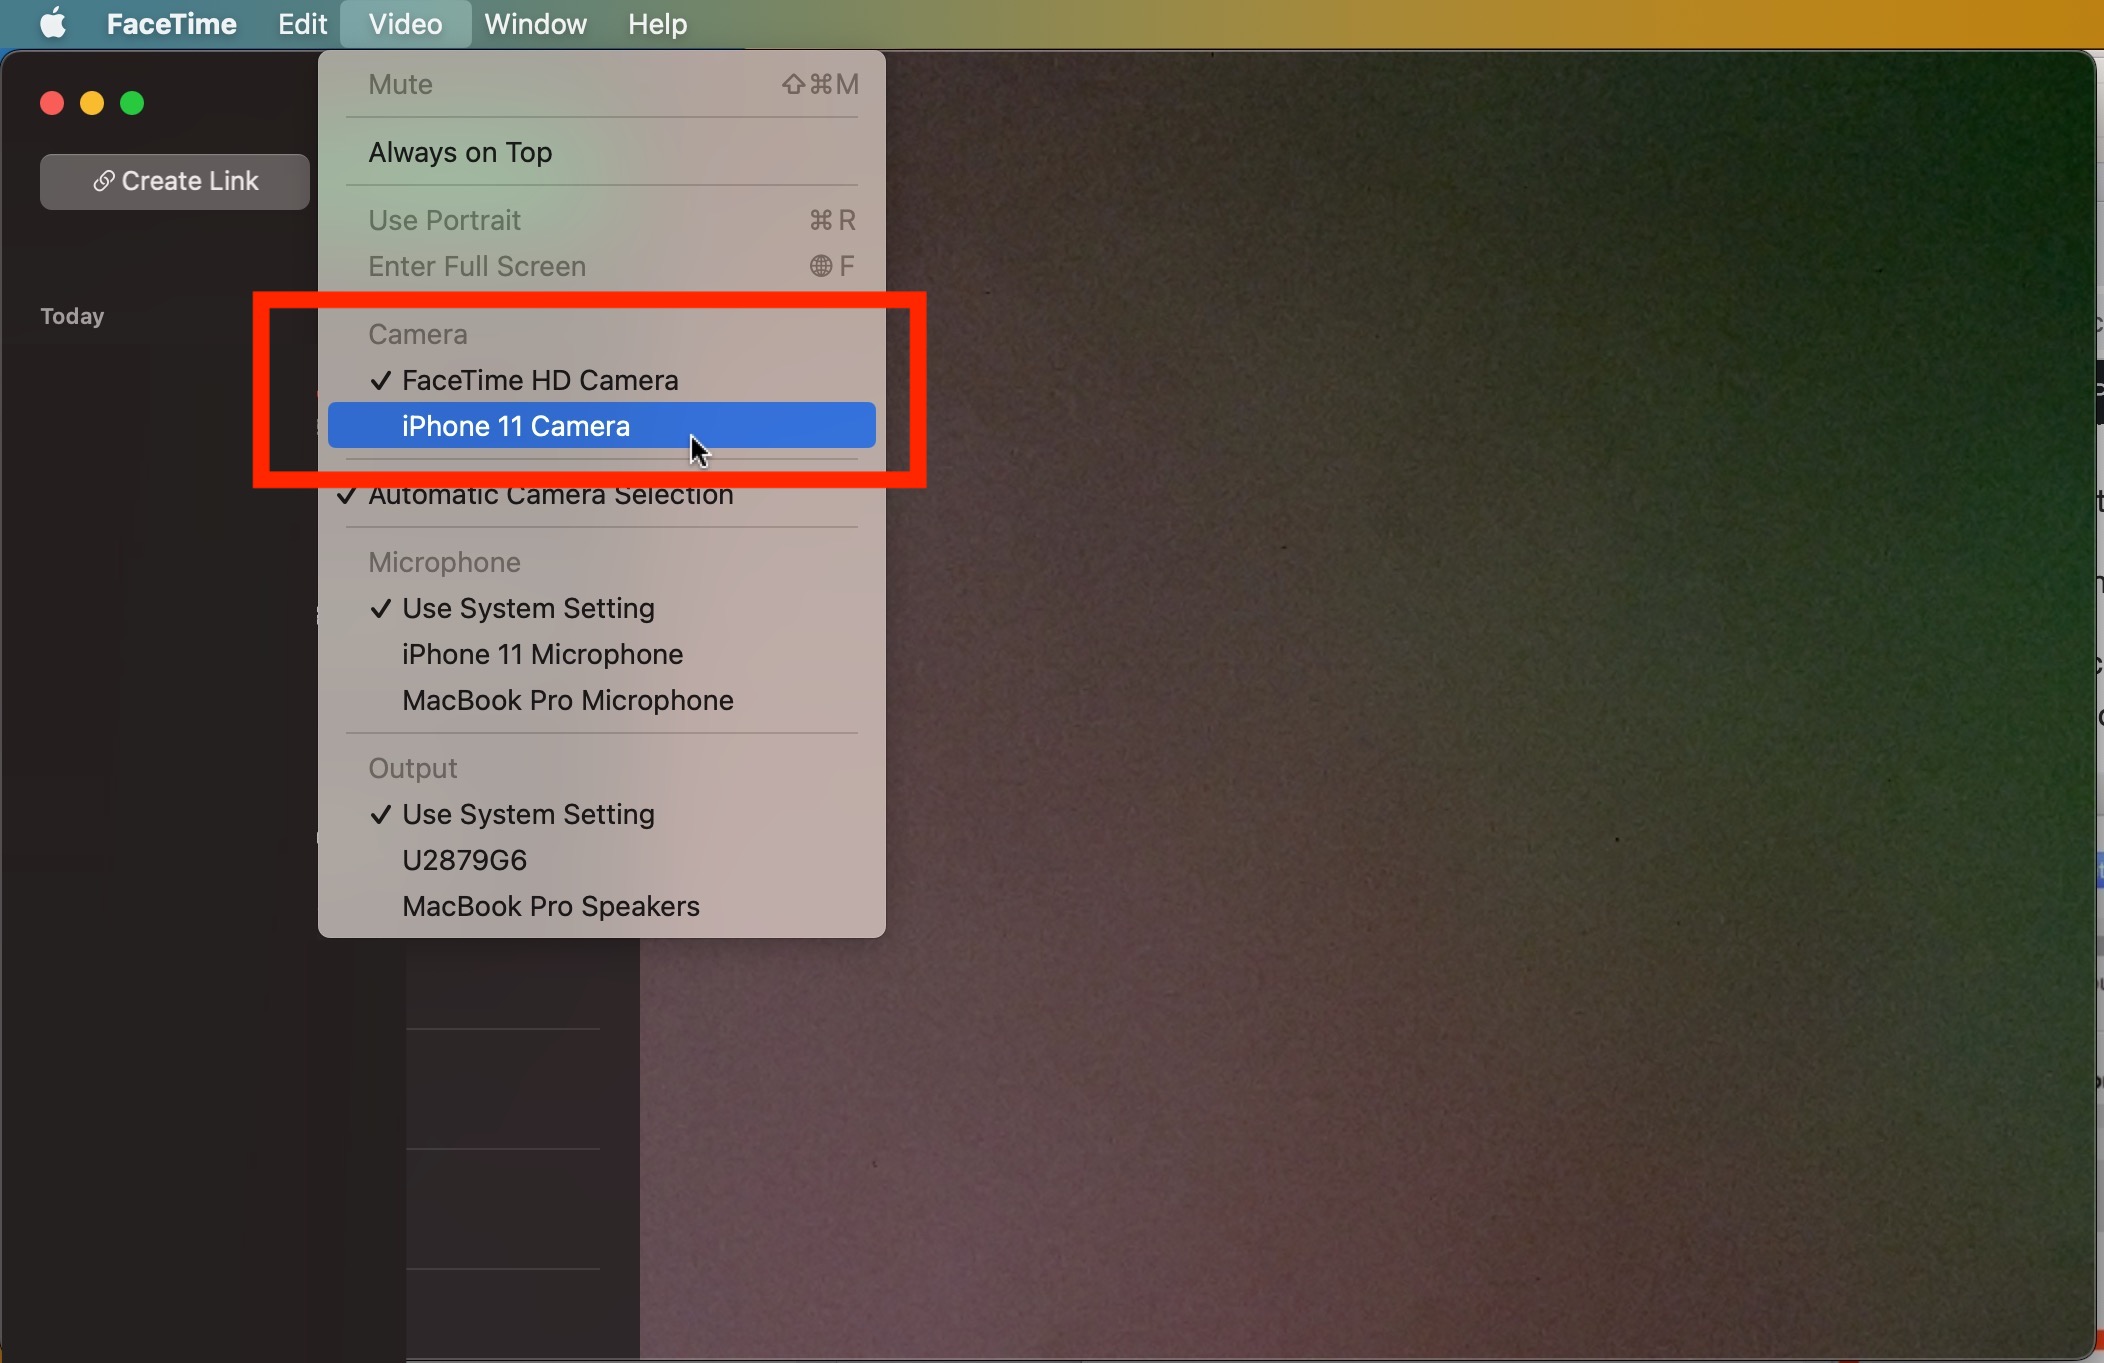
How do I connect a DSLR to my Mac for tethered shooting?
Connect the DSLR with a data-capable USB cable or use the camera’s tethering app. Open your shooting app like Capture One or the vendor app and allow Camera access in System Settings.
Why won’t my Mac recognize my camera via USB?
Often it is a bad cable, a camera in the wrong mode, or missing permissions. Try a different cable, set the camera to mass storage or PC mode, and check Privacy & Security settings.
Can I connect an IP camera to my Mac for live viewing?
Yes, you can view IP or RTSP streams in VLC or OBS by pasting the stream URL into the app. Ensure the Mac and camera share the same network and correct credentials are used.
How do I transfer photos from my camera to Photos on Mac?
Connect via USB or insert the memory card in a reader, open Photos, and use the import feature. Image Capture is another fast way to import without launching Photos.
Is Wi‑Fi connection secure for transferring camera files?
Wi‑Fi can be secure if you use the camera’s encrypted connection or a trusted network. For sensitive work, prefer wired transfer or an isolated hotspot to reduce exposure.
Conclusion
You now have clear, practical steps to connect to a camera on mac using USB, Wi‑Fi/Bluetooth, or network streams. Follow the prep checklist, use the right app, and keep a backup plan ready. Try the steps on your camera now and note what works; small routines save time and prevent stress.
Take action: pick the method that matches your camera and test it today. Share your experience or questions in the comments and subscribe for more hands-on Mac workflows.

Everett Ashford is a tech reviewer at mytechgrid.com specializing in SSDs, cameras, TVs, earbuds, headphones, and other consumer electronics. He provides honest, data-driven reviews based on hands-on testing and real-world performance analysis. Everett simplifies complex tech details to help readers make smart, confident buying decisions.