Draw a classic movie camera by sketching simple shapes, adding a lens, reels, and shading.
I have taught drawing workshops and worked on film sets. I will show you clear steps and practical tips on how to draw a movie camera. This guide covers materials, proportions, step-by-step drawing, details, shading, style variants, and fixes. Read on to learn how to draw a movie camera with confidence and speed.

Materials Needed
Choose simple, reliable tools. Keep your kit light so you can focus on shape and form.
- Pencil set: HB for sketching, 2B for darker lines, and 4B for shading.
- Eraser: soft kneaded eraser for highlights and a rubber eraser for corrections.
- Paper: smooth sketch paper or a drawing pad at least 80 lb weight.
- Ruler and compass: for straight edges and accurate circles.
- Optional: fineliners, markers, or colored pencils for final inks and color.
How you set up matters. A clean workspace and a reference image help a lot. Practicing with a simple pencil first speeds learning.
![]()
Understanding Basic Shapes and Proportions
Start by seeing the camera as a group of basic shapes. That view makes the process simple and repeatable.
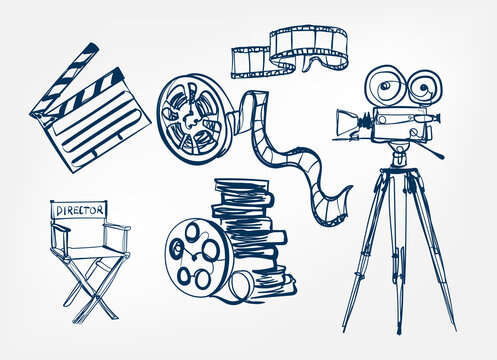
Most movie cameras break down into a rectangular body, cylindrical lens, and circular reels. Note the relative sizes. Reels often sit above or behind the body. Lenses extend from the front. Viewfinders sit on the side or back. Study photos and sketch the shapes lightly to find the right balance. This is the foundation for how to draw a movie camera accurately.

Step-by-Step: How to Draw a Movie Camera
Follow these short steps. Keep lines light. Adjust as you go.
- Lightly draw a rectangle for the camera body. Keep corners slightly rounded.
- Add a smaller rectangle on top for the handle or viewfinder base. This gives height.
- Sketch two circles above the body for the film reels. Space them evenly.
- Draw a cylinder at the front for the lens. Use an oval for the front glass.
- Add a small rectangle or trapezoid for the viewfinder on the back or side.
- Connect the lens and body with a small neck. Draw focus rings as thin lines.
- Add reel spokes: short radial lines inside the reel circles. Keep them light.
- Outline a tripod mount or handles under the body if you want support.
- Refine major lines and erase extra construction strokes. Choose which lines to keep.
- Darken final outlines and add shading to show depth.
Repeat the steps using different sizes. Practice the steps to master how to draw a movie camera from memory.

Adding Details: Lenses, Reels, and Viewfinder
Details bring the camera to life. Add small parts with care.
- Lens details: draw concentric rings, a glass highlight, and a small aperture shape.
- Reels: add a center hub and spokes. Consider small screws or labels on reel edges.
- Viewfinder and handles: sketch small pads, buttons, and grips to suggest function.
- Body textures: add vents, seams, or a battery pack as simple rectangles and lines.
- Cables and knobs: thin curved lines and tiny circles give realism.
These details help when you want to draw a movie camera that looks used or high-end. Keep details minimal on small sketches.

Shading, Light, and Texture
Shading makes your drawing pop. Think of one clear light source.
Use soft pencils for mid tones and darker pencils for deep shadows. Shade with short strokes for a matte metal look. Blend lightly with a tissue for smooth areas. Leave small white highlights on lens glass and shiny metal. Cast shadows under the camera and reels to ground the object. Proper shading shows material and form when you draw a movie camera.

Stylized Variations: Cartoon, Vintage, and Realistic
Adapt the same basics to different looks. Each style uses the same rules of shape.
- Cartoon style: exaggerate the reels and lens. Use bold outlines and simple shading.
- Vintage style: add film sprockets, leather straps, and rounded chrome details. Use darker grime and muted tones.
- Realistic style: focus on accurate proportions, fine texture, and subtle highlights. Include small screws, labels, and reflections.
Try each style on the same basic sketch. This will teach you how to draw a movie camera in many ways.
Common Mistakes and How to Fix Them
Avoid small errors that ruin the look. Fixes are often simple.
- Wrong proportions: measure with your pencil and ruler. Compare reel diameter to body width.
- Flat lens: add an inner oval and highlights to make it look round.
- Stiff lines: sketch loosely first, then refine. Use quick, light strokes.
- Over-detailing: step back and remove small marks that don't add meaning.
- Poor lighting: decide your light source early and keep it consistent.
These fixes save time and improve how to draw a movie camera outcomes.
Practical Tips from My Experience
I have sketched cameras in studios and on location. These lessons helped me hone speed and accuracy.
Practice timed sketches to build confidence. Limit each drawing to 10 minutes at first. I once spent hours on a lens and lost the overall proportion. Now I block shapes first. Use photo references of actual cameras to learn real screws and vents. Keep a sketchbook of 50 small camera studies; this improved my skill fast. These tips show real ways to learn how to draw a movie camera better.
Frequently Asked Questions of how to draw a movie camera
What is the easiest way to start when learning how to draw a movie camera?
Begin with basic shapes: rectangle for the body, circles for reels, and a cylinder for the lens. Sketch lightly and refine lines step by step.
How long does it take to learn how to draw a movie camera realistically?
With daily practice, you can make good sketches in a few weeks. Reaching high realism may take months of focused study.
Which pencils are best for drawing a movie camera?
Use HB for construction lines, 2B for outlines, and 4B or 6B for deep shadows. A kneaded eraser helps with highlights.
Can I draw a movie camera without a ruler or compass?
Yes. Start freehand and use simple guides. A ruler and compass help with cleaner circles and straight edges but are not required.
How do I add reflections on the camera lens effectively?
Leave small white highlights and use soft gradients around them. Keep reflections simple and consistent with your light source.
Should I trace a photo when learning how to draw a movie camera?
Tracing can help you learn shapes, but avoid relying on it. Practice freehand copying of photos to build skill.
What are quick practice exercises for drawing cameras?
Do 10-minute gesture sketches, 5 close-up lens studies, and 20 silhouette sketches to master form and proportion.
Conclusion
You now have a clear, step-by-step plan to learn how to draw a movie camera. Start with basic shapes, add details, and practice shading. Use timed studies and real references. Try a cartoon, vintage, and realistic version to grow your skill. Take action: sketch one camera today, post your progress, and keep drawing regularly to improve.

Everett Ashford is a tech reviewer at mytechgrid.com specializing in SSDs, cameras, TVs, earbuds, headphones, and other consumer electronics. He provides honest, data-driven reviews based on hands-on testing and real-world performance analysis. Everett simplifies complex tech details to help readers make smart, confident buying decisions.