Enable TRIM on an SSD in Windows 10 by running a simple DISM/PowerShell or check with fsutil.
I’ve spent years tuning Windows systems and testing SSD behavior. If you want to learn how to enable trim on SSD in Windows 10, this guide walks you through quick checks, safe step-by-step commands, and real-world tips to keep your drive fast and healthy. You’ll get clear steps, troubleshooting advice, and practical notes from hands-on experience so you can enable TRIM with confidence and avoid common mistakes.
Why TRIM matters for SSDs
TRIM is a command that helps Windows tell your SSD which blocks are no longer in use. This lets the drive erase blocks ahead of time. That reduces write amplification and keeps the SSD fast over time.
If TRIM is off, the SSD must erase blocks during writes. That makes writes slower. Over months, performance can drop and the drive can wear faster.
I’ve seen systems where a simple TRIM enable restored steady write speed. Keeping TRIM enabled is one of the easiest maintenance steps for an SSD.
How to check if TRIM is enabled in Windows 10
You can check TRIM with a built-in tool. Open an elevated Command Prompt or PowerShell window. Then run this command:
- Open Start, type cmd, right-click Command Prompt and choose Run as administrator.
- Type: fsutil behavior query DisableDeleteNotify
- Press Enter.
If the output is DisableDeleteNotify = 0, TRIM is enabled. If it is 1, TRIM is disabled.
You can also check using PowerShell by running the same command in an elevated shell. These checks are safe and fast. They show clearly whether you need to enable TRIM on your SSD in Windows 10.

How to enable TRIM on SSD in Windows 10 (step-by-step)
Follow these steps to enable TRIM on SSD in Windows 10. The commands are simple and reversible.
- Open an elevated Command Prompt or PowerShell
- Press Start, type cmd or PowerShell, right-click and choose Run as administrator.
- Check current TRIM state
- Run: fsutil behavior query DisableDeleteNotify
- Note the result so you can confirm change.
- Enable TRIM if it’s disabled
- Run: fsutil behavior set DisableDeleteNotify 0
- If you use an older driver or third-party filter, also ensure system supports it.
- Verify the change
- Run the query again: fsutil behavior query DisableDeleteNotify
- Confirm the output is DisableDeleteNotify = 0.
If you prefer PowerShell, use the same fsutil commands in an elevated PowerShell window. Enabling TRIM this way addresses the common cases where the OS setting was turned off by software or migration tools.
If your SSD is connected via hardware that blocks TRIM (rare), you may need a firmware update or a different controller. Always back up important data before major firmware changes.

Troubleshooting common TRIM issues
If TRIM does not seem to work, try these checks.
- Verify OS-level TRIM: Run fsutil query again to ensure DisableDeleteNotify = 0.
- Confirm drive type: Make sure Windows sees the disk as an SSD. Open PowerShell and run Get-PhysicalDisk to check MediaType.
- Check drivers and controller: Old storage drivers or certain RAID controllers can block TRIM. Update drivers or use AHCI where possible.
- Inspect third-party software: Some disk tools and encryption drivers can disable TRIM. Temporarily disable them to test.
- Firmware and cable issues: Update SSD firmware and use proper SATA or NVMe connections. Some USB-to-SATA bridges disable TRIM.
I once helped a client whose TRIM was disabled after migrating to a USB enclosure. Moving the SSD back to an internal SATA port and re-enabling TRIM fixed the slowdown. Small hardware details often matter.

Best practices and tips
Use these tips when you enable TRIM on SSD in Windows 10.
- Keep Windows updated: Windows 10 handles TRIM well in recent builds.
- Use AHCI/Native NVMe mode: That ensures proper TRIM support.
- Update SSD firmware: Firmware often improves TRIM and garbage collection.
- Avoid unnecessary full-disk writes: Big temporary writes can cause wear.
- Schedule regular backups: TRIM removes blocks permanently; keep backups before tests.
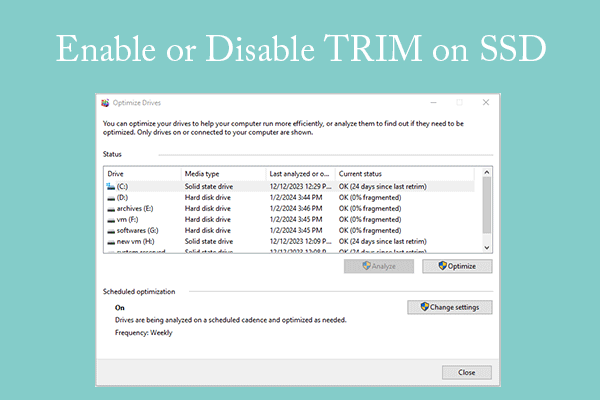
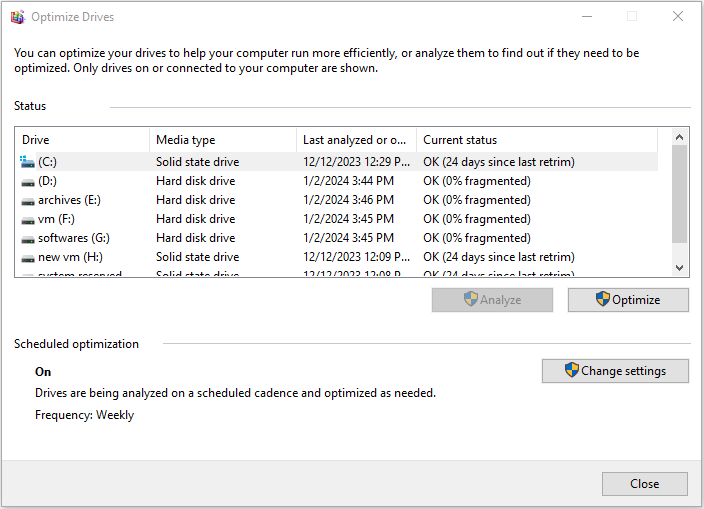
- Use built-in tools: The Windows Optimize Drives tool runs retrim/defrag tasks for SSDs safely.
From my experience, combining TRIM with a current firmware and driver stack gives the best, long-lasting SSD performance. Small maintenance every few months keeps the drive healthy.

Related concepts and limitations
TRIM is not a cure-all. It helps with write performance and wear leveling, but it does not replace secure erase or backups. TRIM may not function fully on some encrypted volumes depending on implementation. Some older RAID setups do not pass TRIM to drives. For those cases, check vendor documentation.
SSD internal garbage collection also helps performance. TRIM simply tells the SSD which blocks are free. Together they maintain the drive’s speed.
If you use external USB enclosures, confirm the bridge chip supports TRIM. Otherwise you may think TRIM is enabled in Windows 10 but the drive will not receive commands.
Personal experience and lessons learned
I’ve enabled TRIM on many machines. The most common mistake I saw was trusting migration tools that left TRIM off. I always check fsutil after cloning a drive. Another lesson: firmware matters. One SSD regained nearly original write speed after a firmware update and re-enabling TRIM.
Be cautious when testing. Run benchmarks before and after enabling TRIM to see real impact. And always keep a backup before firmware or RAID changes. These small steps save time and data.
Frequently Asked Questions of how to enable trim on ssd in windows 10
How do I know if TRIM is on for my SSD in Windows 10?
Run an elevated Command Prompt and use fsutil behavior query DisableDeleteNotify. If it returns 0, TRIM is enabled.
Will enabling TRIM delete my files?
No. Enabling TRIM simply informs the SSD about free blocks. It does not remove user data or files.
Can TRIM be enabled for an encrypted drive?
That depends on the encryption method. Some full-disk encryption can preserve TRIM, while others may block it. Check your encryption vendor’s guidance.
Does TRIM work on external SSDs connected by USB?
Only if the USB bridge supports TRIM. Many cheap enclosures do not pass TRIM through, so test or use an internal connection.
Is TRIM the same as disk defragmentation?
No. TRIM tells the SSD which blocks are free. Defragmentation reorders files and is unnecessary for SSDs. Windows automatically avoids traditional defrag for SSDs.
Conclusion
Enabling TRIM on SSD in Windows 10 is quick, safe, and effective. Check the TRIM status with fsutil, enable it with a single command if needed, and verify your drivers and firmware. Take a moment to back up data and follow best practices like using AHCI or native NVMe modes. Do these steps and you’ll keep your SSD running faster for longer.
Try the commands today, run a simple benchmark before and after, and leave a comment about your results or questions.

Everett Ashford is a tech reviewer at mytechgrid.com specializing in SSDs, cameras, TVs, earbuds, headphones, and other consumer electronics. He provides honest, data-driven reviews based on hands-on testing and real-world performance analysis. Everett simplifies complex tech details to help readers make smart, confident buying decisions.