Check cables, set SATA/NVMe mode in BIOS, load storage drivers or use DiskPart to initialize the drive.
I’ve spent years installing Windows on dozens of rigs, from ultrabooks to custom gaming PCs. If your SSD is not detected during Windows installation, this guide walks you through clear, tested steps. You’ll learn quick checks, BIOS settings, driver loading, DiskPart commands, and advanced fixes so you can get Windows installed without guesswork. Read on — I’ll explain why this happens and how to fix SSD not detected during Windows installation in plain, practical terms.
Why an SSD might not be detected during Windows installation
There are a few common reasons an SSD is not detected during Windows installation. Some issues are simple, like a loose cable. Others are settings or driver issues. Firmware, interface type (NVMe vs SATA), BIOS mode (UEFI vs Legacy), and disk format (GPT vs MBR) can block detection. Knowing the cause helps you pick the right fix.

Before you start: quick checklist
Start here to save time. Each item takes a minute or two.
- Power off and reseat the SSD and cables. Ensure the SATA or M.2 screw is secure.
- Try a different SATA port or M.2 slot. Use a known-working cable or adapter.
- Check BIOS/UEFI to confirm the drive appears there. If BIOS sees it, Windows installer likely can too.
- Verify SATA mode is AHCI for SATA SSDs. For NVMe drives use NVMe support in BIOS.
- Have a USB with the latest Windows installer and a driver pack (chipset, storage) ready.
If the SSD still doesn’t show up, follow the step-by-step fixes below.

Step-by-step fixes during Windows installation
These steps progress from simple to advanced. Try them in order.
- Check physical connections
- Turn off the PC and reconnect the SSD.
- Swap the SATA cable or use a different M.2 slot.
- Test the SSD in another machine or with a USB-to-SATA/NVMe adapter.
- Confirm BIOS/UEFI settings
- Boot into BIOS. Look for the drive under Storage or NVMe Configuration.
- Set SATA controller to AHCI. Disable RAID unless you use a RAID array.
- Enable NVMe support if available. Toggle CSM (Compatibility Support Module) if needed for older installs.
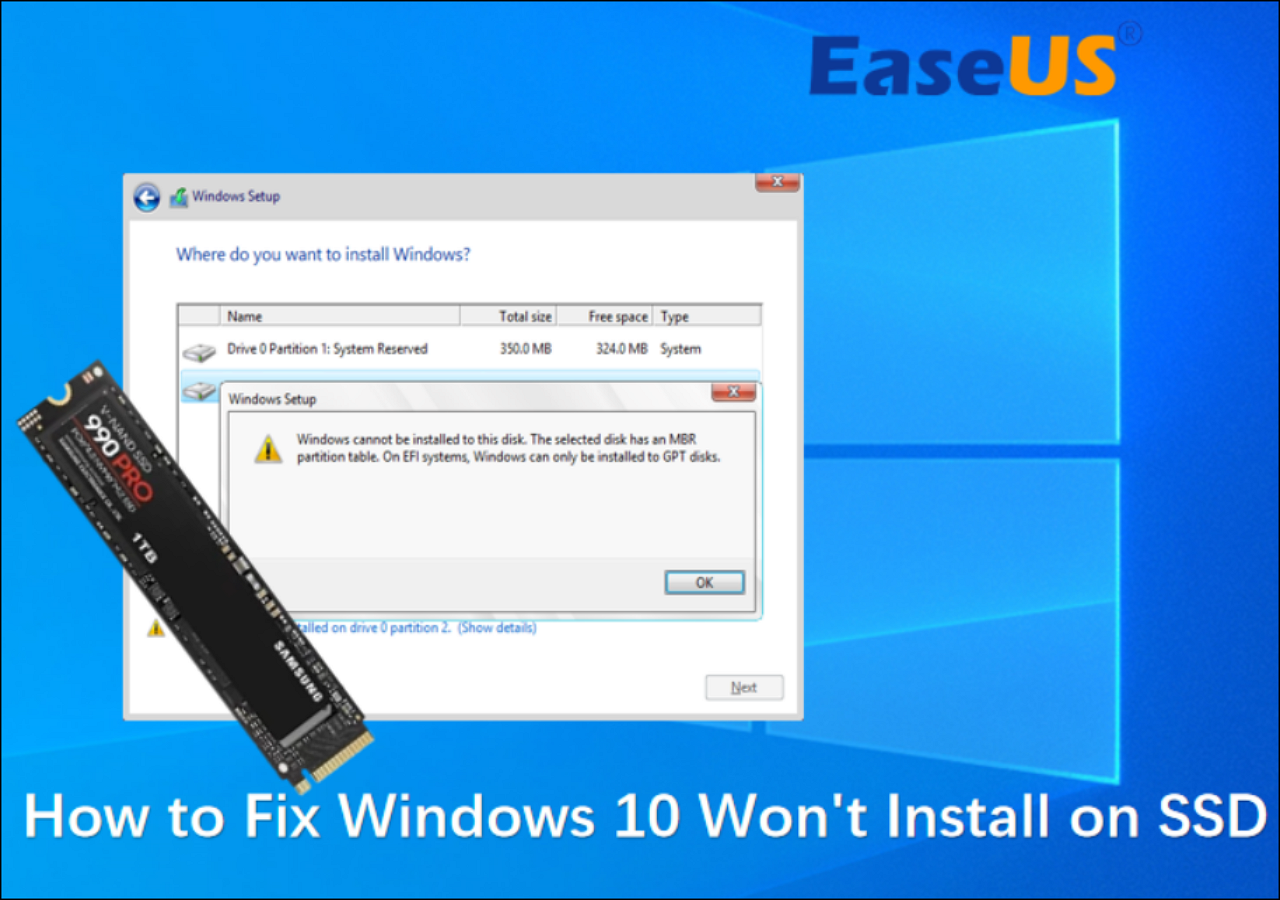
- Switch UEFI vs Legacy and secure boot
- For modern drives, use UEFI + GPT. If installer won’t detect the SSD, try toggling CSM or switching to Legacy temporarily.
- If Secure Boot blocks drivers, try disabling it while installing, then re-enable afterward.
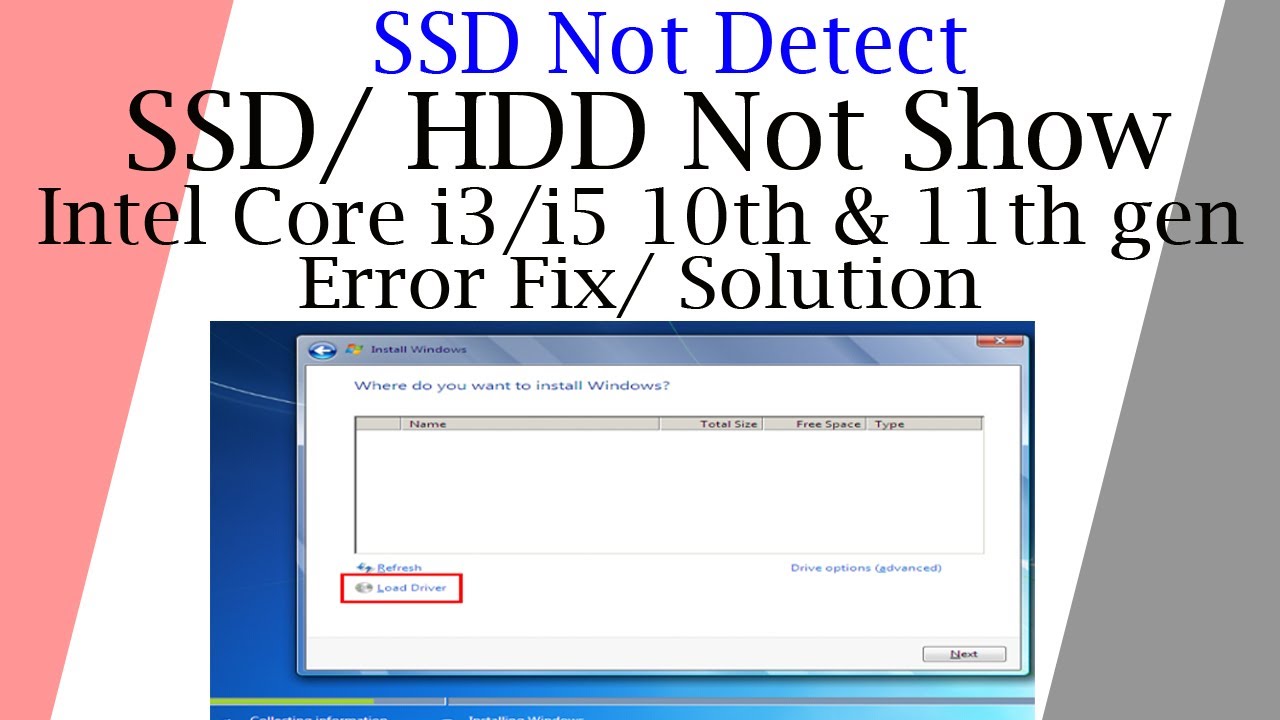
- Load storage drivers during install
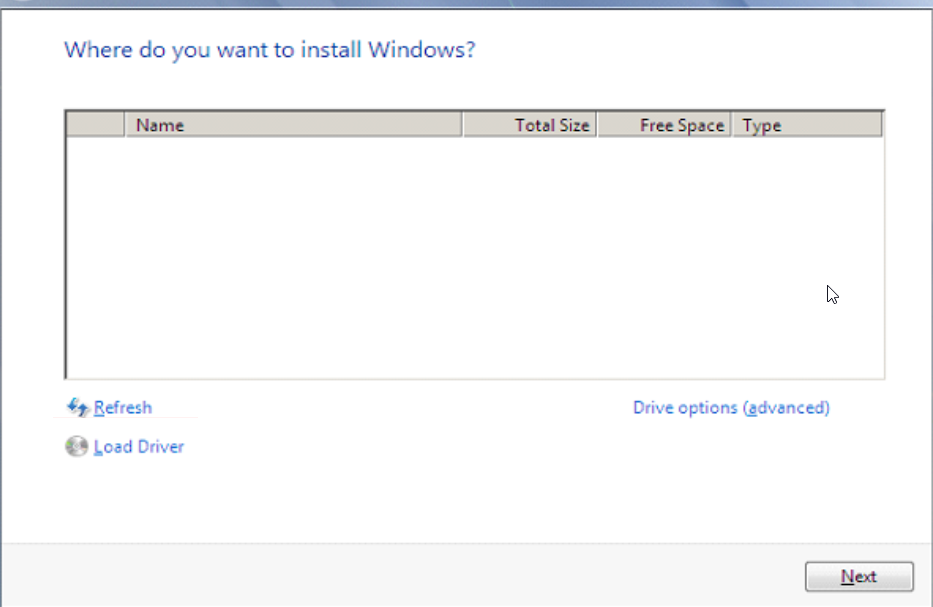
- On the Windows Setup screen, choose “Load driver” when no drives appear.
- Insert a USB with chipset or NVMe drivers from your motherboard or SSD vendor. Point installer to that folder.
- After driver install, refresh the list.
- Use DiskPart to prepare the drive
If the installer lists the drive but shows no partitions or “unallocated,” use DiskPart.
- Press Shift+F10 on the installer screen to open Command Prompt.
- Run:
- diskpart
- list disk
- select disk X (replace X with SSD number)
- clean
- convert gpt (or convert mbr if using legacy)
- exit
- Close the prompt and click Refresh in the installer. The SSD should show as unallocated space.
- Update SSD firmware and motherboard BIOS
- If drive is detected on another machine, check for firmware updates for the SSD.
- Update your motherboard BIOS to improve NVMe and SATA compatibility.
- Try a different installer or USB media
- Recreate the Windows installer on a different USB stick.
- Use the official Media Creation Tool to avoid corrupted images.
- As a last hardware step, test with another OS
- Boot a live Linux USB. If Linux sees the SSD but Windows does not, the issue is likely driver-related.
Source: youtube.com
Advanced fixes and controller-specific tips
If the basic steps fail, use these focused methods.
-
For NVMe drives not detected
- Ensure NVMe RAID mode is not forcing detection issues.
- Load the vendor NVMe driver during Windows setup.
- If BIOS has an “NVMe Configuration” page, check mapped namespaces.
-
For RAID or Intel RST systems
- If Intel RST or RAID is enabled, Windows installer may need Intel RST F6 drivers.
- Consider switching to AHCI after converting or reinstalling if RAID is not used.
-
For M.2 socket sharing issues
- Some boards disable SATA ports when using certain M.2 slots. Check the manual.
- Move the SSD to a slot that doesn’t share lanes.
-
For third-party adapters
- Cheap adapters sometimes fail in install mode. Use a direct connection if possible.
When you run these steps, document what worked. That helps if you need to contact support later.

Preventive tips and best practices
Avoid future headaches with simple habits.
- Keep firmware current for both SSD and motherboard.
- Use high-quality cables and screws. Loose screws matter for M.2.
- Use the latest Windows install media and vendor drivers.
- Match BIOS mode to disk format: UEFI with GPT, Legacy with MBR.
- Backup before converting disk types or cleaning a drive.
These steps keep installations smooth and avoid the common “SSD not detected during Windows installation” scenario.

Personal experience: real fixes that worked for me
I once had a laptop where the NVMe drive vanished during setup. The BIOS showed the drive, but Windows installer did not. I tried USB drivers and DiskPart. The fix was a BIOS update that added NVMe hotplug support. Another time, a desktop failed to see a SATA SSD due to a shared M.2 slot; moving the SSD to another port fixed it in minutes.
Lessons I learned:
- Start simple: cables, ports, BIOS.
- Keep spare cables and a USB adapter on hand.
- Firmware and BIOS updates can be the missing piece.
Source: com.br
Related concepts to know
Brief, plain definitions to help you troubleshoot faster.
-
AHCI
- A SATA interface mode that works well for SSDs. Use AHCI for single-drive setups.
-
NVMe
- A fast protocol for PCIe SSDs. Requires NVMe support in BIOS and drivers in installer.
-
UEFI vs Legacy (CSM)
- UEFI works with GPT disks and modern features. Legacy/CSM uses MBR and older compatibility.
-
GPT vs MBR
- GPT supports bigger drives and more partitions. Use GPT with UEFI.
Knowing these makes it easier to interpret BIOS options during a Windows install.

Frequently Asked Questions of how to fix ssd not detected during windows installation
Why doesn't Windows setup see my NVMe SSD even though BIOS shows it?
Windows setup may lack the NVMe driver. Load the vendor NVMe driver from a USB during setup or update the installer media.
Can DiskPart fix an SSD that the installer doesn't show?
If the SSD appears in DiskPart (list disk), cleaning and converting to GPT or MBR can fix it. If DiskPart doesn't list the disk, it’s likely a hardware or BIOS issue.
Should I change SATA from RAID to AHCI to fix detection?
Yes. If you are not using RAID, switching to AHCI often resolves detection problems. Change in BIOS and reinstall or adjust drivers if Windows is already installed.
Will updating motherboard BIOS help?
Often yes. BIOS updates add storage compatibility and bug fixes, especially for new NVMe drives. Follow manufacturer instructions for safe updates.
Is a faulty cable or adapter a common cause?
Very common. Faulty SATA cables or cheap M.2 adapters can stop installers from seeing drives. Swap cables or use a direct connection to test.
Conclusion
You can fix an SSD not detected during Windows installation by starting with the basics: check cables, test ports, and confirm BIOS settings. If that doesn't work, load the right storage drivers, use DiskPart to clean and format, and update firmware or BIOS. Take methodical steps and document what you try. With a short checklist and a calm approach, you’ll likely resolve the issue in under an hour.
Try the recommended fixes now, and leave a comment with your PC model and SSD type if you need personalized help. Explore more guides or subscribe for step-by-step install tips.

Everett Ashford is a tech reviewer at mytechgrid.com specializing in SSDs, cameras, TVs, earbuds, headphones, and other consumer electronics. He provides honest, data-driven reviews based on hands-on testing and real-world performance analysis. Everett simplifies complex tech details to help readers make smart, confident buying decisions.