Move Windows 11 to an NVMe SSD by cloning or clean-installing, then enable NVMe in UEFI.
I’ve migrated dozens of Windows 11 systems to NVMe SSDs for faster boot and app loads. This guide explains how to migrate Windows 11 to NVMe SSD step-by-step. I’ll cover planning, cloning, fresh install, UEFI setup, troubleshooting, and validation. Read on for clear, tested steps and practical tips from real-world experience.
Why move to NVMe and what benefits to expect
NVMe SSDs are far faster than SATA drives. They cut boot and load times. They also improve multitasking and game load speed. Migrating Windows 11 to NVMe SSD yields a noticeable daily benefit.
- Faster boot and resume times.
- Better app launch and file transfer speeds.
- Lower latency for heavy tasks.
I’ll show safe ways to migrate Windows 11 to NVMe SSD. You’ll learn which method fits your skill level. I’ll also point out problems I’ve seen and how to avoid them.

What you need before you start
Gather these items and info before you attempt how to migrate windows 11 to nvme ssd.
- NVMe SSD that fits your PC and has enough capacity.
- A screwdriver and anti-static care.
- USB flash drive (8 GB+) for recovery or install media.
- A cloning tool or Windows 11 ISO if you’ll do a fresh install.
- Backup of personal files and a full system image if possible.
Check your PC supports NVMe in the motherboard specs. If you don’t see an M.2 slot, you need an adapter card. Confirm Windows 11 license is tied to your Microsoft account or you have your product key.

Decide: clone or fresh install
You can migrate Windows 11 to NVMe SSD by cloning your existing drive or by doing a fresh install. Each has pros and cons.
- Cloning copies Windows, apps, and settings. It’s fast and convenient.
- Fresh install gives a clean system and removes bloat. It can be slower but more stable.
If your current install has issues, choose a fresh install. If you want exact settings and apps preserved, choose cloning. I prefer cloning for speed and then a clean install later if problems appear.

Method 1 — Cloning Windows 11 to NVMe SSD (step-by-step)
Cloning is the most common route when you want a quick switch. Here’s how to migrate Windows 11 to NVMe SSD by cloning.
- Prepare
- Back up files and create a recovery drive.
- Install the NVMe drive in your PC. For laptops, use the M.2 slot. For desktops, use the slot or adapter card.
- Initialize and format the NVMe
- In Disk Management, initialize as GPT for UEFI.
- Create a small partition if required by the cloning tool.
- Choose a cloning tool
- Pick a well-known cloning app. Make sure it supports UEFI/GPT and NVMe.
- Connect both drives and run the tool.
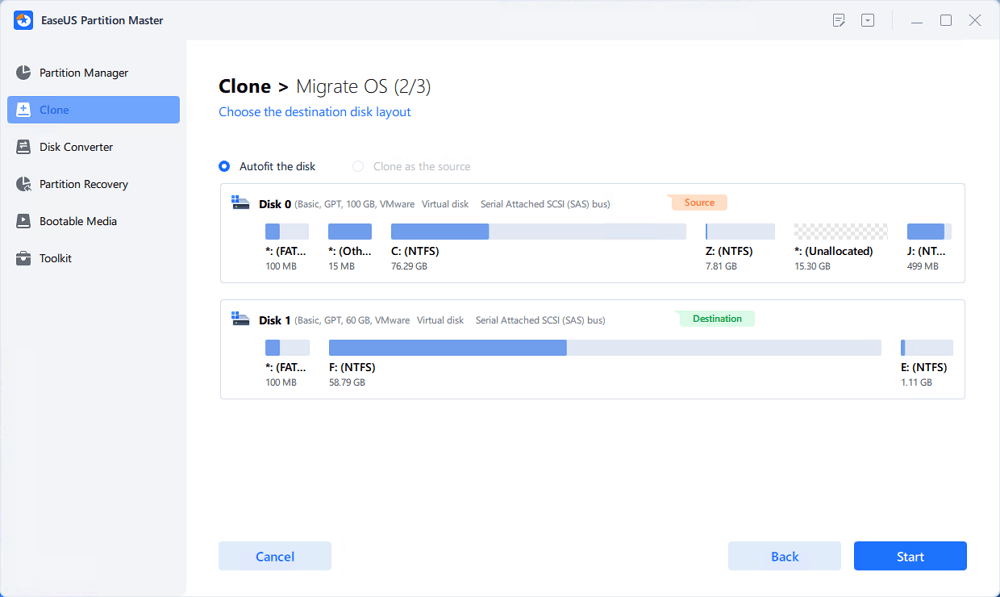
- Clone the system disk
- Select source (current Windows 11 drive) and target (NVMe SSD).
- Use the tool’s option to resize partitions to fit the NVMe.
- Start cloning and wait. Time varies by drive size.
- Switch boot order
- Reboot and enter UEFI/BIOS.
- Set the NVMe as the first boot device.
- Disable legacy/CSM to ensure UEFI boot.
- Verify and clean up
- Boot into Windows 11 on NVMe.
- Check Device Manager for NVMe driver presence.
- Delete old drive partitions if you plan to reuse it.
This method shows how to migrate Windows 11 to NVMe SSD with minimal downtime. If cloning fails, use the fresh install path below.

Method 2 — Fresh install and data migration
If you want a clean system, follow these steps to migrate Windows 11 to NVMe SSD with a fresh install.
- Create Windows 11 USB
- Use the Media Creation Tool to make bootable media.
- Plug it into the PC.
- Install NVMe and boot installer
- Install the NVMe in the M.2 slot.
- Boot from USB and choose custom install.
- Format and install
- Delete old Windows partitions on the NVMe if any.
- Install Windows 11 to the NVMe.
- Transfer files and apps
- Use cloud sync, external drive, or a file copy tool to move personal files.
- Reinstall applications or use a migration tool for apps.
A fresh install reduces legacy issues. It’s the recommended approach for system stability and for learning how to migrate Windows 11 to NVMe SSD properly.

UEFI, Secure Boot, and driver notes
UEFI and NVMe work together. Follow these tips for a smooth transition.
- Ensure UEFI mode is enabled in BIOS. Disable legacy boot.
- Turn on Secure Boot after the system boots from NVMe.
- Install the latest NVMe controller driver if needed.
- Update firmware for your motherboard and NVMe drive.
If Windows doesn’t boot, toggle CSM or check the partition style is GPT. These steps are key to how to migrate Windows 11 to NVMe SSD without boot errors.

Post-migration checks and optimizations
After the move, do these checks to confirm success and tune performance.
- Confirm Windows boots from NVMe in System Information.
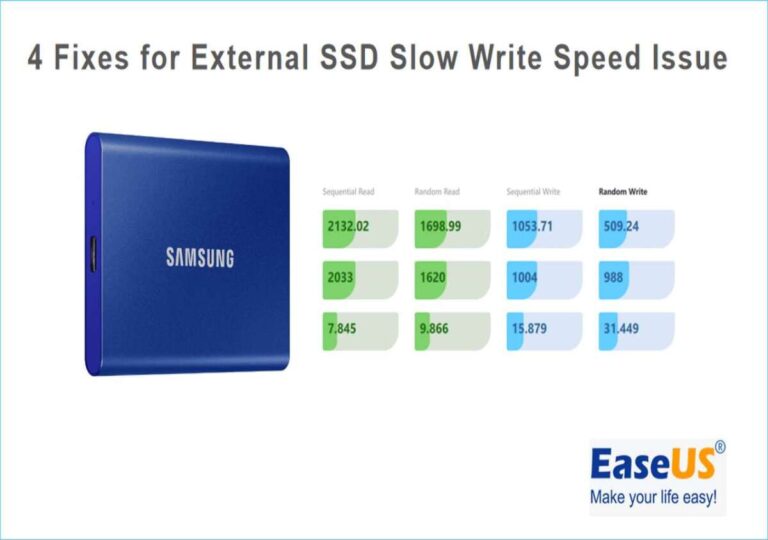
- Run benchmark tools to compare performance.
- Enable TRIM: open PowerShell and run "fsutil behavior query DisableDeleteNotify" (0 means TRIM is on).
- Move pagefile to NVMe if needed, but keep hibernation settings as preferred.
I usually run a boot timer and a small benchmark after migration. This verifies the speed gains promised by NVMe.
Troubleshooting common issues
These issues come up often when you migrate Windows 11 to NVMe SSD. Try these fixes.
- No boot after cloning
- Recheck UEFI/GPT settings. Repair boot with Windows Recovery.
- NVMe not detected
- Update BIOS and ensure the slot is enabled.
- Drivers missing or slow performance
- Install NVMe driver and firmware updates.
If problems persist, revert to the backup image and try a fresh install. I learned that reattempting with a clean install fixes odd boot issues more often than endless repair steps.
Personal experience, tips, and mistakes to avoid
I’ve migrated laptops and desktops many times. Here are some lessons I learned.
- Always back up first. An external image saved me once.
- Test the NVMe in the BIOS before cloning. Detection issues are easier to fix early.
- If the old drive uses MBR, convert to GPT first. Cloning MBR to GPT without conversion breaks boot.
- Keep the old drive intact until you confirm a stable boot on NVMe.
One time I forgot to enable UEFI and CSM caused boot loops. Turning off CSM and setting UEFI fixed it. Small BIOS settings matter a lot.
People also ask
What is the fastest way to migrate Windows 11 to NVMe SSD?
- Cloning with a tool that supports UEFI and resizing is the fastest route.
Do I need to reinstall Windows after moving to NVMe?
- No. You can clone to keep your system. A fresh install is optional for a clean start.
Will NVMe improve my gaming on Windows 11?
- Yes. NVMe reduces load times and can cut texture streaming delays.
Frequently Asked Questions of how to migrate windows 11 to nvme ssd
Is cloning safe for moving Windows 11 to NVMe?
Cloning is safe if you use a trusted tool and have a backup. Confirm UEFI/GPT compatibility before cloning.
Can I migrate Windows 11 to NVMe without losing apps?
Yes. A proper clone copies apps and settings. Verify the clone and test apps after reboot.
Do I need to change BIOS settings after migration?
You must set UEFI as the boot mode and put the NVMe first in boot order. Enable Secure Boot once it boots.
Will Windows 11 activation be affected?
Usually not. Digital licenses tied to your Microsoft account re-activate automatically. Keep your account linked.
How long does it take to migrate to an NVMe SSD?
Time varies by drive size and method. Cloning can take 15 minutes to a few hours. Fresh installs take about 30–60 minutes plus app reinstallation.
Conclusion
You can migrate Windows 11 to NVMe SSD with confidence. Choose cloning for speed or a fresh install for stability. Prepare backups, check UEFI/GPT, install the NVMe correctly, and verify the system boots from the NVMe. My practical tip: back up, test boot, then repurpose the old drive.
Take action today: pick your method, gather tools, and schedule a migration window. If you try this guide, leave a comment with your results or questions.

Everett Ashford is a tech reviewer at mytechgrid.com specializing in SSDs, cameras, TVs, earbuds, headphones, and other consumer electronics. He provides honest, data-driven reviews based on hands-on testing and real-world performance analysis. Everett simplifies complex tech details to help readers make smart, confident buying decisions.