Run SMART checks, use vendor diagnostic tools, and perform a non-destructive surface scan.
I’ve tested dozens of drives in both lab and home setups, so I’ll walk you through exactly how to test new SSD for bad sectors, step by step. This guide explains why SSDs handle bad sectors differently than hard drives, which tools to trust, simple commands you can run on Windows, macOS, and Linux, and what to do if you find problems. Read on for clear procedures, real-world tips from my experience, and a checklist to keep your new SSD healthy.
Why test a new SSD for bad sectors?
Testing a new SSD for bad sectors gives you confidence that the drive is healthy before you store important data. New drives can have early defects or shipping damage that only show up under stress. Finding issues early makes warranty claims and data recovery far easier.
Testing also helps confirm the SSD’s SMART attributes are stable. SMART (Self-Monitoring, Analysis, and Reporting Technology) reports drive health and can flag pending sector failures. A short, targeted set of checks catches most early failures quickly.

How SSDs differ from HDDs and what “bad sector” means for SSDs
SSDs store data on flash memory. They do not use spinning platters or magnetic heads. So a “bad sector” on an SSD means a flash block or page is unreliable, not a physical scratch.
SSDs use wear-leveling and spare blocks to remap faulty cells. That remapping hides many faults automatically. You still need to test because remapping can be exhausted or fail early. SMART error counts, reallocated sectors, and pending sector values are the key indicators on SSDs.
Step-by-step: how to test new SSD for bad sectors
Follow these steps in order. Keep backups of any data and disconnect other drives if possible.
- Verify the basics
- Check packaging and firmware. Install the latest vendor firmware before deep tests.
- Ensure correct cables and ports. Use SATA III or NVMe PCIe lanes, not older controllers.
- Run a SMART health check
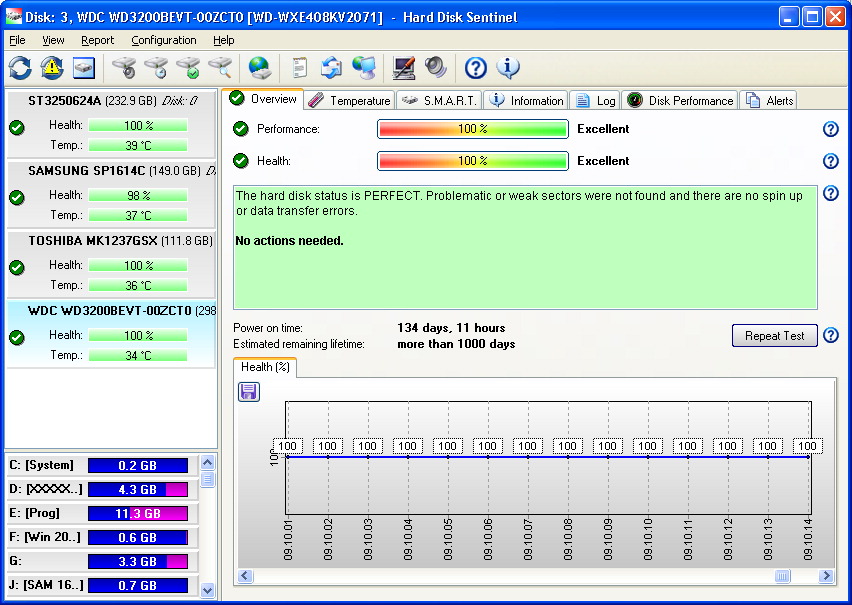
- Windows: use CrystalDiskInfo or vendor dashboard to view SMART attributes.
- macOS/Linux: run
smartctl -a /dev/sdXfor SATA orsmartctl -a /dev/nvme0for NVMe. - Look for reallocated sectors, media errors, pending sectors, and uncorrectable errors.
- Use vendor diagnostic tools
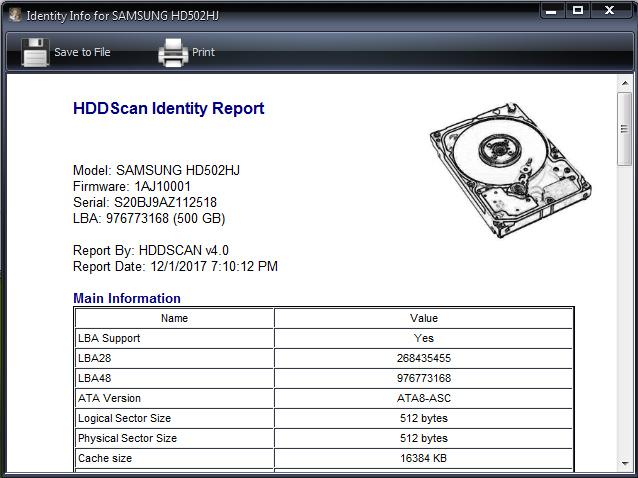
- Download the drive maker’s toolbox (Samsung Magician, WD Dashboard, Intel SSD Toolbox, etc.).
- Run their health check, firmware update, and quick self-test. These tools understand vendor-specific attributes.
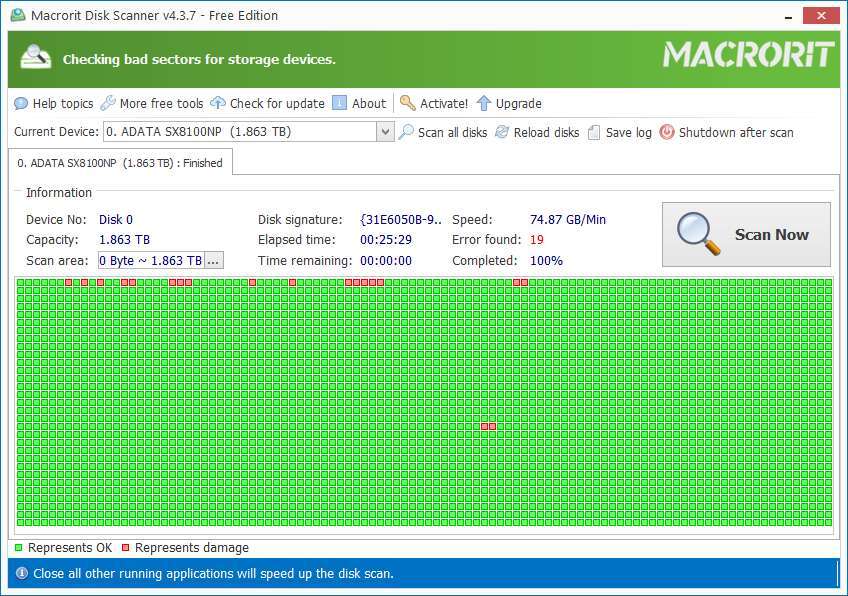
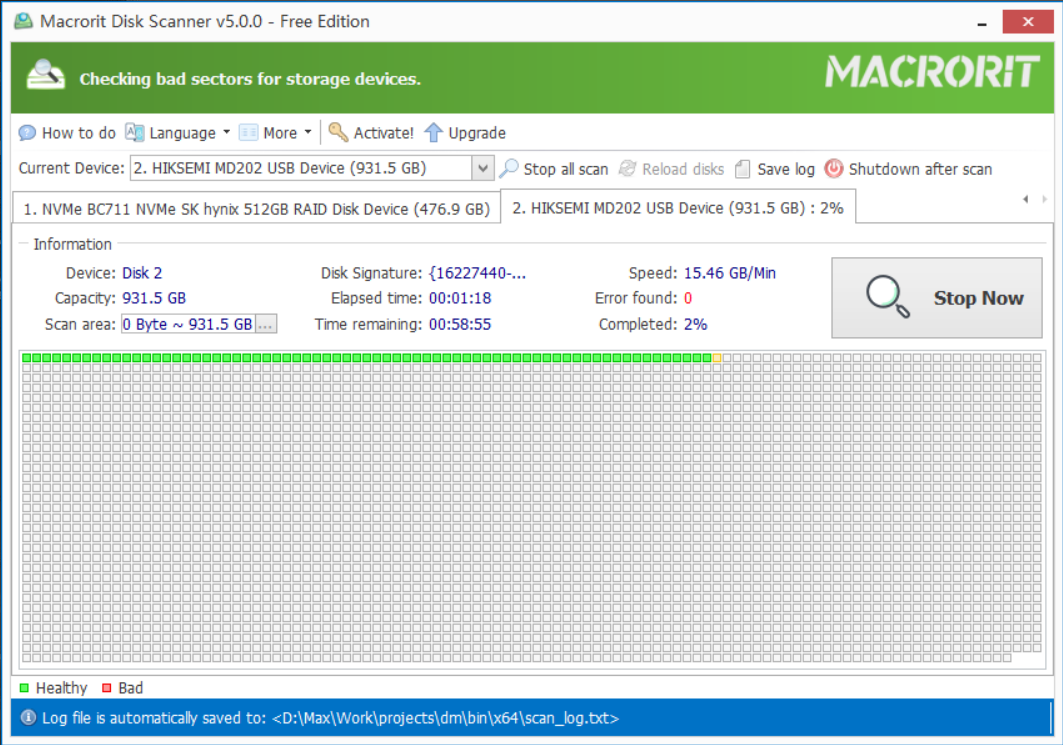
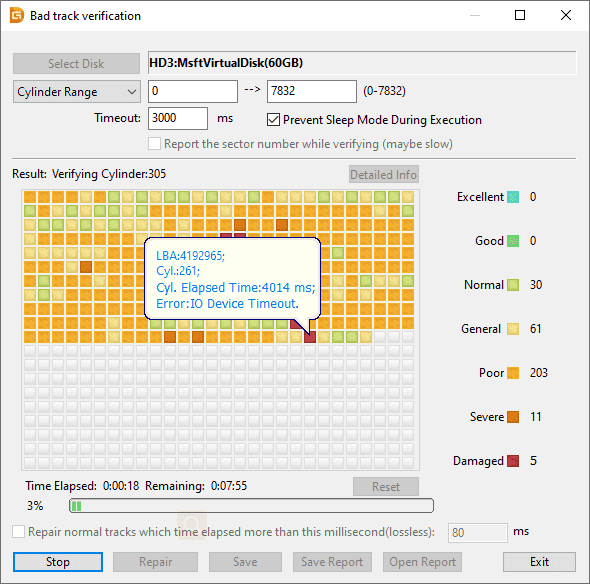
- Do a non-destructive surface or read-only scan
- Purpose: detect read failures without writing to the drive.
- Linux example: use
badblocks -sv /dev/sdXin read-only mode. For NVMe use vendor tools ornvme-cliwithnvme device-inventoryand health logs. - Windows example: use vendor tool’s diagnostics or tools like HD Tune’s error scan in read-only mode.
- Avoid destructive write tests unless you have no data or the drive is disposable.
- Run longer stress and file tests
- Copy a large folder of mixed files to the SSD and verify checksums. This tests real use patterns.
- Use a checksum tool (
md5sumorsha256sum) to compare source and copied files.
- Optional deep tests (use with caution)
- Secure erase and write-zero tests will stress the NAND and rewrite blocks. Only do if you understand the wear and have a spare fresh drive.
- Some third-party surface scanners write patterns to test remapping. These are destructive.
Repeat tests after firmware updates or if SMART shows changes. If quick tests are clean, a new SSD is generally safe for daily use.
Tools and commands (Windows, macOS, Linux)
Windows
- CrystalDiskInfo: read SMART attributes and temperature.
- Manufacturer dashboards: run quick/extended tests and firmware updates.
- File copy + checksum: use
fcivor a GUI checksum verifier.
macOS
- DriveDx or Smartmontools: read SMART and run short tests.
- Use
diskutilto list disks and run basic checks.
Linux
- smartctl:
sudo smartctl -a /dev/sdXorsudo smartctl -a /dev/nvme0n1 - badblocks:
sudo badblocks -sv /dev/sdXfor read-only surface scans. - nvme-cli:
sudo nvme smart-log /dev/nvme0n1and vendor-specific logs. - Use
ddonly for cautious read tests:dd if=/dev/sdX of=/dev/null bs=1M status=progress
Keep tools updated. Vendor utilities know proprietary reporting fields and can interpret SMART values better than generic apps.

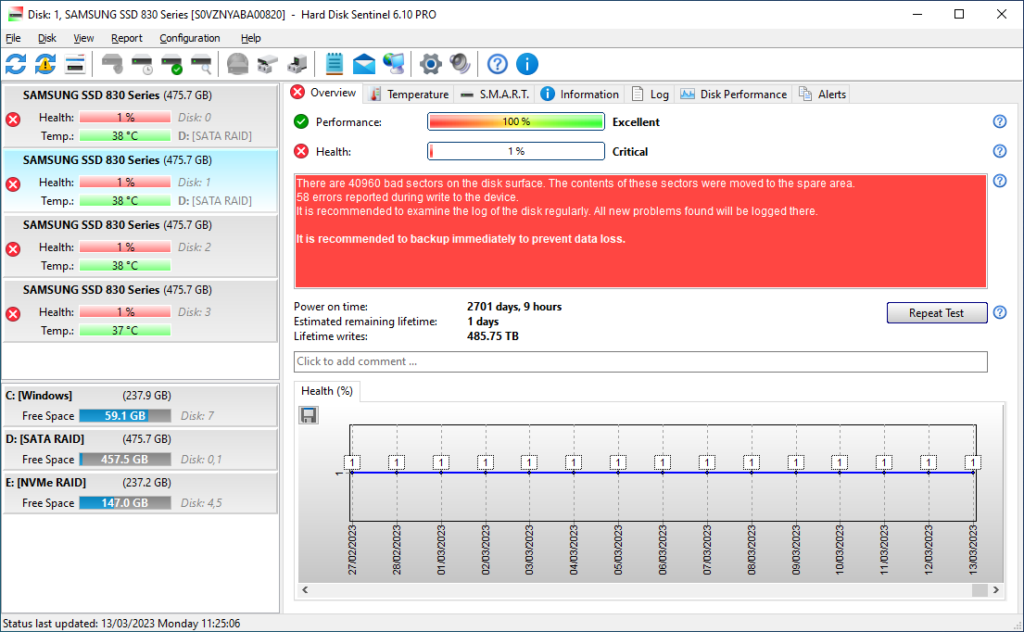
Interpreting results and next steps if you find bad sectors
What to look for
- Zero reallocated sectors, zero pending sectors, and no media errors is ideal.
- Rising values in “Reallocated Sectors Count” or “Current Pending Sector Count” indicate problems.
- For NVMe, watch “Media and Data Integrity Errors” and “Read/Write Error Count”.
If you find problems
- Run vendor extended self-test and capture logs/screenshots.
- Back up immediately. Data safety is priority.
- Contact vendor support and file an RMA with logs and test results.
- Avoid writing heavy workloads while waiting for warranty resolution.
Small, transient SMART warnings sometimes resolve after a firmware update or lightweight tests. Persistent errors require RMA.
Best practices for testing and long-term SSD care
Initial setup
- Update firmware before heavy use.
- Initialize and align partitions properly (sector alignment matters for performance).
Testing frequency
- Test once on first install. Check SMART monthly or when performance drops.
- Run a quick SMART check after major updates or if you hear odd system behaviors.
Operational tips
- Enable TRIM in your OS. TRIM helps SSD maintain performance and block reuse.
- Avoid full-disk writes as a “test” unless you want to stress the NAND.
- Keep at least 10–20% free space for wear-leveling and overprovisioning.
Documentation
- Save SMART logs and copies of test outputs. They speed up RMA and troubleshooting.

Personal experience, mistakes to avoid, and practical tips
From my work testing drives, here’s what I learned.
- Don’t trust only one test. SMART looks good but a surface scan might show read errors. Always combine checks.
- Avoid destructive tests on a drive with data. I once caused unnecessary wear by running a full write-pattern test on a new laptop drive.
- Firmware updates fixed odd read errors on two different models I tested. Always check firmware history before RMA.
- Use checksum-based file copies for a real-world test. I caught a failing SSD that only showed problems under mixed file sizes.
If you’re not confident, ask for help or use a spare drive for aggressive tests. Warranty rules differ, so document everything before sending a drive back.
Tools quick reference table
- CrystalDiskInfo: Read SMART on Windows quickly.
- Samsung Magician / WD Dashboard: Vendor-specific health and firmware tools.
- smartctl (Smartmontools): Cross-platform SMART reader and tester.
- badblocks (Linux): Read-only surface scan for bad sectors.
- nvme-cli: NVMe health logs and SMART attributes.
- File checksum tools: md5sum, sha256sum, or GUI comparators for copy verification.
Select tools that match your drive type and OS. Vendor tools are best for firmware and deep diagnostics.
Frequently Asked Questions of how to test new ssd for bad sectors
How long does a surface scan take on a new SSD?
A read-only surface scan depends on drive size and interface speed. Expect 15–60 minutes for common consumer SSDs; NVMe drives are faster than SATA.
Can I use chkdsk to find bad sectors on an SSD?
chkdsk checks file system integrity and can map out problems, but it was designed for HDDs. Use SMART and vendor tools first for SSD-specific diagnostics.
Is it safe to run badblocks on an SSD?
Read-only badblocks is safe and non-destructive. Avoid write-mode badblocks unless the drive is expendable, as it causes unnecessary wear.
What SMART attributes matter most for SSDs?
Key attributes include reallocated sector count, pending sector count, media errors, and total host writes. NVMe shows media and data integrity error counters.
If a new SSD shows errors, do I need to RMA immediately?
Back up your data first, then gather SMART logs and vendor diagnostics. Contact the manufacturer with logs; persistent errors typically justify an RMA.
Conclusion
Testing a new SSD for bad sectors is quick, practical, and often straightforward. Start with SMART checks, use vendor tools, perform a read-only surface scan, and back up before doing anything risky. If you run these steps and keep simple logs, you’ll catch early faults, preserve data, and make warranty claims much easier. Take five to ten minutes now to test your new SSD and save yourself time and headaches later—try the checks listed here and leave a note about your results or questions below.

Everett Ashford is a tech reviewer at mytechgrid.com specializing in SSDs, cameras, TVs, earbuds, headphones, and other consumer electronics. He provides honest, data-driven reviews based on hands-on testing and real-world performance analysis. Everett simplifies complex tech details to help readers make smart, confident buying decisions.