Have you ever wished your bike could give you an extra boost, making hills easier and rides faster? Turning your regular bike into an electric bike is simpler than you think.
Imagine cutting down your commute time and enjoying effortless rides without buying a brand-new e-bike. In this guide, you’ll discover step-by-step how to transform your bike into an electric powerhouse. Ready to unlock a new level of freedom and fun?
Keep reading to find out how you can make it happen today.
Choosing The Right Bike
Choosing the right bike is the first step to a successful electric bike conversion. The bike must be sturdy and compatible with electric components. A poor choice can lead to safety issues and extra costs. Take time to examine the bike’s structure and parts before starting the conversion.
Types Of Bikes Suitable For Conversion
Not all bikes work well for electric conversion. Some types handle the extra weight and speed better. Here are common choices:
- Mountain Bikes: Strong frames and wide tires make them a top pick.
- Hybrid Bikes: Comfortable and versatile, good for city and trail rides.
- Road Bikes: Lightweight but may need upgrades to handle the motor.
- Folding Bikes: Compact and easy to store, but check frame strength.
Choose a bike type that fits your riding style and terrain.
Assessing Frame And Components
The frame should be solid and free of cracks or rust. Steel and aluminum frames work best. Carbon frames may not be safe for electric motors.
Check the brakes. Strong braking systems are essential for higher speeds. Disc brakes are ideal, but good rim brakes can work too.
Look at the wheels and tires. They must support extra weight and speed. Wider tires with good tread improve safety and comfort.
Inspect the gears and chain. A well-maintained drivetrain helps the motor work smoothly. Replace worn parts before conversion.
Selecting An E-bike Conversion Kit
Selecting the right e-bike conversion kit is key to a smooth ride and good performance. The kit must fit your bike and riding style. It should offer enough power without adding too much weight. Understanding the main parts helps you choose wisely. Focus on motor type, battery, and controller features. Each part affects how the bike feels and performs.
Motor Types And Power Options
Motors come in different types and power levels. The most common types are hub motors and mid-drive motors. Hub motors fit into the wheel hub. Mid-drive motors sit near the pedals. Hub motors are easier to install. Mid-drive motors give better hill climbing power.
Power options vary from 250 watts to 1000 watts or more. Lower power suits city riding and flat roads. Higher power is better for hills and off-road. Check your local laws on motor power limits before choosing.
Battery Choices And Range Considerations
Batteries store the energy to power your motor. Most e-bike kits use lithium-ion batteries. They are light and last long. Battery capacity is measured in watt-hours (Wh). Higher watt-hours mean longer riding range.
Consider how far you want to ride on a single charge. Choose a battery that matches that distance. Also, think about battery weight and size. Some batteries mount on the frame, others on the rear rack.
Controller And Display Features
The controller manages power flow from the battery to the motor. A good controller ensures smooth acceleration and braking. Some controllers offer pedal assist modes. This helps the motor work only when you pedal.
Displays show speed, battery level, and distance. Simple displays show basic info. Advanced displays offer settings and ride data. Pick a display that is easy to read and use while riding.
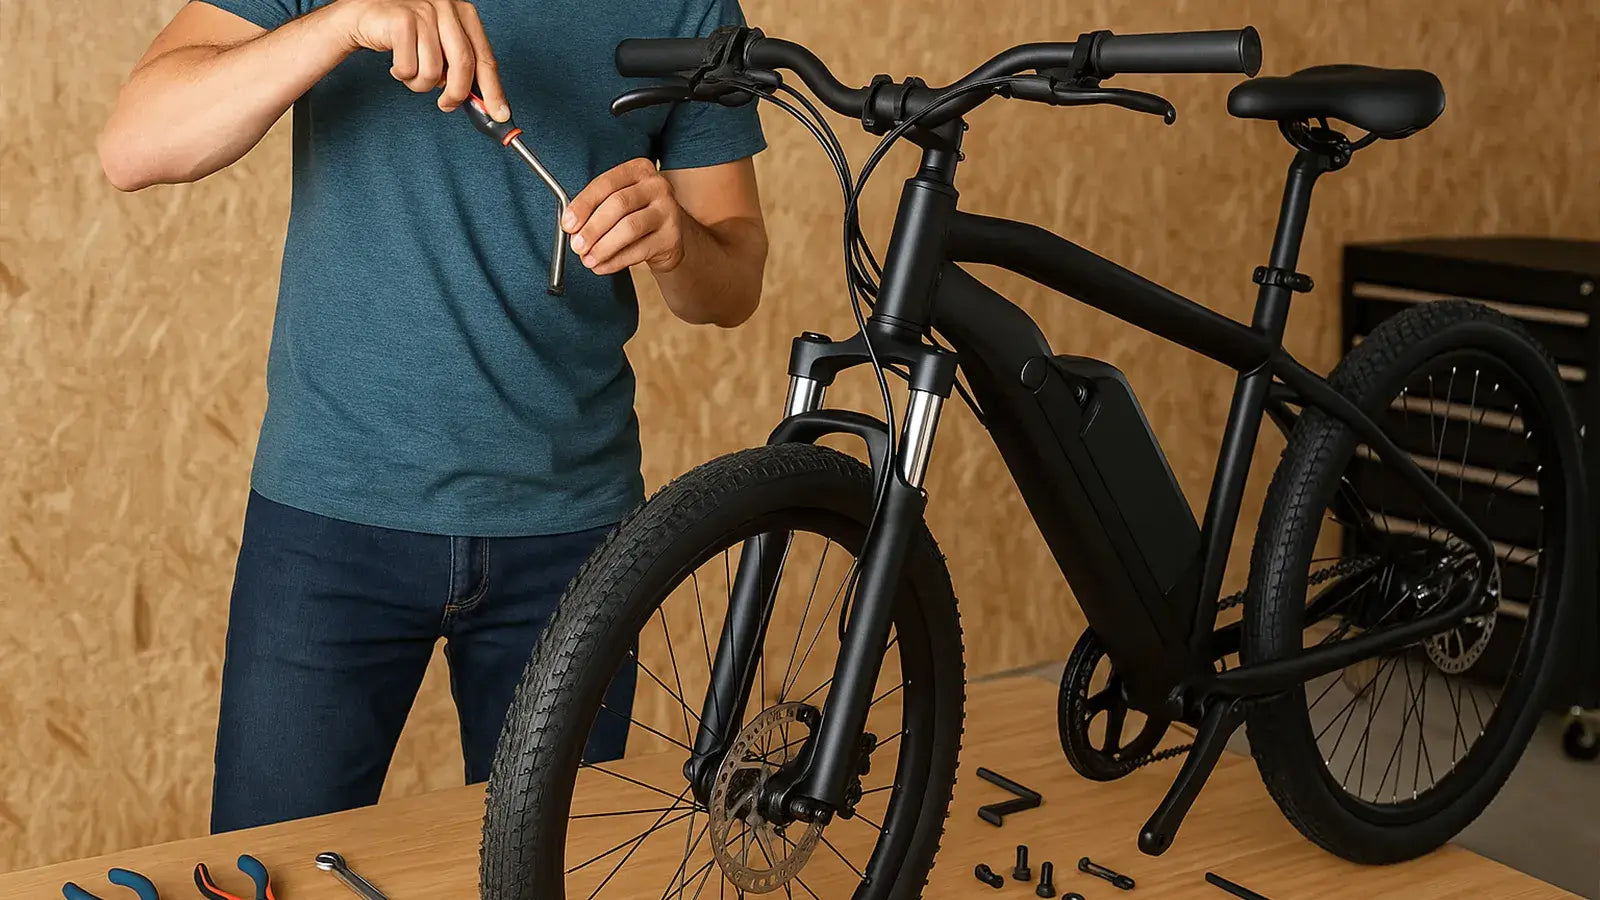
Tools And Materials Needed
Converting a regular bike into an electric bike requires specific tools and materials. Having the right items makes the installation smooth and efficient. This section lists everything you need before starting the process.
Essential Tools For Installation
- Electric bike conversion kit (motor, battery, controller)
- Wrench set for loosening and tightening bolts
- Screwdrivers (both flathead and Phillips)
- Allen keys for adjusting bike parts
- Wire cutters and strippers for electrical connections
- Electrical tape for securing wires
- Multimeter to check electrical circuits
- Crank puller tool for removing pedals
- Tire levers for wheel removal
- Zip ties to organize cables neatly
Safety Gear And Accessories
- Protective gloves to avoid cuts and scrapes
- Safety goggles to protect eyes from debris
- Helmet for safe test rides after installation
- Reflective vest to stay visible on roads
- Bike lock to secure your electric bike
Preparing The Bike For Conversion
Preparing your bike for conversion is a key step toward building an electric bike. This stage ensures the bike is ready to support the new electric components. Careful preparation helps avoid problems during installation. It also improves the bike’s performance and safety after conversion.
Removing Unnecessary Parts
Start by taking off parts that the electric kit will replace or block. This includes the pedals, chain, and sometimes the existing gear system. Removing these parts makes space for the motor and battery. It also reduces weight, which helps the electric system work better.
Keep tools like wrenches and screwdrivers handy for this task. Store removed parts safely in case you want to reuse or sell them. Check the bike frame for extra brackets or mounts that might get in the way. Remove any accessories like baskets or lights that do not fit after conversion.
Cleaning And Inspecting Components
Clean the bike thoroughly before adding new parts. Dirt and grease can hide damage or wear. Use a mild detergent and water to wash the frame and wheels. Dry everything completely to prevent rust.
Inspect key parts for damage or wear. Look closely at the frame, tires, brakes, and wheels. Check for cracks, rust, or worn-out brakes. Replace any parts that seem unsafe or too old. Tighten loose bolts and lubricate moving parts. A well-maintained bike ensures a smooth and safe electric conversion.
Installing The Motor
Installing the motor is the key step to turn your bike into an electric bike. This process involves attaching either a hub motor or a mid-drive motor. Each type fits differently and offers unique benefits. Proper installation ensures smooth riding and long motor life.
Mounting Hub Motors
Hub motors fit inside the wheel hub. They are simpler to install and often come with the wheel included. Start by removing the existing wheel from the bike. Replace it with the wheel containing the hub motor.
Secure the motor by tightening the axle nuts or quick-release skewer. Connect the motor wires to the controller carefully. Make sure to route the cables neatly to avoid damage while riding. Check the alignment of the wheel to ensure it spins freely.
- Remove the existing wheel
- Install the motorized wheel
- Tighten nuts or skewer
- Connect motor wires to controller
- Secure and route cables properly
- Check wheel alignment
Installing Mid-drive Motors
Mid-drive motors mount near the bike’s crankset. This placement helps with better balance and hill climbing. Remove the existing crankset and bottom bracket carefully. Fit the mid-drive motor in the bottom bracket shell.
Attach the crank arms to the motor as instructed. Connect the motor cables to the controller and battery. Ensure all bolts are tight and check for smooth pedal rotation. Route cables along the frame and secure them to prevent snagging.
- Remove crankset and bottom bracket
- Install mid-drive motor in bottom bracket
- Attach crank arms to motor
- Connect cables to controller and battery
- Tighten all bolts firmly
- Check pedal rotation
- Secure cables along frame

Credit: www.youtube.com
Mounting The Battery
Mounting the battery is a critical step when converting your bike into an electric one. The battery’s position affects the bike’s balance, safety, and overall riding experience. Choosing the right spot and securing it properly ensures your ride stays smooth and reliable.
Battery Placement Options
Think about where the battery will fit best on your bike frame. Common spots include the down tube, rear rack, or inside a specially designed battery bag.
- Down tube:This spot keeps the battery low and central, improving stability. It’s perfect if your frame has enough space and mounts for a battery holder.
- Rear rack:Mounting on the rear rack is easier and doesn’t require frame modifications. However, it can affect balance, especially if the battery is heavy.
- Battery bag:Some riders prefer a durable bag attached to the frame or handlebars. It offers flexibility but may expose the battery to more bumps and weather.
Ask yourself: where can the battery sit without interfering with your pedaling or accessories? Think about your daily routes and how rough the terrain is. The placement affects more than just looks—it impacts safety and comfort too.
Securing The Battery Safely
Once you pick the spot, securing the battery is key. A loose battery can shift or fall, causing damage or accidents.
- Use a strong, lockable battery mount or bracket designed for your bike’s frame shape.
- Double-check all bolts and straps after installation; vibrations from riding can loosen them over time.
- Consider adding extra padding or rubber strips to reduce movement and protect the battery casing.
- Weatherproof your setup—rain and dust can harm battery life. Sealing connectors and covering exposed parts helps.
Imagine riding on a bumpy road with your battery shaking loose—that’s a risk you don’t want to take. Secure the battery like your safety depends on it, because it does.
Wiring And Connecting Components
Wiring and connecting components is the heart of converting your bike into an electric bike. This stage determines how well your bike performs and how smoothly all parts work together. Careful attention here saves you from future headaches and ensures safety.
Connecting The Motor To The Controller
The motor and controller must communicate perfectly for your e-bike to run efficiently. Usually, the motor has several wires—power, hall sensor, and phase wires—that connect to matching ports on the controller.
Start by identifying each wire by color or label. Commonly, phase wires come in three colors like yellow, green, and blue, while hall sensor wires are thinner and come in five colors including red, black, green, yellow, and blue.
- Match phase wires from the motor to the controller’s phase wires.
- Connect hall sensor wires carefully; these help the controller know the motor’s position.
- Secure connections with waterproof connectors or heat shrink tubing to avoid exposure to moisture.
Have you checked if your controller matches the motor’s voltage and current requirements? Mismatched parts can lead to poor performance or damage.
Integrating The Throttle And Display
The throttle controls how fast your bike goes, and the display shows important info like speed and battery life. Both components plug into the controller, usually via dedicated connectors.
Throttle wires are typically three: power, ground, and signal. Plugging these into the controller’s throttle port activates your speed control.
Displays vary but often require a multi-pin connection. This link sends data back and forth to show stats and sometimes adjust settings.
- Check the user manual for pin layouts before connecting to avoid mistakes.
- Test throttle response before final assembly; a smooth throttle means your wiring is solid.
- Make sure the display is secured on your handlebars where you can easily see it while riding.

Credit: www.kickstarter.com
Testing And Troubleshooting
After converting your bike into an electric bike, testing and troubleshooting are key to ensure everything works smoothly. This phase helps you catch any issues early and fine-tune your setup for the best performance. Let’s dive into what you should check right after powering on your e-bike and how to fix common problems that might pop up.
Initial Power-on Checks
Once you turn on your electric bike, the first thing to do is verify that the battery is properly connected and charged. Look for any warning lights or error codes on the display panel. These indicators can quickly tell you if something is off.
Check the throttle or pedal assist sensor by gently engaging it and observing if the motor responds. If the motor doesn’t spin, confirm all wiring connections are secure and tight. Loose wires are often the culprit behind a dead motor.
Don’t forget to test the brakes. Many electric bike setups have a cutoff switch on the brake levers to stop the motor when you brake. If your motor keeps running despite braking, this switch might be faulty or improperly installed.
Common Issues And Fixes
One frequent issue is the motor not running despite all connections looking fine. This can happen if the controller isn’t programmed correctly or if the throttle calibration is off. Recalibrating the throttle via the controller settings often solves this.
If your battery drains too quickly, check the battery’s health and the motor’s power settings. Running the motor at a higher power level than your battery can handle will reduce its life and range. Lowering the power output or upgrading to a higher capacity battery might be necessary.
Another common problem is unexpected motor cutouts or jerky acceleration. This can be caused by poor quality connectors or damaged cables. Inspect all wiring for wear or corrosion, and replace any suspect parts to restore smooth performance.
- Motor doesn’t start: Check battery charge, wiring, and throttle calibration.
- Battery drains fast: Verify battery health and adjust power settings.
- Jerky motor response: Inspect wiring and connectors for damage.
- Brake cutoff not working: Test and possibly replace brake lever switches.
Have you ever faced a problem that seemed impossible to fix with your electric bike? Often, taking a systematic approach to testing each component saves hours of frustration. What’s your biggest challenge in making your e-bike run perfectly?
Legal And Safety Considerations
Turning your bike into an electric bike is exciting. Legal rules and safety must guide every step. Knowing local laws helps avoid fines and trouble. Riding safely protects you and others on the road.
Local Regulations For E-bikes
Each place has its own rules for electric bikes. Some areas limit motor power and speed. Others require registration or special licenses. Check these key points:
- Maximum motor wattage allowed
- Speed limits for electric assistance
- Helmet requirements
- Where e-bikes can be ridden (bike lanes, roads, trails)
- Age restrictions for riders
Following local laws keeps you safe and legal. Visit official government or transportation websites for details.
Riding Safety Tips
Electric bikes can go faster than regular bikes. Extra caution is needed for smooth rides. Keep these safety tips in mind:
- Wear a properly fitted helmet every ride
- Check brakes and tires before riding
- Use lights and reflectors in low light
- Ride at safe speeds, especially in traffic
- Be aware of pedestrians and other vehicles
- Practice handling your e-bike in open areas
Safe riding habits reduce accidents and injuries. Respect other road users and stay alert.
Maintenance Tips For Your E-bike
Proper maintenance keeps your electric bike running smoothly. Regular care extends the life of key parts. Focus on the battery and motor for best results. Small habits prevent big problems later. Follow these tips to keep your e-bike in top shape.
Battery Care And Charging
Charge the battery after each ride, even if it’s not empty. Use the charger that came with your e-bike. Avoid overcharging by unplugging once full. Store the battery in a cool, dry place. Keep battery terminals clean and dry. Check battery health regularly to spot issues early. Avoid completely draining the battery to protect its lifespan.
Motor And Component Upkeep
Keep the motor clean from dirt and moisture. Wipe it gently with a damp cloth, never a hose. Check wiring connections for any loose or damaged parts. Lubricate moving parts like the chain and gears often. Inspect brakes and tires regularly for safety. Tighten bolts and screws to avoid rattles. Regularly test the motor’s performance to catch faults early.
Credit: leoguarbikes.com
Frequently Asked Questions
What Tools Are Needed To Convert A Bike To Electric?
You need a conversion kit, battery, motor, controller, charger, and basic tools. Kits often include most parts. A wrench and screwdriver are essential for installation. Some knowledge of wiring helps ensure proper setup and safety.
How Long Does It Take To Turn A Bike Electric?
Conversion typically takes 2 to 5 hours. Time depends on your experience and kit complexity. Reading instructions carefully speeds up the process. Testing the system before riding is important for safety.
Can I Keep My Original Bike Parts During Conversion?
Yes, most original parts remain intact. The electric kit usually adds motor and battery without replacing components. Retaining parts like brakes and gears ensures ride comfort and control.
Is It Legal To Ride A Converted Electric Bike?
Laws vary by region but generally allow e-bikes under certain speed and power limits. Check local regulations before riding. Complying with rules ensures safety and avoids fines.
Conclusion
Turning your bike into an electric bike is a smart choice. It saves money and adds fun to your rides. You only need some basic parts and tools. The process is simple if you follow each step carefully. Electric bikes help you travel faster and farther with less effort.
They are good for the environment and your health. Start small, take your time, and enjoy the new ride. Soon, you will see how useful and enjoyable an electric bike can be. Give it a try and feel the difference.