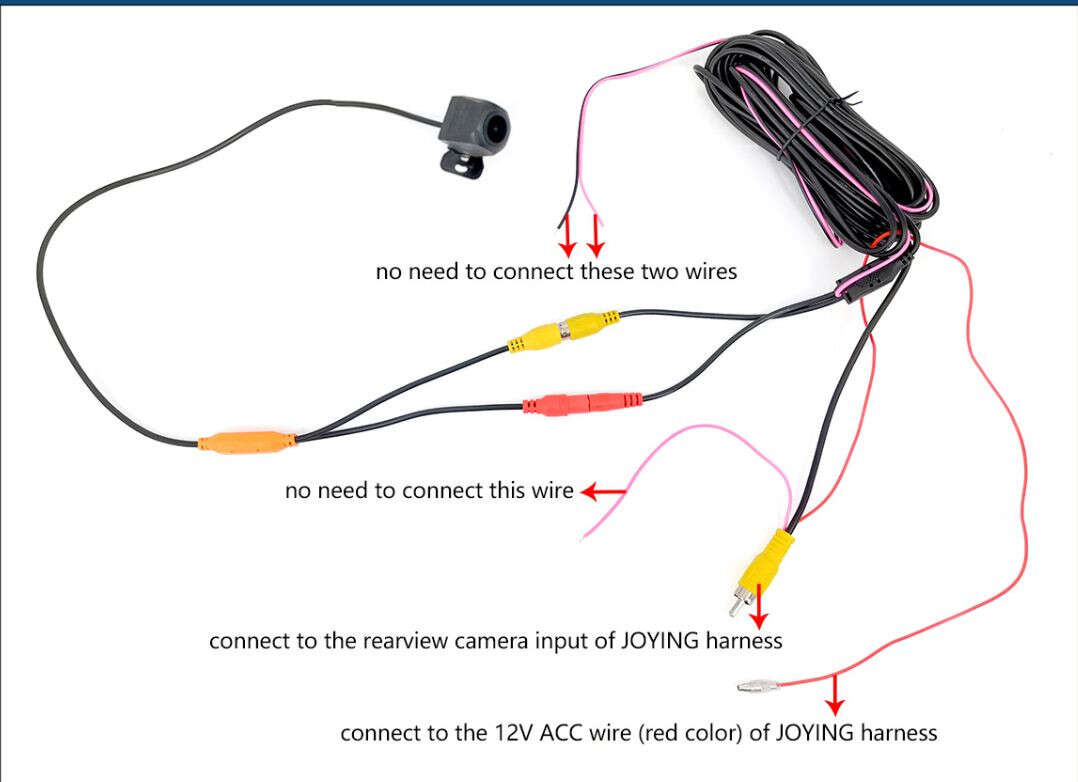
Connect the camera's power to the reverse light, run video to the monitor, and ground the system securely.
I have installed and wired dozens of backup cameras on cars, trucks, and vans. This guide shows exactly how to wire a backup camera with clear parts lists, safe wiring steps, troubleshooting, and real-world tips I learned on the job. Read on to get confident wiring your backup camera the right way, avoid common mistakes, and know when to call a pro.

Why add and wire a backup camera
A backup camera improves safety, reduces blind spots, and makes parking easier. Many drivers add a camera to older vehicles to get modern assistance. Wiring your own camera saves money and gives you control over placement and connections.
Common benefits:
- Better rear visibility when reversing.
- Fewer fender benders and parking dings.
- Night vision and wide-angle views on many models.
Knowing how to wire a backup camera helps you choose the right type and connect it safely. This saves time and prevents electrical trouble.
Tools and parts you need before wiring
Gathering tools speeds the job and prevents trips to the store. Here’s what I use on every installation.
Essential parts and tools:
- Backup camera kit that includes camera and video cable or wireless transmitter.
- Monitor or head unit that accepts the camera input.
- Wire strippers, crimpers, and electrical tape.
- Multimeter to test voltages and continuity.
- Inline fuse holder and appropriate fuse for the camera power.
- Quick splice connectors or butt connectors and heat-shrink tubing.
- Zip ties and wire loom for neat routing.
- Screwdrivers and drill bits for mounting.
Optional parts:
- Reverse trigger wire adapter for some aftermarket head units.
- Relay if you want to power the camera independently.
- Grounding screw or ring terminal for secure chassis ground.
When learning how to wire a backup camera, having all parts ready cuts the install time in half.

Types of backup cameras and wiring methods
Different cameras need different wiring. Pick the method that matches your kit.
Main types:
- Wired RCA camera: Uses video cable and is powered from the reverse light.
- Wireless camera: Transmits video to a receiver; still needs power at the camera location.
- Integrated OEM-style camera: Replaces a factory part and may tie into vehicle data networks.
Wiring methods overview:
- Reverse-light power method — most common. Power the camera from the reverse lamp so the camera turns on only when reversing.
- Constant power method — camera stays on, useful for dash-cam style rear recording.
- Hardwired to fuse box — use fuse taps for a clean power source and added protection.
Understanding the type you bought makes wiring simpler. Wireless does not mean power-free — the camera still needs 12V.

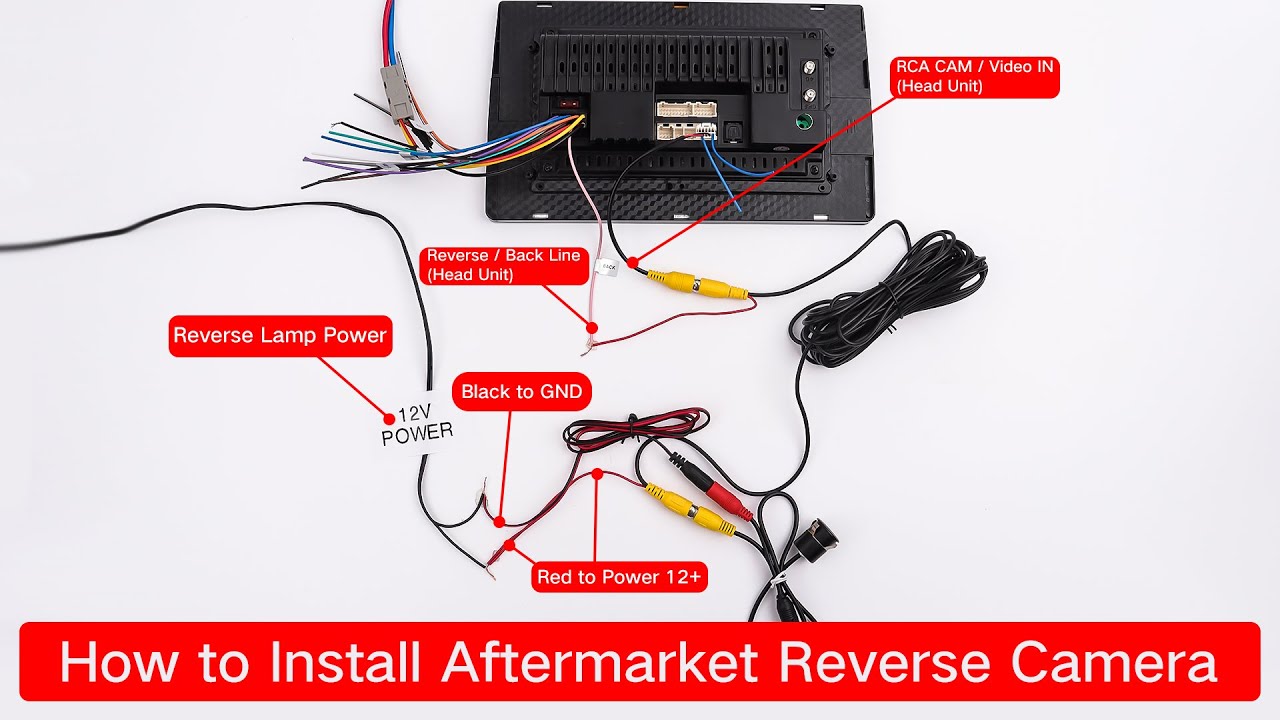
Step-by-step: how to wire a backup camera (wired RCA to monitor)
This covers a typical aftermarket camera that uses an RCA video cable and taps power from the reverse light.
- Plan placement and route.
- Mount camera height so view is not obstructed and route cable through trunk or hatch opening.
- Disconnect battery.
- Remove negative terminal to prevent shorts.
- Mount the camera.
- Drill or use existing mount points. Seal holes with silicone to prevent leaks.
- Run video cable to the monitor.
- Thread cable through vehicle interior, keep away from high-current wiring, and use wire loom.
- Connect video cable to monitor.
- Plug RCA into monitor or into head unit camera input.
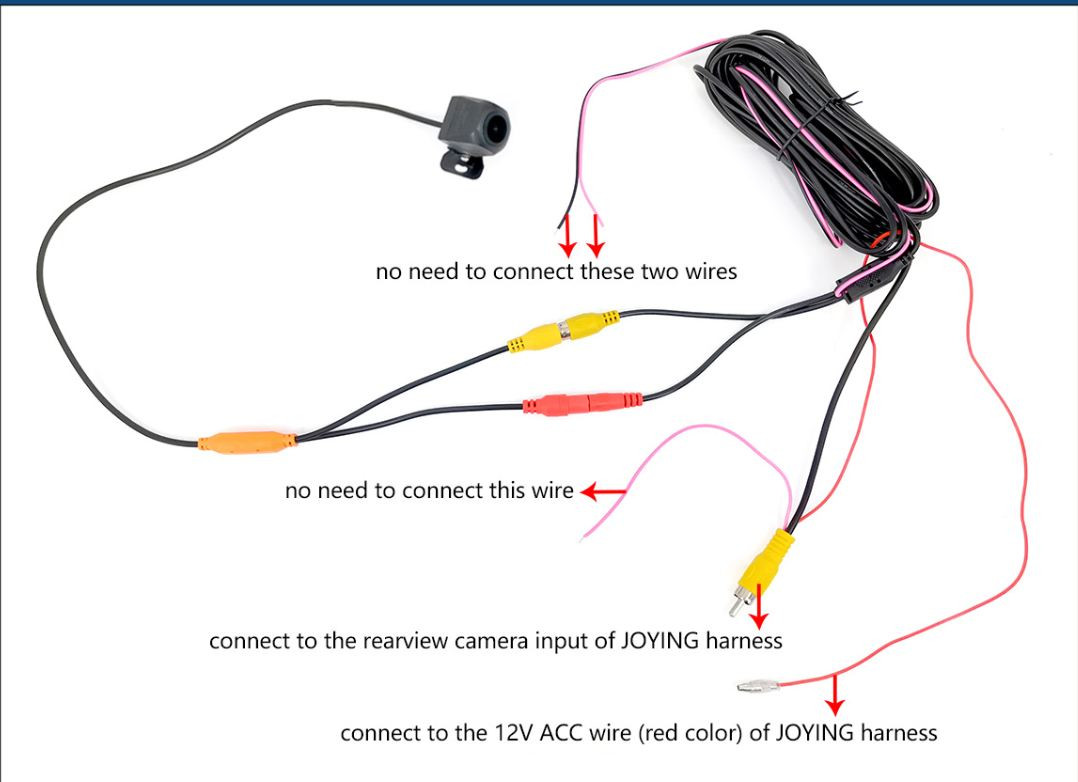
- Tap camera power to reverse light.
- Locate reverse lamp wire in trunk harness. Use multimeter to identify the wire that is 12V only when reverse is engaged.
- Make the power connection.
- Use a fused inline power lead from the camera positive to the reverse lamp positive wire. Connect the camera ground to a good chassis ground.
- Test before reassembly.
- Reconnect battery, shift to reverse, and confirm video and image orientation.
- Secure and tidy wiring.
- Use zip ties, route away from moving parts, and reinstall trim.
How to wire a backup camera well means clear routing, proper fusing, and verified grounds. If video is noisy, check grounding and avoid running video cable parallel to power wires.
Step-by-step: how to wire a backup camera (wireless camera option)
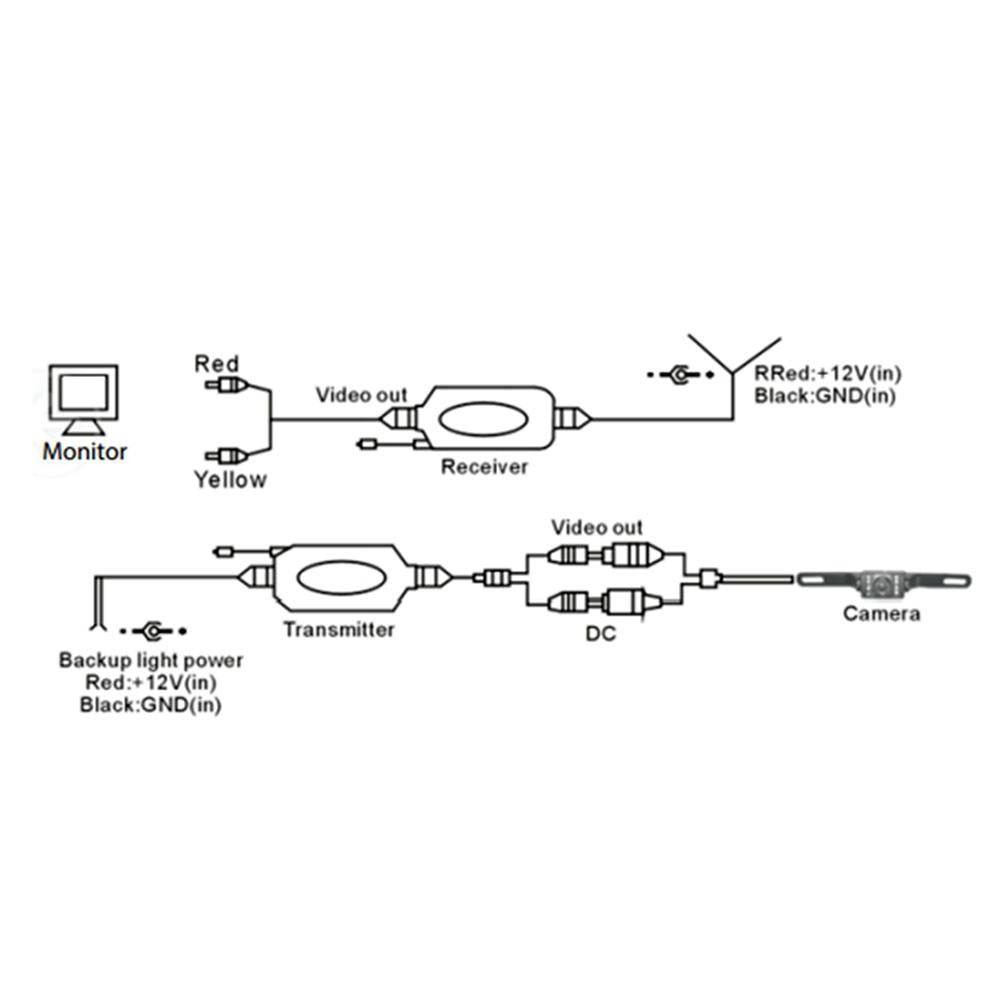
Wireless kits reduce long video runs but still need power at the rear.
- Mount and power the camera as described above.
- Mount the wireless transmitter close to the camera and protect it from weather.
- Install the receiver near the monitor or head unit and connect to the monitor input.
- Pair transmitter and receiver following the kit instructions.
- Test the feed in reverse and adjust antenna placement for stable signal.
Wireless systems can be easier but may have interference. Learn how to wire a backup camera wirelessly but be ready to relocate antennas for a clean picture.

Common troubleshooting when wiring a backup camera
When something fails, check basic items first.
- No power: Verify fuse, camera power lead, and reverse lamp voltage with a multimeter.
- No video: Confirm RCA connections and that monitor is on the right input.
- Flicker or noise: Improve ground, keep video cable away from alternator wiring, and replace poor connectors.
- Image upside-down: Flip the camera physically or use monitor settings if available.
- Weak night vision: Clean the lens and check LED power.
People Also Ask:
How do I identify the reverse light wire?
Use a multimeter or test light. With the car in reverse (engine off and hand brake on), probe wires in the tail harness until you see 12V on the reverse wire.
Can I power the camera from the tail light fuse?
Yes. Use a fused tap or the reverse lamp positive wire. Always use an inline fuse sized to the camera draw.
Will running video cable under the car cause problems?
It can. Use protected routing and a waterproof conduit if you must run cable under the car. Prefer interior runs through grommets.
Safety, legal, and best practices
Work safely and follow local rules.
Safety checklist:
- Disconnect battery before cutting or splicing power wires.
- Use an inline fuse near the battery or power source.
- Seal exterior mounting holes to prevent water entry.
- Keep wiring away from hot exhaust and moving parts.
- Follow local laws about altering tail lights or adding monitors.
Limitations and legal notes:
- Backup cameras help, but do not replace mirrors and careful scanning.
- Some states limit video displays for the driver when the vehicle is moving. Use the camera only as intended.

Personal experience: tips, mistakes, and lessons learned
I’ve installed cameras on delivery vans and family cars. Here’s what I learned.
Real-world tips:
- Always test your connections before you tuck wires away. This saves effort later.
- Use heat-shrink over soldered joints. Tape alone fails in years.
- Label both ends of long cables during install. It prevents confusion.
- If signal is weak on a wired RCA, try a higher quality video cable or a powered video balun.
Common mistakes I’ve seen:
- Skipping a fuse. That risks fire if the cable shorts.
- Grounding to sheet metal that flacks paint. Sand to bare metal for a solid ground.
- Routing video beside heavy gauge power cables. That causes interference.
These lessons make wiring a backup camera easier and more durable in the long run.
Troubleshooting checklist and test sequence
A short test routine helps diagnose issues fast.
Test sequence:
- Confirm camera power: measure 12V at camera connector when reverse is on.
- Check ground continuity to chassis.
- Verify video output with a portable monitor or camera tester.
- Swap RCA cable to rule out bad cable.
- Scan for noise sources by turning on headlights, wipers, and AC while viewing.
Follow these steps when learning how to wire a backup camera to find faults quickly.
Frequently Asked Questions of how to wire a backup camera
What wire do I tap into for the reverse light?
Tap the reverse light positive wire. Use a multimeter with the car in reverse to find the wire that becomes 12V only when backing up.
Do backup cameras need a fuse?
Yes. Use an inline fuse on the power lead sized slightly above the camera's current draw to protect against short circuits.
Can I run the camera power to a constant 12V source?
Yes, but the camera will stay on. For automatic operation, power it from the reverse light so it only powers on when reversing.
How do I ground the camera correctly?
Attach the camera ground to a clean, unpainted metal surface on the chassis or use an existing ground point. Ensure solid metal-to-metal contact.
Will a wireless camera be less reliable than wired?
Wireless can be convenient but may suffer interference. Wired provides a more stable image, especially in heavy EMI environments.
What if my monitor shows no signal?
Check the video input selection, RCA connections, and that the camera is powered. Swap cables or use a test monitor to isolate the problem.
Is professional installation worth it?
If you lack tools or comfort with vehicle wiring, professional installation avoids risks and ensures proper integration with factory systems.
Conclusion
Wiring a backup camera is a practical DIY task when you plan, use the right tools, and follow safe wiring practices. Start by gathering parts, mount thoughtfully, tap power at the reverse light with a fuse, and test thoroughly before closing trim. My key takeaway: secure grounds, protect connections, and route cables away from interference to get a clear, reliable picture every time. Try one install on a simple vehicle first, keep notes, and share your results or questions below to help others learn.

Everett Ashford is a tech reviewer at mytechgrid.com specializing in SSDs, cameras, TVs, earbuds, headphones, and other consumer electronics. He provides honest, data-driven reviews based on hands-on testing and real-world performance analysis. Everett simplifies complex tech details to help readers make smart, confident buying decisions.