How To Install PCIe SSD: Easy Step-By-Step Guide
Installing a PCIe SSD means checking compatibility, fitting the drive, securing it, and setting it up in your operating system.
Learning how to install PCIe SSD storage can make an older computer feel new again. A PCIe solid-state drive can offer fast boot times, quick file transfers, and smoother app loading, but only when the drive matches your motherboard and is installed correctly. This guide explains the full process in simple steps, from choosing the right slot to confirming that Windows or Linux detects the new drive.
What Is a PCIe SSD?
A PCIe SSD uses the PCI Express interface to move data between the storage drive and the motherboard. Most modern PCIe SSDs use the NVMe protocol, which is designed for fast flash storage and has much lower delay than older SATA technology.
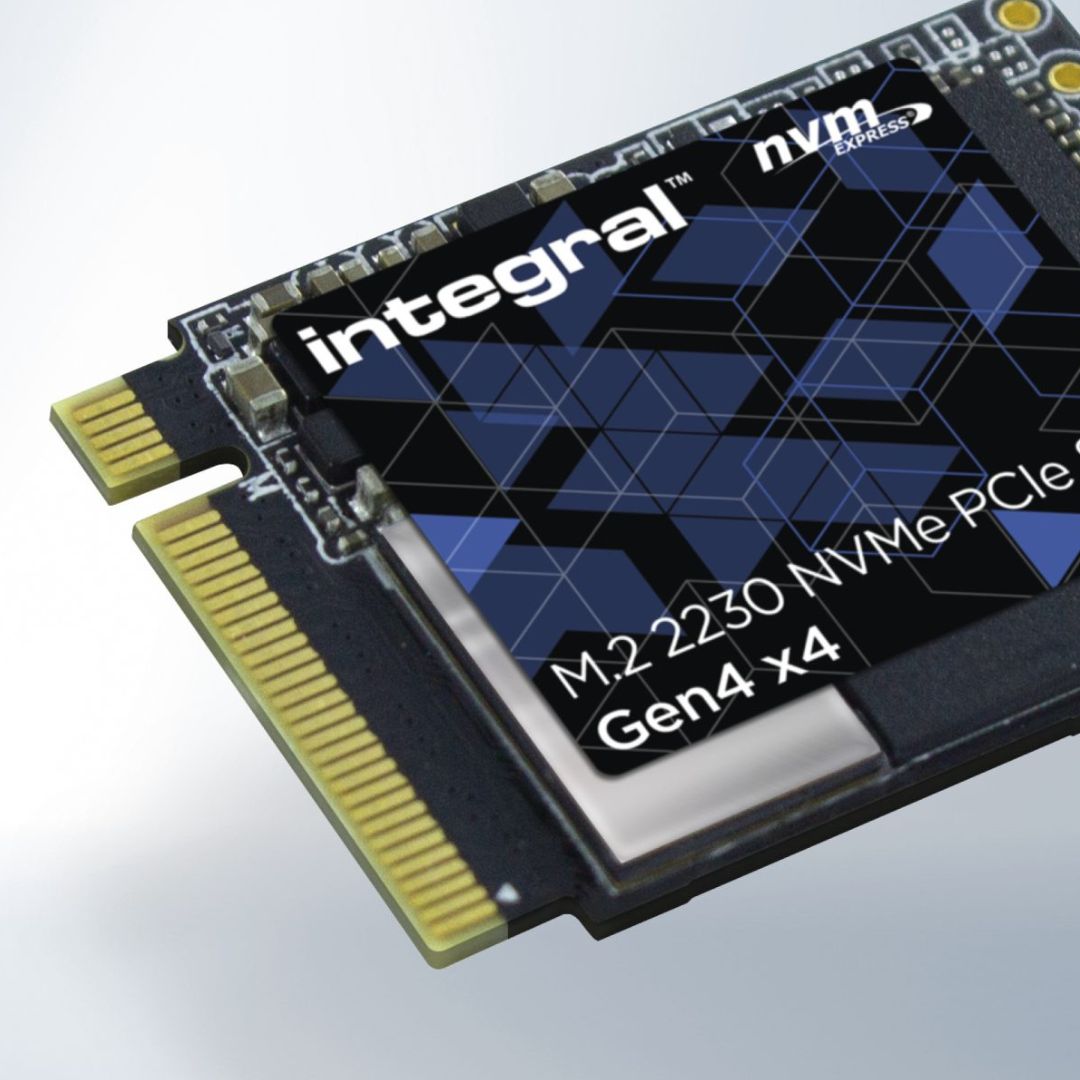
The most common type is an M.2 NVMe SSD. It looks like a small circuit board and fits into an M.2 slot on the motherboard. Some PCIe SSDs come as larger expansion cards that fit into a PCIe x4, x8, or x16 slot.


The term “PCIe SSD” describes the connection type, while “NVMe” describes the storage communication protocol. Many products use both terms together, such as a PCIe 4.0 NVMe SSD.
A PCIe SSD may use different PCIe generations:
• PCIe 3.0 offers strong performance for most everyday computers.
• PCIe 4.0 can provide much higher read and write speeds on compatible hardware.
• PCIe 5.0 is even faster but may need better cooling and a newer motherboard.
Newer PCIe versions usually support backward compatibility. For example, a PCIe 4.0 SSD can often work in a PCIe 3.0 slot, but it will run at PCIe 3.0 speeds.


Check Compatibility Before You Install
The most important part of how to install PCIe SSD hardware happens before you open the computer. A few minutes of checking can prevent a drive that does not fit, does not boot, or runs below its expected speed.
Check your motherboard manual or manufacturer specifications for these details:
• M.2 slot support. Confirm that the slot supports PCIe or NVMe, not only SATA M.2 drives.
• Physical size. Most drives use the 2280 size, which means 22 millimeters wide and 80 millimeters long.
• PCIe generation. Check whether the slot supports PCIe 3.0, 4.0, or 5.0.
• Supported key type. NVMe drives usually use an M-key connector.
• Lane sharing. Some M.2 slots disable certain SATA ports or PCIe slots when used.
• Boot support. Older systems may support an NVMe drive for storage but may not boot from it without a BIOS update.
An M.2 slot may look suitable while supporting only SATA storage. This is one of the most common installation mistakes. Always confirm the exact slot type in the manual instead of relying on appearance.
You should also check whether the motherboard includes an M.2 screw and standoff. Some boards include them in a small accessory box. If yours is missing, buy the correct M.2 mounting screw rather than forcing another screw into place.
Tools and Safety Supplies You Need
You do not need a large tool kit for how to install PCIe SSD storage. In most desktop computers, a small Phillips screwdriver is enough.
Prepare these items:
• The PCIe or NVMe SSD
• A compatible M.2 screw and standoff, if required


• A Phillips screwdriver
• Your motherboard manual
• An anti-static wrist strap, if available
• A clean, well-lit work area
• A USB flash drive containing your operating system installer, if you plan to install Windows or Linux on the new drive
Before touching the components, shut down the computer. Turn off the power supply and unplug the power cable. Press the computer’s power button for a few seconds to discharge leftover power.
Static electricity can damage sensitive parts, although modern hardware is more durable than many people think. Touch the metal frame of the case before handling the SSD, and hold the drive by its edges. Do not touch the gold contacts or chips.
How to Install PCIe SSD in an M.2 Slot
This is the most common installation method. The process is simple, but the angle and screw placement matter.
1. Locate the correct M.2 slot
Remove the computer’s side panel and find the M.2 connector on the motherboard. It is often placed between the CPU socket and the main PCIe graphics slot, although its location varies.
Look for a small connector marked “M.2,” “PCIe,” or “NVMe.” If the motherboard has multiple M.2 slots, check the manual to find the fastest or preferred slot.
Some motherboards place an aluminum cover over the M.2 slot. This cover may include a thermal pad. Remove it carefully and keep the screws nearby.
2. Install the standoff
The M.2 standoff must match the SSD length. For a common 2280 drive, the standoff should be positioned at the 80-millimeter mark.
If the standoff is in the wrong position, move it only if the motherboard allows it. Do not leave the SSD unsupported, because pressure on the drive can damage the connector.
3. Insert the SSD
Hold the SSD by its edges. Align the notch in the drive’s connector with the key inside the M.2 slot.


Insert the drive at about a 25 to 30-degree angle. It should slide in with light pressure. If it does not fit, stop and check the key position. Never push hard or insert the drive straight down.
Once the contacts are inside the slot, lower the free end of the SSD toward the standoff.
4. Secure the drive
Use the small M.2 screw to secure the end of the SSD to the standoff. Tighten it until the drive is held flat and firm.
Do not overtighten the screw. The goal is to prevent movement, not to clamp the circuit board tightly against the motherboard.
If your motherboard has an M.2 heatsink, check whether its thermal pad still has protective plastic on it. Remove the plastic before reinstalling the cover. The heatsink should sit evenly on the SSD.
5. Close the case and reconnect the computer
Replace the side panel, reconnect the power cable, and turn on the computer. The drive should now appear in the firmware settings or operating system.
These steps explain how to install PCIe SSD hardware in a standard M.2 slot. An expansion-card SSD uses a different method, explained below.

How to Install a PCIe SSD Expansion Card
Some PCIe SSDs are built as expansion cards. These drives resemble graphics cards and plug directly into a PCIe slot.
Choose a slot that provides enough lanes for the drive. A PCIe x4 slot is usually appropriate, but an open x8 or x16 slot may also work if the motherboard supports it.
Follow these steps:
-
Shut down the computer, unplug it, and remove the case panel.
-
Remove the metal slot cover that lines up with the chosen PCIe slot.
-
Align the expansion card with the slot.
-
Press the card straight down until it is fully seated.
-
Secure the card to the case with the screw from the removed slot cover.
-
Reconnect the power cable if the card requires extra power.
-
Close the case and start the computer.


Do not install the card in a slot that shares important resources unless the motherboard manual confirms that the arrangement is supported. On some systems, using a particular slot can reduce graphics bandwidth or disable another slot.
An expansion-card SSD may include its own heatsink or fan. Keep the area around it clear so air can move through the cooler.
How to Install PCIe SSD as a Boot Drive
If the new SSD will hold Windows or Linux, you need to install the operating system on it. Installing the hardware alone does not transfer your old system or files.
You have two main options:
• Perform a clean installation on the new SSD.
• Clone your existing system drive to the new SSD.
A clean install is usually the best choice when your old system has years of unused programs, driver problems, or corrupted files. Cloning is more convenient because it preserves your apps, settings, and files, but the source and target partitions may need adjustment.
For a clean installation:
-
Create a bootable operating system USB drive.
-
Install the PCIe SSD.
-
Start the computer and open the boot menu or firmware settings.
-
Select the USB installer.
-
Choose the new SSD as the installation destination.
-
Complete the operating system setup.
-
Install motherboard and chipset drivers after the first boot.
For cloning, connect the new SSD, open reliable disk-cloning software, and copy the source drive to the new drive. Confirm that the target disk is correct before starting. Cloning normally erases the target drive.
After cloning, shut down the computer and remove the old drive temporarily. This prevents the system from booting from the wrong disk. If the computer starts correctly from the new SSD, reconnect the old drive and use it as extra storage after checking your files.
In my experience, the most common cloning mistake is failing to expand the main partition. A larger SSD may initially show unused space until the system partition is extended in Disk Management or a similar tool.
Configure BIOS or UEFI Settings
Most modern motherboards detect an NVMe drive automatically. If the drive does not appear, enter the BIOS or UEFI setup by pressing a key such as Delete, F2, or F12 during startup.
Look for a storage, NVMe, boot, or PCIe information page. The exact menu name depends on the motherboard manufacturer.
Check these settings:
• Confirm that the SSD model appears in the storage list.
• Use UEFI boot mode for a modern operating system.
• Set the new SSD as the first boot device if it contains the operating system.
• Check whether the M.2 slot is disabled or set to SATA mode.
• Update the motherboard firmware if the manual recommends it.
Avoid changing advanced settings without knowing what they do. A firmware update can improve compatibility, but it should be performed carefully with stable power and the correct file for the exact motherboard model.
If a new drive appears in the firmware but not in Windows, the hardware is probably installed correctly. The drive may simply need to be initialized and formatted.

Set Up the SSD in Windows
A new PCIe SSD may not appear in File Explorer until Windows initializes it. This is normal.
Use these steps:
-
Right-click the Start button and select Disk Management.
-
Find the new disk by matching its capacity.
-
If prompted, choose GPT for modern UEFI systems.
-
Right-click the unallocated space.
-
Select New Simple Volume.
-
Assign a drive letter.
-
Format the volume with NTFS for general Windows use.
-
Give the drive a clear label, such as “Games” or “Projects.”
Be careful when selecting the disk. Formatting the wrong disk can erase important data. Capacity may appear slightly lower than the number printed on the box because manufacturers use decimal units while operating systems often display binary-based values.
For Linux, tools such as Disks, GNOME Disks, or command-line utilities can initialize and format the drive. The correct file system depends on how you plan to use it. Ext4 is common for Linux, while exFAT is useful when sharing files between different operating systems.
Confirm PCIe SSD Performance and Health
After learning how to install PCIe SSD hardware, test that it is operating as expected. The drive does not need to reach its advertised maximum speed in every computer.
Performance depends on several factors:
• PCIe generation
• Number of active PCIe lanes
• Processor and motherboard design
• Drive capacity
• Temperature
• Workload type
• Available free space
Use a trusted disk benchmark to check sequential read and write speeds. Treat the result as a guide, not a guarantee. Large advertised numbers usually describe ideal sequential tests, while everyday tasks often use smaller random files.
Also check the drive temperature. NVMe SSDs can slow down when they become too hot. This behavior is called thermal throttling. A motherboard heatsink, better case airflow, or a larger aftermarket cooler may help.
Keep at least some free space on the drive. A nearly full SSD often has less room for background management tasks and may show slower write performance.
Use the manufacturer’s utility or a trusted system tool to check:
• Drive health
• Firmware version
• Total data written
• Temperature
• Available spare capacity
Do not run benchmarks repeatedly for no reason. They create extra drive writes and provide little useful information after the initial check.

Common Problems and Fixes
The computer does not detect the SSD
Power off the computer and reseat the drive. Make sure it is inserted at an angle and secured correctly.
Then check the motherboard manual. The slot may support SATA M.2 drives only, or it may share lanes with a disabled SATA port. A BIOS update may also be needed on an older motherboard.
The SSD appears in BIOS but not Windows
Open Disk Management and look for an uninitialized or unallocated disk. Initialize it with GPT, create a volume, and format it.
Do not format the disk if it contains files you need. If the drive was used before, confirm its contents before making changes.
The SSD does not appear in BIOS
Check the physical installation first. Look for bent connectors, a missing standoff, or a drive that is not fully inserted.
Try another compatible M.2 slot if available. If the drive still does not appear, test it in another compatible computer or enclosure to separate a drive problem from a motherboard problem.
The drive is slower than advertised
Confirm its PCIe generation and lane configuration. A PCIe 4.0 drive in a PCIe 3.0 system cannot reach PCIe 4.0 speeds.
Heat can also reduce performance. Check temperatures during a sustained transfer and make sure the heatsink’s thermal pad contacts the drive.
Windows boots from the old drive
Enter UEFI settings and select the new SSD as the first boot option. If you cloned the old drive, shut down and disconnect the old drive temporarily to confirm that the new installation works by itself.
The system becomes unstable after installation
Remove the SSD and test whether the problem disappears. Then check for a firmware update, motherboard BIOS issue, driver conflict, or lane-sharing limitation.
Do not ignore repeated crashes or data errors. Back up important files and investigate before using the drive for critical work.
Tips for a Reliable PCIe SSD Installation
A careful installation is usually more reliable than a rushed one. These small habits can protect both the drive and your data.
• Back up important files before changing storage hardware.
• Read the motherboard manual before choosing an M.2 slot.
• Use the correct screw and standoff.
• Never touch the gold contacts.
• Remove protective film from thermal pads.
• Avoid overtightening the mounting screw.
• Keep the SSD cool with proper airflow.
• Update firmware only when needed and follow the manufacturer’s instructions.
• Label old and new drives during a cloning project.
• Keep the old drive untouched until the new system has booted and your files are verified.
One lesson I have seen repeatedly during PC upgrades is that installation problems often come from assumptions. A drive can fit physically but still be electrically incompatible. Checking the manual is faster than troubleshooting an unsupported slot later.

Frequently Asked Questions About How to Install PCIe SSD
Can I install a PCIe SSD in any M.2 slot?
No. Some M.2 slots support only SATA drives, while others support PCIe NVMe drives. Check your motherboard manual before installation.
Do I need to install drivers for a PCIe SSD?
Modern versions of Windows and Linux usually include basic NVMe support. You may still need motherboard chipset drivers or manufacturer software for firmware updates and advanced monitoring.
Can I use a PCIe 4.0 SSD in a PCIe 3.0 slot?
Yes, in most cases. The drive should work at the slower PCIe 3.0 speed, provided the slot supports NVMe storage.
Do I need a heatsink for an NVMe SSD?
A heatsink is not always required, especially for light office use. It can help maintain performance during large file transfers, gaming installations, video work, and other sustained workloads.
Should I format a new PCIe SSD before using it?
A new secondary SSD usually needs to be initialized, partitioned, and formatted before it appears in File Explorer. A drive used for an operating system is normally formatted during the installation process.
Can I replace my SATA SSD with a PCIe SSD?
You can replace it if your motherboard supports an M.2 PCIe NVMe drive or a compatible PCIe expansion card. You may need to clone the old drive or perform a clean operating system installation.
Why is my PCIe SSD not as fast as the package claims?
Advertised speeds come from ideal test conditions. Your result may be lower because of PCIe generation limits, fewer lanes, drive temperature, capacity, workload type, or limited free space.
Conclusion
Learning how to install PCIe SSD storage is mostly a matter of matching the drive to the correct slot, inserting it carefully, securing it with the right screw, and setting it up in the operating system. Always check NVMe support, PCIe generation, drive size, lane sharing, and boot settings before you begin.
After installation, initialize the drive if needed, confirm its health, monitor temperature, and keep a backup of important files. Take your time, follow the motherboard manual, and your new SSD can deliver faster starts and smoother everyday performance. If this guide helped, explore more PC upgrade guides or share your installation experience in the comments.

Everett Ashford is a tech reviewer at mytechgrid.com specializing in SSDs, cameras, TVs, earbuds, headphones, and other consumer electronics. He provides honest, data-driven reviews based on hands-on testing and real-world performance analysis. Everett simplifies complex tech details to help readers make smart, confident buying decisions.