Use Task Manager or CrystalDiskMark for a quick NVMe SSD speed check on Windows 11.
As a storage engineer who has benchmarked dozens of NVMe drives, I’ll walk you through how to check nvme ssd speed in windows 11 using easy built-in checks and robust third-party tools. Read on for step-by-step instructions, real examples, and troubleshooting tips so you can test, interpret, and fix slow results with confidence.
Why measure NVMe SSD speed in Windows 11?
Knowing how to check nvme ssd speed in windows 11 helps you see real performance. You can confirm whether a new drive meets specs. You can also spot thermal throttling, driver problems, or configuration issues that cut speeds.
Measuring speed keeps your system reliable. It helps decide if an upgrade is needed. It also shows whether background apps or power settings are limiting throughput.

Preparations before testing
Prepare your PC for a fair test. Close heavy apps and pause backups. Plug in power if you use a laptop and set Windows to a high-performance power plan.
Update your NVMe firmware and drivers first. Record the drive model and PCIe generation from Device Manager. This makes results easier to interpret when you run benchmarks.

Use Task Manager for a quick live check
Task Manager shows real-time throughput. Open Task Manager with Ctrl+Shift+Esc, go to Performance, then select the disk that lists “NVMe.” Watch the graph while copying a large file to see read and write MB/s.
This method is fast and built into Windows. It gives a good first impression of how the drive behaves under basic load. Use it for quick verification before running deeper benchmarks.
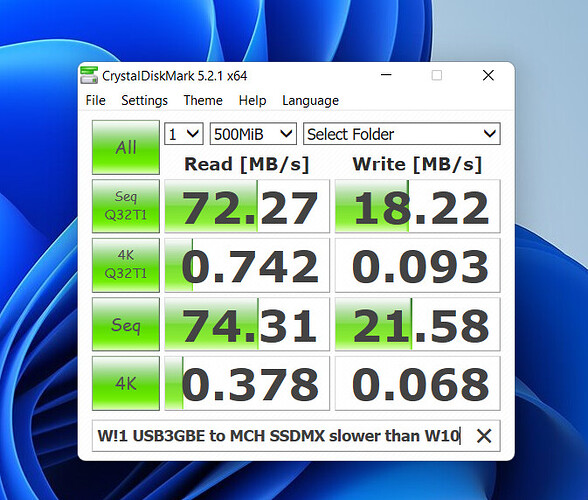
Use CrystalDiskMark for easy, repeatable benchmarks
CrystalDiskMark is the most common free tool to test NVMe performance. Download and run it, choose the drive letter, and start the default tests. It reports sequential and random read/write speeds in MB/s and IOPS.
Interpret the main results like this:
- Sequential read/write shows large file throughput. This reflects copying big files.
- Random 4K read/write and IOPS show small-file responsiveness. This impacts app load times.
Repeat tests a few times and average them for stable numbers.

Source: dumin.org
Use Diskspd and winsat for advanced command-line testing
Diskspd is a Microsoft tool for controlled workloads. A sample read-only test:
- diskspd -b8K -d30 -o32 -t4 -r -w0 c:\testfile.dat
This runs a 30-second random 8K read test with multiple threads and queues. Diskspd outputs MB/s and IOPS.
Winsat is a simple built-in tool (may be deprecated on some systems). Example:
- winsat disk -seq -read -drive C
Winsat gives a quick sequential read/write score. For repeatable lab testing, diskspd is more flexible.
Vendor tools and deeper analysis
Vendor utilities like Samsung Magician or Western Digital Dashboard provide tailored benchmarks and firmware tools. They can also show health, temperatures, and firmware updates. Use them when testing drives from those makers.
For advanced tracing, use Windows Performance Recorder (WPR) and Windows Performance Analyzer (WPA). These tools take longer to learn but reveal detailed I/O patterns and driver-level issues.

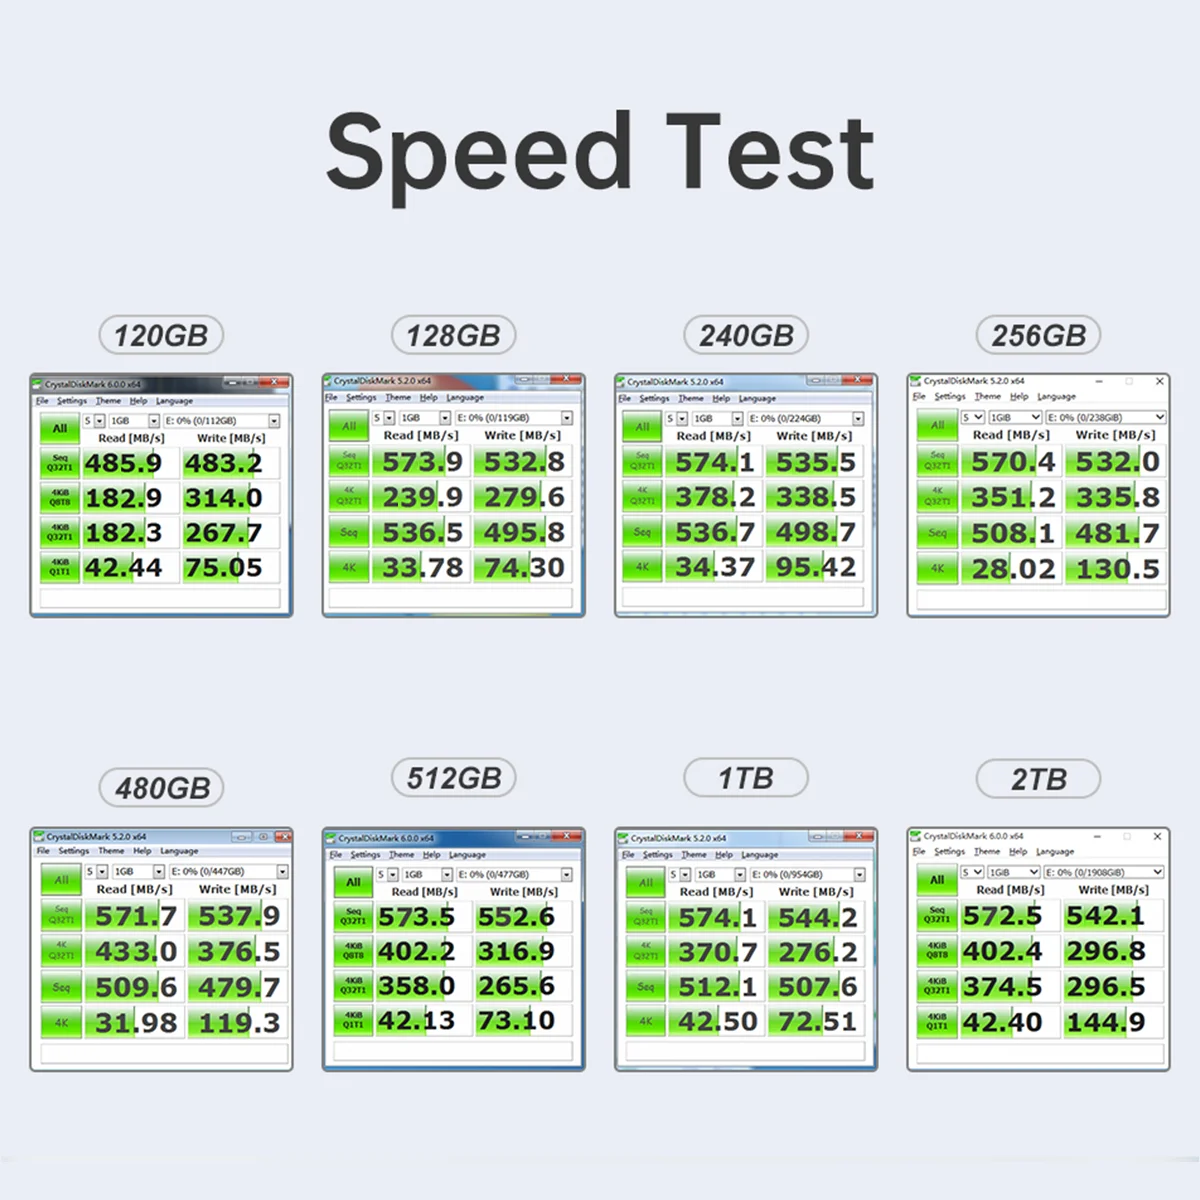
How to interpret results
When you check nvme ssd speed in windows 11, compare numbers to expected specs. Typical ranges:
- PCIe 3.0 x4 NVMe: around 1500–3500 MB/s sequential.
- PCIe 4.0 x4 NVMe: around 5000–7000 MB/s sequential.
Random 4K IOPS vary a lot by drive and queue depth.
Remember: synthetic benchmarks show peak potential. Real-world transfers will be lower due to file sizes, CPU, and background tasks. Pay attention to temperature and active time during tests, as throttling cuts sustained speeds.

Common causes of slow NVMe performance and fixes
If your NVMe is slower than expected, check these items:
- Drivers: Update NVMe and chipset drivers from the motherboard or laptop maker.
- BIOS settings: Ensure PCIe lanes are set correctly and NVMe mode is enabled.
- Thermal throttling: Check drive temps and improve airflow or add a heatsink.
- Power plan: Use a high-performance or balanced plan that doesn’t aggressively park devices.
- Background tasks: Stop indexing, backups, and antivirus scans during tests.
- Encryption: BitLocker or other encryption can reduce throughput; test with it paused to compare.
Addressing these items often restores expected performance quickly.
Practical examples and step-by-step test plan
Here’s a simple test plan I use in the lab:
- Back up important data and close apps.
- Set power plan to High Performance.
- Run Task Manager to confirm idle baseline.
- Run CrystalDiskMark with default settings three times.
- Run a diskspd random 8K 30-second test.
- Note temperatures and system activity during tests.
- If speeds look low, update drivers, test again, then check BIOS settings.
I learned to always monitor temperatures. One laptop showed 30% lower speeds until I added better cooling.
Quick questions people ask (PAA-style)
Q: Will Windows indexing affect NVMe speed tests?
A: Yes. Indexing can cause background I/O and lower benchmark scores. Pause indexing before testing.
Q: Is a single short test enough?
A: No. Run multiple tests and average results. Short tests may miss thermal throttling or caching effects.
Q: Do I need admin rights to benchmark?
A: Some tools require admin rights for accurate results. Run benchmarks as administrator when prompted.
Frequently Asked Questions of how to check nvme ssd speed in windows 11
How do I use Task Manager to check NVMe speed?
Open Task Manager, select Performance, choose the NVMe drive, and watch the read/write graphs during a transfer. This shows real-time MB/s.
Is CrystalDiskMark safe to use on my main drive?
Yes. CrystalDiskMark runs non-destructive tests by default. Use it carefully on system drives and avoid filling the drive completely.
What factors make NVMe speeds lower than advertised?
Thermal throttling, PCIe lane limits, outdated drivers, and background tasks are common causes. Also, advertised speeds are peak synthetic numbers.
Can BitLocker affect NVMe benchmark results?
Yes. Encryption adds CPU work and can reduce throughput. Disable or pause BitLocker temporarily to compare raw speeds.
Which is better for real-world performance: sequential or random tests?
Random 4K tests better reflect application responsiveness. Sequential tests show large file transfer rates. Use both to get a full picture.
Conclusion
Testing how to check nvme ssd speed in windows 11 takes a handful of simple steps and a few smart checks. Start with Task Manager for a quick view, use CrystalDiskMark for repeatable scores, and turn to diskspd or vendor tools for deeper analysis. Keep firmware, drivers, and cooling in good shape, and repeat tests to confirm changes.
Try the step-by-step plan above and compare results to your drive’s specs. If you see issues, apply the troubleshooting checklist and test again. Share your results or questions below, subscribe for more storage tips, or leave a comment with your drive model and numbers.

Everett Ashford is a tech reviewer at mytechgrid.com specializing in SSDs, cameras, TVs, earbuds, headphones, and other consumer electronics. He provides honest, data-driven reviews based on hands-on testing and real-world performance analysis. Everett simplifies complex tech details to help readers make smart, confident buying decisions.