Test every drive with SMART, a full performance pass, secure erase, and a burn-in cycle.
I’ve tested thousands of drives and built repeatable processes to make sure every SSD you sell is healthy, fast, and secure. This guide on how to test bulk SSDs before selling to customers walks you through inventory, quick checks, deep diagnostics, performance benchmarks, secure erasure, and scale tips. You’ll get clear steps, real-world tips from my refurb shop experience, and the tools to set up a reliable testing line that protects customers and your reputation. Read on to learn a practical, repeatable workflow for how to test bulk SSDs before selling to customers.

Why testing bulk SSDs matters
Selling a bad SSD harms customers and your brand. SSD failures cause data loss, downtime, and expensive returns. Testing bulk SSDs before selling to customers reduces returns, keeps reviews positive, and protects you legally.
I’ve seen small issues turn into big problems when a single batch slips through. A quick test plan removes most risks. It also helps you price drives fairly based on health and expected lifespan.

Quick checklist before testing
Use this short checklist to prep any batch before detailed testing.
- Inventory each SSD with serial, model, capacity, and source.
- Label drives to track status and test results.
- Verify connectors and adapters (SATA, M.2, NVMe) are available.
- Prepare a clean test bench with stable power and known-good host systems.
- Back up any customer data if refurbishing used drives.
This checklist saves time and keeps records tidy when you scale.
Step-by-step testing workflow for bulk SSDs
Follow this workflow for reliable, repeatable testing. I repeat these stages for every batch I send to customers.
- Receive and log
- Record serial, model, capacity, and batch source.
- Assign a unique batch ID and label each SSD.
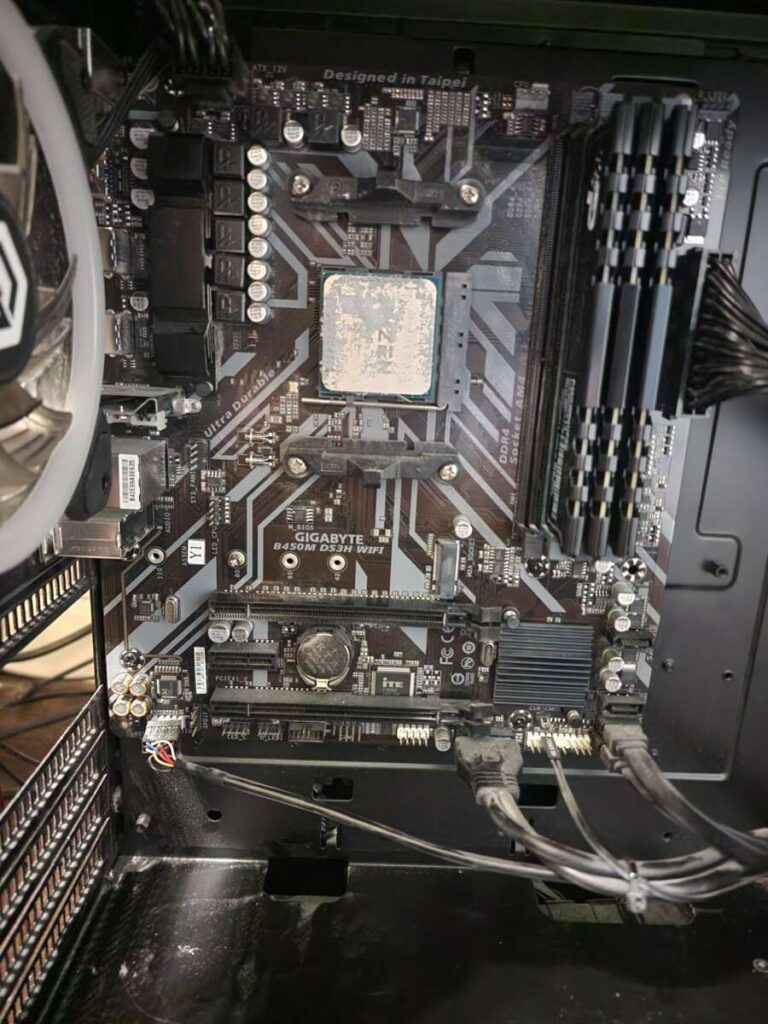
- Visual inspection
- Check for physical damage to PCB, connectors, and labels.
- Look for missing components, bent pins, or corrosion.
- Basic connectivity test
- Connect the SSD to a test system. Confirm the drive is detected in BIOS/UEFI.
- Run SMART and health readout
- Pull SMART attributes to check reallocated sectors, media wear, power cycles, and temperature.
- Flag drives with abnormal SMART values for deeper tests.
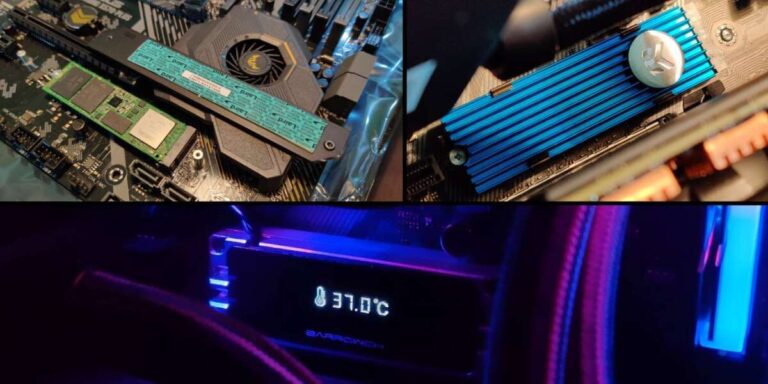
- Full surface and data integrity test
- Do a read/write pass to detect bad blocks and verify data integrity. For SSDs use non-destructive tests where possible, then a destructive full wipe when safe.
- Performance benchmarking
- Measure sequential and random read/write IOPS and throughput with tools like FIO or CrystalDiskMark. Compare to manufacturer specs.
- Endurance and burn-in
- Run a burn-in cycle: sustained reads/writes for several hours to reveal early failures. For used drives, shorten; for new drives, do a longer cycle when feasible.
- Firmware and feature check
- Confirm current firmware. Update only if stable firmware is available and tested.
- Secure erase and verification
- Use manufacturer tools or standard secure erase processes to wipe the drive. Then verify with a read pass.
- Final health grading and labeling
- Grade drives (A, B, C) based on health, remaining life, and performance. Record final results in inventory.
- Shipping prep
- Repackage drives with anti-static protection, include a printed health report if selling to end customers.
This workflow explains how to test bulk SSDs before selling to customers in a way you can repeat every day.

Tools and software recommendations
Pick tools that work for the drive types you handle. Mix free and paid tools for best coverage.
- SMART tools
- Use smartctl or vendor utilities to read SMART attributes.
- NVMe utilities
- nvme-cli for NVMe drives to read health logs and firmware versions.
- Performance tools
- FIO for Linux-based scripted tests; CrystalDiskMark for quick Windows checks.
- Secure erase tools
- Vendor secure erase utilities or hdparm for SATA where supported.
- Drive imaging and wiping
- Use verified utilities that support SSD-aware secure erase to avoid wear from unnecessary writes.
- Inventory software
- Simple spreadsheets work. For scale, use a small asset database or RMM tool.
I run scripted FIO jobs on a Linux test station and cross-check results with vendor tools. That combo catches more issues than a single tool.

Common issues and how to fix them
Knowing common failure modes speeds troubleshooting.
- SSD not detected
- Try a different adapter or port. Check power, connectors, or firmware that blocks detection.
- Failing SMART attributes
- Re-run tests. If reallocated sectors are rising, grade lower or scrap the drive.
- Slow performance
- Check the interface (SATA 3 vs SATA 2). Update firmware, and ensure the drive is not in a degraded mode.
- Firmware update errors
- Don’t update firmware mid-test. Test updates on a small sample first, then roll out if stable.
- Secure erase fails
- Use vendor tools first. If unsuccessful, note and mark drive as non-sellable or for parts.
From my experience, the biggest mistake is skipping burn-in. Early failures usually show up during extended read/write cycles.

Best practices for handling, data security, and compliance
Protect customers and your business with clear policies.
- Data privacy
- Always perform secure erase that meets legal standards. Keep logs of erasures for audits.
- Traceability
- Keep batch records with serials and test results for warranty claims.
- Handling
- Use ESD-safe workbenches, proper storage, and anti-static bags.
- Warranty policy
- Define fair return and warranty terms based on the grade you assign to each SSD.
- Legal compliance
- Follow local laws for data destruction and resale of used storage devices. Keep proof of compliance when required.
I once had to prove a secure erase for a business client. The record saved a sale and avoided a legal headache.
Cost, time estimates, and scaling tips
Plan resources before you commit to large batches.
- Time per drive
- Basic inspection and SMART: 2–5 minutes.
- Full performance + burn-in: 1–6 hours depending on depth.
- Cost factors
- Test stations, software licenses, adapters, labor, and disposal of failed drives.
- Scaling tips
- Automate: script SMART reads, FIO runs, and logging.
- Parallelize: use multi-bay test rigs.
- Sample testing: validate a random sample per batch to save time, but balance risk. For high-value or used drives, test 100% of units.
- Throughput example
- With four test rigs and scripted jobs you can handle several hundred drives per week with full validation.
My refurb shop started with manual tests. After scripting and adding two racks, throughput rose 6x and returns fell by 70%.

Frequently Asked Questions of how to test bulk ssds before selling to customers
How long should burn-in testing be for SSDs?
Burn-in time varies. For spotting early failures, run at least 4–24 hours of sustained read/write. Higher-value drives may get 48–72 hours.
Can I rely only on SMART to test SSD health?
SMART is a good first filter but not enough alone. Combine SMART with read/write tests and performance benchmarks to catch subtle failures.
Is secure erase safe for all SSDs?
Secure erase is the recommended method for most SSDs. Use vendor tools when possible, as some SSDs need special commands to fully wipe flash. Always verify after erasure.
Should I update firmware before selling?
Only update firmware after testing it on a small sample. Firmware can improve stability but can also introduce new bugs if untested.
How many drives should I test per batch?
For used drives or high-value sales, test every drive. For low-risk new bulk, sample testing is possible but less safe; test at least 5–10% per batch and increase if you find issues.
Conclusion
Testing bulk SSDs before selling to customers protects buyers and your brand. Use a clear workflow: log, inspect, run SMART, perform integrity and performance tests, burn-in, secure erase, and grade each drive. Automate common steps and keep tight records to scale confidently. Start small, refine your scripts, and aim to test 100% for used or high-value SSDs.
Take action today: draft a test checklist, set up one repeatable test station, and run a pilot batch. Share results, improve the process, and watch returns drop while customer trust grows.

Everett Ashford is a tech reviewer at mytechgrid.com specializing in SSDs, cameras, TVs, earbuds, headphones, and other consumer electronics. He provides honest, data-driven reviews based on hands-on testing and real-world performance analysis. Everett simplifies complex tech details to help readers make smart, confident buying decisions.