Use USB, Wi-Fi, SD card, or a transfer app to move photos from camera to phone quickly.
I’ve spent years shooting on travel and client shoots, and I’m comfortable explaining how to transfer photos from camera to phone in ways that work for hobbyists and pros. This guide covers every method, step-by-step instructions, real-world tips, common pitfalls, and fast fixes so you can move images from your camera to your phone reliably and safely.
Main methods to transfer photos from camera to phone
There are five reliable ways to move images. Choose one based on your camera model, phone type, speed needs, and whether you want original files or quick previews.
- USB cable connection using OTG or camera tethering for direct transfers.
- Wi-Fi or Bluetooth using the camera’s built-in wireless or a companion app.
- Remove the SD card and use an adapter or card reader for the phone.
- Cloud sync by uploading from camera/computer to a cloud service, then downloading on phone.
- Camera-to-phone app or Wi-Fi hotspot transfers for quick previews and selective downloads.
How to transfer photos from camera to phone depends on your gear and goals. If you want full-resolution RAW files, you’ll likely use a cable, card reader, or connect through a computer. For quick social shares, wireless app transfers work best. I’ll show each option with steps and tips.

USB cable and OTG: fastest direct transfer option
USB is usually the fastest method for large files. Many cameras support USB mass storage or PTP modes. Most phones can accept a camera via OTG (On-The-Go) cable.
Step-by-step for direct USB/OTG transfer:
- Check compatibility: confirm your phone supports OTG and your camera supports USB file transfer.
- Use the right cable: use the camera’s USB cable plus a USB-C or Lightning OTG adapter for your phone.
- Set camera mode: switch camera to “Mass Storage” or “PC Connect” when prompted.
- Connect and browse: the phone’s file manager will show the camera or DCIM folder; copy the files.
- Eject safely: unmount the device on your phone before unplugging.
Tips and limits:
- Some phones cannot mount the camera directly. If that fails, use an SD card reader.
- Transfer speeds vary by USB version; USB 3.0 devices offer the fastest times.
- How to transfer photos from camera to phone via USB is ideal when you need original files for editing.
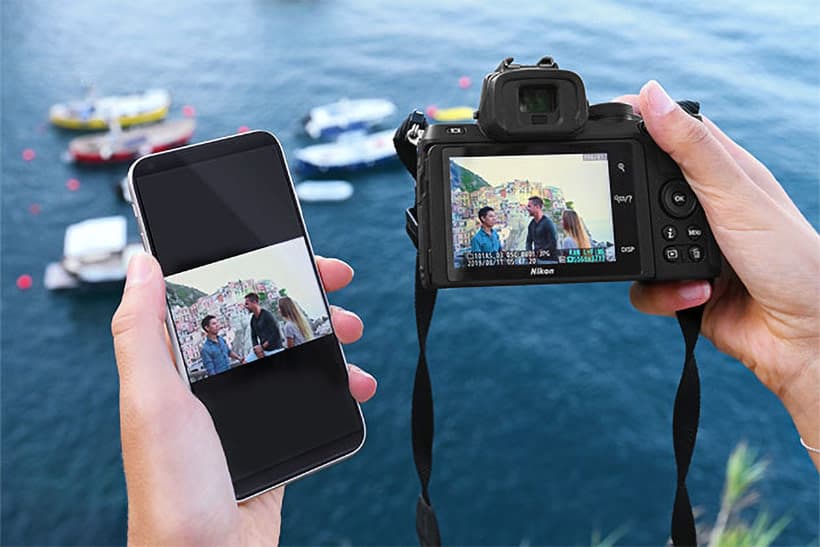
Using an SD card or microSD adapter: simple and reliable
Removing the card is often the simplest method. Most phones support microSD cards natively or with an inexpensive USB card reader.
Steps for SD card transfer:
- Power off the camera and remove the card.
- Use a phone microSD slot, or insert the card into a USB card reader that connects to your phone.
- Open a file manager or gallery app and copy the photos to phone storage.
- Organize and back up: move files into folders named by date or project.
Advantages and downsides:
- This method is fast and avoids camera battery drain.
- It’s the easiest way to get RAW files off the camera.
- If your phone has no slot and you don’t have a reader, use a computer as an intermediary.
How to transfer photos from camera to phone with a card reader is my go-to for shoots when I need every RAW file quickly.

Camera companion apps and Wi‑Fi: wireless convenience
Many modern cameras include a companion app. These apps let you browse thumbnails and send selected photos wirelessly.
How to use camera apps:
- Install the manufacturer app on your phone and enable the camera’s Wi‑Fi mode.
- Connect the phone to the camera’s Wi‑Fi network or pair via Bluetooth.
- Open the app, browse images, and download selected files or thumbnails.
Practical notes:
- App transfers are excellent for quick social shares and previews.
- Full-resolution RAW files may be limited or slow over Wi‑Fi.
- Learn the app’s steps before you’re in the field to avoid delays.
When speed and convenience matter, camera apps show how to transfer photos from camera to phone without cables.

Bluetooth and NFC: low-speed transfers for quick sharing
Bluetooth and NFC are handy for one-off shots and small JPEG files. They’re easy but slow for large files.
How to transfer via Bluetooth/NFC:
- Enable Bluetooth or NFC on both devices.
- Pair or tap to initiate the transfer.
- Use the camera’s sharing menu to send the chosen photo.
Limitations:
- Bluetooth is slow for large batches or RAW files.
- NFC often just triggers a Wi‑Fi pairing or opens the companion app.
Use Bluetooth or NFC when you only need a single JPEG quickly and don’t need full quality.

Cloud-based transfers and wireless backup
Cloud sync is great for backups and multi-device workflows. Upload photos from your camera (via Wi‑Fi) or from your computer, then access them on your phone.
Common cloud workflows:
- Use the camera app to upload to a cloud service directly.
- Transfer to a laptop, then upload to cloud storage and sync to phone.
- Use an automatic backup app on the phone to pull new images into your photo library.
Pros and cons:
- Works well for offsite backup and sharing across devices.
- Uploads can be slow on mobile networks and may cost data.
- For privacy and speed, prefer local transfers for client work or RAW files.
Cloud methods provide a flexible way to manage how to transfer photos from camera to phone while keeping backups.

Step-by-step guides for popular setups
Below are practical workflows for common pairings. These steps are simple and repeatable.
iPhone and mirrorless camera via SD card reader:
- Remove the SD card and insert into a Lightning-compatible SD card reader.
- Connect the reader to your iPhone.
- The Photos app imports available images. Select and import.
Android phone and DSLR via OTG:
- Connect camera to phone using camera USB cable and USB-C OTG adapter.
- Switch camera into mass storage mode.
- Use the Files app to copy photos to phone folders.
Sony/Canon/Nikon Wi‑Fi app transfer:
- Enable Wi‑Fi or smartphone connect on the camera.
- Install the camera maker’s app and follow on-screen pairing.
- Browse photos in the app and download selected images.
How to transfer photos from camera to phone varies by brand, but these templates work across many devices.

File formats, RAW vs JPEG, and what to transfer
Decide what you need before transferring. RAW files are large but retain full detail. JPEGs are smaller and ready for sharing.
Quick guidance:
- If editing later, transfer RAW files or original files.
- For quick posts or messages, transfer JPEGs to save time and space.
- Some apps only show JPEG previews even if RAW is available; confirm file type before deleting originals.
Choosing the right format is central to how to transfer photos from camera to phone efficiently.
Troubleshooting common problems
Here are quick fixes for transfer hiccups.
Problem: Phone won’t detect camera
- Ensure OTG support or try a different cable or reader.
- Switch camera modes and check battery levels.
Problem: Slow wireless transfer
- Move closer to the camera, turn off other Wi‑Fi devices, or switch to direct Wi‑Fi mode.
- Use the SD card route for bulk transfers.
Problem: Missing RAW files in the phone gallery
- Use a file manager to browse the camera’s folders. Some phones need a third-party RAW viewer.
These practical fixes make learning how to transfer photos from camera to phone less frustrating.
Security, privacy, and backup best practices
Protect your work while moving files.
Good habits:
- Always back up originals to two locations, such as an external drive plus cloud.
- Use trusted apps and avoid public Wi‑Fi when transferring client photos.
- Check app permissions and remove access when done.
Being mindful of security helps you safely transfer and store photos after learning how to transfer photos from camera to phone.
My real-world tips and mistakes I learned from
I learned quick lessons on shoots and travel.
Personal tips:
- Always carry a small USB-C OTG adapter and a compact SD card reader.
- Label cards by date and shoot to avoid mix-ups.
- When in a rush, use a phone transfer app to grab a few JPEGs for immediate share, then transfer RAWs via card reader later.
Mistakes to avoid:
- Don’t delete memory cards until you’ve verified imports.
- Don’t trust a single backup. I lost client footage once because I only had one copy.
These lessons come from real experience and are part of the practical guidance on how to transfer photos from camera to phone that I use daily.
Organizing and managing photos on your phone
After transfer, keep files tidy for easy access.
Simple system:
- Create folders by date or project.
- Rename files with a short code and number if you need order.
- Use a dedicated photo app to tag and flag selects for editing.
A clear system makes later edits and shares fast and painless, reinforcing good transfer habits.
Frequently Asked Questions of how to transfer photos from camera to phone
How do I transfer RAW photos from my camera to my phone?
Use an SD card reader or a USB OTG cable to move RAW files directly to your phone. Some camera apps can download RAWs, but card readers are the most reliable method.
Will transferring photos over Wi‑Fi reduce quality?
No, Wi‑Fi transfers can preserve full file quality if the camera and app support full-resolution downloads. Some apps only send compressed JPEGs, so check settings first.
Can I transfer photos from camera to phone without an app?
Yes. Use a card reader or USB OTG connection to copy files using your phone’s file manager without needing any app. This method works for full-size files.
Why won’t my phone read the camera’s SD card?
Your phone may lack the right card slot or the file system may be incompatible. Use an external card reader or connect via a computer to reformat or copy files safely.
Is it safe to transfer client photos over public Wi‑Fi?
Avoid using public Wi‑Fi for sensitive files unless you use a secure VPN. Public networks can expose transfers to interception, so prefer local wired transfers or encrypted cloud sync.
Conclusion
You now have clear, practical ways for how to transfer photos from camera to phone across every common setup. Pick the method that fits your gear and goals: SD card readers and USB OTG for full-resolution work, companion apps for quick shares, and cloud sync for backups. Start by testing your preferred method at home to avoid surprises on location. Try one of these workflows today and streamline your photo pipeline — and if you found this guide useful, leave a comment, subscribe for more tips, or share your transfer trick.

Everett Ashford is a tech reviewer at mytechgrid.com specializing in SSDs, cameras, TVs, earbuds, headphones, and other consumer electronics. He provides honest, data-driven reviews based on hands-on testing and real-world performance analysis. Everett simplifies complex tech details to help readers make smart, confident buying decisions.