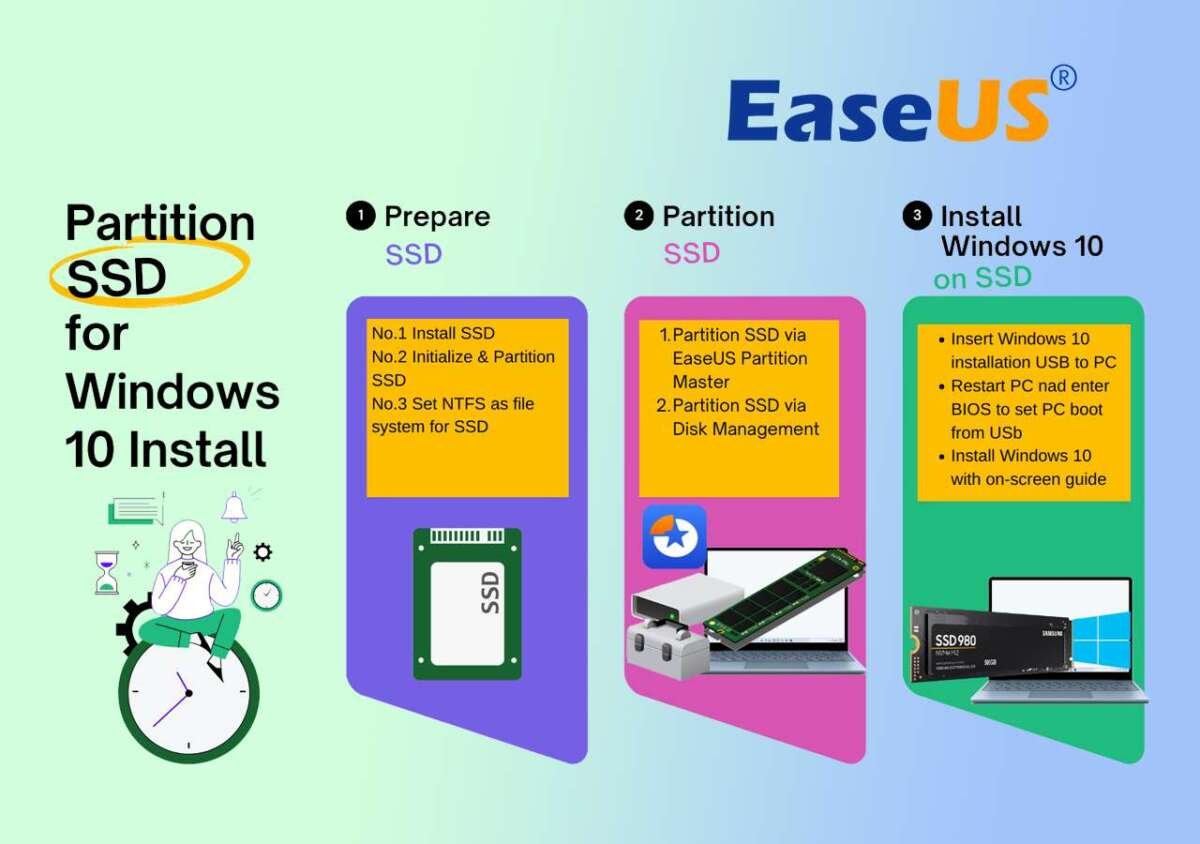
partition an SSD in Windows 11 by shrinking an existing volume, creating unallocated space, and formatting a new partition.
Learning how to partition SSD Windows 11 systems is useful when you want separate spaces for Windows, personal files, games, backups, or work projects. The process is safe when you understand disk layouts, back up important data, and avoid changing recovery or system partitions by mistake.
What SSD Partitioning Means in Windows 11
A partition is a logical section of a physical drive. One SSD can contain several partitions, and Windows 11 treats each one like a separate drive, such as C:, D:, or E:.
When you partition an SSD Windows 11 computer, you divide available storage without physically cutting the drive. For example, a 1 TB SSD might contain:
• A C: partition for Windows and apps
• A D: partition for documents, photos, and videos
• A small EFI System Partition for startup files
• A Windows Recovery partition for repair tools
Windows 11 usually uses the NTFS file system for internal storage. Modern computers also commonly use the GPT partition style with UEFI firmware. GPT supports large drives and more partitions than the older MBR format.
Partitioning can improve organization, but it does not magically make an SSD faster. It also does not protect files from drive failure. If the SSD stops working, every partition on it may become unavailable.
Should You Partition an SSD in Windows 11?
Partitioning makes sense when you have a clear reason. It can help keep personal files separate from Windows, simplify a clean Windows installation, or organize a large drive.
Common reasons include:
• Keeping Windows files separate from personal data
• Creating a dedicated location for games or creative projects
• Making file management easier
• Preparing space for another operating system
• Separating work files from everyday files
There are also limits. A separate partition is not a backup because it still uses the same physical SSD. If you delete the wrong partition, Windows may fail to start. A small SSD may also feel cramped if you give too much space to a second partition.
In my experience testing Windows storage setups, the most common mistake is creating a D: drive that is too large while leaving C: with too little free space. Windows updates, temporary files, applications, and system restore data all need room.
Prepare Before You Partition an SSD
Preparation is the most important part of learning how to partition SSD Windows 11 safely. The actual clicks take only a few minutes, but a poor plan can cause data loss.
Back Up Important Files
Copy important files to an external drive or a trusted cloud service. A backup should include documents, photos, browser data, project files, and anything you cannot replace.
Do not rely only on a restore point. System Restore can help with some software problems, but it is not a complete backup of your personal data.
Check Available Space
Open File Explorer and select This PC. Check how much free space remains on the C: drive.
As a general guide:
• Keep at least 15 to 20 percent of the Windows partition free
• Leave extra room for major Windows updates
• Reserve more space if you install large games or creative software
• Do not shrink a partition until it has enough free space afterward
Check Drive Health
A failing SSD should not be repartitioned. First, check its health with the drive maker’s utility or a trusted system tool. If Windows reports errors, back up your files before doing anything else.
You can also open Windows Terminal as an administrator and run:
chkdsk C: /scan
This checks the file system without immediately scheduling a full repair. If Windows reports serious problems, solve those issues first.
Confirm BitLocker Status
BitLocker or device encryption may be active on your Windows 11 computer. Partitioning often works while encryption is enabled, but it is wise to save your recovery key before changing disk settings.
You can check encryption by opening Settings, selecting Privacy & security, and choosing Device encryption. On some editions, search for Manage BitLocker in the Start menu.
How to Partition SSD Windows 11 With Disk Management
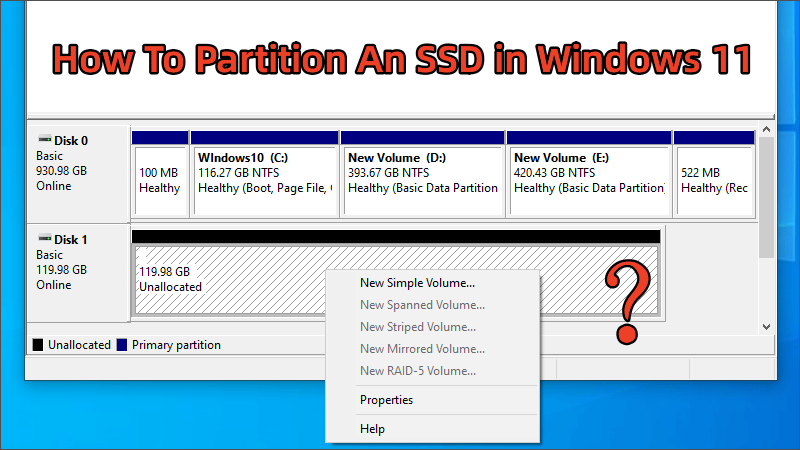
Disk Management is the simplest built-in tool for how to partition SSD Windows 11 computers. It can shrink an existing volume, create unallocated space, and make a new partition.
Step 1: Open Disk Management
Use one of these methods:
-
Right-click the Start button.
-
Select Disk Management.
-
Wait for the list of disks and volumes to load.
You can also press Windows key + X and select Disk Management from the menu.
Look at the lower section of the window. Identify the correct SSD by checking its size and existing drive letters. Do not rely only on the disk number.
Step 2: Select the Existing Volume
Most users shrink the C: partition. Right-click the volume you want to reduce and select Shrink Volume.
Windows will check how much space it can safely release. This number may be lower than the total free space shown in File Explorer because some files cannot move while Windows is running.
Step 3: Enter the Amount to Shrink
The shrink window shows the amount of available shrink space in megabytes. Windows uses 1,024 MB for about 1 GB.
For example:
• 50 GB requires about 51,200 MB
• 100 GB requires about 102,400 MB
Enter the amount you want to remove from the existing partition. Double-check the number before selecting Shrink.
After the process finishes, Disk Management will show a black bar labeled Unallocated. This space is not ready for normal file storage yet.
Step 4: Create a New Simple Volume
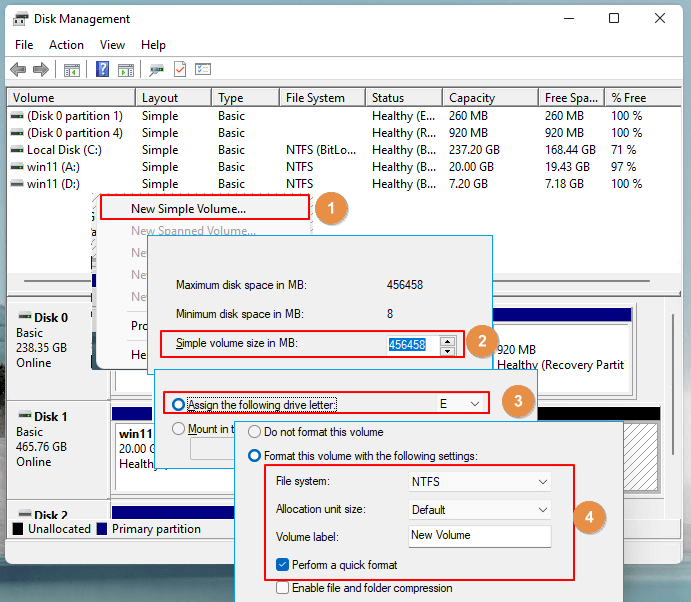
Right-click the unallocated space and select New Simple Volume. The New Simple Volume Wizard will guide you through the setup.
Use these choices:
-
Select Next on the welcome screen.
-
Enter the volume size, or use the full available size.
-
Assign a drive letter.
-
Choose NTFS as the file system.
-
Use Default allocation unit size.
-
Enter a helpful volume label, such as Data or Games.
-
Select Perform a quick format.
-
Review the settings and select Finish.
Windows will create the partition and format it. The new volume should then appear in File Explorer.
Step 5: Confirm the New Partition
Open File Explorer and select This PC. Confirm that the new drive has the correct letter, label, and available capacity.
Create a test folder before moving important files. This simple check confirms that Windows can read and write to the partition.

How to Shrink the Windows 11 C: Drive
Shrinking the C: drive is a common part of how to partition SSD Windows 11 setups. The process is usually safe, but Windows may limit the amount you can shrink.
Follow these steps:
-
Open Disk Management.
-
Right-click the C: drive.
-
Select Shrink Volume.
-
Wait while Windows checks the volume.
-
Enter the amount of space to shrink in megabytes.
-
Select Shrink.
-
Use the new unallocated space to create another volume.
If Windows allows only a small reduction, several causes may be responsible. These can include the page file, hibernation data, restore points, shadow copies, or other files near the end of the volume.
Do not repeatedly force the process with random tools. First, free up space and restart the computer. You can also temporarily disable hibernation with this administrator command:
powercfg /hibernate off
After partitioning, you can turn hibernation back on with:
powercfg /hibernate on
You may also temporarily adjust System Protection or the paging file, but change these settings only if necessary. Restore their previous settings afterward.
How to Format and Name the New Partition
Creating a partition and formatting it are related but different steps. A partition defines the space. Formatting prepares that space for a file system.
For most internal Windows 11 SSDs, choose NTFS. It supports Windows permissions, large files, encryption features, and reliable system integration.
Use a clear label:
• Data for personal files
• Games for game libraries
• Projects for work or study files
• Backup for temporary backup storage
Avoid storing the only copy of important files on a new partition. A partition is like a room inside the same house. It helps with organization, but it does not protect the house from fire, theft, or structural damage.
Quick format is usually enough for a new SSD partition. A full format takes much longer and is generally unnecessary for a healthy modern SSD.

How Much Space Should You Allocate?
The right size depends on how you use the computer. There is no universal number for every Windows 11 SSD.
Here are practical starting points:
• Windows-only partition: at least 150 GB for basic use
• Windows with games and creative apps: 250 GB or more
• General data partition: use the remaining space after leaving room for Windows
• Large game library: allocate space based on the games you actually install
Windows 11 itself requires less space than many real-world installations. Updates, applications, caches, restore points, and personal files can quickly use more than expected.
For a 512 GB SSD, a balanced setup might use around 200 GB for C: and the rest for data. For a 1 TB SSD, you might use 250 to 350 GB for C: and the remaining space for files or games.
These figures are examples, not strict rules. Measure your current usage before deciding how to partition an SSD Windows 11 computer.
Partition an SSD Windows 11 With DiskPart
DiskPart is a powerful command-line tool included with Windows 11. It can manage disks and volumes, but one wrong command can erase an entire drive.
Use DiskPart only when Disk Management does not meet your needs. Back up your files first, and carefully confirm the disk number.
Open Windows Terminal as an administrator and enter:
diskpart
list disk
select disk X
list volume
Replace X with the correct disk number. Do not continue until the disk size matches your SSD.
To shrink a selected volume, the general process is:
select volume Y
shrink desired=51200
This attempts to shrink the selected volume by 51,200 MB, or about 50 GB.
To create a partition in unallocated space, use:
create partition primary
format fs=ntfs quick label=Data
assign letter=D
exit
These commands are examples. The correct volume, size, and drive letter depend on your system.
Never use commands such as clean, delete partition, or format on a disk unless you fully understand their effect. They can remove partitions and data with little warning.

Common Problems When Partitioning an SSD
Windows 11 may not always let you shrink a volume as much as expected. This does not necessarily mean the SSD is damaged.
“Shrink Volume” Shows Very Little Space
This often happens because unmovable system files sit near the end of the partition. Try these steps:
• Empty the Recycle Bin
• Remove temporary files
• Restart Windows
• Run Disk Cleanup or Storage Sense
• Temporarily disable hibernation
• Check System Protection settings
• Try again after Windows performs maintenance
If the limit remains, a trusted partition manager may help, but create a full backup first. Third-party tools work outside the normal Windows environment and can carry greater risk.
The New Partition Has No Drive Letter
Open Disk Management, right-click the partition, and select Change Drive Letter and Paths. Select Add, choose an available letter, and confirm.
Some special partitions intentionally have no drive letter. Do not assign letters to EFI, Microsoft Reserved, or Recovery partitions unless you know exactly why.
The New Partition Is Not Visible in File Explorer
Check Disk Management. The volume may be unformatted, offline, or missing a drive letter.
If it is unallocated, create a new simple volume. If it is formatted but lacks a letter, assign one through Change Drive Letter and Paths.
Windows Will Not Boot After Partitioning
Do not panic, but stop making changes. Disconnect unnecessary external drives and use Windows Startup Repair from the Windows Recovery Environment.
If the problem continues, restore from your backup or seek professional help. This is why you should never resize or delete EFI, recovery, or system partitions casually.
Partitions You Should Not Delete
Windows 11 often creates several small partitions. Their names and sizes can vary, but the common types are:
• EFI System Partition: stores files needed for UEFI startup
• Microsoft Reserved Partition: supports GPT disk management
• Windows Recovery Partition: contains repair and reset tools
• Primary Windows Partition: normally contains C: and the operating system
Do not delete a small partition simply because it has no drive letter. A partition without a letter may still be essential.
When you partition an SSD Windows 11 computer, work with the large data or Windows volume only unless you have advanced recovery knowledge. If you are unsure, take a screenshot of Disk Management and check the partition purpose before changing it.
SSD Partitioning Tips for Better Results
A few habits make how to partition SSD Windows 11 safer and easier.
• Keep a current backup before resizing any volume
• Leave free space on the Windows partition
• Use GPT for modern UEFI-based Windows 11 systems
• Choose NTFS for normal internal Windows storage
• Give each volume a clear label
• Avoid creating many small partitions
• Do not defragment an SSD like a traditional hard drive
• Keep Windows and SSD firmware updated
• Check the drive letter before moving large folders
• Never treat a second partition as a true backup
Windows 11 includes Storage Spaces for some advanced storage setups, but Storage Spaces is not the same as ordinary partitioning. It combines drives into storage pools and is designed for different use cases.
If your goal is better file safety, use an external backup drive or cloud backup. If your goal is dual booting, research the other operating system’s requirements before resizing the Windows partition.
When to Use a Third-Party Partition Tool
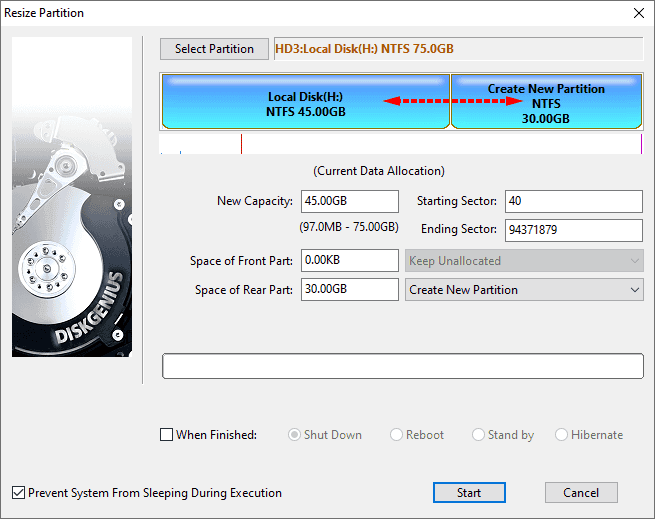
Disk Management is enough for most users. A third-party partition manager may be useful when you need to move partitions, resize a volume beyond Windows’ built-in limit, or adjust a more complex disk layout.
Use one only when:
• You have a verified backup
• The software supports Windows 11
• The SSD has no health warnings
• You understand the changes it will make
• The computer will remain connected to reliable power
Do not install an unknown tool from an untrusted website. Partition software operates at a low level, so a bad download or interrupted operation can cause serious problems.
For simple tasks, built-in Disk Management is often the better choice. Fewer steps mean fewer chances to select the wrong disk.
Frequently Asked Questions About How to Partition SSD Windows 11
Is it safe to partition an SSD in Windows 11?
Yes, it is usually safe when you back up your files and resize the correct volume. Do not delete EFI, recovery, or Microsoft Reserved partitions.
Does partitioning an SSD make Windows 11 faster?
Partitioning does not normally create a major speed boost. It mainly helps organize files and separate Windows data from personal storage.
Can I partition an SSD without losing data?
Windows Disk Management can shrink an existing NTFS volume without normally deleting its files. Even so, back up important data first because power loss, disk errors, or selecting the wrong volume can cause data loss.
How much space should I leave for the Windows 11 C: drive?
Leave enough room for updates, applications, temporary files, and future growth. For many users, 150 GB is a practical minimum, while 250 GB or more is better for games and large programs.
Should I use NTFS or exFAT for a new SSD partition?
Use NTFS for a normal internal Windows 11 partition. Choose exFAT mainly when you need to move the drive between Windows and other operating systems.
Why can’t Windows shrink my C: drive more?
Unmovable files, such as hibernation data, the page file, restore points, or shadow copies, may limit the shrink size. Freeing space, restarting, and temporarily adjusting selected system features may help.
Is a separate SSD partition a backup?
No. All partitions on one SSD depend on the same physical hardware. Use another drive or a reputable cloud service for real backup protection.
Can I merge partitions later?
You can merge partitions in some cases, but Disk Management usually requires adjacent unallocated space. Back up your files before deleting or extending any volume.
Conclusion
Learning how to partition SSD Windows 11 computers is straightforward when you use Disk Management, plan your storage, and protect your data first. Shrink a suitable volume, create unallocated space, format the new volume as NTFS, and avoid changing hidden system partitions.
Keep the C: drive roomy, label new partitions clearly, and remember that a second partition is not a backup. Take a few minutes to review your disk layout before clicking Apply, then use your new storage space with confidence. Share your storage setup or explore more Windows 11 storage guides to keep your PC organized and reliable.

Everett Ashford is a tech reviewer at mytechgrid.com specializing in SSDs, cameras, TVs, earbuds, headphones, and other consumer electronics. He provides honest, data-driven reviews based on hands-on testing and real-world performance analysis. Everett simplifies complex tech details to help readers make smart, confident buying decisions.