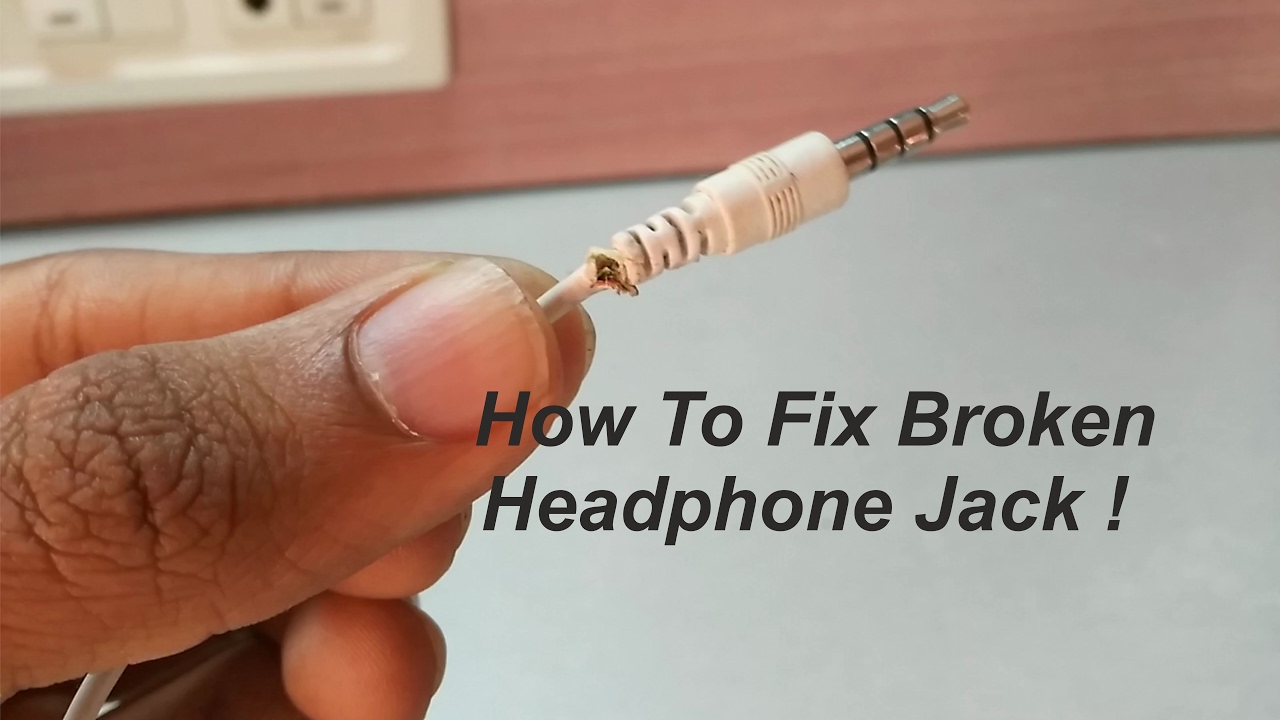
Most broken headphone wires can be fixed at home with simple tools like a soldering iron, heat-shrink tubing, and patience.
I’ve repaired dozens of headphones for friends and clients, so I know what works and what doesn’t. This guide on how to fix broken headphone wire walks you through diagnosis, tools, step-by-step repairs for common breaks, prevention tips, and realistic limits. Read on for clear, tested methods that save money and extend the life of your gear.
Why headphone wires break
Wires fail for simple reasons. Bending near the plug or earbud strains tiny internal wires. Heat, sweat, and dirt wear down insulation over time. Cheap cables use thin wires that fray faster. Pets and accidental tugs also cause sudden breaks.
Knowing why wires break helps you fix them right. If you understand common weak points, you can choose the best repair method and avoid repeat damage. This section sets the scene for practical fixes.
Tools and materials you will need
Choose a few quality tools. They make the repair faster and neater.
- Soldering iron with fine tip and rosin-core solder
- Wire stripper or sharp knife for careful insulation removal
- Heat-shrink tubing in small sizes and a lighter or heat gun
- Electrical tape and isolation tape for temporary fixes
- Replacement 3.5mm stereo plug or earbud housings if you need to replace parts
- Helping hands or small clamp to hold wires steady
- Multimeter to test continuity and find breaks
- Small scissors, tweezers, and a fine needle for delicate work
Having these tools ready before you start makes the repair smooth. If you plan to learn how to fix broken headphone wire often, invest in a decent soldering iron. Cheap irons cause cold joints and failed repairs.

How to diagnose the break
Find where the wire is bad before you cut anything. Diagnosis saves time.
- Listen while you wiggle the cable. A scratchy or intermittent sound usually marks the break.
- Look for visible frays, exposed copper, or flattened spots along the cable.
- Use a multimeter set to continuity. Probe along the cable to locate where continuity drops.
- Test both left and right channels separately to isolate the faulty conductor.
- For earbuds with removable tips, remove the tip and inspect the wire entry point.
If the break is inside the plug or earcup, the fix differs. Accurate diagnosis helps you pick the right how to fix broken headphone wire method.

Quick answers users ask while diagnosing
How do I tell if the break is in the plug or the earbud? Wiggle the cable near the plug and earbud separately. If sound cuts out when you move one area, the break is there.
Can a multimeter save time? Yes. A multimeter shows which conductor is open. It often points to the exact spot to repair.
Step-by-step repairs for common scenarios
Below are practical fixes for the usual failures. Pick the one that matches your problem: break near the plug, break near the earbud, inline remote faults, or fully broken cable.

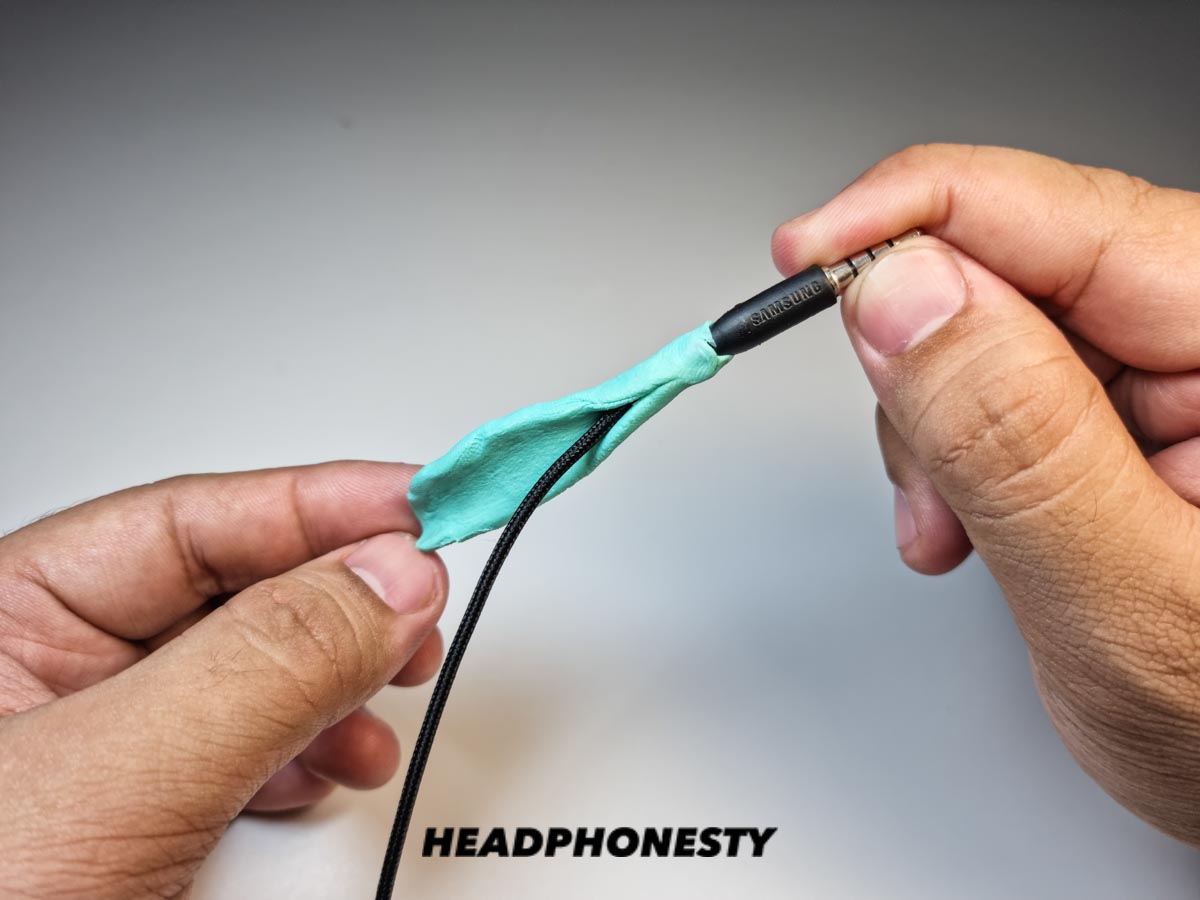
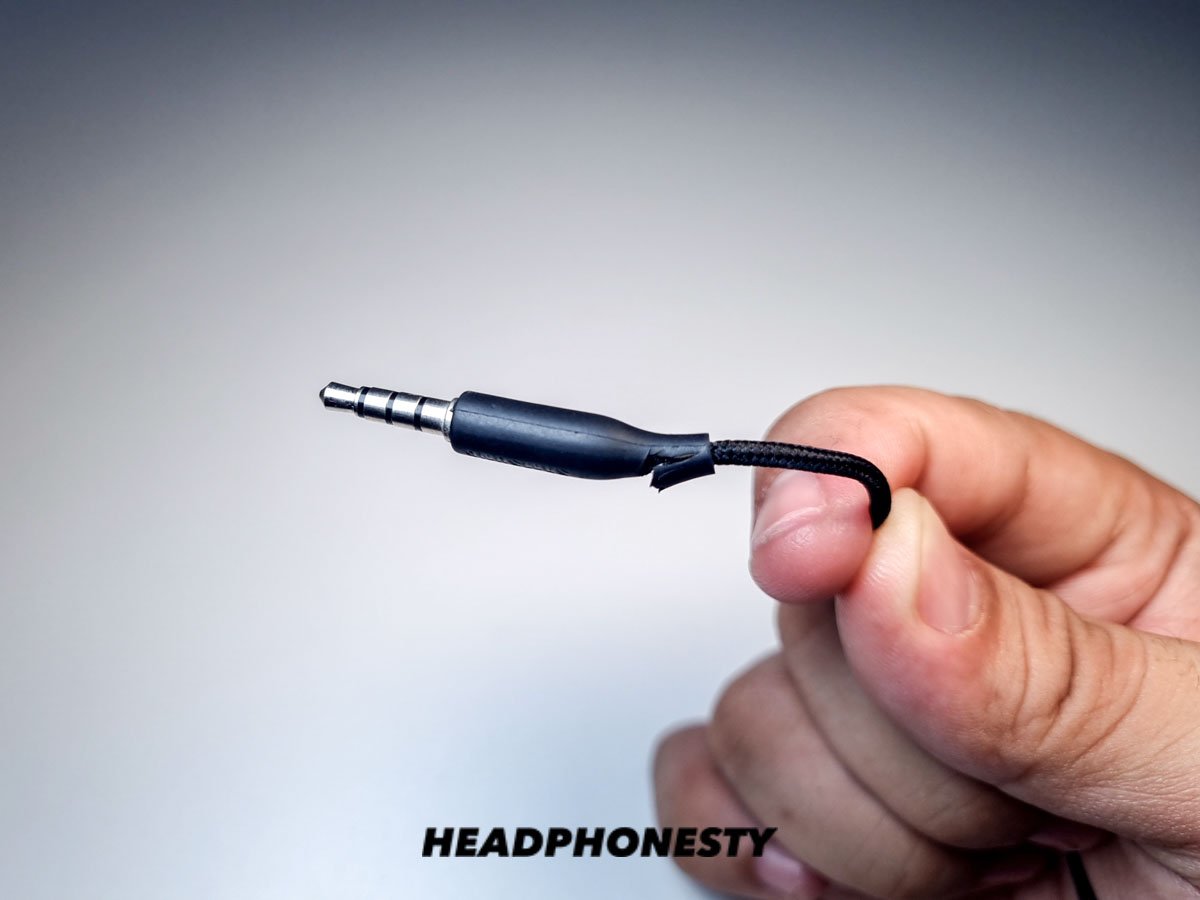
Repair a break near the 3.5mm plug (replace the plug)
This is the most common and reliable fix for how to fix broken headphone wire near the plug.
- Cut the cable a little above the damaged area to reach solid wire.
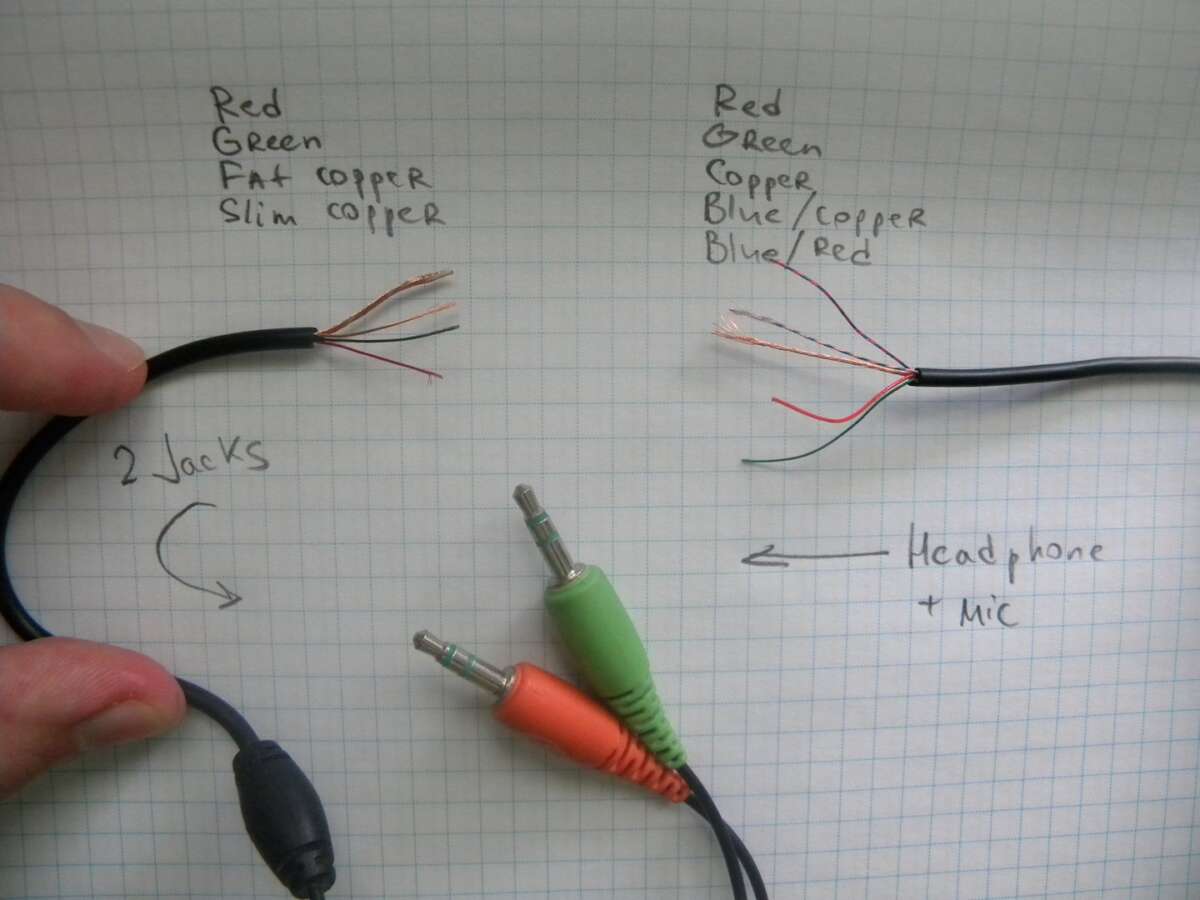
- Strip about 6–8 mm of the outer jacket to expose inner conductors. Keep them tidy.
- Identify wires: common colors are red (right), blue/green (left), and copper/silver (ground). Twist stray strands.
- Slide heat-shrink tubing over the cable before soldering the plug.
- Tin each conductor and the plug terminals lightly with solder.
- Solder left and right to the correct terminals (tip and ring). Solder ground to the sleeve.
- Check continuity with a multimeter. Confirm left and right are not shorted to ground.
- Slide the plug housing over the joint and shrink the tubing if used. Secure with the plug shell and test audio.
This method makes the cable as good as new when done cleanly. If you don’t know which terminal is which, look at diagrams for the plug or follow color guides on the replacement plug packaging.

Repair a break near the earbud or inline remote (splice and solder)
When the break is close to the earcup or remote, open the housing if possible.
- Remove ear tips and tiny screws or pry open the plastic carefully. Keep parts safe.
- Locate the break and cut back to good wire. Strip a short length of insulation.
- Slide heat-shrink tubing over one side before you join wires.
- Match colors and solder each conductor. Work fast to reduce heat stress on components.
- Use a small dab of hot glue inside the housing for strain relief if needed.
- Reassemble and test before final sealing.
If the earbud uses very thin enamel-coated wires, you may need to burn off the enamel with a lighter or sand it gently before soldering. Work slowly to avoid melting plastic.

Quick temporary fixes (when you need sound now)
Temporary fixes give time until you can do a full repair.
- Wrap the damaged area tightly with electrical tape or use a fabric cable sleeve for extra support.
- Tie a loose knot near the damaged spot to reduce stress.
- Use a small binder clip or spring from a pen at the plug to stop bending.
Temporary fixes are not long-term. Treat them as stopgaps while you plan a proper repair.
Using crimp connectors or wire couplers (no solder option)
If you can’t solder, try crimp connectors.
- Cut and strip wires. Insert conductors into small crimp caps and crimp tightly.
- Use separate caps for each conductor and wrap with heat-shrink tubing.
- Test thoroughly to ensure good contact and no shorts.
Crimped joints can be solid when done well. They add bulk, so plan for strain relief.

Testing and final checks
After any repair, test carefully.
- Play audio with a test track that pans left and right to confirm channels.
- Move the cable around through its range to detect intermittent faults.
- Use a multimeter one more time to confirm no shorts between channels.
- Add extra strain relief with heat-shrink tubing or glue to keep the joint safe.
A clean test is the difference between a lasting fix and a return visit.
Prevention: how to avoid a broken headphone wire in the future
Good habits make repairs rare.
- Store cables loosely coiled. Avoid tight knots.
- Use a small case for transport. A hard case prevents crushing.
- Replace cheap cables with braided or reinforced models.
- Avoid wrapping cable around device bodies. This strains the plug.
- Add a spring from a retractable pen near the plug to stop sharp bends.
Prevention is cheaper than repair. Small changes extend cable life significantly.
Benefits and limitations of DIY fixes
Fixing your cable saves money and waste. You gain a working pair fast. Repairs can restore performance and teach skills.
However, DIY limits include micro soldering challenges, possible damage to tiny parts, and time spent learning. High-end headphones with integrated boards or warranty seals may be better handled by the manufacturer. Be honest about your skill level.
Personal experience and common mistakes
I’ve soldered many cables. My early mistakes taught me key lessons. Never rush soldering. Cold joints cause noise later. Always use heat-shrink tubing and test with a multimeter. For thin enamel wires, I learned to sand and flux before soldering. I also learned that cheap replacement plugs can fail quickly, so buy a decent one.
Common mistakes to avoid:
- Using too much heat and melting the insulation.
- Skipping strain relief and letting the joint flex.
- Mixing up left/right connections and creating phase issues.
These tips come from hands-on repairs and help you succeed faster.
Frequently Asked Questions of how to fix broken headphone wire
How long does a typical repair take?
A basic plug replacement can take 15–30 minutes. Repairs inside earbuds take longer, often 30–60 minutes depending on disassembly.
Can I fix wires without soldering?
Yes. You can use crimp connectors or strong tape as a temporary fix. Soldering gives the most reliable and compact result.
Will repairing void my warranty?
Often yes. Opening sealed earbud housings or replacing the plug usually voids manufacturer warranties. Check warranty terms before you start.
Is a soldering iron required for a lasting fix?
It’s not required, but it is strongly recommended. Soldering provides secure electrical and mechanical joints that last longer than tape or glue.
Can I use superglue to hold wire joints?
Use superglue only for mechanical support, not as the electrical join. Superglue can make rework harder and may not offer strain relief.
How do I identify left and right wires?
Common color codes are red for right, blue/green for left, and copper or silver for ground. If colors differ, use a multimeter and known working headphone as a reference.
Are there repair services if I can't fix it myself?
Yes. Many local electronics shops and manufacturer service centers repair headphone wires for a fee. Costs vary by brand and damage.
Conclusion
Fixing a broken headphone wire is often quick and cost-effective when you know how to diagnose the break and choose the right method. With basic tools, careful soldering, and good strain relief, most common breaks can be repaired and made reliable. Try a small repair today—start with simple temporary fixes if needed, then move to a solid soldered repair when you have time and tools. If you found this guide helpful, leave a comment with your repair story or subscribe to learn more DIY audio tips.

Everett Ashford is a tech reviewer at mytechgrid.com specializing in SSDs, cameras, TVs, earbuds, headphones, and other consumer electronics. He provides honest, data-driven reviews based on hands-on testing and real-world performance analysis. Everett simplifies complex tech details to help readers make smart, confident buying decisions.