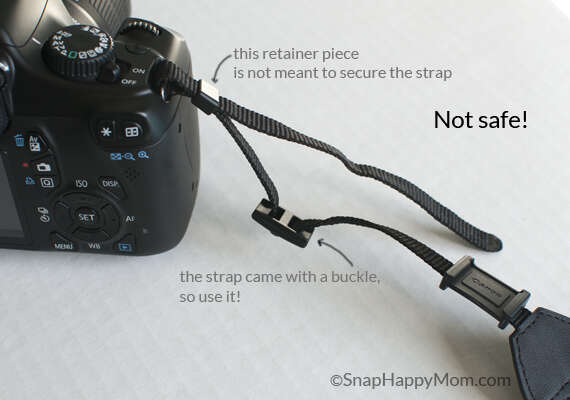
Loop the strap through each lug, thread the buckle or ring, tighten, and test the connection.
I’ve spent years shooting in the field and teaching other photographers how to put on a camera strap safely and quickly. This guide breaks down every step, explains different attachment methods, and shares real-world tips so you can secure your gear with confidence. Read on to master how to put on a camera strap the right way, avoid common mistakes, and choose the best setup for your camera and shooting style.
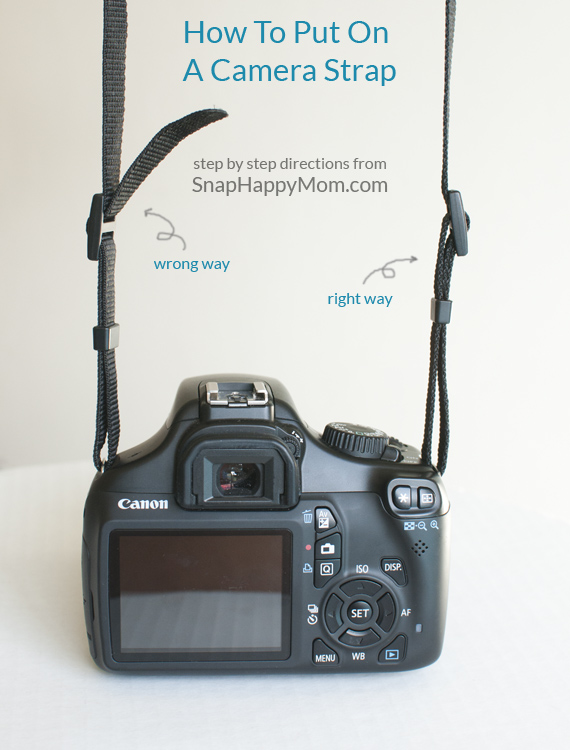
Why a proper strap matters
A good strap keeps your camera safe. It prevents drops and reduces strain on your neck and shoulders. A secure strap also speeds up shooting. When you know how to put on a camera strap correctly, you avoid damage and feel more confident with your camera in hand.
Benefits of a well-fitted strap
- Protects your gear from accidental drops.
- Improves comfort for long shoots.
- Allows fast access to the camera for quick shots.
Risks of a poor setup
- Camera can slip or fall.
- Buckles or rings may wear out faster.
- Uncomfortable fit can cause pain or distraction.
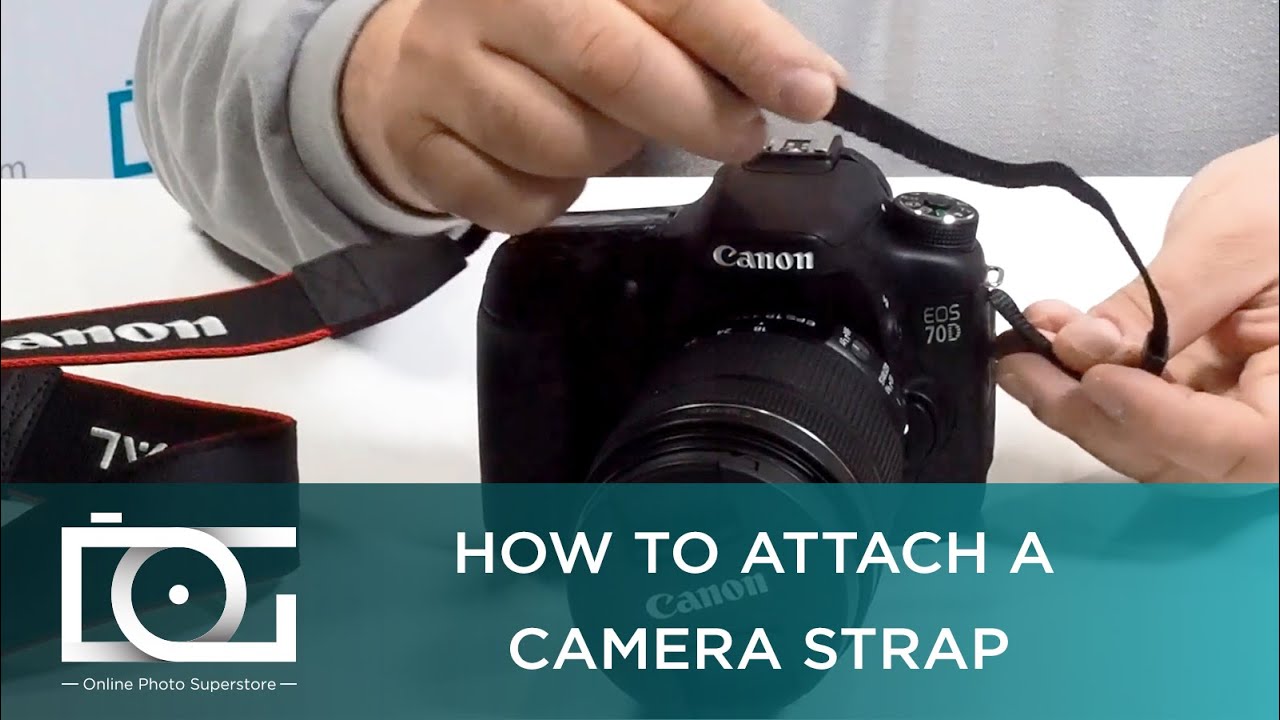
Types of straps and when to use them
Choosing the right strap affects how you put it on. Different straps use different attachments. Know the common types before you attach anything.
Common strap types
- Neck straps: Wide, simple, good for casual shooting.
- Wrist straps: Short, light, for small cameras or active work.
- Sling straps: Cross-body, fast to rotate from hanging to shooting.
- Hand straps: Secure grip for video or one-handed use.
- Camera-plate straps and quick-release systems: Attach to tripod plates for strong, low-profile mounting.
Material and hardware
- Nylon and polyester are light and durable.
- Leather is stylish but heavier.
- Metal rings, split rings, and quick links add security.
When to choose each type
- Travel and street: Sling or neck strap.
- Sports and action: Wrist or shoulder harness.
- Studio or long sessions: Padded neck strap or harness.
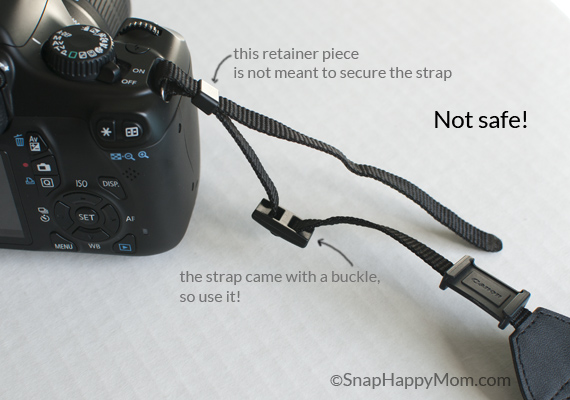
Tools and prep before you start
Gather a few simple items. Clean, inspect, and plan where the strap will sit on the camera.
What you need
- The strap you plan to use.
- Any included hardware like split rings, buckles, or anchor links.
- A small screwdriver if your camera has tight lugs or screws.
- A soft cloth to wipe attachment areas.
Pre-attachment checklist
- Clean the strap ends and camera lugs.
- Inspect for frays or weak stitching.
- Confirm the strap’s load rating suits your camera and lens.
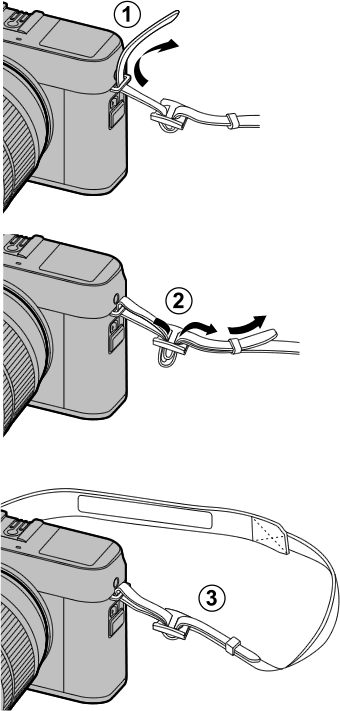
Step-by-step: how to put on a camera strap
Follow these clear steps to attach a strap safely. I include tips I learned after dropping a camera once—so these are practical.
Step 1: Start with a clean workspace
- Place the camera on a soft surface to avoid scratches.
- Remove lens caps if you need to test balance with the lens attached.
Step 2: Identify the attachment points
- Most cameras have metal lugs or brackets on each side.
- Some mirrorless models use strap eyelets or dedicated anchor points.
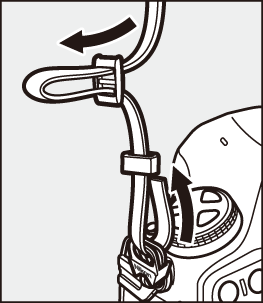
Step 3: Thread the strap or ring
- Feed the strap’s thin end through the camera lug from the bottom or inside.
- Loop it through a split ring if your strap uses one, then back through the strap buckle.
- For anchor systems, attach the anchor to the strap, then click the anchor into the camera eyelet.
Step 4: Secure the buckle or slider
- Pull the strap tight and thread it through the locking buckle.
- Ensure the strap doubles back where required, so stitching faces stress, not the buckle.
Step 5: Test the connection
- Hold the camera by the strap and give it a firm tug.
- Rotate the camera to verify the connection stays put.
Step 6: Adjust length and balance
- Shorten the strap to bring the camera to your chest, or lengthen it for a relaxed hang.
- Check balance with the lens you will use most.
Quick tips
- Always thread the strap so the stitched end faces the camera for stronger hold.
- Use silicone strap keepers to stop excess webbing from flapping.

Common attachment methods explained
Different methods change how to put on a camera strap. Know which matches your gear.
Split ring method
- Uses a small metal ring that threads through the camera lug.
- The strap loops onto the ring. This is secure and common.
Anchor link systems
- Use small anchors with rated strength that click into eyelets.
- They are fast and often rated to the strap’s load limit.
Quick-release plate attachment
- Mounts to the tripod plate screw.
- Low profile and secure, but check compatibility with your tripod.
Wrist strap loop
- Threaded through a tiny eyelet or strap bar.
- Simple and best for light cameras.
When to use each
- Use split rings for standard DSLR straps.
- Use anchor links for quick on/off swaps.
- Use plate-mounted straps when you want a streamlined profile.
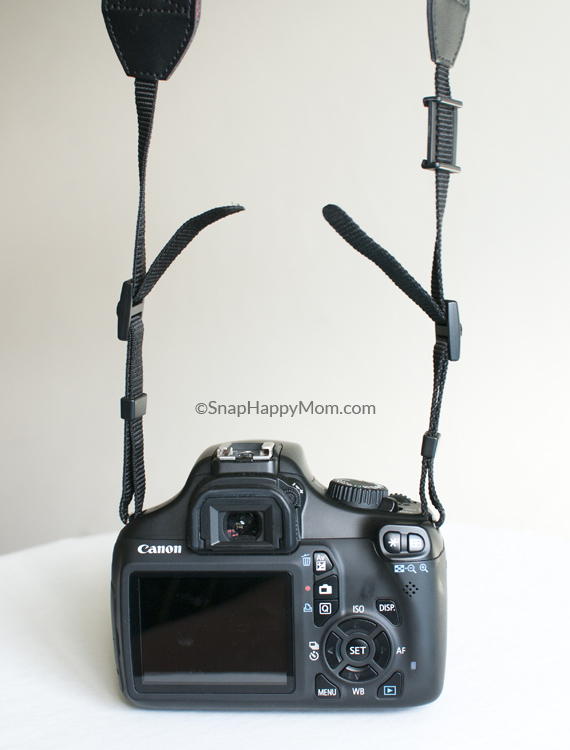
Adjusting length and fit for comfort and shooting styles
A correctly adjusted strap improves posture and reaction time. It also keeps the camera stable.
How to find the right length
- For chest carry, set the strap so the camera rests at chest height when hanging.
- For shooting, shorten it so the camera rises quickly to your eye.
- For cross-body sling use, adjust to allow rotation from hanging to shooting without removing the strap.
Tips for balance
- Heavier lenses need a shorter strap for stability.
- Use a shoulder pad for long walks or heavy loads.
- Keep the strap centered to avoid twisting.
Ergonomic reminders
- If you feel neck strain, use a padded strap or a harness.
- Try different lengths before long shoots to avoid fatigue.
Safety checks and maintenance
Regular checks prevent failures. Follow a simple routine after each shoot.
Daily checks
- Inspect for frays at stitch points.
- Test buckles and rings for movement or cracks.
- Ensure anchor links click fully into place.
Monthly care
- Clean leather with proper conditioner.
- Rinse and air-dry nylon straps when dirty.
- Replace worn hardware immediately.
Weight and rating
- Check the strap’s load rating versus your camera plus lens weight.
- If you cannot find a rating, prefer a heavier-duty strap for large lenses.
Manufacturer guidance
- Follow your camera and strap maker’s instructions.
- Use rated accessories to avoid liability and damage.

Troubleshooting common problems
Simple fixes solve most issues you’ll face when learning how to put on a camera strap.
Slipping strap
- Tighten the sliding buckle and double the webbing if needed.
- Check for worn fabric that no longer grips.
Twisting strap
- Route the strap correctly through the eyelets to avoid looped twists.
- Use a swivel split ring to allow free rotation.
Noisy metal parts
- Add rubber washers or wrap thin tape around noisy rings.
- Replace corroded metal hardware.
Loose quick release
- Re-seat the anchor and test repeatedly.
- Replace anchors that show play or wear.

Personal tips and lessons from the field
I once shot a wedding and a strap failed on a cheap anchor. I now use rated anchor links and check them before every event. These quick lessons can save you time and gear.
What I do every shoot
- Attach the strap first and test with a firm tug.
- Keep a backup wrist strap in my bag for fast swaps.
- Match strap type to the job: sling for street, harness for long hikes.
Common mistakes I’ve seen
- Skipping the tug test.
- Relying on decorative straps without rated hardware.
- Forgetting to shorten the strap for quick shots.
A simple habit to adopt
- Make checking strap connections part of your gear routine. It takes seconds and prevents major loss.
Quick questions photographers ask
Q: Can I attach a strap to a tripod plate?
- Yes. Many photographers use a strap attached to a tripod plate. Ensure the plate is secure and rated to carry your camera weight.
Q: Is leather better than nylon for straps?
- Leather looks good and is durable but heavier. Nylon is lighter and dries faster if wet.
Q: How tight should the strap buckle be?
- Tighten so the strap won’t slip, but leave a little slack for quick length changes. Always do the tug test after tightening.
Frequently Asked Questions of how to put on a camera strap
How do I attach a strap to my camera lugs safely?
Thread the thin end of the strap through the camera lug, loop it through any split ring or buckle, then back through the locking slider. Pull tight and perform a firm tug test to confirm.
Can I use a wrist strap on a heavy DSLR?
A wrist strap is not recommended for a heavy DSLR with a long lens. It may not support the weight or offer enough stability. Use a neck strap or harness for heavy setups.
What are anchor links and are they safe?
Anchor links are small connectors that click into dedicated eyelets. When you use rated anchor links and follow manufacturer instructions, they are safe and convenient for quick swaps.
How often should I replace my camera strap?
Replace a strap if you see fraying, cracked leather, or loose stitching. For heavy use, inspect monthly and replace based on wear or any sign of failure.
Is it OK to attach a strap to a tripod quick-release plate?
Yes, attaching to a tripod quick-release plate is common. Make sure the plate is tightened properly and compatible with your strap to avoid accidental detachment.
Conclusion
Knowing how to put on a camera strap is a small skill that prevents big problems. Secure the strap properly, choose the right type, and test the connection every time. Start by practicing the steps outlined here until they become routine. Try adjusting different strap lengths for comfort and safety, and treat hardware checks like part of your prep. If this guide helped, leave a comment, subscribe for more gear tips, or try a new strap today and notice the difference.

Everett Ashford is a tech reviewer at mytechgrid.com specializing in SSDs, cameras, TVs, earbuds, headphones, and other consumer electronics. He provides honest, data-driven reviews based on hands-on testing and real-world performance analysis. Everett simplifies complex tech details to help readers make smart, confident buying decisions.