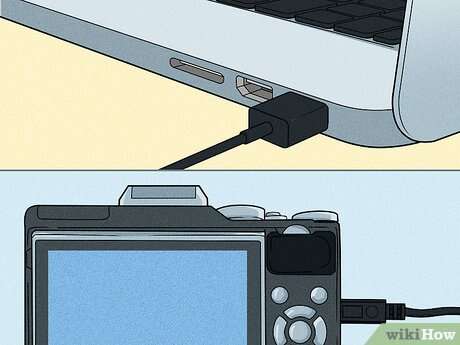
Connect your camera or memory card, then import photos via USB, card reader, or Wi‑Fi.
I’ve helped photographers and hobbyists for years move images quickly and safely. This guide explains how to transfer photos from camera to computer with clear steps, real-world tips, and troubleshooting. You’ll learn multiple methods, choices for organization, and simple fixes for common transfer problems so your photos arrive ready to edit and share.
Why transfer photos from camera to computer
Moving photos from a camera to a computer keeps files safe, frees card space, and lets you edit with power and precision. Knowing how to transfer photos from camera to computer helps you work faster and avoid data loss.
Benefits include easy backups, batch editing, and smoother sharing. This section explains the reasons and what to expect when you move your images.
Preparation: settings, backup, and file types
Set your camera to the right file format. RAW keeps the most data. JPEG is smaller and easier to handle.
Check card capacity and battery level before you start. Low battery can interrupt a transfer and corrupt files.
Always make a backup. Use a second folder, external drive, or cloud service right after transfer. This step protects your work from accidents.

Method 1: Transfer photos via USB cable
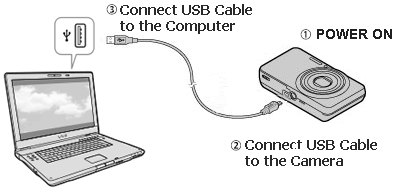
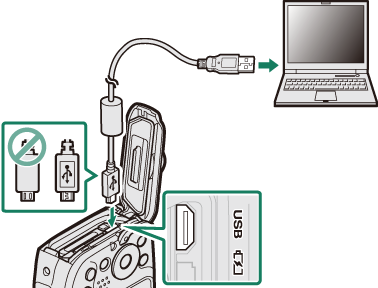
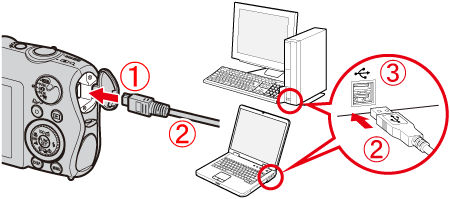
Most cameras include a USB cable. Connect the camera to a computer with that cable. Turn on the camera, set it to playback or transfer mode if needed, and the computer will usually detect it as a drive.
On Windows, use File Explorer or the Photos app to import. On macOS, use Image Capture or Photos. This method is simple and works for nearly every camera.

Method 2: Use an SD card or card reader
Remove the SD card from your camera. Insert it into a computer slot or a USB card reader. The card appears like an external drive.
Drag and drop folders or use import tools. Card readers are faster and reduce battery drain. I use a USB 3.0 reader for large RAW batches to cut transfer time.
Method 3: Transfer photos wirelessly (Wi‑Fi or Bluetooth)
Many modern cameras offer Wi‑Fi or Bluetooth transfer. Install the maker’s app on your phone or computer, pair the devices, and move images without cables.
Wireless is great for quick previews or sharing small batches. For many large RAW files, Wi‑Fi is slower than a card reader, so use it for convenience rather than bulk moves.

Method 4: Tethering and capture software
Tethering sends photos directly to your computer while shooting. Use capture apps made for your camera brand or universal tools for live transfer and instant review.
This method works well for studio shoots. It needs a fast cable and stable software. I tether when I want instant proofing on a large monitor.

How to import and organize files efficiently
Plan a folder structure before transfer. Use a simple pattern like Year/Month/Event or Year/Event/Camera. Consistent naming helps you find photos fast.
Use import tools to rename files, add metadata, and create backups during the transfer. Many apps can automatically apply keywords, copyright info, and basic adjustments on import.
Troubleshooting common transfer problems
If the computer doesn’t see the camera, try a different USB port, a new cable, or a card reader. Reboot both devices if needed.
If files are missing, check hidden folders and the camera’s file system. Corrupted photos may need recovery tools. Prevent problems by always ejecting the device safely.

How long will a transfer take?
Transfer time depends on file size, connection speed, and hardware. A few JPEGs move in seconds. Hundreds of RAW files can take minutes to hours.
Can I transfer RAW files wirelessly?
You can, but it is slower. Wi‑Fi works for small RAW batches or previews. For bulk RAW transfers, use a card reader or USB 3.0 cable.
What if my computer won’t mount the card?
Try a different reader or computer. If that fails, card repair tools may help. Avoid reformatting a card before you recover needed files.
Security, metadata, and privacy
Keep backups in at least two places. Consider encrypting sensitive folders or using a password-protected disk image.
Check metadata on import. Cameras embed EXIF data like date, time, and GPS. Edit or strip metadata if you plan to share images publicly to protect privacy.
Personal experience, tips, and mistakes to avoid
I once lost a day’s shoot by not backing up right away. Now I copy files to two drives on transfer. That habit saved me more than once.
Tips I use daily:
- Always carry a spare battery and a USB 3.0 card reader.
- Import raw files first, then create smaller JPEGs for fast sharing.
- Use clear folder names to avoid duplicate imports.
Common mistakes to avoid: - Don’t reformat the card without confirming backups.
- Don’t rely solely on cloud sync for immediate backups if you have slow internet.
Software recommendations and workflow examples
Pick a tool that fits your needs. Use simple apps for quick imports and robust editors for cataloging and edits. Examples of workflows:
- Beginner: Copy card to Pictures folder, use Photos app to sort and edit.
- Enthusiast: Import with Lightroom, add keywords, backup to external drive.
- Pro: Tether into Capture One, cull on a second monitor, archive to RAID storage.
Choose software that supports your camera and file types to save time and reduce friction.
Cost, limitations, and when to choose each method
Card readers and cables are cheap and fast. Wi‑Fi is convenient but slower. Tethering needs cables and stable apps.
For high-volume work, invest in fast readers and large external drives. For casual shooters, mobile apps and cloud sync can be enough. Balance cost and speed to match your needs.
Frequently Asked Questions of how to transfer photos from camera to computer
How do I transfer photos from camera to computer using USB?
Connect your camera to the computer with the supplied USB cable. Turn the camera on and use File Explorer (Windows) or Image Capture (Mac) to import files.
Can I transfer photos from camera to computer without a cable?
Yes. Use Wi‑Fi or Bluetooth if your camera supports it, or remove the memory card and use a reader. Wireless transfer works best for small batches.
What is the fastest way to transfer photos from camera to computer?
A USB 3.0 card reader is usually the fastest option for most SD cards. It avoids camera battery drain and handles large RAW files quickly.
Do I need special software to transfer photos from camera to computer?
No, basic file transfer works with built-in tools on Windows and macOS. Specialized software adds import options, metadata, and cataloging if you need them.
How can I avoid file corruption during transfer?
Use a reliable cable and port, keep the camera powered, and eject the device safely before removal. Back up files immediately after transfer to reduce risk.
Conclusion
You now have clear, practical ways to transfer photos from camera to computer. Use the method that fits your gear and workflow, and make backups a habit to protect your work. Try one quick transfer today, set a simple folder plan, and you’ll save time and stress on future shoots. Share your experiences or questions below and consider subscribing for more photo workflow tips.

Everett Ashford is a tech reviewer at mytechgrid.com specializing in SSDs, cameras, TVs, earbuds, headphones, and other consumer electronics. He provides honest, data-driven reviews based on hands-on testing and real-world performance analysis. Everett simplifies complex tech details to help readers make smart, confident buying decisions.