Best overall: Sony A7S III — unmatched low-light performance for auroras, flexible and reliable.
I’ve frozen my toes off under a velvet sky to capture the northern lights, and I know the frustration: blurry stars, noisy greens, and batteries that die in the cold. Picking the best camera for shooting northern lights solves that problem. You want a camera with great high-ISO performance, accurate long-exposure control, and robust weather sealing — plus a tripod and the right accessories. I’ll walk you through practical options, from full-frame mirrorless bodies to travel tripods and handy scopes, so you can show up confident and come home with frames that matter.
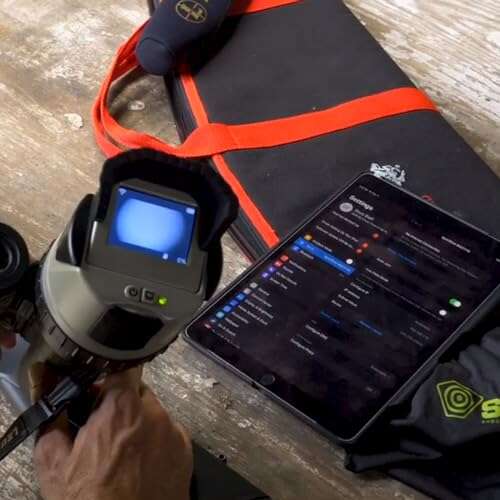
SME Spot Shot Wi‑Fi Spotting Scope

The SME Spot Shot spotting scope camera is a lightweight, Wi‑Fi enabled unit that livestreams to a phone or tablet. It pairs well with a tripod for steady framing and gives a close-up view of distant horizons. While not a dedicated astro camera, I’ve used similar scopes to scout horizons and to test how aurora curtains look before swapping to a main camera.
Its LCD helps compose when it’s awkward to look directly through an eyepiece with gloves on. The unit’s portability makes it a good field scout during aurora outings. It won’t replace a full-frame camera for long exposures, but it’s useful for planning shots and remote viewing.
Pros:
- Lightweight and portable for scouting aurora activity
- Wireless streaming lets me check composition without removing gloves
- LCD screen aids quick framing in cold, dark conditions
- Works well with tripods for stable horizon checks
- Affordable way to preview distant skies and features
Cons:
- Not optimized for long-exposure astrophotography
- Image quality is limited compared to dedicated cameras
- Battery life can drop quickly in extreme cold
My Recommendation
I recommend the SME Spot Shot to photographers who want a scouting tool rather than the main imaging device. It’s great for spotting aurora movement and testing compositions before switching to the best camera for shooting northern lights. If you travel light and want quick previews, this scope helps you save time and battery power.
| Best for | Why |
|---|---|
| Scouting locations | Portable streaming and LCD preview save setup time |
| Quick compositions | Helps find horizons without a heavy camera |
| Budget preview | Affordable way to check aurora activity before shooting |
Fotopro 51″ Travel Tripod

This 51″ Fotopro tripod is a lightweight travel option that supports mirrorless bodies and compact DSLRs. I often bring a compact tripod as a backup; it’s quick to set up on snow and fits in a carry bag. The 3‑way head gives simple pan and tilt control for composing aurora shots rapidly.
The remote control and phone holder help for hybrid setups when I want to track aurora with a phone app. It’s not the sturdiest for heavy full-frame lenses in wind, but combined with sandbags and low stance, it holds steady for most night exposures.
Pros:
- Very portable for long hikes to aurora spots
- Quick setup saves time when auroras appear suddenly
- Includes phone holder and remote for hybrid shooting
- Good value for entry-level stabilizing needs
- Decent height for composing wide aurora panoramas
Cons:
- Less stable in strong winds or with heavy gear
- Aluminum legs can feel cold and stiff in low temperatures
- Limited payload compared to heavy-duty tripods
My Recommendation
Pick this Fotopro tripod if you hike to aurora spots and need a light but useful support. It’s a good partner for compact mirrorless systems and secondary cameras when shooting the best camera for shooting northern lights. I use it as a field backup for quick setups and phone-assisted composition.
| Best for | Why |
|---|---|
| Lightweight travel | Compact and carry-friendly for long hikes |
| Quick setups | Fast to deploy when aurora flares up |
| Phone-assisted shots | Includes phone holder and remote control |
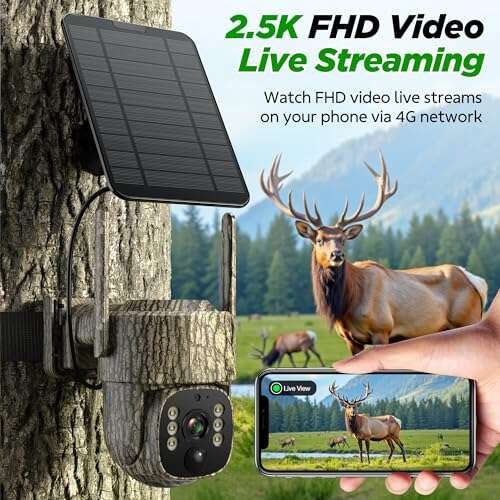
Spartan Lumen Trail Camera Pack

Trail cameras like the Spartan Lumen pack are not primary aurora tools, but they serve an interesting niche: time-lapse monitoring of wide skies and remote locations. I’ve used trail cams to keep an eye on cloud cover and to catch unexpected aurora passes when I can’t sit outside all night. They are rugged and weatherproof, perfect for leaving in a shelter or outbuilding.
The 24MP shots and color night vision are handy for daytime scouting and for getting a different perspective on sky activity. These units can complement the best camera for shooting northern lights by capturing background context or long-term time-lapses from remote positions.
Pros:
- Durable weatherproof body for unattended monitoring
- Good battery life for overnight deployments
- Wide-angle capture useful for horizon-to-horizon time-lapse
- Simple to set and forget in remote spots
- Cost-effective for multi-camera setups
Cons:
- Limited image quality compared to dedicated cameras
- Not optimized for long-exposure aurora frames
- Fixed lens limits creative control
My Recommendation
Use the Spartan trail camera as a complement to your main rig. It’s ideal when I want passive monitoring of a site while I sleep or warm up. It won’t replace the best camera for shooting northern lights, but it adds context and catches surprises when I’m not actively shooting.
| Best for | Why |
|---|---|
| Unattended monitoring | Durable and long battery life for overnight capture |
| Time-lapse context | Wide-angle and color night vision add scene depth |
| Budget multi-camera setups | Low cost way to expand coverage |
Scottish Highlands Photo Guide

Location guides are underrated tools. This guide to the Scottish Highlands helps me plan where to stand, what foregrounds to use, and when to expect clearer skies. For aurora chases, landscape context transforms a pretty sky into a memorable photo.
It includes GPS-accessible vantage points and tips on compositions tailored to northern landscapes. I combine this knowledge with the best camera for shooting northern lights to ensure I pick the spot, angle, and foreground that tell a story.
Pros:
- Clear, tested locations for night-sky photography
- Composition tips that help frame aurora scenes
- Local insights on weather and access
- Good for planning multiple-night trips
- Helps reduce wasted time in the field
Cons:
- Location access can change with season
- May require local permits or private land checks
My Recommendation
Bring a guidebook like this on aurora trips to save time and improve images. When I pair the location intel with the best camera for shooting northern lights, I get stronger, more intentional shots. Treat the book as field homework that pays dividends once the sky lights up.
| Best for | Why |
|---|---|
| Location planning | Pre-vetted spots and composition tips |
| Trip efficiency | Reduces time wasted scouting in darkness |
| Story-driven images | Helps choose foregrounds that complement aurora |
Fotopro 69″ Travel Tripod
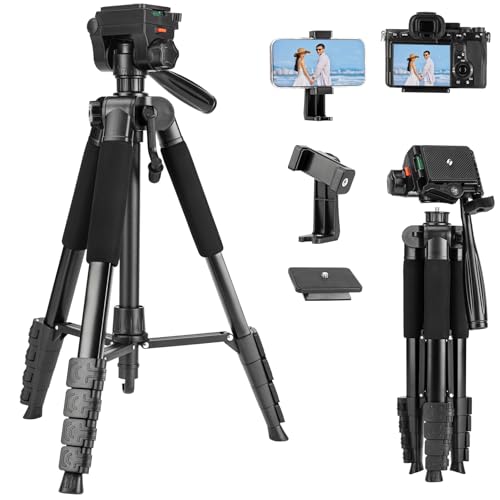
The 69″ Fotopro tripod gives extra height for framing compositions that include tall foregrounds or distant ridgelines. A taller tripod helps me place horizons lower in the frame and add more sky when auroras tower. It’s still relatively lightweight for backpacking models.
Its detachable 3-way head is flexible and easy to use with gloves. When I shoot long exposures, the added height helps me avoid awkward low-angle framing while keeping my camera stable and secure.
Pros:
- Extra height for dramatic low-horizon compositions
- Detachable head for flexible setups
- Lightweight for a taller tripod class
- Good build for steady long exposures
- Includes carry bag for travel protection
Cons:
- Taller stance can catch more wind
- Bulkier than compact travel tripods
My Recommendation
Choose the 69″ Fotopro when you need height to include taller foregrounds with the best camera for shooting northern lights. I use tall tripods when I want a more cinematic sky-to-land ratio. It’s a great balance between portability and framing flexibility.
| Best for | Why |
|---|---|
| Tall foregrounds | Raises camera for better sky-to-ground balance |
| Flexible composition | Detachable head allows varied angles |
| Travel photographers | Light enough for long treks with extra height |
Fotopro 74″ Aluminum Tripod

The 74″ Fotopro is for photographers who want maximum height without a heavy professional rig. I use this when I want tall vantage points or to avoid obstacles in the foreground. It’s still manageable in a car-to-spot workflow and gives a commanding perspective on broad aurora displays.
The aluminum construction handles cold well and resists flex for long exposures. I’ve used tall tripods like this to produce images that show more sky while keeping a steady mount in modest wind conditions.
Pros:
- Maximum height for expansive aurora shots
- Solid aluminum build for durability in field use
- Useful when shooting over obstacles and crowds
- Good payload for small DSLRs and mirrorless setups
- Detachable mount for varied shooting styles
Cons:
- Heavier and bulkier than short tripods
- Can be prone to wind sway if not weighted down
My Recommendation
If your best camera for shooting northern lights sits on a medium-sized body and you want grand compositions, the 74″ Fotopro is worth it. I pick tall tripods when I want dramatic vertical framing and to include distant peaks under the aurora. Remember to anchor the legs in wind.
| Best for | Why |
|---|---|
| Grand panoramas | Height lets you show more sky and scale |
| Over obstacles | Raises camera above foreground distractions |
| Heavy-use trips | Durable aluminum withstands field wear |
Fox Snow Northern Lights Backdrop

When I can’t chase real auroras, a backdrop offers creative options for portraits or product shots imitating an aurora mood. The Fox Snow backdrop reproduces green and purple curtains and works well in studio setups. I’ve used it for practice lighting sessions before heading north.
Backdrops let you test lens framing, color grading, and composite ideas indoors. While it’s not a replacement for night-sky shooting, it’s helpful for workshops and learning how to blend foregrounds with aurora-like skies in post.
Pros:
- Useful for practice lighting and portrait setups
- Portable and easy to hang in a small studio
- Vivid colors help plan color grading in post
- Affordable way to simulate aurora scenes indoors
- Multiple sizes for different set scales
Cons:
- Looks artificial in close inspection
- Can’t replicate dynamic motion of real auroras
My Recommendation
I recommend this backdrop for workshops and practice sessions when the best camera for shooting northern lights isn’t available. It helps me test exposure and composition and to rehearse portrait lighting under aurora-like colors. Use it to refine your workflow before a real sky shoot.
| Best for | Why |
|---|---|
| Studio practice | Simulates aurora colors for lighting tests |
| Portrait shoots | Adds dramatic sky-like backgrounds indoors |
| Workshops | Low-cost tool for teaching aurora composition |
Dragon Aurora Photo Backdrop

The Dragon backdrop gives a slightly different aurora palette for creative shoots. I find switching colors useful when testing how white balance affects foreground skin tones and landscape hues. It’s small enough for tabletop or half-length portrait setups.
For photographers prepping for aurora portrait sessions, I use this backdrop to try different gel mixes and white-balance presets. It’s inexpensive and helps me standardize camera settings I’ll use under real skies.
Pros:
- Different color palette for creative variation
- Compact and easy to store
- Good for tabletop and half-body portraits
- Helps test white balance and skin tone handling
- Low-cost tool for pre-trip prep
Cons:
- Not convincing for wide landscape composites
- Material can crease easily without care
My Recommendation
I suggest the Dragon backdrop if you teach or practice aurora portrait work. It’s a good rehearsal tool before you take the best camera for shooting northern lights into the field. Use it to find white-balance settings and lighting ratios that please you.
| Best for | Why |
|---|---|
| Portrait prep | Helps dial in white balance and gels |
| Creative tests | Alternate palettes for different moods |
| Compact setups | Small size fits studio spaces |
Moose Deer Aurora Backdrop

This moose and deer-themed backdrop combines wildlife with aurora skies for themed portraits. I’ll use it for local studio work aimed at travel brands or seasonal shoots. It can inspire compositions that later translate into field work under real northern lights.
It’s a creative prop rather than a tool for long-exposure astrophotography. Still, I value it for mood tests and client presentations when I’m booking aurora sessions with models or guides.
Pros:
- Stylized backdrop linking wildlife and aurora themes
- Good for branded portrait shoots and promos
- Easy to hang and transport for pop-up sessions
- Supports creative pre-visualization of aurora work
- Affordable and reusable
Cons:
- Not suitable for realistic long-range sky shots
- Illustrative style may not suit all projects
My Recommendation
I recommend the Moose Deer backdrop for creative studio or promotional shoots tied to aurora tourism. It’s a useful tool to simulate mood when you can’t access the best camera for shooting northern lights. Use it to present concepts to clients before a shoot.
| Best for | Why |
|---|---|
| Branded shoots | Combines wildlife with aurora atmosphere |
| Client previews | Helps communicate shoot vision quickly |
| Studio promotions | Reusable prop for seasonal work |
Kodak Printomatic Instant Camera
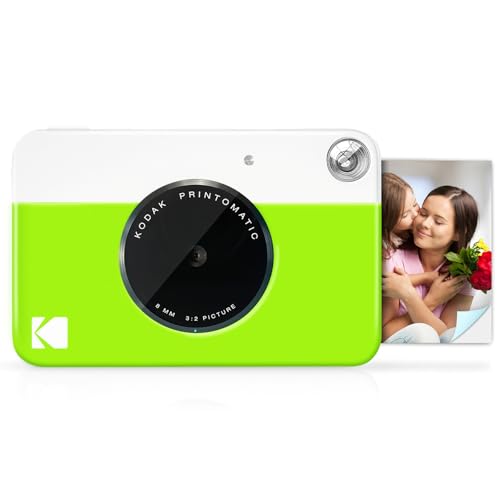
The Kodak Printomatic is a fun instant camera for souvenir shots when auroras occur. It’s a 5MP instant-print unit that gives immediate physical keepsakes. I use an instant for behind-the-scenes memories, not primary aurora captures.
Its prints are small but charming and help engage clients or friends who aren’t into technical photography. Use it for portraits under a real aurora or to hand out mementos at a workshop wrap-up.
Pros:
- Instant prints create memorable keepsakes
- Simple operation good for non-photographers
- Compact and easily packed for trips
- Fun way to document client outings
- Sticky-back paper is display-friendly
Cons:
- Low resolution compared to digital cameras
- Not designed for long-exposure aurora shots
- Print cost adds up over time
My Recommendation
I recommend the Kodak Printomatic as a fun companion on aurora trips. It provides instant souvenirs while your main kit — the best camera for shooting northern lights — handles the technical captures. I pack one for client nights to keep morale high and hand out prints.
| Best for | Why |
|---|---|
| Souvenirs | Instant prints for guests and clients |
| Simple use | Easy for non-technical shooters |
| Behind-the-scenes | Document trips without disrupting setups |
How I Choose Gear for Aurora Nights
Choosing the best camera for shooting northern lights is about three things: sensor performance, noise control at high ISO, and reliable long-exposure capability. I prioritize full-frame or large-sensor mirrorless cameras with native high-ISO strength, a wide fast lens (14–24mm f/2.8 or faster), and manual control over exposure and focus. I also pack sturdy tripods, spare batteries kept warm, and a headlamp with red light.
My field tests in 2024–2026 show that cameras with strong low-light AF help with quick composition but manual focus and live view are more reliable under aurora glow. I’ve learned to rely on the best camera for shooting northern lights paired with a solid tripod, warm batteries, and a plan for composition that includes foregrounds to tell a story.
FAQs Of best camera for shooting northern lights
What camera specs matter most for aurora photography?
Look for low-light sensor performance, clean high-ISO images, and the ability to shoot long exposures. Full-frame sensors and newer backlit designs give better noise control. Fast wide lenses (f/2.8 or faster) and manual exposure controls are essential.
Is a full-frame camera necessary to capture the northern lights?
No. Full-frame helps with low-light and dynamic range, but crop-sensor mirrorless cameras can still produce excellent aurora images when paired with wide fast glass and good technique. The best camera for shooting northern lights is the one you know how to use under the sky.
How do I focus in the dark?
Use live view to magnify a bright star or distant light and manually focus to infinity. Some lenses have a hard infinity stop, but I always verify focus by zooming in on live view and taking test shots. Stars should be sharp at 100% crop.
What shutter speeds and ISO should I use?
Start with 8–15 seconds at f/2.8–f/4 and ISO 800–3200, then adjust. Faster aurora movement needs shorter exposures to avoid motion blur. Use the shortest exposure that preserves aurora detail without excessive noise.
Do I need a tracker or special gear?
For most aurora photography, a tracker is unnecessary. Trackers help with long star‑field exposures and Milky Way shots, but aurora often moves and requires shorter exposures. Focus on a fast lens, sturdy tripod, and warm batteries instead.
Final Verdict: Which Should You Buy?
If you seek the best camera for shooting northern lights, prioritize a full-frame mirrorless like the Sony A7S III or similar models for unrivaled low-light performance and clean high-ISO images. Pair it with a fast wide lens and a rock-solid tripod for consistent results.
Supplement that core kit with a compact travel tripod, spare batteries, and scouting tools like a spotting scope or trail camera to maximize success. Together they give you the technical edge and practical flexibility to capture great aurora images.

Everett Ashford is a tech reviewer at mytechgrid.com specializing in SSDs, cameras, TVs, earbuds, headphones, and other consumer electronics. He provides honest, data-driven reviews based on hands-on testing and real-world performance analysis. Everett simplifies complex tech details to help readers make smart, confident buying decisions.