You can check SSD performance by testing read and write speeds, latency, temperature, health, and real-world file transfers.
Knowing how to check SSD performance helps you spot slowdowns, confirm a new drive works as promised, and catch problems before data is lost. The best results come from using the right test, preparing the drive first, and comparing results with the manufacturer’s specifications rather than trusting one number.
What SSD performance really means
SSD performance is more than one speed score. It describes how quickly a solid-state drive reads data, writes data, responds to requests, and handles work over time.
The main measurements include:


• sequential read speed: How fast the SSD reads large, continuous files.
• Sequential write speed: How fast it saves large, continuous files.
• Random read speed: How quickly it finds many small files in different locations.
• Random write speed: How quickly it updates small files across the drive.
• Latency: The delay between a request and the drive’s response.
• IOPS: Input/output operations per second. This matters for apps, games, and multitasking.


• Sustained performance: How well the SSD maintains speed during long transfers.
A drive may advertise read speeds above 7,000 MB/s, yet feel only slightly faster than a 3,500 MB/s model during daily use. Booting Windows, opening a browser, and launching most apps often depend more on latency and random access than peak sequential speed.
This is why learning how to check SSD performance requires more than running one benchmark. A complete check combines a synthetic test, a real file transfer, drive health data, and temperature monitoring.
Prepare your computer before testing
Good preparation makes your results more accurate. Background activity can use the SSD while a benchmark is running, much like traffic can slow a car during a speed test.
Before you start, follow these steps:
-
Save important files. Benchmark tools are normally safe, but some tests can write large amounts of data.
-
Close games, browsers, cloud backup tools, and file-sharing apps.
-
Pause downloads and system updates.
-
Let the computer sit for a few minutes so the SSD reaches an idle temperature.
-
Check that the drive has free space. Keep at least 10% to 20% free when possible.
-
Connect a laptop to its charger and use a performance power mode.
-
Confirm that the SSD is installed in the correct slot and is using the expected interface.
Do not test a nearly full SSD if you want a fair result. Many drives use a portion of their free space as a temporary cache. When that space runs low, write performance can drop sharply.
Also check whether the drive is connected through SATA, PCIe 3.0, PCIe 4.0, or PCIe 5.0. A fast PCIe 4.0 SSD placed in a slower slot may not reach its rated speed. On some desktops, a second M.2 slot may share bandwidth with other devices.


Check SSD performance on Windows
Windows users have several practical ways to test an SSD. A benchmark tool gives detailed results, while PowerShell provides a quick built-in check.
Use a trusted SSD benchmark
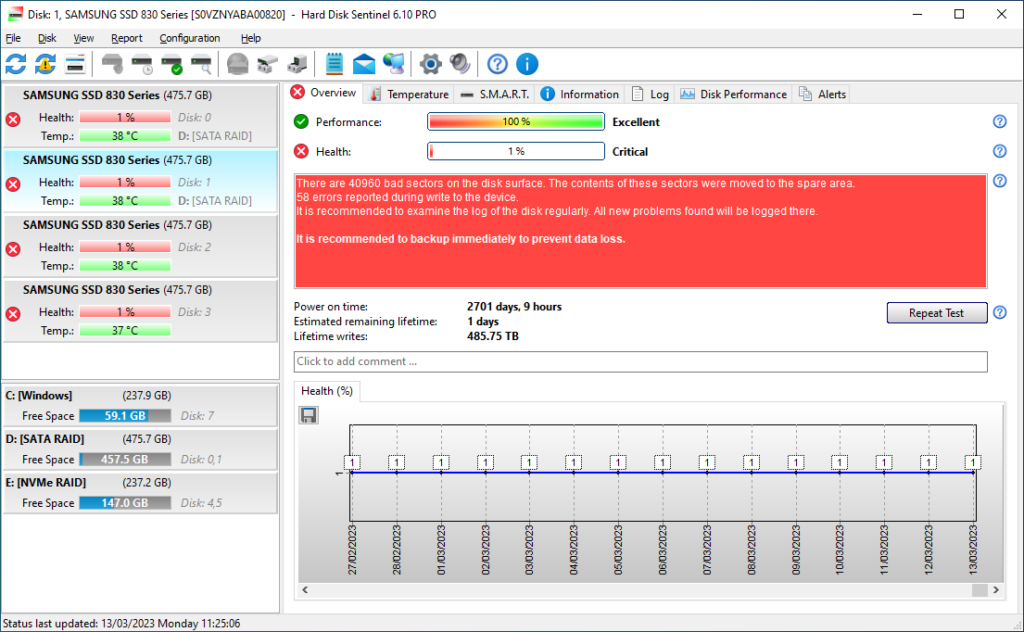
A storage benchmark such as CrystalDiskMark is popular because it shows sequential speed, random speed, queue depth, and thread results in a simple layout.
To test an SSD:
-
Install the benchmark from its official website.
-
Select the correct SSD from the drive list.
-
Choose a moderate test size, such as 1 GiB or 4 GiB.
-
Run several test passes.
-
Record the sequential and random results.
-
Repeat the test only after the drive has cooled.
A small test file may fit inside the SSD’s high-speed cache. A larger test, such as 32 GiB or 64 GiB, can show how the drive behaves during longer work. Larger tests take more time and write more data, so use them carefully.
The most useful results are usually:
• Sequential read and write speeds for large file work.
• 4K random read and write speeds for everyday responsiveness.
• Queue depth 1 results for normal desktop use.


• Higher queue depth results for heavy multitasking or workstation workloads.
Use Windows PowerShell
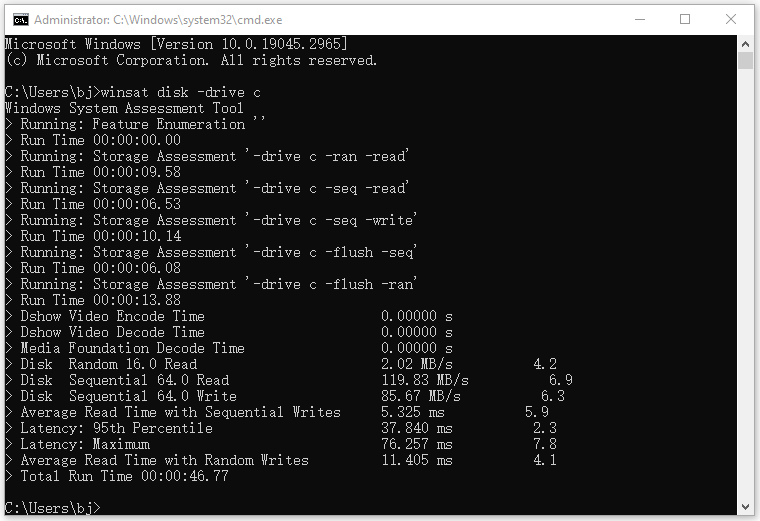
Windows includes a built-in command that can test disk performance. Open PowerShell as an administrator and run:
winsat disk -drive C
Replace C with the correct drive letter. The result may show sequential and random transfer rates, along with other storage data.
This tool is useful for a quick baseline, but it is not as detailed as a dedicated SSD benchmark. Avoid running commands you do not understand against important drives, and always confirm the target drive before starting a test.
Check drive health
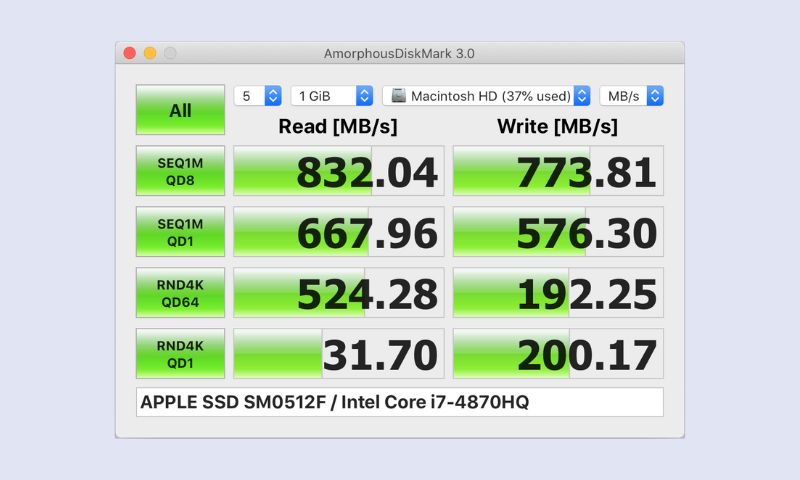
A health tool can show temperature, total data written, firmware details, and the drive’s SMART status. SMART data can reveal warning signs such as media errors, excessive wear, or unsafe shutdowns.
Health status is not the same as speed. An SSD can report “good” health while running slowly because of heat, low free space, outdated firmware, or a poor connection.

Check SSD performance on macOS
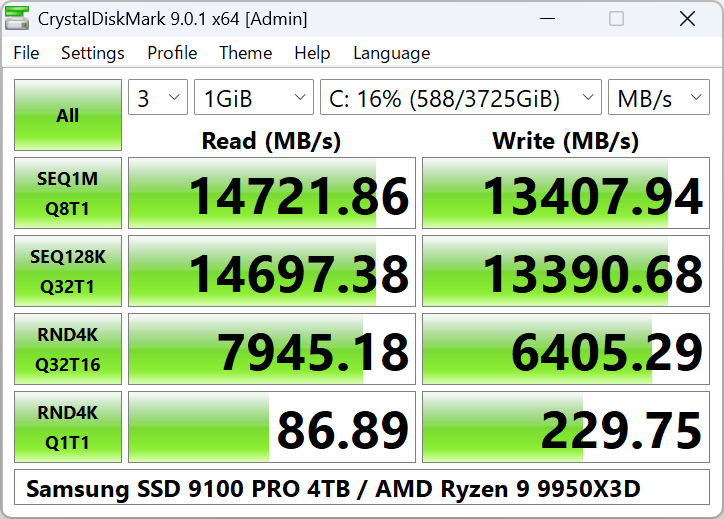
Mac users can test an SSD with a benchmark app or with Terminal. A graphical tool is easier for most people, while Terminal gives a fast basic check.
Use a Mac benchmark app
Install a reputable storage benchmark from a trusted source. Select the internal or external SSD, then run the read and write tests.
For a fair result:
• Disconnect unnecessary external drives.
• Stop cloud syncing and large downloads.
• Keep the Mac connected to power when testing a laptop.
• Run the test more than once.
• Note whether the SSD is internal, USB, Thunderbolt, or a network drive.


Connection type matters a great deal. An external SSD connected through a slow USB port cannot reach the speed of the same drive connected through Thunderbolt or USB 3.2 Gen 2×2.
Test with Terminal
You can create a temporary file and measure write speed with a command such as:
time dd if=/dev/zero of=ssd-test.bin bs=1m count=4096
This creates a 4 GB file in the current folder. After the test, remove it with:
rm ssd-test.bin
This is a simple sequential write test. It does not measure random performance, latency, or long-term behavior, so treat it as a basic estimate rather than a complete SSD performance review.
Check SSD performance on Linux
Linux offers strong storage tools for both beginners and advanced users. A graphical benchmark can provide easy-to-read results, while command-line tools offer detailed control.
Use GNOME Disks
Many Linux distributions include GNOME Disks. Open the application, select the SSD, choose the menu option for performance testing, and run the benchmark.
The tool can test:
• Read rate.
• Write rate.
• Access time.
• Multiple test regions on the drive.
Remember that write testing can create or overwrite data. Read the warning carefully and back up important files before starting.
Use the fio benchmark
The fio tool is widely used for advanced storage testing. It can measure random IOPS, latency, queue depth, and sustained performance.
A basic read test might look like this:
fio --name=readtest --filename=/path/to/testfile --size=4G --rw=read --bs=1M --iodepth=1 --direct=1
Use a test file rather than a raw device unless you fully understand the risks. Testing the wrong device can destroy data.
Linux results can vary based on the file system, mount options, kernel version, CPU, and storage driver. For that reason, compare results on the same system whenever possible.
Test SSD speed with real-world file transfers
Synthetic benchmarks are useful, but real file tests show how an SSD behaves during normal work. This matters because benchmark patterns do not perfectly match video editing, gaming, photo management, or office use.
Create a test folder with a mix of files:
• One large video file.
• Several compressed files.
• A folder containing thousands of small documents or photos.
Then copy the folder from one fast drive to another. Measure the time with a stopwatch or file-copy utility.
Use this simple formula:
Transfer speed = File size ÷ Transfer time
For example, if a 20 GB folder takes 40 seconds to copy:
20 GB ÷ 40 seconds = 0.5 GB per second
This result may be lower than the SSD’s benchmark score. That is normal. The source drive, destination drive, file system, USB connection, CPU use, and file mix can all affect the result.
One of the clearest lessons from SSD testing is that small files expose limits quickly. A drive can read a large movie file at thousands of megabytes per second but take much longer to copy a folder with tens of thousands of tiny files.

Monitor SSD temperature and throttling
Heat is a common reason SSD performance falls during a test. When an NVMe drive becomes too hot, its controller may reduce speed to protect the hardware. This process is called thermal throttling.
Use a hardware monitor to watch the SSD temperature before, during, and after testing. Many NVMe drives operate normally in a broad temperature range, but the exact limit depends on the model. Always check the manufacturer’s specifications.
Signs of thermal throttling include:
• The first benchmark run is fast.
• Later runs become slower.
• Write speed drops during a long transfer.
• The drive temperature rises quickly.
• Performance returns after several minutes of cooling.
To reduce heat, improve airflow, use the motherboard’s M.2 heatsink, remove protective plastic from thermal pads, and avoid blocking the drive with a graphics card when possible.
Do not confuse controller temperature with the temperature of the flash memory. Some monitoring tools display more than one sensor, and readings may differ.
Compare your results with the right standard
The best way to understand an SSD result is to compare it with the correct expectations.
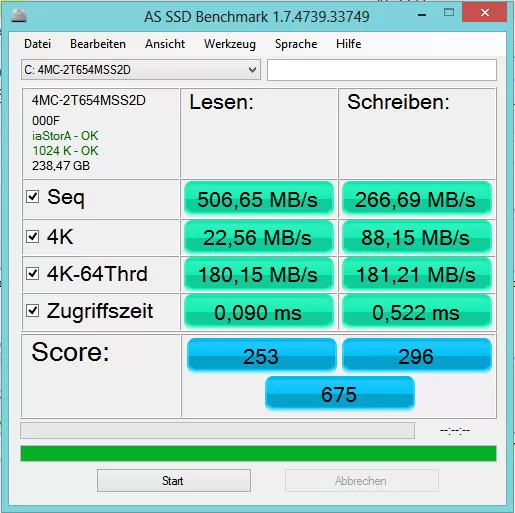
A SATA SSD usually reaches around 500 to 560 MB/s for sequential reads and writes because the SATA interface creates a practical limit. An NVMe SSD using PCIe 3.0 may reach roughly 3,000 to 3,500 MB/s. PCIe 4.0 models can exceed 7,000 MB/s, while newer PCIe 5.0 drives can go higher.
These are broad ranges, not promises. Actual results depend on the model, capacity, firmware, test method, cooling, and system configuration.
When comparing results, check:
• The manufacturer’s rated read and write speeds.
• Whether the rating applies to a specific capacity.
• The test size and benchmark software.
• The PCIe generation and number of lanes.
• Whether the result is peak or sustained performance.
• The drive’s temperature during testing.
A 1 TB version may perform differently from a 500 GB version of the same product. Some SSDs also use different flash types or controllers at different capacities.

Understand why SSD performance is slow
If your results are lower than expected, do not assume the SSD is defective. Check the most common causes first.
The drive is nearly full
An SSD needs free blocks to organize data and maintain speed. Performance may decline when the drive has very little free space.
Remove unnecessary files, move large media to another drive, and keep a reasonable amount of free capacity.
The SSD is overheating
High temperatures can trigger throttling. Check the temperature during a long test, not only when the computer is idle.
The wrong interface is in use
A fast NVMe drive cannot reach full speed in a slow slot or adapter. Confirm the slot’s PCIe generation and lane support in your motherboard or computer manual.
Background tasks are running
Antivirus scans, indexing, cloud sync, updates, and virtual machines can change benchmark results. Repeat the test after these tasks stop.
The cache is full
Many consumer SSDs use a fast SLC cache. After a long write fills that cache, speed can fall to the native flash speed. This drop is normal for some models.
Firmware or drivers need updates
SSD firmware, chipset drivers, and motherboard firmware can affect compatibility and performance. Read the update instructions carefully and back up data first.
The drive is worn or failing
Health warnings, repeated errors, disappearing files, or sudden performance changes require attention. Back up important data before running more tests.

Avoid common SSD testing mistakes
Learning how to check SSD performance also means knowing what can produce misleading results.
Avoid these mistakes:
• Running a benchmark while downloading a large game.
• Testing a nearly full drive and treating the result as normal.
• Comparing SATA results with PCIe results without considering the interface.
• Using a tiny test file to judge long-term write performance.
• Running many write-heavy tests on a drive with important data.
• Ignoring SSD temperature.
• Comparing results from different operating systems without noting the difference.
• Treating one benchmark score as proof of overall drive quality.
Benchmarking creates extra writes. Modern SSDs are designed to handle normal testing, but repeated large write tests are unnecessary. Use a moderate number of runs and focus on useful information.
Another mistake is chasing peak numbers that do not improve your real work. If your apps open quickly and file transfers meet your needs, a small benchmark difference may not matter.
A practical SSD performance testing routine
Use this routine when you need a clear and repeatable answer to how to check SSD performance.
-
Check the SSD model, capacity, interface, and available space.
-
Review the drive’s health and temperature at idle.
-
Close background apps and pause syncing.
-
Run a trusted benchmark with a moderate test size.
-
Record sequential and random results.
-
Run a larger test if sustained write speed matters.
-
Copy a large file and a mixed folder in real-world testing.
-
Watch temperatures during every long test.
-
Compare the results with the manufacturer’s specifications.
-
Repeat the test after the drive cools.
Keep a simple record with the date, benchmark version, test size, temperature, and result. This makes it easier to notice gradual changes over time.
A useful baseline can help you identify problems after a firmware update, operating system change, hardware upgrade, or sudden slowdown.
Frequently Asked Questions About How to Check SSD Performance
How do I check SSD performance quickly?
Install a trusted SSD benchmark, select the correct drive, and run sequential and random read and write tests. Also check the drive’s temperature and health because speed alone does not show the full condition of an SSD.
What is a good SSD read and write speed?
A SATA SSD often reaches about 500 to 560 MB/s, while PCIe 3.0, PCIe 4.0, and PCIe 5.0 NVMe drives can be much faster. The correct comparison is the rated speed for your exact model, capacity, interface, and test method.
How often should I test my SSD?
Test an SSD when you install it, notice a slowdown, upgrade hardware, or want to create a performance baseline. Routine testing is not needed every day, and excessive write tests add unnecessary wear.
Can low SSD speed mean the drive is failing?
It can, but low speed is often caused by heat, low free space, background tasks, a full write cache, or a slow connection. Check health data, temperature, interface settings, and free space before assuming the SSD is defective.
Does an SSD get slower when it is full?
Many SSDs become slower when they have very little free space because they have fewer empty blocks available for data management. Keeping about 10% to 20% free can help maintain consistent performance.
Is CrystalDiskMark accurate for SSD testing?
It is useful for comparing results under similar conditions, but it measures selected workloads rather than every real-world task. Use it with temperature checks and real file transfers for a more complete view.
How can I test an external SSD?
Connect the drive to the fastest compatible USB or Thunderbolt port, confirm the cable supports the expected speed, and run a benchmark plus a real file transfer. The enclosure, cable, port, and internal SSD can all limit performance.
Conclusion
The best way to check SSD performance is to combine benchmark results, real file transfers, temperature readings, and health data. Test the correct drive, keep background tasks closed, leave free space available, and compare results with the specifications for your exact model.
Do not worry if real-world speeds are lower than the maximum number on the product box. What matters most is stable performance, healthy temperatures, reliable storage, and speed that matches your daily work. Run a baseline test today, save the results, and use them to spot changes over time.

Everett Ashford is a tech reviewer at mytechgrid.com specializing in SSDs, cameras, TVs, earbuds, headphones, and other consumer electronics. He provides honest, data-driven reviews based on hands-on testing and real-world performance analysis. Everett simplifies complex tech details to help readers make smart, confident buying decisions.