Installing Windows 10 on a new SSD in a U.S. desktop or laptop usually takes 30 to 90 minutes. You need a working computer, an 8 GB or larger USB flash drive, a Windows 10 installation file, and a valid license or digital activation.
The cleanest method is to create a bootable Windows 10 USB drive, start the new computer from that drive, select the new SSD, and let Windows create the needed partitions. Back up your files first. A clean installation can erase the selected drive.
Support note for U.S. users: Microsoft ended regular Windows 10 support on October 14, 2025. Windows 10 may still install and run, but it no longer receives normal free security updates. If your computer supports Windows 11, that is the safer long-term choice. Use Windows 10 when you have a valid compatibility, software, or hardware reason.


What You Need Before Installing Windows 10
Prepare the hardware, installation media, and license before you remove or format any drive. This prevents most installation problems.
Hardware and files checklist
You will need:
- A new SSD installed in the computer
- A working Windows PC with internet access
- An empty USB flash drive with at least 8 GB of space
- A Windows 10 license or a digital license for that computer
- A backup of personal files
- The computer manufacturer's drivers, if needed
- The BitLocker recovery key, if the old Windows drive uses BitLocker
The USB drive will be erased when you create installation media. Do not use a USB drive that contains files you want to keep.
Check the SSD type
A new SSD may use one of these common formats:
| SSD type | How it connects | What to check |
|---|---|---|
| 2.5-inch SATA SSD | SATA data and power cables | Both cables must be connected |
| M.2 SATA SSD | M.2 slot | The slot must support SATA M.2 drives |
| M.2 NVMe SSD | M.2 slot using PCIe | The motherboard must support NVMe |
| PCIe add-in SSD | PCIe expansion slot | The slot and firmware must support the drive |
An M.2 SSD is not always an NVMe SSD. Some M.2 slots support only SATA, only NVMe, or one specific drive length. Check the motherboard or laptop manual before installation.
Decide between a clean install and a clone
A clean install places a fresh copy of Windows on the SSD. It removes old apps, settings, and possibly files from the selected drive.


A clone copies the old system to the SSD. It keeps your programs and settings, but it can copy old problems, unwanted software, or incorrect partition layouts.
Use a clean install when you want a fresh start or are building a PC. Use a clone when keeping the existing setup matters more and the source drive fits properly on the new SSD.

Create a Windows 10 Bootable USB Drive
Use Microsoft's official Windows 10 download page to get the Media creation Tool or an ISO file. Avoid unofficial “modified” Windows installers because they may contain unwanted software or altered system files.
Method 1: Use Microsoft's Media Creation Tool
- Open Microsoft's Download Windows 10 page on a working Windows computer.
- Download the Media Creation Tool.
- Run the tool as an administrator.
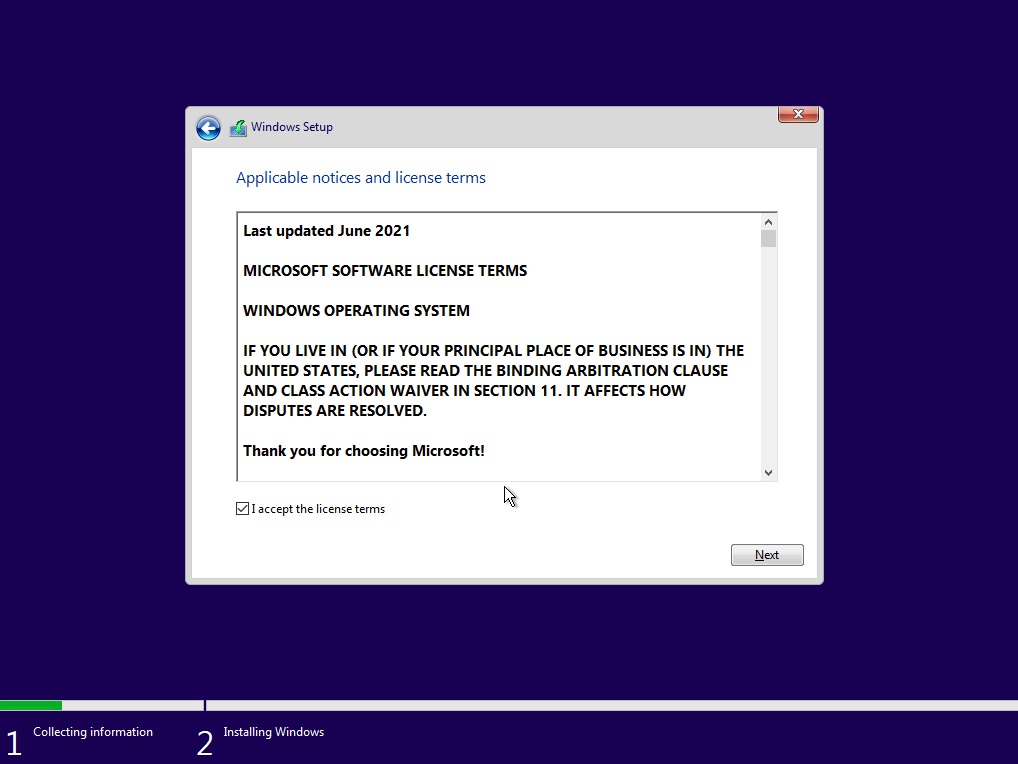
- Accept the license terms.
- Select Create installation media for another PC.
- Choose the correct language, Windows edition, and 64-bit architecture.
- Select USB flash drive.
- Choose the correct USB drive.
- Let the tool download Windows and create the bootable media.
The tool may erase the USB drive. Confirm that you selected the correct removable drive before continuing.
Method 2: Use an ISO file
You can also download a Windows 10 ISO and write it to a USB drive with a trusted tool that supports bootable media. Select these settings when the tool asks:
- Partition scheme: GPT
- Target system: UEFI
- File system: usually FAT32 or the tool's recommended option
- Image mode: standard Windows installation
GPT and UEFI are the normal choices for modern U.S. PCs. Older systems may require MBR and Legacy BIOS mode, but do not mix GPT with Legacy mode unless the computer requires it.
Match the Windows edition to your license
The installed edition must match the license on the computer.
| Existing license | Install this edition |
|---|---|
| Windows 10 Home | Windows 10 Home |
| Windows 10 Pro | Windows 10 Pro |
| Windows 10 Education | Windows 10 Education |
| Windows 10 Enterprise | Usually supplied through an organization |
A Home license will not activate Windows 10 Pro. If the installer asks for a product key, you can often choose I don't have a product key and activate Windows after installation.
Set the PC to Boot From the USB Drive
The computer must start from the Windows USB instead of the old internal drive.
- Insert the Windows 10 USB drive.
- Shut down the computer.
- Turn it on and repeatedly press the boot menu key.
- Select the USB drive listed with UEFI in its name.
Common boot menu keys include:
- F12 on many Dell and Lenovo systems
- F9 on many HP systems
- F8 or F11 on some desktop motherboards
- Esc on some laptops
- Delete or F2 to enter firmware settings
The correct key varies by manufacturer. Look for a brief message on the screen during startup.
If the USB does not appear, enter the UEFI or BIOS setup and check:
- USB boot is enabled
- The USB drive is connected directly to the computer
- Fast Boot is temporarily disabled
- The USB was created correctly
- The boot mode is set to UEFI when using a GPT installer
Do not change random firmware settings. Write down the original setting before changing storage or boot options.


Install Windows 10 on the New SSD
Follow these steps for a clean installation. Read the drive list carefully before deleting anything.
1. Start Windows Setup
After booting from the USB, select:
- Language to install
- Time and currency format
- Keyboard or input method
Select Next, then choose Install now.
2. Enter or skip the product key
Enter your Windows 10 product key if you have one. If the computer already has a digital license, select I don't have a product key.
Windows may activate automatically later when:
- The installed edition matches the license
- The computer connects to the internet
- The motherboard still has the original digital license
- The product key has not already been used beyond its license terms
A retail Windows license may be transferable, but an OEM license is often tied to the original computer. Microsoft licensing terms control the final result.
3. Select the correct edition
Choose Home, Pro, or another edition that matches your license. Selecting the wrong edition can prevent activation.
4. Choose a custom installation
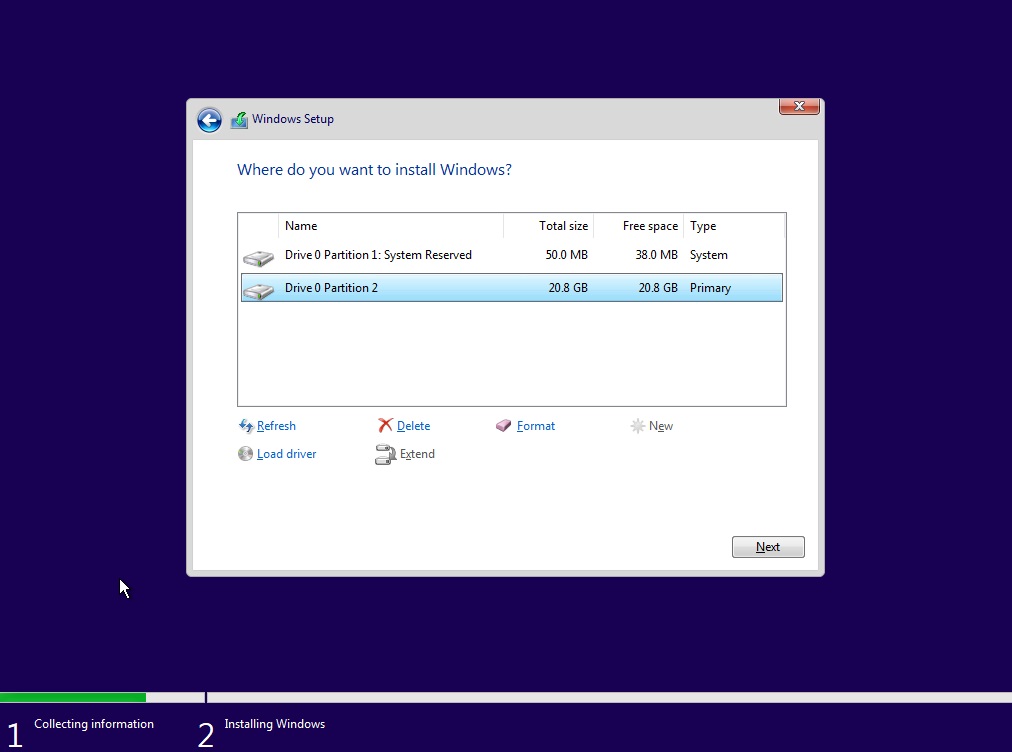
Select Custom: Install Windows only (advanced). This option lets you choose the new SSD and manage its partitions.
5. Identify the new SSD
The setup screen lists drives as Drive 0, Drive 1, and so on. Use the drive's capacity and position to identify it.
For example, a drive shown as about 931 GB is usually a marketed 1 TB drive. A drive shown as about 465 GB is usually a marketed 500 GB drive. The difference comes from how storage makers and Windows calculate gigabytes.
If possible, disconnect the old Windows drive before installing. This reduces the risk of deleting the wrong drive and helps Windows place its boot files on the new SSD.
6. Delete old partitions only on the target SSD
If the new SSD is empty, select its unallocated space and choose Next.
If it contains old partitions and you want a completely clean install:
- Confirm the drive number and capacity.
- Select each partition on that SSD.
- Choose Delete.
- Continue until the SSD shows Unallocated Space.
- Select the unallocated space.
- Choose Next.
Do not delete partitions from another drive unless you have a verified backup and intend to erase that drive. Some computers contain recovery partitions, data partitions, or manufacturer tools that you may still need.


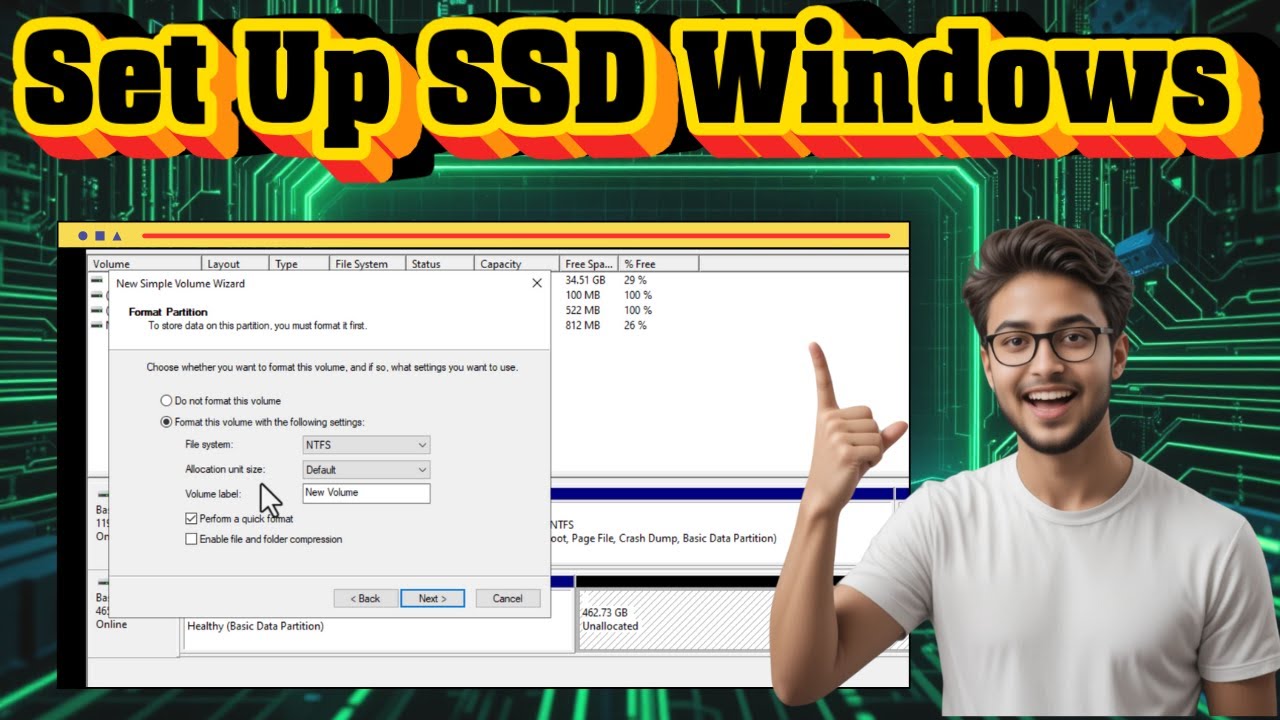
Windows will create several partitions, such as an EFI System Partition, Microsoft Reserved partition, Windows partition, and recovery partition. This is normal.
7. Let Windows copy its files
Windows will copy files, install features, and restart several times. When the computer restarts, remove the USB drive or select the internal SSD as the boot device.
If Setup starts from the beginning again, the computer is still booting from the USB. Remove it and restart.

Complete Windows 10 Setup After the First Restart
Windows will ask for basic settings after the files are installed.
- Select your region, such as United States.
- Select the keyboard layout.
- Add another keyboard layout only if needed.
- Connect to the internet when prompted.
- Sign in with a Microsoft account or choose an available local account option.
- Create a strong password or PIN.
- Review privacy settings.
- Allow Windows to reach the desktop.
Windows may ask for permission to use location, diagnostic data, voice services, or advertising ID. Choose the settings that fit your needs.
Confirm that Windows is using the SSD
After reaching the desktop:
- Press Windows key + X.
- Select Disk Management.
- Confirm that the Windows partition is on the new SSD.
- Open Task Manager and select the Performance tab.
- Check that the expected SSD appears under Disk.
You can also open Settings > System > About to confirm the Windows edition and system type.
Check activation
Open:
Settings > Update & Security > Activation
A successful result will show that Windows is activated. If it is not activated:
- Confirm that the computer is online.
- Confirm that you installed the correct edition.
- Sign in with the Microsoft account linked to the digital license.
- Select Troubleshoot under activation.
- Enter a valid product key if required.
Changing the motherboard can affect digital activation. Replacing only the storage drive usually does not remove a license tied to the computer, but activation still depends on the license type.

Install Drivers and Windows Updates
Install updates in a sensible order. Start with Windows Update, then add drivers that Windows does not provide.
Recommended order
- Open Settings > Update & Security > Windows Update.
- Select Check for updates.
- Restart as requested.
- Check for updates again until no important updates remain.
- Install the chipset, storage, network, graphics, audio, and touchpad drivers from the computer or motherboard maker.
- Open Device Manager and look for devices with a yellow warning icon.
- Install the manufacturer's firmware or SSD utility only when you understand what it changes.
Use official manufacturer sites for drivers. Avoid driver-pack websites and tools that install many unverified drivers at once.


Check SSD health and storage mode
Many SSD makers provide a utility that can display drive health, temperature, firmware, and available space. Use the tool only if it supports the exact SSD model.
For best results:
- Leave some free space on the SSD.
- Do not defragment an SSD with old-style disk defragmentation tools.
- Let Windows optimize the drive with its built-in scheduled process.
- Keep firmware updates backed up and do not interrupt power during an update.
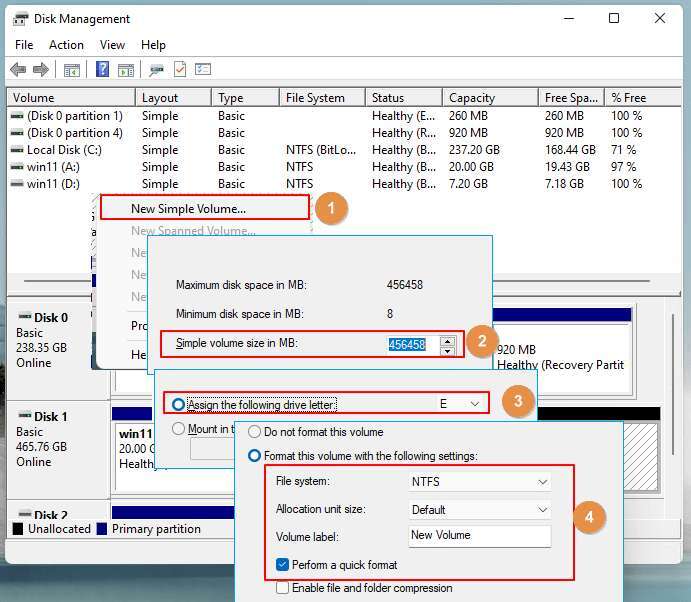
If the SSD does not appear in Windows, check Disk Management first. It may need to be initialized or assigned a drive letter if it is a second storage drive. Do not initialize it if it contains data you need.
Troubleshoot Common Windows 10 SSD Installation Problems
Most installation failures come from boot mode, storage drivers, damaged media, or selecting the wrong drive. Check the safest and simplest causes first.
The SSD does not appear in Windows Setup
Possible causes include:
- The SSD is not fully inserted.
- A SATA power or data cable is loose.
- The M.2 slot does not support that type of SSD.
- The firmware does not detect the drive.
- Intel Rapid Storage Technology or RAID mode needs a storage driver.
- The SSD or motherboard has a compatibility problem.
Try these checks:
- Shut down the PC and reseat the SSD.
- Check the drive in UEFI or BIOS storage information.
- Confirm that the motherboard supports the SSD type.
- Check whether another M.2 slot is required.
- If the installer requests a storage driver, download the correct driver from the PC or motherboard maker and place it on a second USB drive.
- Do not switch RAID or storage-controller modes casually if another Windows installation already exists. The change can make that installation unbootable.
If the firmware does not see the SSD, Windows Setup usually cannot see it either. Solve the hardware or firmware issue first.
Windows Setup says it cannot install to the disk
This often means the boot mode and partition style do not match.
- UEFI normally works with GPT.
- Legacy BIOS normally works with MBR.
For a new, empty SSD, the simplest fix is usually to reboot the installer in UEFI mode and delete the target drive's partitions so Setup can create a GPT layout.
A more advanced option is to use DiskPart, but it erases the selected disk. Do not use it unless you can identify the disk with certainty.
The computer keeps returning to the installer
Remove the USB drive after the first restart. If the problem continues:
- Enter the boot menu.
- Select Windows Boot Manager on the new SSD.
- Move Windows Boot Manager above the USB drive in the boot order.
- Save and restart.
Windows activates with the wrong edition
A Windows 10 Home license cannot activate Windows 10 Pro. Reinstall the matching edition or enter a valid key for the edition you installed.
The installation stops or restarts
Check the following:
- Re-create the USB installer.
- Try another USB port.
- Use a different flash drive.
- Disconnect unnecessary USB devices.
- Test the SSD and memory if the issue continues.
- Check CPU and SSD temperatures.
- Confirm that the installation media came from Microsoft.
Repeated blue screens or file-copy errors can indicate faulty RAM, a bad USB drive, unstable firmware settings, or a failing SSD.

Clean Install Versus Clone: Which Should You Use?
Choose the method based on whether you want to preserve the existing Windows environment.
| Goal | Better choice | Main trade-off |
|---|---|---|
| Fresh Windows system | Clean install | Apps and settings must be restored |
| Keep programs and settings | Clone | Old errors and clutter may follow |
| Upgrade a smaller drive | Clone or clean install | Cloning may need partition resizing |
| Build a new PC | Clean install | Requires driver and app setup |
| Replace a failing drive | Clean install from backup | Requires a reliable backup |
| Change from Legacy to UEFI | Clean install is often simpler | The target drive may need repartitioning |
A clean install is not a backup method. Before starting, copy documents, photos, browser data, game saves, license details, and work files to a separate drive or approved cloud backup.
Common Mistakes to Avoid
Avoid these errors when installing Windows 10 on a new SSD:
- Erasing the wrong disk: Confirm the drive number and capacity.
- Using the wrong Windows edition: Match Home with Home and Pro with Pro.
- Mixing UEFI and Legacy modes: Use UEFI with GPT on most modern PCs.
- Leaving the old drive connected: Windows may place boot files on the old drive.
- Forgetting BitLocker: Save the recovery key before changing drives.
- Using an unofficial ISO: Download Windows from Microsoft.
- Skipping drivers: Network, chipset, graphics, and storage drivers may still be needed.
- Changing RAID settings without a plan: The old installation may stop booting.
- Assuming activation equals support: Activation does not provide security updates after Windows 10 support ended.
- Failing to test the old drive: Keep it untouched until the new installation works and your files are safe.
Frequently Asked Questions
Can I install Windows 10 directly to a new SSD without an old hard drive?
Yes. A new SSD can be the only internal drive during installation. Boot from the Windows 10 USB, select the unallocated SSD space, and continue.
Do I need a product key to install Windows 10?
Not always. You can often select I don't have a product key during Setup and activate Windows later. The computer still needs a valid digital license or product key for activation.
Should I format the SSD before installing Windows 10?
No. Windows Setup can create and format the required partitions. For a clean install, delete the target SSD's existing partitions and select its unallocated space.
Why does my new SSD show less space than advertised?
Manufacturers use decimal storage units, while Windows reports capacity using a different calculation. A 1 TB SSD commonly appears as roughly 931 GB in Windows. This difference is normal.
Can I keep my old hard drive connected during installation?
Yes, but disconnecting it is safer. With multiple drives connected, it is easier to select the wrong disk or place Windows boot files on the old drive.
Is Windows 10 still safe to use in the United States?
Windows 10 may continue to run, but Microsoft ended standard support on October 14, 2025. Without normal security updates, continued use carries more risk. Check whether the computer supports Windows 11 before choosing Windows 10 for a new installation.
Final Checklist After Installing Windows 10
Before relying on the new SSD, confirm that:
- Windows starts without the USB drive
- The SSD appears in Disk Management
- The correct Windows edition is installed
- Windows is activated
- Windows Update has finished
- Device Manager shows no unknown devices
- Network, audio, graphics, and storage drivers work
- Personal files have been restored from backup
- The old drive remains untouched until the new setup is verified
- Your BitLocker recovery key is stored safely
The next practical step is to open your PC or laptop manual, confirm the SSD type and slot support, and create the official Windows 10 USB installer before changing any partitions.

Everett Ashford is a tech reviewer at mytechgrid.com specializing in SSDs, cameras, TVs, earbuds, headphones, and other consumer electronics. He provides honest, data-driven reviews based on hands-on testing and real-world performance analysis. Everett simplifies complex tech details to help readers make smart, confident buying decisions.