To clone your C drive to a new SSD, copy the entire system disk, then boot Windows from the cloned drive.
Upgrading to an SSD can make an older computer feel new again, but moving Windows is more than copying files. You must copy hidden boot partitions, system data, applications, and personal files in the right order. This guide explains how to clone C drive to new SSD safely, including preparation, software choice, BIOS settings, activation concerns, and common mistakes.
What Cloning the C Drive Actually Does
Cloning creates an exact, bootable copy of your current system drive. The copy includes Windows, installed programs, user accounts, settings, recovery partitions, and personal files.
Think of cloning as making a working twin of your old drive. You do not need to reinstall Windows or download every program again. After the process, the new SSD should start Windows just as the old drive did.


When you clone C drive to new SSD, the software usually copies more than the visible C partition. A typical Windows system disk may also contain:
• EFI System Partition, which stores UEFI boot files
• Microsoft Reserved Partition, used by modern GPT disks
• Windows C partition, which contains the operating system
• Recovery partitions, used for troubleshooting and reset tools
• Personal files and application data
Copying only the C partition may leave the new SSD unable to boot. For that reason, choose an option such as “clone the entire disk” rather than copying one partition.

Before You Clone C Drive to New SSD
Good preparation prevents most cloning problems. The process is usually safe, but the destination SSD will often be erased during cloning. Check everything before you click Start.
Check the new SSD capacity
The new SSD should have enough space for the data stored on the old drive. It does not always need to match the old drive’s total size.


For example, a 1 TB hard drive may contain only 250 GB of data. You can clone it to a 500 GB SSD if the cloning program can resize the partitions.
Check your current usage in Windows:
- Open File Explorer.
- Right-click the C drive.
- Select Properties.
- Review the used space.
- Compare that figure with the usable space on the new SSD.
Leave some free space after cloning. An SSD works best when it is not completely full. Keeping at least 10% to 20% free space is a practical target.
Back up important files
A clone is not a substitute for a backup. If you select the wrong disk, lose power, or encounter a hardware failure, files can be damaged.
Back up important documents, photos, work files, browser data, and financial records to one of these locations:
• External hard drive
• USB flash drive
• Network storage
• Trusted cloud storage
Open a few backed-up files before continuing. A backup is useful only when you can restore it.
Check the connection
For a desktop computer, install the SSD inside the case if possible. For a laptop, use a compatible SATA-to-USB adapter or an NVMe enclosure.
A slow USB connection may make cloning take longer, but it should still work if the adapter supports the drive type. Do not disconnect the SSD during the process.
Check the drive type
SATA and NVMe SSDs use different physical connections. A 2.5-inch SATA SSD cannot fit into an M.2 NVMe slot, and an M.2 NVMe drive may not work in a SATA-only slot.
Before buying or installing the SSD, confirm:
• Interface: SATA or NVMe
• Physical size: 2.5-inch, M.2 2280, or another size
• Motherboard support
• Available slot or adapter
• Required mounting screw or bracket
Suspend BitLocker if needed
BitLocker encrypts Windows drives. Cloning encrypted data can work with some tools, but encryption may make the process slower or create boot issues.
If BitLocker is enabled, save your recovery key first. You may then suspend protection temporarily through Windows settings. Do not delete encryption or format the old drive until you confirm that the new SSD boots correctly.
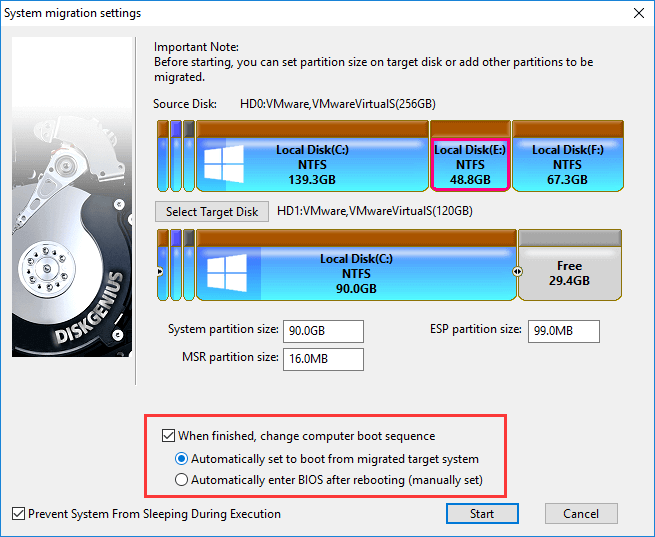


Choose Reliable Cloning Software
Windows does not provide a simple, built-in tool for cloning a complete boot drive. You normally need third-party cloning software or a bootable cloning utility.
Common choices include:
• Clonezilla for advanced users who want a free, flexible tool
• Rescuezilla for a simpler graphical interface based on Clonezilla
• SSD manufacturer migration tools for supported drives
• Commercial disk-cloning programs with partition resizing and recovery features
The best tool depends on your comfort level. A graphical program is often easier for a first-time upgrade. A bootable tool can be helpful when Windows is unstable or the source drive has errors.
Avoid random download sites. Download cloning software from the developer or SSD manufacturer, and read each disk label carefully before starting.
A cloning program normally has two separate choices:
• Source disk: your current Windows drive
• Destination disk: the new SSD
Choosing these in reverse can erase the original drive. This is the most serious mistake to avoid when you clone C drive to new SSD.

How to Clone C Drive to New SSD
The exact button names vary by program, but the overall process is similar. The steps below explain how to clone C drive to new SSD without reinstalling Windows.
Step 1: Install the cloning software
Download and install a trusted cloning tool. Close unnecessary programs, especially file editors, games, and applications that constantly write data.
Some tools ask you to create a bootable rescue USB. Creating one is wise. If the Windows version of the program fails, you can start the computer from the rescue USB and repeat the operation outside Windows.
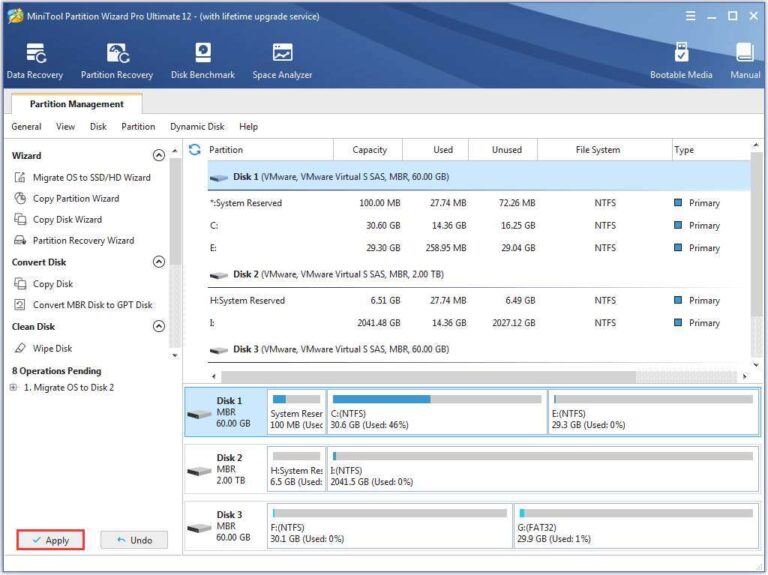
Step 2: Open the disk-cloning wizard
Launch the program and choose an option such as:
• Clone disk
• Migrate OS
• Copy disk
• Disk image and restore
Select the entire old system disk as the source. Do not choose only the C partition unless the tool clearly explains that it will also copy the boot partitions.


Step 3: Select the new SSD as the destination
Choose the new SSD as the destination disk. Check its capacity and model number carefully.
The software may display a warning that all destination data will be deleted. Confirm that the SSD is new or that you have already backed up anything stored on it.
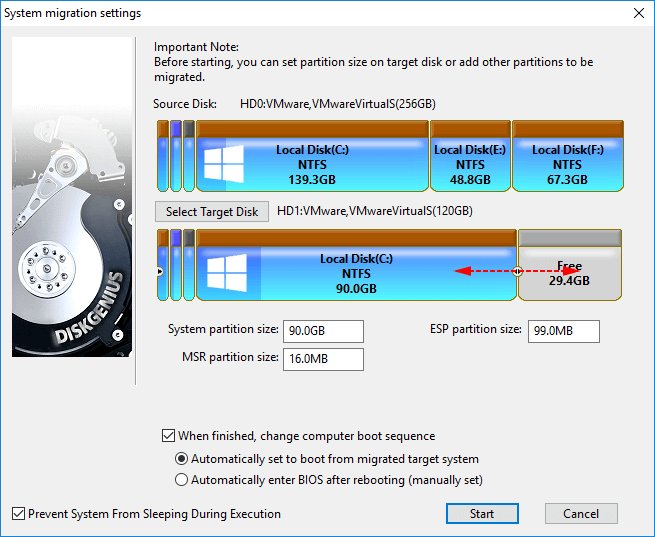
Step 4: Adjust the partition size
If the new SSD is larger, you can usually expand the C partition to use the extra space. Look for settings such as:
• Fit partitions to the entire disk
• Proportional resize
• Edit partition layout
• Use maximum available space
If the new SSD is smaller, the cloning software must shrink the source partition. The amount of used data must fit within the destination capacity.
If the resize option is unavailable, remove large temporary files, uninstall unused programs, empty the Recycle Bin, and try again. Never force a clone when the source data cannot fit.
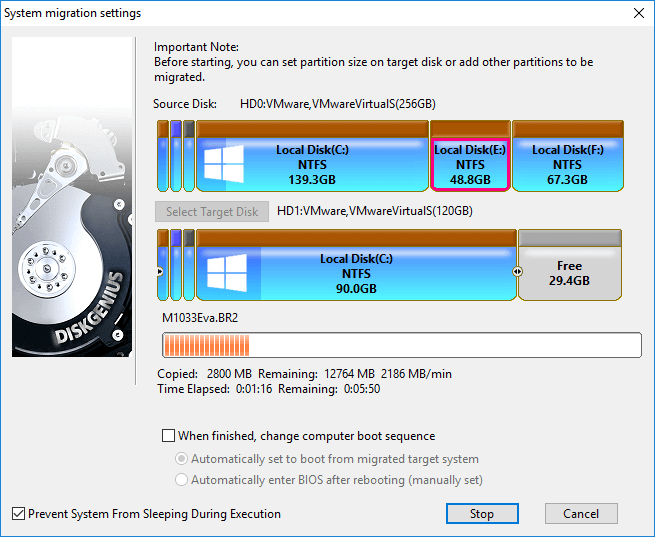
Step 5: Start the clone
Start the operation and leave both drives connected. The process may take from several minutes to several hours, depending on the amount of data, drive speed, and connection type.
Do not:
• Shut down the computer
• Disconnect the USB cable
• Run demanding programs
• Allow the computer to sleep
• Interrupt the cloning process
A progress bar may pause for a while. That does not always mean the program has stopped. Wait unless the software reports a clear error.
Step 6: Shut down after completion
When the software reports success, shut down the computer fully. Do not immediately format or remove the old drive.
For a desktop, you can disconnect the old drive for the first boot test. For a laptop, replace the old drive with the new SSD if that is the normal installation method.
Make the New SSD Bootable
After cloning, the computer must start from the new SSD. Most systems do this automatically if the old drive is removed. If both drives remain connected, you may need to change the boot order.
Set the boot order in UEFI
Start the computer and open the firmware setup screen. Common keys include F2, Delete, F10, or Esc, but the correct key depends on the manufacturer.


Find a menu named Boot, Boot Priority, or Boot Sequence. Select Windows Boot Manager associated with the new SSD and move it to the first position.
Save the changes and restart.
If you see two Windows Boot Manager entries, temporarily disconnect the old drive. This removes confusion and helps confirm whether the new SSD is truly bootable.
Check Windows after the first boot
Once Windows starts, verify the following:
• The computer reaches the normal sign-in screen
• Your files and programs open correctly
• The C drive is assigned to the new SSD
• Device Manager shows no major hardware errors
• Windows activation remains valid
• The new SSD has the expected capacity
You can check the drive model in Task Manager:
- Press Ctrl + Shift + Esc.
- Open the Performance tab.
- Select Disk.
- Confirm that the listed drive is the new SSD.
You can also open Disk Management by right-clicking the Start button and selecting Disk Management.

What to Do If the New SSD Will Not Boot
A failed first boot does not always mean the clone is unusable. The problem may be a boot order setting, missing boot files, or a mismatch between Legacy BIOS and UEFI mode.
Try these steps:
- Shut down the computer.
- Disconnect the old drive temporarily.
- Enter UEFI settings.
- Select Windows Boot Manager on the new SSD.
- Confirm that the boot mode matches the original installation.
- Save changes and restart.
Modern Windows installations usually use UEFI with GPT. Older systems may use Legacy BIOS with MBR. Converting between MBR and GPT without preparation can make Windows unbootable.
If the files copied correctly but boot files are damaged, use a Windows installation USB and open Startup Repair. You can also rebuild boot files with advanced recovery commands, but those commands should be used carefully.
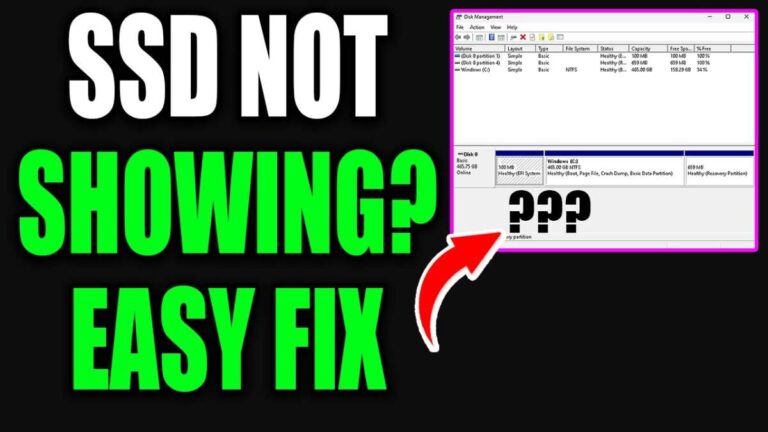
If the SSD is not visible in firmware, check the physical connection, adapter, power cable, M.2 slot support, and firmware compatibility. A missing drive in UEFI is usually a hardware or compatibility issue rather than a Windows issue.

Common Mistakes to Avoid
The most common cloning errors are simple and preventable.
Cloning the wrong direction
Always identify the old drive by its model, capacity, and current partitions. Selecting the SSD as the source can erase the drive you meant to preserve.
Copying only personal files
Dragging files from C drive to the SSD does not create a bootable Windows installation. You need a full disk clone or a clean Windows installation.
Forgetting hidden partitions
The EFI, Microsoft Reserved, and Recovery partitions may not appear like normal folders. A full-disk clone copies them automatically.
Cloning to a smaller SSD without resizing
The destination must have enough space for the data being copied. Delete unnecessary files or shrink the source partition first.
Formatting the old drive too soon
Keep the old drive untouched for several days. Use the new SSD for normal work and open your most important applications and files.
Ignoring SSD alignment
Modern cloning tools usually align partitions correctly. Incorrect alignment can reduce performance and increase unnecessary drive activity. Choose a tool that supports SSD alignment or 4K alignment.
Skipping firmware updates
An SSD may work better after a firmware update, but do not update firmware during the cloning process. Complete the migration first, then follow the manufacturer’s instructions.
Forgetting encryption and recovery keys
Save your BitLocker recovery key before changing drives. You may need it after a firmware change, hardware swap, or unexpected boot repair.
How to Verify the Clone
A successful cloning message is helpful, but a real test is better. Spend a few minutes checking the new installation.
Open several programs that you use often. Check your Documents, Pictures, Downloads, and Desktop folders. Confirm that browser bookmarks, email settings, saved games, and work files are available.
Look at the free space on the new SSD. If the drive is much smaller than expected, the cloning tool may not have expanded the main partition.
You can also check drive health with a trusted diagnostic tool. Review the SSD’s temperature, total health status, and firmware version. Avoid relying on one test alone, since health readings can vary by manufacturer.
After several successful boots, create a fresh backup of the new system. A cloned drive protects against migration problems, but it does not protect against future deletion, malware, theft, or hardware failure.
Benefits and Limits of Cloning
Cloning is popular because it saves time and preserves your current setup.
Benefits include:
• No complete Windows reinstall
• Existing programs remain installed
• User accounts and settings are preserved
• Less configuration work
• Faster migration than starting from scratch
• A usable copy of the old drive remains available
However, cloning has limits. It copies problems too. If the old Windows installation contains malware, corrupted files, unwanted programs, or years of clutter, those issues move to the new SSD.
A clean installation is better when Windows is unstable, heavily infected, or filled with software you no longer use. It also gives you a chance to rebuild a cleaner system, although it requires more time.
The right choice depends on your goal. Clone the drive when you want a fast, familiar migration. Install Windows from scratch when you want a fresh start.

Personal Lessons From SSD Migrations
One lesson stands out from hands-on drive upgrades: most failures happen before cloning begins. People rush past the disk-size check, skip the backup, or select a disk by position instead of model name.
A safer habit is to write down the old and new drive models before opening the cloning program. I also recommend taking a screenshot of Disk Management. It gives you a clear record of the original partition layout.
Another useful lesson is to test the new SSD with the old drive disconnected. When both drives contain identical Windows installations, firmware can select the wrong boot files. Disconnecting the old drive makes the test simple and honest.
Finally, do not throw away the old drive on the same day. Keep it stored safely until the new SSD has passed several restarts and you have opened the files and programs that matter most.
Frequently Asked Questions About How to Clone C Drive to New SSD
Can I clone my C drive without reinstalling Windows?
Yes. A full disk clone copies Windows, applications, settings, personal files, and boot partitions to the new SSD. The new drive must have enough usable space for the data being copied.
How long does it take to clone C drive to new SSD?
The time depends on the amount of data, drive speed, and connection type. A small system may finish in less than an hour, while a large drive connected through USB can take several hours.
Can I clone a larger hard drive to a smaller SSD?
Yes, if the data stored on the source drive fits on the smaller SSD. You may need to delete files or shrink the main partition before cloning.
Will cloning Windows transfer my product activation?
Activation usually remains linked to the computer’s digital license or hardware. If activation changes after the upgrade, open Windows activation settings and use the Microsoft account or product key connected to the original installation.
Should I keep the old drive after cloning?
Keep it until the new SSD boots reliably and your important files and programs work. After that, you can securely erase the old drive before selling, recycling, or reusing it.
Can I use the computer while it is cloning?
Some programs allow limited use, but heavy activity can slow the process or create changed files during the copy. For the safest result, close applications and avoid using the computer until cloning is complete.
Do I need to clone the recovery partition?
A full-disk clone should copy the recovery partition along with the EFI and Windows partitions. Keeping it helps preserve built-in troubleshooting and reset options.
Conclusion
Learning how to clone C drive to new SSD is a practical way to upgrade storage without rebuilding your Windows environment. The key steps are simple: back up your files, identify the source and destination correctly, clone the entire system disk, set the new SSD as the boot device, and test it before erasing the old drive.
Take your time with the drive selection screen. That one careful step protects your data and makes the migration much less stressful. Follow this guide, keep a backup, and your new SSD can deliver faster startup times without forcing you to start over.

Everett Ashford is a tech reviewer at mytechgrid.com specializing in SSDs, cameras, TVs, earbuds, headphones, and other consumer electronics. He provides honest, data-driven reviews based on hands-on testing and real-world performance analysis. Everett simplifies complex tech details to help readers make smart, confident buying decisions.