A small hole or lens projected a scene onto a surface, where it was traced or fixed chemically.
I’ve spent years teaching and building simple optical devices, so I can explain clearly how did the camera obscura record a picture. This ancient device used basic optics to turn light into an image you could see and make permanent. Read on for step-by-step explanations, historical context, practical experiments, and tips from hands-on experience that show exactly how did the camera obscura record a picture.
How the camera obscura works
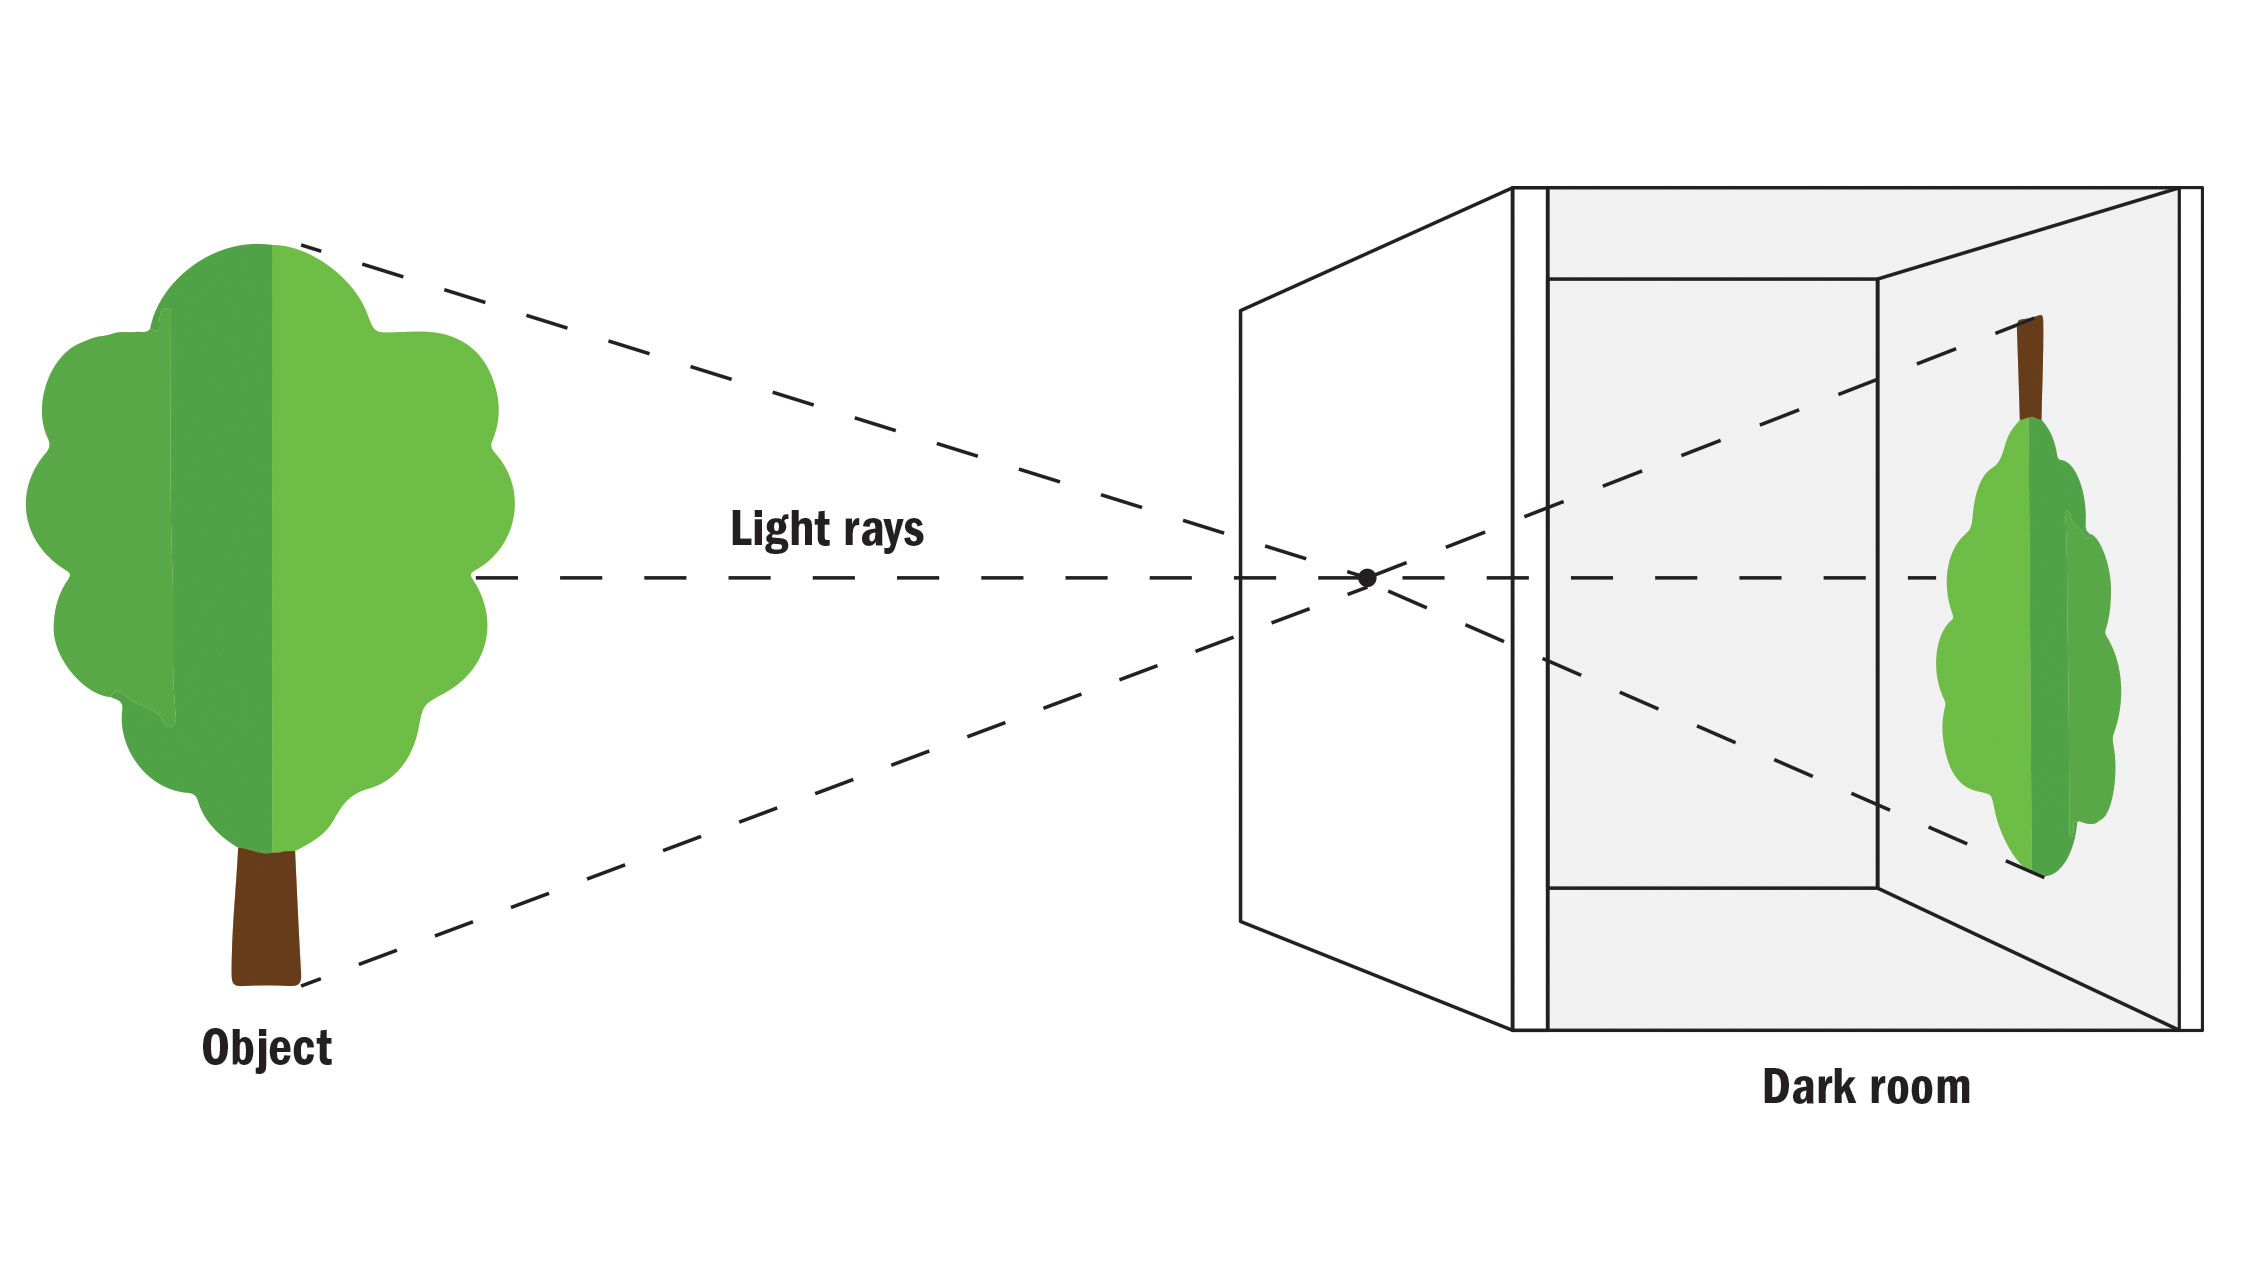
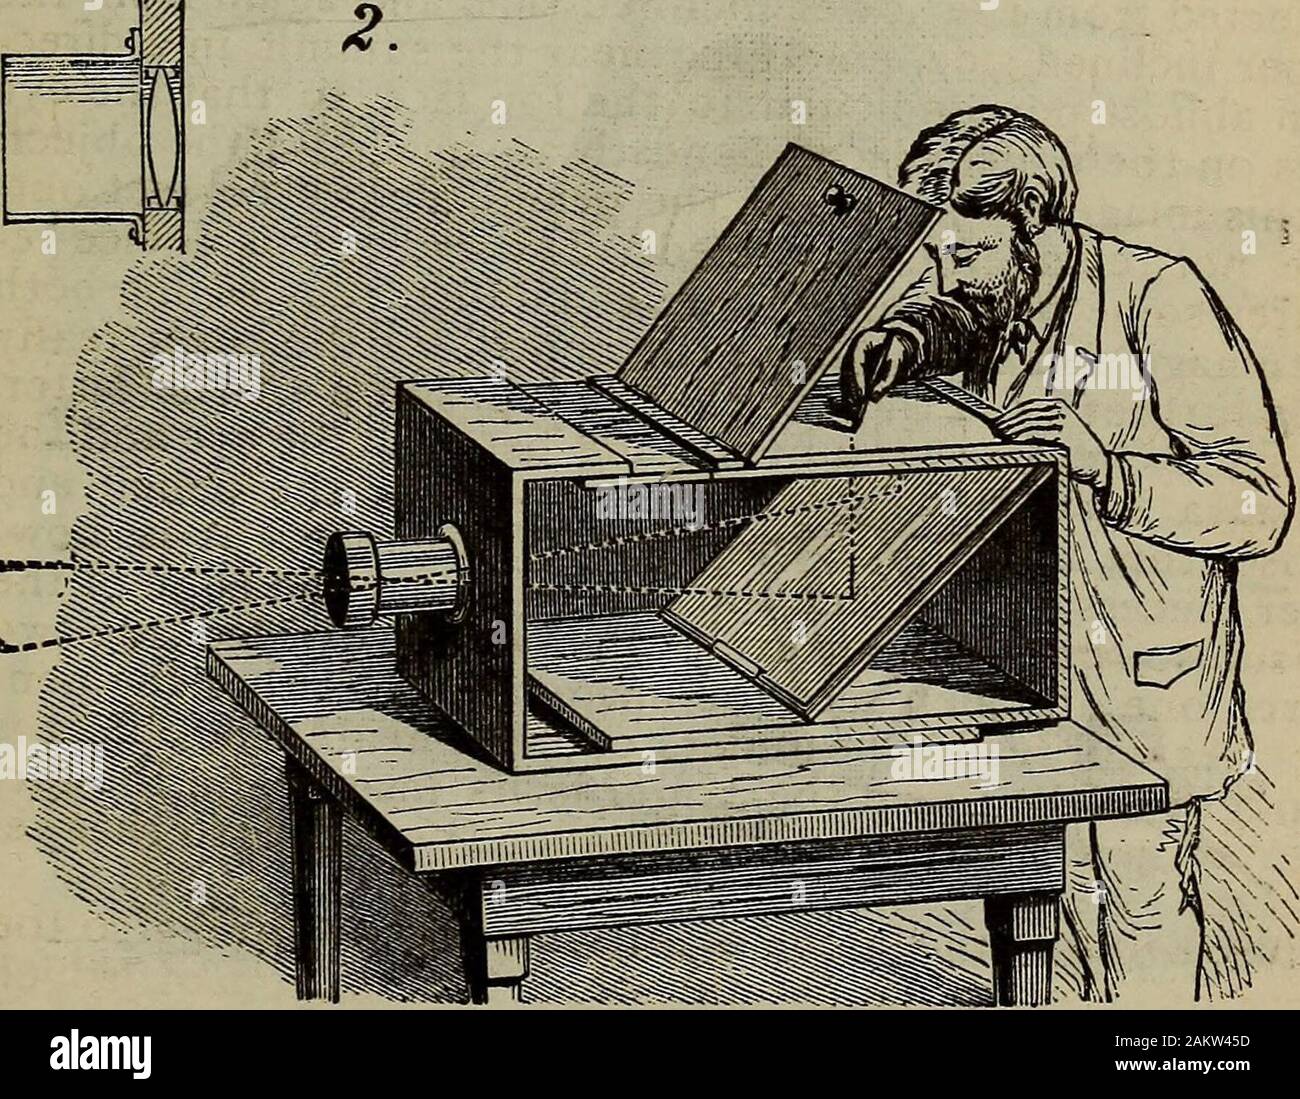
The camera obscura is a darkened box or room with a tiny opening or lens on one side. Light from outside passes through that small gap. Rays of light cross and project an inverted image of the scene onto the opposite surface. A lens focuses more light and sharpens the picture. A plain hole (a pinhole) makes a softer image but does not require glass.
The core idea is simple physics. Each point on the outside scene emits rays in many directions. Only a narrow bundle from each point passes through the hole. Those bundles hit the back surface in a pattern that recreates the scene, but flipped vertically and horizontally. That projected image is what early artists and inventors used to record a picture.

Types and historical development
The device appeared in observations by Chinese and Greek thinkers. By the Middle Ages and Renaissance, artists and scientists used rooms and boxes as drawing aids. Two main forms emerged:
- Pinhole camera obscura
- Uses a tiny opening. Produces a clear but dim image. No lens needed.
- Lens-based camera obscura
- Adds a convex lens to gather more light. Image is brighter and sharper.
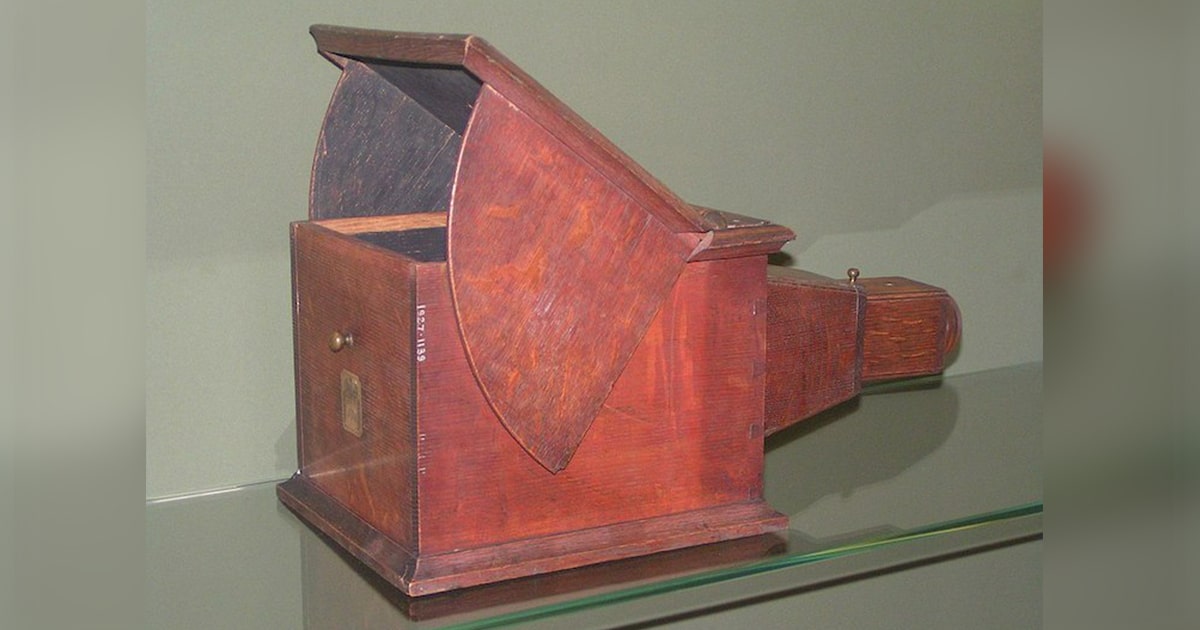
Over time, inventors combined the camera obscura with light-sensitive materials to record a picture directly. That step moved the device from a drawing aid to a true photographic tool. Museums and reconstructions confirm the basic operation across centuries.
How the camera obscura recorded a picture: methods
There are two main ways the camera obscura recorded a picture: manual tracing and photochemical capture.
Manual tracing
- Project the image onto a flat surface or paper.
- An artist traces the outline and key tones.
- This method dominated before light-sensitive media were well known.
- Traced images could be colored or enhanced after.
Photochemical capture
- The projected image falls on a surface coated with a light-sensitive chemical.
- Early experimenters used silver salts that darken with light.
- Exposure time depended on light intensity, lens speed, and chemical sensitivity.
- After exposure, the developer and fixer made the image visible and permanent.
Using a lens shortens exposure time and brightens the image. Pinholes require long exposures but avoid lens distortion. Both tracing and chemical capture answer the question of how did the camera obscura record a picture — one by human hand, the other by changing a material with light.

Technical factors that affected image recording
Several simple factors determine how well the camera obscura records a picture:
- Aperture size
- Small hole: sharp but dim image. Large hole: brighter but blurrier image.
- Lens quality
- A clean, well-made lens focuses light accurately. Imperfect glass causes blur and color fringing.
- Distance from hole to screen (focal length)
- Longer distance increases image size but reduces brightness.
- Exposure time and light sensitivity
- For photochemical capture, the chemical must respond to the available light. Low sensitivity requires long exposure.
- Surface texture and color of projection screen
- Matte, neutral screens reproduce tones best. Glossy or colored surfaces distort contrast.
These practical limits shaped how artists and inventors used the camera obscura. Simple experiments show that steady support and precise alignment improve results dramatically.

Practical examples and a DIY experiment
I’ve built several cardboard camera obscuras while teaching. They are cheap, forgiving, and teach the core ideas fast. Try this simple experiment to see how did the camera obscura record a picture.
Materials
- A small box or shoebox
- Black paint or dark paper to line the inside
- A pin or needle for a hole
- A small convex lens (optional)
- White paper for the screen
- Tape and scissors
Steps
- Darken the inside of the box so stray light won’t wash out the image.
- Make a tiny hole in one short side. If you have a lens, mount it over the hole and seal light leaks.
- Place white paper on the opposite inside wall to act as the screen.
- Point the hole toward a bright outdoor scene. You’ll see an inverted image on the paper.
- For tracing, tape the paper in place and trace the outlines you see with a pencil.
- For photochemical capture, only attempt with proper photosensitive paper and safety precautions; alternatives include using a modern photographic paper in a controlled setting.
Lessons from my builds
- Use a tripod or steady support. Movement blurs the projected image.
- Adjust the hole size slowly. Small changes make a big difference.
- Work in bright outdoor light to maximize contrast.
- Tracing trains your eye to see values and perspective better than freehand drawing.
Benefits and limitations
Benefits
- Teaches optical principles with simple tools.
- Produces realistic perspective and proportion for artists.
- Serves as a bridge between naked-eye observation and photography.
- Works without electricity or complex gear.
Limitations
- Images are inverted and must be corrected or adapted.
- Brightness can be low, especially with small apertures.
- Photochemical capture requires specialized materials and safety steps.
- Lens imperfections and chromatic aberration can reduce sharpness.
Understanding these trade-offs helps explain why the camera obscura remained a tool for drawing and demonstration until advances in chemistry and optics enabled modern photography. This also answers how did the camera obscura record a picture in practical terms: it projected and either guided a human hand or chemically altered a surface to hold the image.
Frequently Asked Questions of how did the camera obscura record a picture
How exactly did images appear on the back wall of a camera obscura?
Light enters through a small hole or lens and crosses inside the dark space, casting an inverted image on the opposite surface. Each point of the scene maps to a point on the screen.
Could the camera obscura make a permanent photograph directly?
Yes, when the projected image fell on light-sensitive materials that darken or change with exposure, the image could be made permanent after chemical development. Early photographic experiments used silver compounds.
Which is better for recording — a pinhole or a lens?
A lens is better for brightness and short exposures; a pinhole yields sharp edges at the cost of dim light. The choice depends on whether you trace or use photosensitive media.
Did artists use the camera obscura to help paint?
Yes. Many artists used projected images to get accurate perspective and proportions. They commonly traced projections and then refined them by hand.
How long did it take to record a picture with early photochemical methods?
Exposure times varied widely, from seconds with bright light and efficient lenses to minutes or more with weak light and slow chemicals. Early experiments often required long exposures.
Can I build a camera obscura today to record pictures?
Yes. A simple cardboard model will project an image you can trace. With modern photographic paper and safety knowledge, you can capture images chemically, but follow proper handling instructions for chemicals.
Conclusion
The camera obscura recorded a picture by turning light into a usable projected image and then either guiding an artist’s hand or altering a light-sensitive surface to make that image permanent. From pinhole projections to lens-enhanced images and early photochemical captures, the device shows how simple optics and careful exposure create pictures. Try building a small camera obscura yourself to see the process firsthand. Share your results, ask questions, or subscribe for more hands-on guides and historical experiments.

Everett Ashford is a tech reviewer at mytechgrid.com specializing in SSDs, cameras, TVs, earbuds, headphones, and other consumer electronics. He provides honest, data-driven reviews based on hands-on testing and real-world performance analysis. Everett simplifies complex tech details to help readers make smart, confident buying decisions.