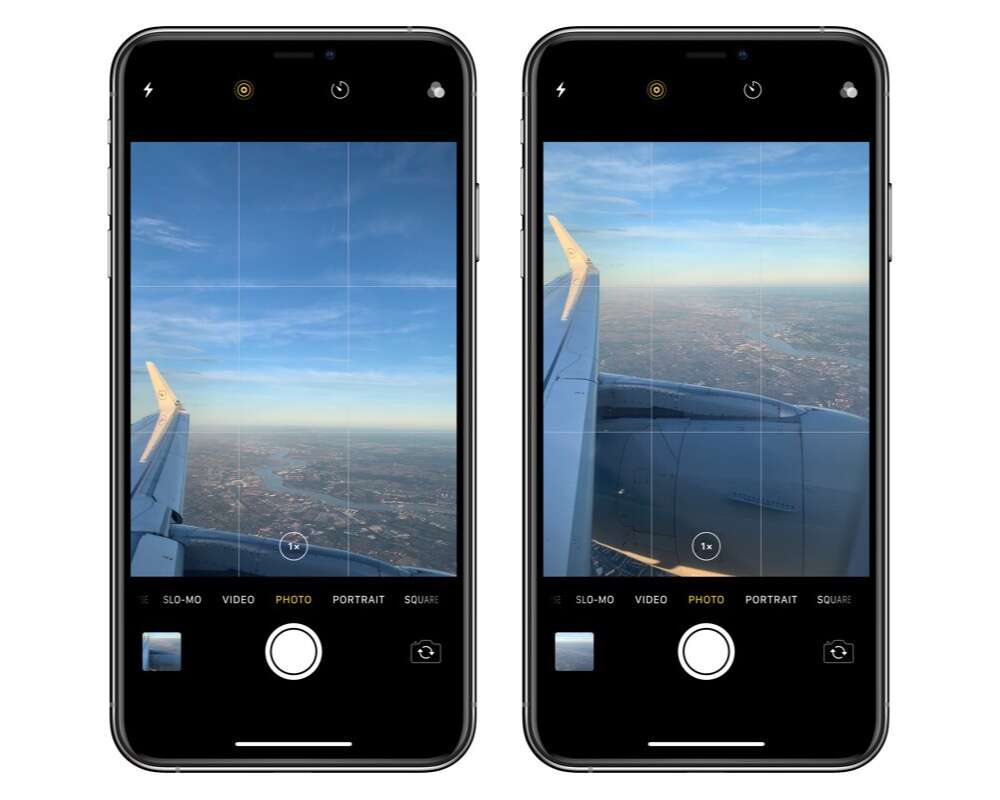
Turn on the Grid in Settings > Camera > Grid — then use it in the Camera app to frame shots.
I’ve used iPhones for years and taught photography basics to beginners, so I know how powerful a simple grid overlay can be. This guide explains exactly how to put a grid on iPhone camera, why it helps your photos, how to use it for better composition, which apps give custom grids, and how to troubleshoot common problems. Read on and you’ll be ready to use the grid to improve every shot you take.
Why use a grid on your iPhone camera
A grid is a simple overlay that divides the frame into equal sections. It helps you apply composition rules like the rule of thirds and vertical/horizontal alignment. Using a grid makes photos look balanced and intentional, whether you’re shooting landscapes, portraits, or everyday scenes.
Using a grid on iPhone camera helps with:
- Aligning horizons so landscapes are level.
- Placing subjects at strong points using the rule of thirds.
- Keeping architecture straight and symmetrical.
- Cropping with purpose by previewing final framing.
I rely on the grid for quick composition checks when I shoot on the go. It cuts down editing time and makes my photos feel more professional.
How to put a grid on iPhone Camera — step-by-step
Follow these short steps to enable the grid. This is the standard iOS method and works on most modern iPhones.
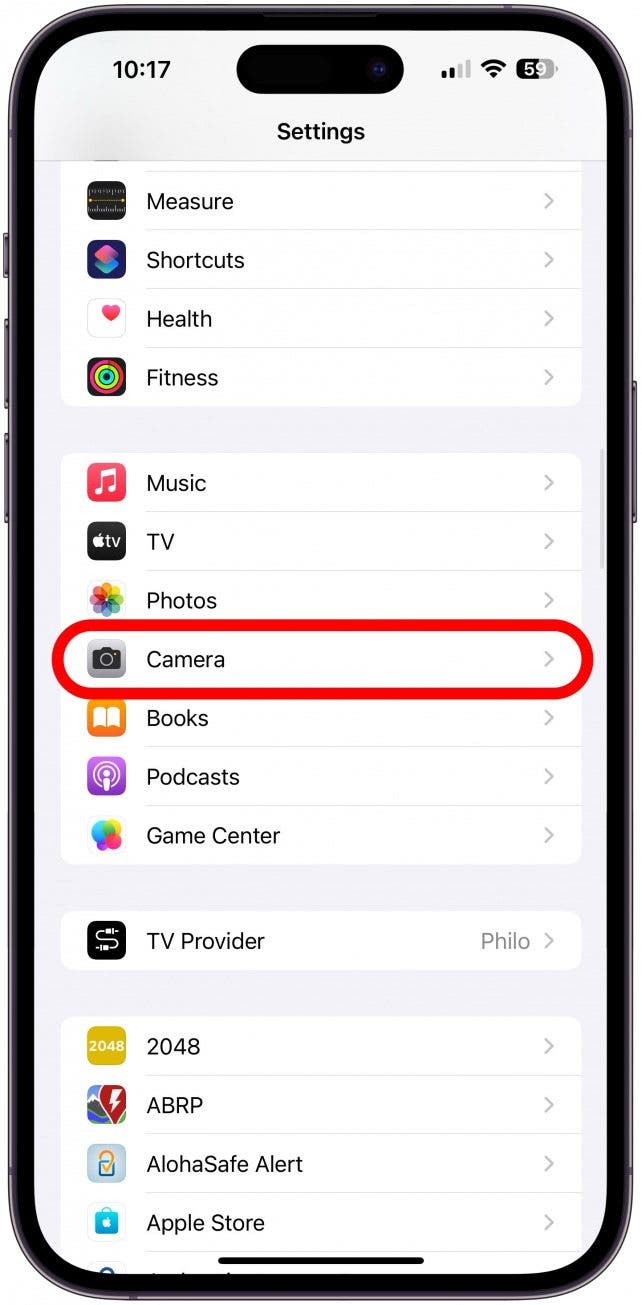
- Open the Settings app on your iPhone.
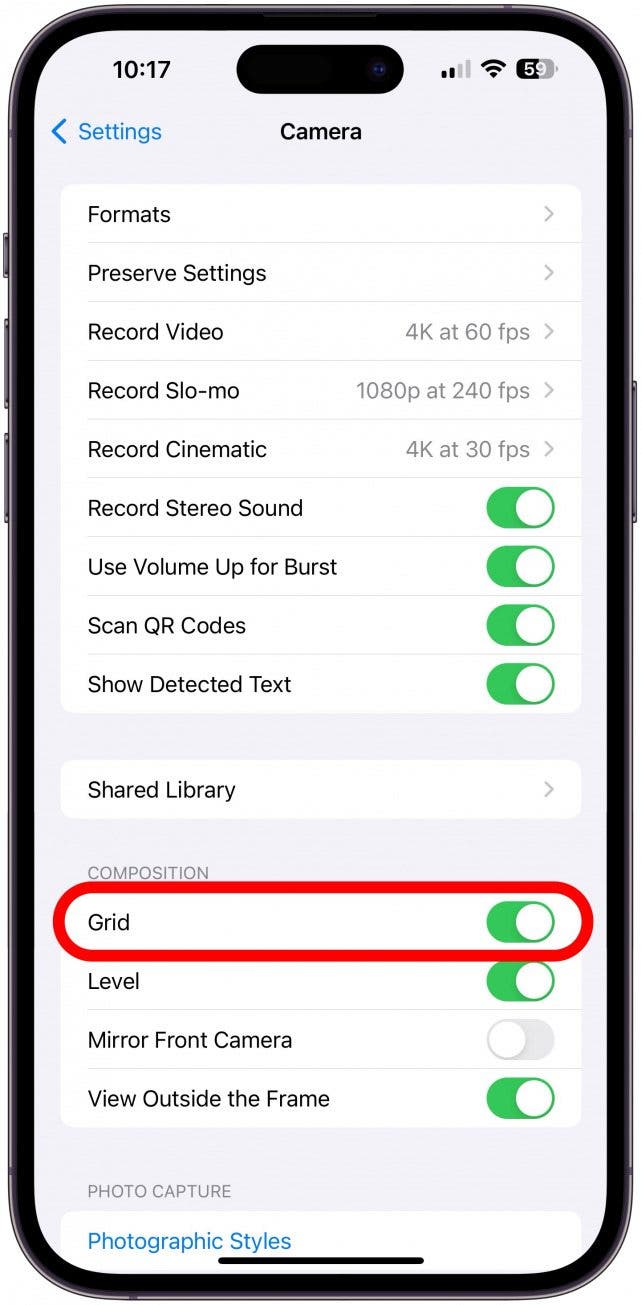
- Scroll down and tap Camera.
- Toggle Grid to the ON position.
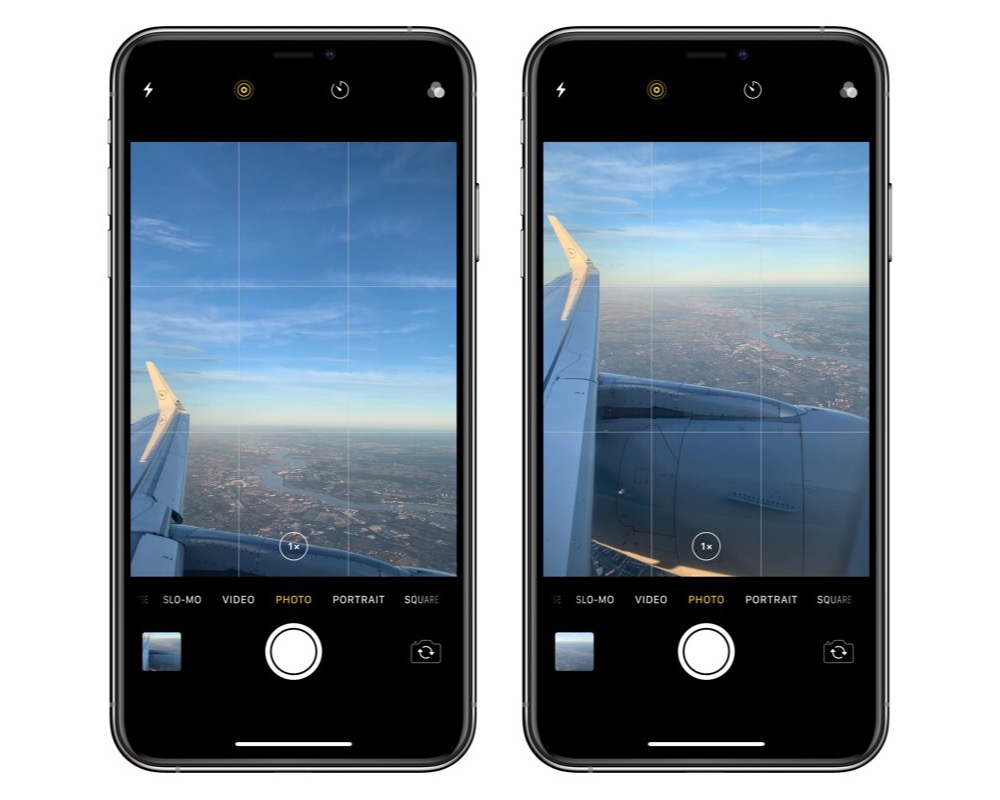
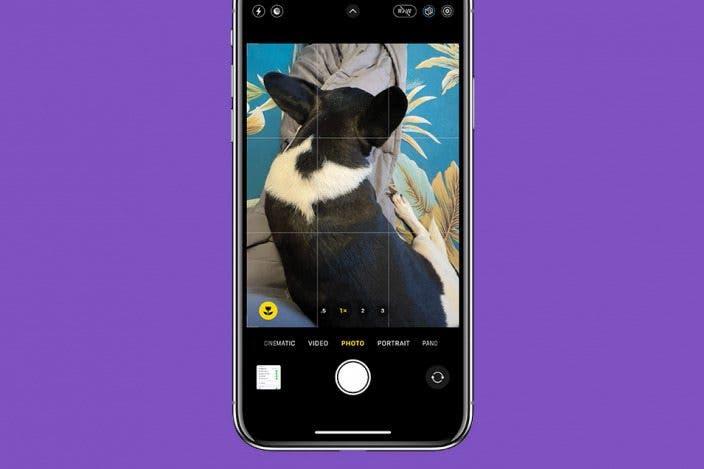
- Open the Camera app and you will see the grid overlay.
That’s how to put a grid on iPhone camera using the built-in setting. The grid appears in Photo, Square, and Pano modes. It also shows up in Portrait and Live Photo modes in most iOS versions.

Using the grid to improve composition
A grid changes how you see and place elements in the frame. Use it actively, not passively.
Practical uses:
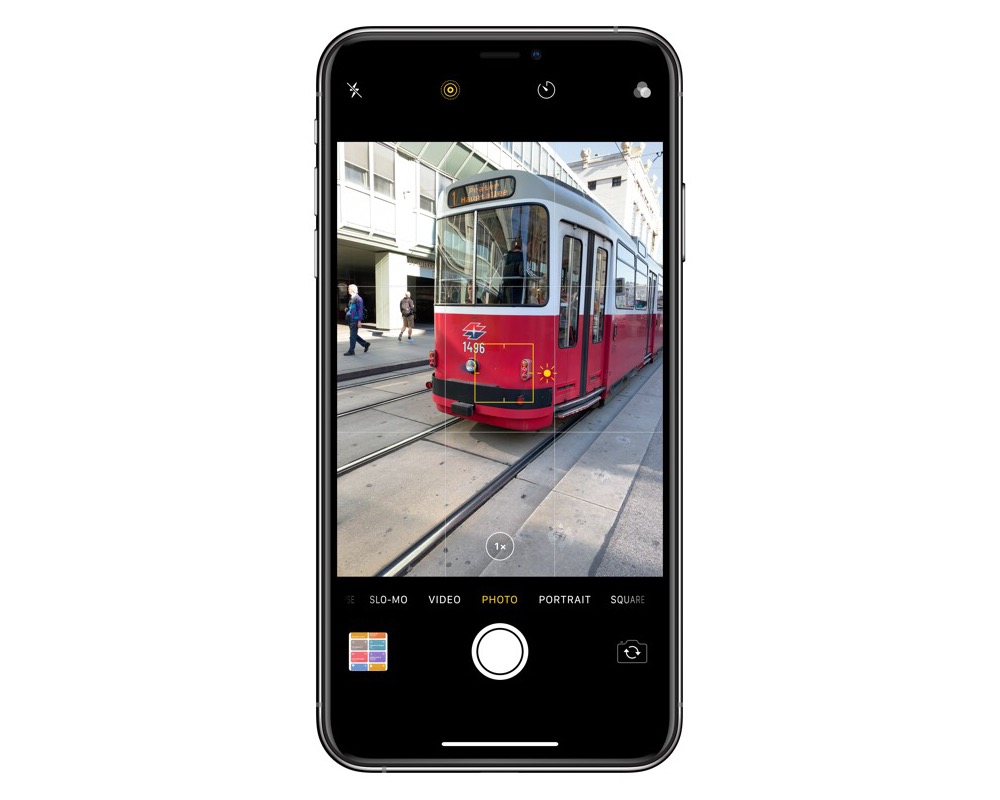
- Rule of thirds: Place your subject on one of the four intersections to create balance.
- Horizon lines: Line the horizon with a horizontal grid line for a straight look.
- Symmetry: Use the center vertical line to split scenes that are symmetrical.
- Negative space: Align the subject on a third and leave empty space for mood.
Example workflow I use:
- Turn on the grid.
- Frame the subject on an intersection.
- Check background clutter along other grid lines.
- Recompose until lines and points feel balanced.
These simple steps show why the grid is one of the easiest tools for better photos. Once you know how to put a grid on iPhone camera, your eye for composition improves quickly.
Third-party apps and advanced grid options
The built-in grid is limited to a 3×3 rule-of-thirds overlay. If you want more control, third-party apps add options.
Common advanced grids:
- Golden ratio and spiral overlays for artistic framing.
- Rule-of-thirds plus thirds-of-thirds for tighter composition.
- Custom grids with adjustable spacing and angles.
- Level and horizon indicators combined with grid lines.
Popular third-party camera apps often include multiple grid choices, on-screen crop guides, and professional tools. When you need a custom overlay, these apps let you go beyond the native grid. I use a third-party app when I need a golden-ratio guide for portraits or architecture shots.

Troubleshooting and tips when the grid won’t show
If you enabled the grid but don’t see it, try these quick fixes.
Steps to try:
- Confirm Grid is toggled on in Settings > Camera.
- Close and reopen the Camera app.
- Restart your iPhone if the grid still doesn’t appear.
- Update iOS to the latest version to fix software bugs.
- Try the grid in multiple camera modes to verify behavior.
If a third-party app offers a grid but it’s not showing, check the app’s settings and permissions. Some apps manage overlays inside the app, not in iPhone system settings.
Practical examples and real-life tips from my experience
I’ve shot street scenes, portraits, and interiors using the grid. Here are lessons I learned.
What worked best:
- For portraits, I place the eyes near the top third intersection.
- For landscapes, I switch between placing the horizon on the top or bottom third.
- For architecture, the center vertical line helps me check symmetry fast.
Mistakes to avoid:
- Don’t rely on the grid for every shot — sometimes breaking the rule looks better.
- Don’t force a crop that makes the subject too close to the edge.
- Avoid using grid as a crutch; learn to visualize composition without it.
By practicing these tips, you’ll internalize composition and use the grid only when it benefits the image. Learning how to put a grid on iPhone camera is the first step; practice makes it instinctive.

Accessibility and pro tips
Small adjustments make a big difference when using the grid.
Accessibility tips:
- Increase display brightness if you can’t see the grid outdoors.
- Use the level feature (available in some apps) with the grid for perfect horizons.
- For shaky hands, use a tripod and the grid to fine-tune alignment.
Pro tips:
- Combine the grid with Exposure and Focus Lock for consistent shots.
- Use burst mode while composing along a grid line to capture subtle movements.
- When editing, keep the grid in mind to crop to stronger intersections.
These simple tweaks help you get consistent results and make the grid part of your creative workflow.
Frequently Asked Questions of how to put a grid on iphone camera
How do I enable the grid on my iPhone camera?
Go to Settings, then Camera, and toggle Grid to ON. Open the Camera app and you will see the 3×3 overlay.
Will the grid appear in all camera modes?
The built-in grid appears in most modes like Photo, Portrait, and Pano, though behavior can vary by iOS version. Some specialized modes may not show the overlay.
Can I use a golden ratio grid on iPhone camera?
The native iPhone grid only shows a rule-of-thirds grid; for a golden ratio grid you must use a third-party camera or editing app. Many apps include spiral and golden-ratio overlays.
Why can’t I see the grid after turning it on?
Make sure the Grid setting is enabled, then restart the Camera app or reboot the iPhone. If the problem persists, update iOS or check for app-specific overlay settings.
Does the grid help with horizon leveling?
Yes. Lining the horizon along a horizontal grid line ensures a straight horizon and reduces perspective issues. For precise leveling, combine the grid with a level indicator in the camera or a third-party app.
Conclusion
Knowing how to put a grid on iPhone camera gives you a fast, reliable way to improve composition and make photos look intentional. Enable the grid, practice placing subjects on intersections, and try third-party overlays when you need more advanced guides. Start using the grid on your next shoot, experiment with placement, and watch your images get stronger. If this guide helped you, try the tips on your next photo and leave a comment with your results or questions.

Everett Ashford is a tech reviewer at mytechgrid.com specializing in SSDs, cameras, TVs, earbuds, headphones, and other consumer electronics. He provides honest, data-driven reviews based on hands-on testing and real-world performance analysis. Everett simplifies complex tech details to help readers make smart, confident buying decisions.