Charge both buds, reset pairing, clean contacts, check balance, and test with another device.
I’ve spent years fixing audio gear and helping friends rescue dead-sounding earbuds. If you’re searching how to fix one earbud not working, this guide walks you through clear, step-by-step checks and fixes. I’ll explain why one earbud stops working, show reliable troubleshooting steps, share real-life fixes I’ve used, and explain when replacement or repair is the right choice. Read on to get your earbuds sounding balanced again.

How earbuds work and why one side can fail
Earbuds use tiny drivers, a power source, and a signal path. True wireless earbuds have two individual units that sync with each other and your device. A fault in any link can mute one earbud.
Common tech links that fail include:
- Battery or charging contact problems
- Bluetooth pairing or mono/stereo settings
- Physical blockages like earwax
- Firmware or software bugs
- Hardware damage or water exposure
Knowing these parts helps when you troubleshoot how to fix one earbud not working. I’ll break each area down so you can test and isolate the cause.

Step-by-step troubleshooting checklist
Follow these steps in order. Each step is quick and will help isolate the problem.
- Inspect and charge both earbuds
- Put both earbuds in the case and charge for 15–30 minutes.
- Check LED indicators for both buds and the case.
- If one bud shows no light, the bud or case contact may be faulty.
- Clean contacts and speaker mesh
- Gently clean charging pins and mesh with a dry cotton swab or soft toothbrush.
- Remove visible earwax from mesh using a soft pick or brush.
- Try again after cleaning.
- Check device audio settings
- On your phone/computer, play audio and check left-right balance.
- Ensure mono audio is off and balance slider is centered.
- Try switching apps to rule out app-level audio issues.
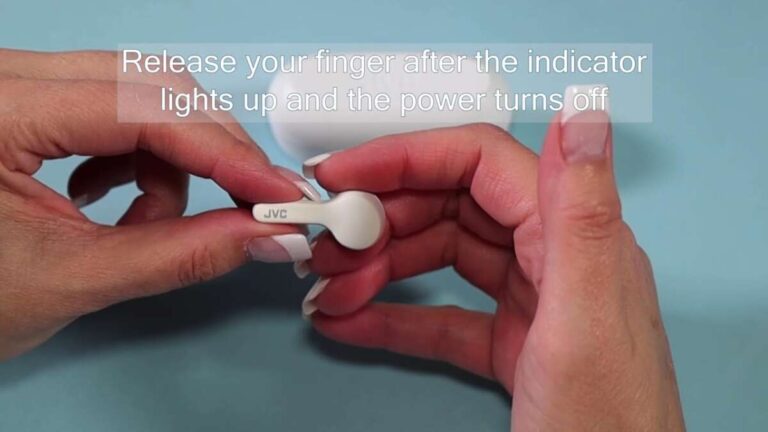
- Re-pair or reset the earbuds
- Forget the earbuds on your device’s Bluetooth list.
- Reset the earbuds using the manufacturer method (press-and-hold or case reset).
- Re-pair and test left and right channels.
- Test each earbud separately
- Some models let you use one bud at a time. Use one bud in the case and the other out.
- Swap roles: test the previously dead bud by removing the working bud and pairing again.
- This shows if the bud itself is dead or if the pairing master is the issue.
- Try another source device
- Pair earbuds to a different phone, tablet, or laptop.
- If the earbud works on a different device, the original device may be the problem.
- Update firmware and app
- Open the earbud companion app and check for firmware updates.
- Firmware fixes wireless sync bugs that can mute one side.
- Look for physical or water damage
- Inspect for dents, loose parts, or moisture.
- For water-exposed earbuds, dry them in a warm, dry place for 24–48 hours.
- Contact support or seek repair
- If under warranty, contact the manufacturer for repair or replacement.
- For out-of-warranty units, evaluate repair cost vs. replacement.
These steps usually resolve most cases of how to fix one earbud not working. When they don’t, the fault is often internal.
Common causes and specific fixes
Here I list the likely root causes and precise fixes you can try.
Battery or charging issues
Cause: One bud doesn’t charge due to dirty contacts or a broken charging spring.
Fix: Clean the contacts and wiggle the bud in the case to ensure a secure fit. Test with a multimeter if you have one.
Bluetooth pairing and master-slave problems
Cause: One bud fails to connect because it lost sync with the other.
Fix: Reset both earbuds and re-pair. Many earbuds assign a “master” bud; ensure the master is the one that connects first.
Device audio settings
Cause: Audio balance or mono settings are misconfigured.
Fix: On iPhone go to Settings > Accessibility > Audio/Visual. On Android look for Sound > Advanced > Balance. Center the balance.
Earwax and blockages
Cause: Build-up muffles sound in one earbud.
Fix: Use a dry brush and gentle picks to clear mesh. Avoid liquids or sharp tools.
Firmware glitches
Cause: Software bugs can mute channels after an update.
Fix: Update firmware in the companion app or perform a factory reset.
Physical or water damage
Cause: Internal driver damage or corrosion.
Fix: If under warranty, request replacement. Otherwise, consider a repair shop; DIY fixes risk permanent damage.
These cause-and-effect checks help you triage the issue when figuring out how to fix one earbud not working.

Cleaning and maintenance best practices
Good care prevents many one-earbud failures. Follow these simple habits.
- Clean after heavy use
- Remove earwax from mesh with a soft brush weekly
- Use a dry cloth to wipe charging pins and case interior
- Keep earbuds dry; avoid sweat exposure during charging
- Store earbuds in their case when not in use
I once fixed a “dead” left bud by removing a tiny wax plug. It took five minutes and a soft brush. Regular cleaning saved me money and extended the earbuds’ life.

When to repair, replace, or claim warranty
Use this guide to decide next steps.
- If the earbuds are under warranty, contact support first.
- If only the charging case is faulty, replacing the case can be cheaper.
- If a driver or board is damaged, repair costs often approach replacement cost.
- For budget earbuds, replacement is usually the smarter choice.
- For premium earbuds, a professional repair can be worth it.
Be aware that opening earbuds often voids warranty. If you value original coverage, avoid DIY repairs. I’ve repaired some stems and saved units, but that works only if you accept the risk of voiding warranty.

Preventive tips to avoid one-side failures
Small habits keep both earbuds working.
- Charge both earbuds evenly and avoid leaving one out
- Update firmware monthly
- Store in a clean, dry case
- Avoid high-volume sessions that stress drivers
- Use only manufacturer-approved chargers and cables
These steps reduce wear and the chance you’ll need to search how to fix one earbud not working again.

Frequently Asked Questions of how to fix one earbud not working
Why is one earbud not making sound but shows connected?
Often the bud is paired but muted by device balance or app settings. Resetting the earbud and re-pairing usually restores audio.
Can earwax alone cause one earbud to sound dead?
Yes. Earwax can block the driver or mesh and cause very low or no sound. Cleaning the mesh carefully often fixes it.
Will updating firmware help if one earbud is silent?
Yes. Firmware updates can fix Bluetooth sync and audio channel bugs that mute one side. Always check the companion app.
Is it worth repairing expensive earbuds with one dead side?
If under warranty, yes. Out of warranty, compare repair costs to replacement price; repairs often cost less for premium models.
How long should I charge earbuds before first use after they stop working?
Give them at least 15–30 minutes in the case to ensure both buds get a charge. Check indicators and retry pairing after charging.
Can water exposure cause only one earbud to fail?
Yes. Moisture can corrode contacts or the driver in a single bud. Drying may help, but professional repair is often needed for water damage.
Conclusion
You can resolve most cases of how to fix one earbud not working with calm, methodical checks: charge, clean, reset, test on another device, update firmware, and decide on repair if needed. Use the step-by-step checklist to isolate the issue quickly and save time. Try the easy fixes first, and if you hit a hardware limit, weigh warranty and repair costs. If this guide helped, try the steps now, share your results, or ask a follow-up question below — I’ll help troubleshoot further.

Jamie Lee is a seasoned tech analyst and writer at MyTechGrid.com, known for making the rapidly evolving world of technology accessible to all. Jamie’s work focuses on emerging technologies, product deep-dives, and industry trends—translating complex concepts into engaging, easy-to-understand content. When not researching the latest breakthroughs, Jamie enjoys exploring new tools, testing gadgets, and helping readers navigate the digital world with confidence.