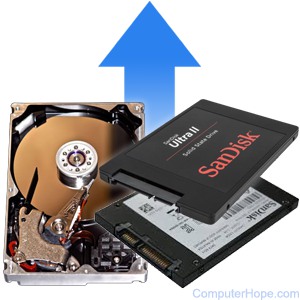
Upgrading to an SSD means choosing a compatible drive, cloning your data, installing it, and checking the new setup.
Learning how to upgrade to a SSD drive can make an older computer feel new again. An SSD can shorten startup times, open apps faster, and make daily work feel smoother. This guide explains the full process for Windows desktops and laptops, including drive selection, data transfer, installation, troubleshooting, and common mistakes.

Why Upgrade to an SSD Drive?
A solid-state drive, or SSD, stores data on flash memory. It has no spinning disks or moving read heads. A traditional hard disk drive, or HDD, uses moving parts, so it is slower and more sensitive to drops and vibration.
When you learn how to upgrade to a SSD drive, the biggest change is usually speed. Windows may start in seconds instead of minutes. Programs can load faster, and files may open with less delay.
An SSD upgrade can also reduce noise. Since an SSD has no moving parts, it runs silently. It often uses less power than an HDD, which can help extend laptop battery life.
The upgrade is most useful when:
• Your computer takes a long time to start
• Apps open slowly
• The hard drive reaches 90% or more of its capacity
• Your system freezes during file access
• You want better shock resistance in a laptop
• You need faster file transfers
However, an SSD cannot fix every performance problem. A computer with very little RAM, an old processor, malware, or poor cooling may still feel slow after the upgrade.

Choose the Right SSD
The first step in how to upgrade to a SSD drive is finding a drive that matches your computer. SSDs differ in size, connection type, speed, and physical shape.
SATA SSD
A 2.5-inch SATA SSD is the most common replacement for an older laptop or desktop HDD. It uses the same basic data connection as many hard drives.
SATA SSDs usually reach speeds near 500 to 550 MB per second. That is far faster than most HDDs, even though it is slower than newer PCIe drives.
Choose a SATA SSD if:
• Your computer has a 2.5-inch drive bay
• The system uses a SATA data connection
• You are replacing an older laptop hard drive
• You want an affordable and simple upgrade
M.2 SATA SSD
An M.2 SATA SSD is a small stick-shaped drive. It may fit into an M.2 slot, but it still uses the SATA protocol.
Do not assume that every M.2 slot supports every M.2 drive. Some slots support SATA, PCIe, or both. Check your computer manual before buying one.
M.2 NVMe SSD
NVMe drives use the PCIe interface. They are much faster than SATA SSDs and are common in modern laptops and desktops.
An NVMe SSD may offer several times the sequential speed of a SATA SSD. Yet the difference in normal tasks may feel smaller than the numbers suggest. Windows startup, web browsing, and office work often depend on many small tasks, not only large file transfers.
Choose an NVMe SSD when:
• Your motherboard or laptop supports NVMe
• You edit video or large photo files
• You transfer large files often
• You want a modern, high-performance drive
Check capacity
For most people, 1 TB is a useful starting point. A 500 GB SSD can work for basic use, but Windows, apps, photos, games, and updates can fill it quickly.
Consider these general sizes:
• 500 GB for light office work and web use
• 1 TB for everyday use, photos, and several large programs
• 2 TB or more for games, video projects, and large media libraries
Leave some free space on the SSD. A nearly full drive may slow down and leave less room for system updates. Keeping about 10% to 20% free is a sensible habit.
Check Compatibility Before You Buy
Compatibility is the part of how to upgrade to a SSD drive that prevents the most problems. Take a few minutes to inspect your computer before ordering the drive.
For a desktop computer
Check the following:
• Does the motherboard have a free SATA port?
• Is there an available SATA power cable?
• Does the case have a 2.5-inch mounting point?
• Does the motherboard include an M.2 slot?
• Does the M.2 slot support SATA, NVMe, or both?
A 2.5-inch SATA SSD may need a mounting bracket if your case only has 3.5-inch drive bays. You also need a SATA data cable if one is not included.
For a laptop
Laptop upgrades need more care. Check the service manual or the manufacturer’s specifications.
Look for:
• The existing drive type
• The supported SSD size
• The maximum storage capacity
• The available M.2 key type
• Whether the laptop supports a second drive
• Whether opening the case affects your warranty
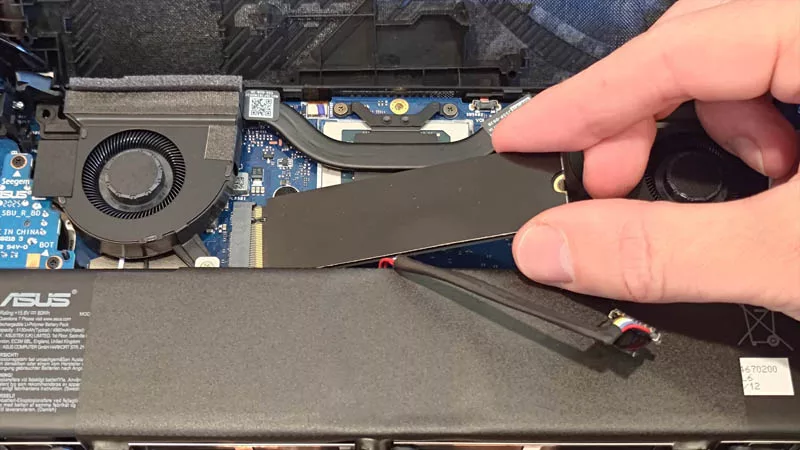
Many thin laptops use only an M.2 drive. Others use a 2.5-inch SATA drive. Some laptops have storage soldered to the motherboard and cannot be upgraded.
Find your current drive type in Windows
You can identify the current drive in several ways.
Open Task Manager by pressing Ctrl, Shift, and Esc. Select Performance, then choose Disk. Windows may show whether the drive is an SSD or HDD.
You can also open PowerShell and use this command:
Get-PhysicalDisk
Look at the MediaType result. For more precise information, check your computer’s model number on the manufacturer’s support page.
Back Up Your Data First
A backup is essential when learning how to upgrade to a SSD drive. Drive cloning often works well, but no transfer method is perfect.
Save important files to at least one separate location. Good choices include:
• An external hard drive
• A second computer
• A trusted cloud storage service
• A network drive
Your backup should include documents, photos, videos, browser bookmarks, saved game files, and other personal data. If you use special software, confirm that you have the license key or account details.
Do not rely on the old drive as your only backup. It may fail during the cloning process or while you remove it.
Before starting, check that your backup files open correctly. A backup that cannot be restored is only a copy with false confidence.
Prepare for the SSD Upgrade
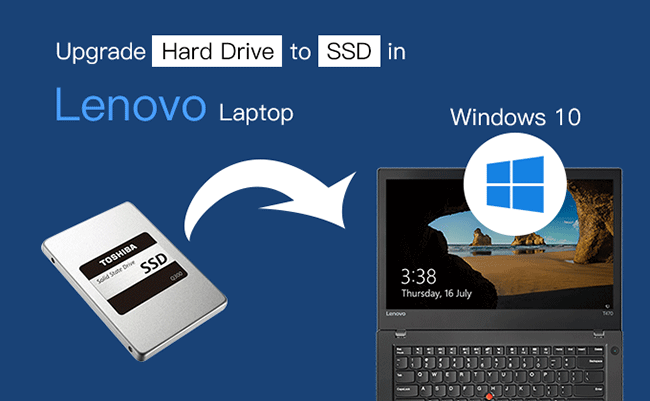
Good preparation makes how to upgrade to a SSD drive much easier. Gather the right tools before opening the computer.
You may need:
• The new SSD
• A small Phillips screwdriver
• A SATA data cable for a desktop
• A 2.5-inch mounting bracket for some desktops
• A USB to SATA adapter for cloning a SATA drive
• An NVMe USB enclosure for cloning an M.2 NVMe drive
• A bootable Windows installer, if needed
• An anti-static wrist strap
Shut down the computer fully. Disconnect the power cable from a desktop. For a laptop, unplug the charger and remove the battery if the design allows it.
Press the power button for a few seconds after unplugging the system. This helps discharge remaining power. Work on a clean table and avoid carpet when possible.
Touch a grounded metal part of the computer case before handling the drive. Never touch the gold contacts on the SSD.

Choose Between Cloning and a Fresh Install
There are two main ways to transfer Windows to the new SSD.
Clone the old drive
Cloning copies the operating system, apps, settings, and files to the new drive. It is the simplest option if your current Windows installation works well.
Cloning is a good choice when:
• You want to keep your current setup
• You have many programs installed
• You want the least disruption
• The new SSD has enough space for the used data
The cloning software may let you resize partitions during the process. Make sure the destination SSD is selected correctly. Choosing the wrong drive can erase your original data.
Perform a clean Windows installation
A clean installation gives you a fresh system. It removes old drivers, unwanted programs, and years of accumulated clutter.
Choose a clean install when:
• Windows has serious errors
• The old installation has malware
• You want a fresh start
• You are changing computers or major hardware
• The old drive contains more data than the new SSD
A clean install takes longer because you must reinstall apps, restore files, and change settings. It can still be worth the effort for a system that has become unstable.
How to Clone Your Drive to an SSD
Cloning is often the most practical answer to how to upgrade to a SSD drive without reinstalling everything. The general process works with many reputable disk-cloning tools.
-
Connect the new SSD to the computer.
-
Start the cloning software.
-
Select the old drive as the source.
-
Select the new SSD as the destination.
-
Copy all required system partitions.
-
Resize the main partition if the new SSD is larger.
-
Start the clone and wait for it to finish.
-
Shut down the computer after the software confirms completion.
Do not use the computer heavily during cloning. Close files and pause large downloads. A clone can take several minutes or several hours, depending on the amount of data and the connection speed.
If the old drive contains more data than the new SSD, remove large files first. You can also move videos, photos, and game libraries to another drive.
After cloning, do not immediately erase the old drive. Keep it untouched until the new SSD boots correctly and your important files are present.

Install the SSD in a Desktop
A desktop installation is usually straightforward.
-
Shut down the computer and unplug it.
-
Remove the side panel.
-
Find an open drive bay or M.2 slot.
-
Mount the 2.5-inch SATA SSD if needed.
-
Connect the SATA data cable to the motherboard.
-
Connect the SATA power cable from the power supply.
-
For an M.2 SSD, insert it at a slight angle.
-
Press the M.2 drive down gently.
-
Secure it with the small mounting screw.
-
Replace the case panel and reconnect power.
Never force a connector. SATA cables fit in one direction, and M.2 drives must match the slot’s key. If the SSD is not detected, turn off the computer and check the connection.
For a cloned system, enter the firmware setup by pressing a key such as Delete, F2, or Esc during startup. Set the new SSD as the first boot device.
Install the SSD in a Laptop
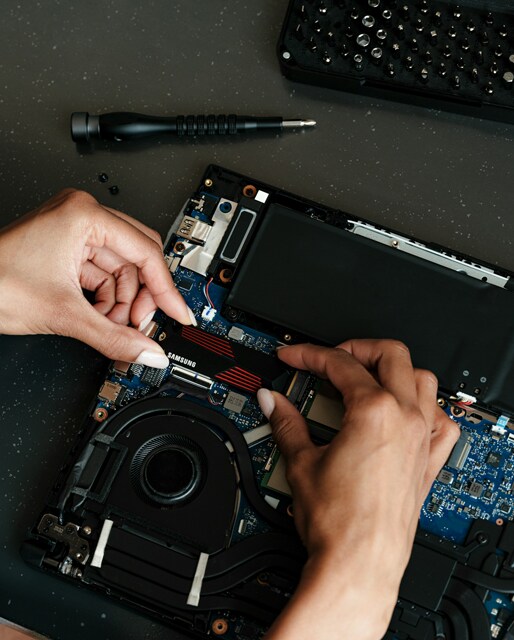
Laptop installation varies by model, so use the service guide for your exact computer.
-
Shut down the laptop.
-
Disconnect the charger.
-
Remove the bottom cover.
-
Disconnect the battery if possible.
-
Remove the old drive or storage shield.
-
Install the new SSD in the correct slot.
-
Secure the drive.
-
Reconnect the battery.
-
Replace the bottom cover.
-
Start the laptop and check the boot process.
Some laptops use delicate clips and small screws. Take a photo before disconnecting cables. Keep screws in a small container because they may look alike but have different lengths.
A common mistake is placing a 2.5-inch SSD into a laptop that only accepts an M.2 drive. Another mistake is buying an M.2 NVMe SSD for a laptop that supports only M.2 SATA. Confirm the interface before opening the case.
Set Up Windows After Installation
Once you understand how to upgrade to a SSD drive, do not stop after Windows starts. A few checks can confirm that the upgrade worked properly.
Open File Explorer and confirm that the expected files are present. Launch several programs and test sleep, restart, and shutdown.
Then check these areas:
• Windows Update
• Device Manager
• Storage capacity
• Drive health
• Boot order
• Activation status
Windows normally enables the TRIM feature for SSDs. TRIM helps the operating system tell the SSD which blocks are no longer needed. You can check TRIM in an elevated Command Prompt with:
fsutil behavior query DisableDeleteNotify
A result of 0 usually means TRIM is enabled. Avoid manually defragmenting an SSD. Windows uses storage optimization, which sends the proper maintenance command instead.
You can check the SSD’s health with the manufacturer’s software or a trusted monitoring tool. Pay attention to temperature, available firmware updates, and reported drive health.
Common SSD Upgrade Problems
Even careful upgrades can produce problems. Most are easy to solve when you know what to check.
The SSD does not appear
Check the cables, power connection, and M.2 seating. A new drive may also need to be initialized and formatted in Disk Management if it is being used as extra storage.
Do not initialize or format the drive if it contains your cloned operating system and you have not confirmed the boot setup.
Windows will not boot
Enter the firmware setup and select the new SSD as the first boot device. If that does not work, the clone may have missed a system partition or the boot files may need repair.
A Windows installation USB can open recovery tools. Use Startup Repair first, then consider rebuilding the boot configuration if needed.
The new SSD is slower than expected
A SATA SSD will not reach NVMe speeds. An NVMe SSD may also run slower if it is in a limited PCIe slot, becomes too hot, or shares bandwidth with another device.
Benchmark results can vary. Real-world speed depends on the processor, software, file sizes, temperature, and workload.
The computer shows less capacity
Manufacturers label storage using decimal units, while Windows reports capacity differently. A drive sold as 1 TB will show somewhat less usable space after unit conversion and formatting.
This is normal and does not mean the SSD is defective.
Mistakes to Avoid During an SSD Upgrade
The most costly errors usually come from rushing. These habits can protect your data and your hardware.
• Do not skip the backup.
• Do not format the old drive before testing the new one.
• Do not assume every M.2 drive is compatible.
• Do not touch the SSD contacts.
• Do not force a connector or screw.
• Do not clone more data than the new SSD can hold.
• Do not unplug the computer during cloning.
• Do not use a questionable adapter for important data.
• Do not discard the old drive until the migration is complete.
In hands-on upgrades, one lesson appears again and again: label each drive before cloning. When two drives have similar names, it is easy to select the wrong one. A quick photo of the Disk Management screen can prevent a painful mistake.
Another useful tip is to keep the old drive intact for at least a few days. It works like a safety net while you check files, apps, passwords, and settings on the new SSD.
How Much Does an SSD Upgrade Improve Performance?
The improvement depends on what you replace and what you do on the computer. Moving from an HDD to a SATA SSD often creates a major everyday improvement. Moving from a SATA SSD to an NVMe SSD may provide a smaller benefit for normal office tasks.
You may notice:
• Faster startup
• Quicker application launches
• Less waiting when opening files
• Faster game loading
• Smoother system updates
• Better performance during multitasking
Large file work benefits most from high-speed NVMe storage. Video editors, engineers, photographers, and developers may see stronger gains than casual web users.
Still, an SSD does not increase processor speed. It also does not add memory. If the system has only 4 GB of RAM or an aging processor, upgrading those parts may provide a better next step.
Frequently Asked Questions About How to Upgrade to a SSD Drive
Can I upgrade any computer to an SSD?
Most desktops and many laptops can use an SSD, but compatibility depends on the available connection and physical space. Check whether the system uses SATA, M.2 SATA, or M.2 NVMe storage before buying a drive.
Is it better to clone a drive or reinstall Windows?
Cloning is faster and preserves your programs, files, and settings. A clean installation is better when the old system has errors, malware, or years of unwanted software.
How long does it take to upgrade to an SSD?
The physical installation may take 15 to 60 minutes. Cloning, updates, and testing can take longer, especially when the old drive contains hundreds of gigabytes of data.
Do I need to format the new SSD before cloning?
Usually, no. Cloning software normally prepares the destination drive during the copy process. Follow the software instructions and never format the source drive by mistake.
Can I keep my old hard drive after the upgrade?
Yes. You can use it as a backup or secondary storage drive after confirming that the new SSD works. Erase or reuse the old drive only after your important files are safely backed up.
Should I buy a SATA SSD or an NVMe SSD?
Buy the type your computer supports. NVMe is faster in supported systems, but a SATA SSD is still an excellent upgrade for a computer that uses a SATA connection.
Will an SSD make my computer faster for gaming?
An SSD can reduce game load times and improve level loading. It usually does not increase graphics frame rates unless the old drive caused severe loading or streaming problems.
Conclusion
Learning how to upgrade to a SSD drive is a practical way to improve an older computer. Choose a compatible SSD, back up your files, clone or reinstall Windows, install the drive carefully, and test the system before erasing the old storage.
The safest approach is simple: verify compatibility first, protect your data, and keep the original drive until the upgrade proves reliable. If you are ready for faster startup and smoother everyday use, use this guide to plan your SSD upgrade and explore your computer manufacturer’s support resources before you begin.

Everett Ashford is a tech reviewer at mytechgrid.com specializing in SSDs, cameras, TVs, earbuds, headphones, and other consumer electronics. He provides honest, data-driven reviews based on hands-on testing and real-world performance analysis. Everett simplifies complex tech details to help readers make smart, confident buying decisions.