Use a USB cable, SD card adapter, Wi‑Fi app, or USB‑OTG to move photos fast.
I’ve spent years helping photographers and everyday users move images between devices. Whether you shoot on a DSLR, mirrorless, or point‑and‑shoot, this guide shows exactly how to transfer pictures from a camera to a phone. You’ll get clear steps, real tips I learned on shoots, and fixes for common problems so your photos land on your phone fast and intact.
Why move photos from a camera to a phone?
Moving photos from a camera to a phone gives you quick sharing, fast edits, and instant backups. Phones make it easy to post to social media, send files, or proof images on the go. I often move photos to my phone between shoots to check exposure and composition quickly.
Benefits include:
- Faster sharing to email, messages, and social apps.
- Quick light edits and previews with mobile apps.
- Immediate backups to cloud services from your phone.
- Ability to select, crop, and caption before publishing.
You can learn different ways depending on your camera model and phone type. Each method balances speed, quality, and convenience.

Main methods to transfer pictures from a camera to a phone
Different cameras and phones support different methods. Pick the one that fits your gear, speed needs, and budget. Below are the most reliable methods to move images.
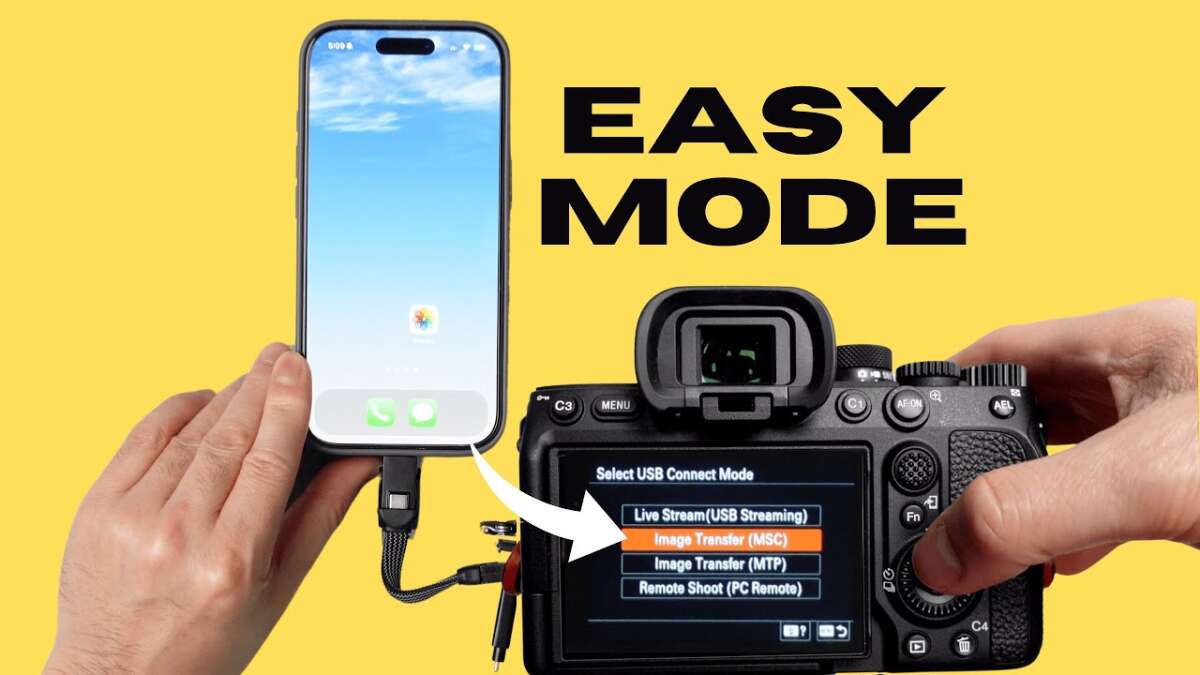
Wired transfer with camera USB cable
- Connect camera to phone or computer with the camera’s USB cable.
- Use the phone’s file manager or camera app to import files.
- Works well for large RAW files and stable transfers.
Using an SD card and adapter
- Remove the camera’s SD card and use a card reader or SD-to-phone adapter.
- Insert into phone (if supported) or into a USB card reader connected to the phone.
- Fast and simple for bulk transfers.
Wi‑Fi or Bluetooth built into the camera
- Many modern cameras include Wi‑Fi or Bluetooth and a companion app.
- Pair the camera with the phone, then select and send images.
- Great for quick JPEG transfers without cables.
USB OTG (On-The-Go) cable
- Use a USB OTG adapter to plug the camera or card reader directly into Android phones.
- The phone will detect the storage and allow file copy.
- Useful when you don’t want a computer as an intermediary.
Cloud sync and tethered workflows
- Upload from camera (via Wi‑Fi) to cloud, then download on phone.
- Or tether the camera to a laptop, then sync with cloud and access on phone.
- Handy for remote teams and multi-device backups.
Third‑party apps and wireless transmitters
- Apps such as camera manufacturers’ apps, or wireless transmitters, can speed transfers.
- Some apps let you transfer full-resolution images; others limit to JPEG previews.
- Check app settings for file-size and quality options.
When to choose which method:
- Choose wired or SD card for RAW and large transfers.
- Choose Wi‑Fi/Bluetooth for quick social‑ready JPEGs.
- Use cloud if you want automated backups and multi-device access.
Quick questions you might have:
- Can I transfer RAW files over Wi‑Fi?
- Some cameras and apps allow RAW transfer, but it’s often slow. Use SD card or USB for large RAW files.
- Will transferring reduce image quality?
- Direct transfers keep original quality. Some companion apps may send reduced JPEG previews unless configured otherwise.
- Is USB OTG safe for my phone?
- Yes, if your phone supports OTG and you use a quality adapter. Avoid cheap cables that can cause power issues.

Source: cnet.com
- Yes, if your phone supports OTG and you use a quality adapter. Avoid cheap cables that can cause power issues.
Step‑by‑step: Wired, SD card, and wireless transfers
Here are clear, repeatable steps for the most common workflows. I use these on shoots and to prep images for clients.
- Transfer with the camera USB cable (most cameras)
- Turn off the camera. Use the original USB cable if possible.
- Connect the camera to your phone (or to a computer, then sync to phone).
- Turn the camera on and set it to the correct mode (playback or PC mode).
- On your phone, open the Files app or the camera manufacturer’s app.
- Copy or import the photos to a phone folder.
- Transfer using an SD card and adapter
- Power off your camera and remove the SD card.
- Insert the SD card into a USB‑card reader or phone SD slot/adapter.
- Plug the reader into your phone or computer.
- Use your phone’s file manager to copy images to the phone’s Photos or Pictures folder.
- Transfer via the camera’s Wi‑Fi or Bluetooth app
- Turn on camera Wi‑Fi or Bluetooth and enable pairing.
- Open the camera maker’s app on your phone and follow pairing prompts.
- Browse thumbnails and download selected images to your phone.
- Transfer with USB OTG (Android)
- Get a USB OTG adapter compatible with your phone.
- Connect an SD card reader or camera to the phone via OTG.
- The phone will detect external storage; open Files and copy images.
- Use cloud or tethered transfer for continuous sync
- Connect camera to Wi‑Fi or tether to a laptop.
- Upload images to cloud storage or an FTP server.
- Open the cloud app on your phone and sync or download files.
Practical tips during transfer
- Keep batteries charged. Many cameras drain battery during transfers.
- Use the fastest SD card your camera supports for smooth copying.
- For large shoots, transfer in batches to avoid timeouts.

Source: tomsguide.com
Tips, troubleshooting, and best practices
Files not showing, slow transfers, and missing metadata are common. These quick fixes help.
Speed and quality
- Use USB 3.0 readers and fast SD cards for big files.
- Transfer RAW over wired methods to keep full quality.
- If using Wi‑Fi, move close to the camera and avoid interference.
Metadata and file tags
- Export with metadata intact if you plan to edit on phone apps.
- Use Lightroom Mobile or similar apps to preserve EXIF and edits.
Security and backups
- Remove cards carefully and keep backups on cloud or a second drive.
- Avoid public Wi‑Fi when transferring sensitive images.
Common problems and fixes
- Phone won’t detect camera: try a different cable, enable camera USB mode, or use a card reader.
- App won’t pair: reboot both devices, update the app, and re-pair.
- Files are thumbnails only: change app settings to download originals.
Real lesson from experience:
- Once, on a job, I tried to send RAWs over Wi‑Fi and it took too long. I switched to an SD card reader and saved an hour. When in doubt, pick the wired/card route for large, critical transfers.
Limitations to know
- Some phone apps limit file size or format.
- Older phones may not support OTG or large external drives.
- Wireless transfers can be slower and less reliable for many files.
Best routine
- Use SD card or cable for final masters and Wi‑Fi for quick previews.
- Keep a small portable reader and OTG cable in your kit.

Source: youtube.com
Frequently Asked Questions
How do I transfer pictures from a camera to a phone without a computer?
Connect the camera via USB to the phone if supported, use an SD card reader or use the camera’s Wi‑Fi app. USB OTG adapters or SD-to-phone adapters are common solutions.
Can I transfer RAW files directly to my phone?
Yes, many phones can accept RAW files via USB or SD card, but transfer may be slow. For large RAW sets, use a fast card reader and wired connection.
Which method is fastest for many photos?
Using an SD card with a fast USB 3.0 card reader is typically the fastest and most reliable method. Wired connections beat most wireless transfers for bulk files.
Will I lose photo quality when transferring to my phone?
No, if you copy the original files you keep full quality. Some apps send compressed JPEGs by default, so choose “download original” or use file manager copy.
My phone won’t detect the camera — what should I do?
Try a different USB cable, enable camera USB/file transfer mode, use an SD card reader, or check that your phone supports OTG. Restart devices and update firmware or apps if needed.
Conclusion
You now have clear, practical ways to transfer pictures from a camera to a phone. Use SD card readers or cables for full‑quality files, and rely on Wi‑Fi or apps for fast previews. Keep spare adapters, a fast card, and a simple routine to avoid delays on shoots. Try one method today and pick the one that fits your workflow. Share your results or questions below, subscribe for more tips, or leave a note about what gear you use.

Everett Ashford is a tech reviewer at mytechgrid.com specializing in SSDs, cameras, TVs, earbuds, headphones, and other consumer electronics. He provides honest, data-driven reviews based on hands-on testing and real-world performance analysis. Everett simplifies complex tech details to help readers make smart, confident buying decisions.