Replacing a damaged headphone audio jack usually requires opening the earcup, removing the old jack, and soldering a new one.
Learning how to replace audio jack on headphones can save a favorite pair from the trash. With the right replacement part, a small soldering iron, and careful wire testing, this repair is often easier than it looks. This guide explains the process, common wiring layouts, safety steps, and mistakes to avoid.
Before You Replace the Headphone Audio Jack
A faulty audio jack is not always the real problem. Crackling may come from a broken cable, damaged solder joint, dirty contacts, or a failure inside one earcup. Testing the headphones first can prevent unnecessary work.
Try these simple checks:
• Play audio at a low volume.
• Gently move the plug while listening.
• Test the headphones with another phone, computer, or music player.
• Try another audio cable if the headphones use a removable cable.
• Clean the plug with a dry cloth and check for bent metal.
If sound returns when you bend the cable near the plug, the cable may be broken. If sound cuts out when you move the plug inside the headphone socket, the jack is a stronger suspect.
Many headphones use a 3.5 mm TRS jack. TRS means tip, ring, and sleeve. These contacts usually carry the left audio channel, right audio channel, and ground.
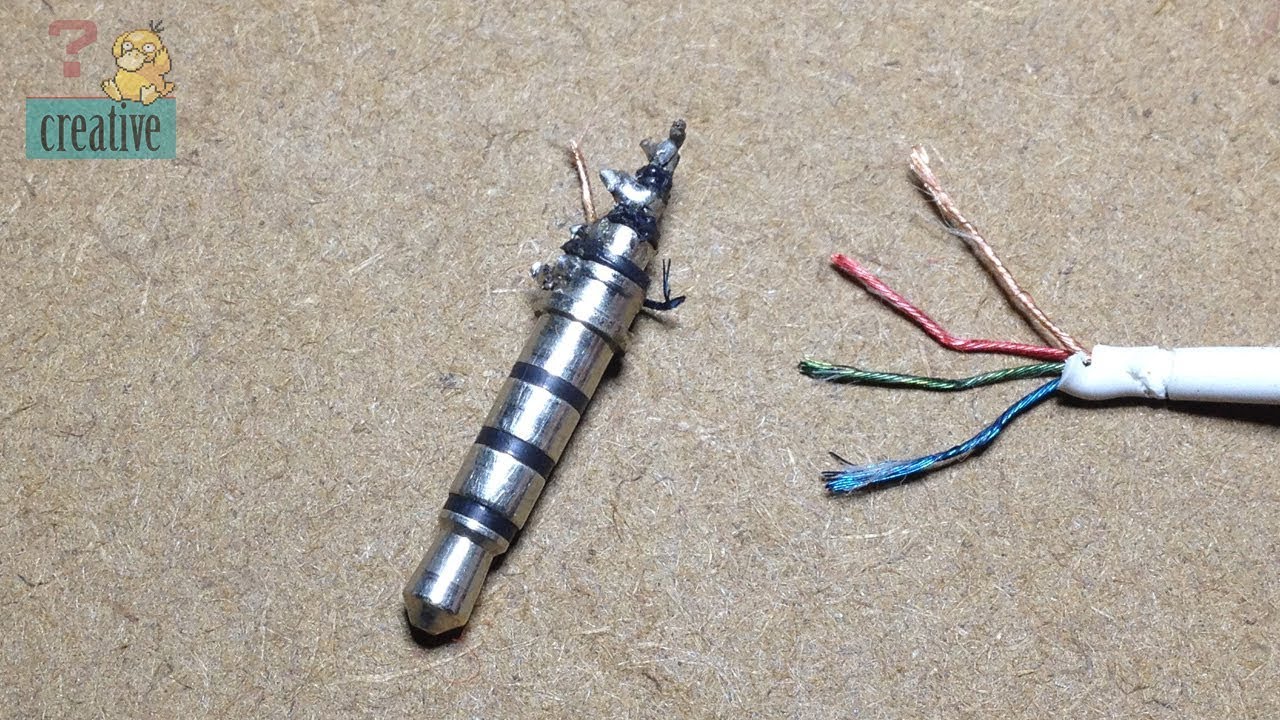
Headsets with a microphone often use a 3.5 mm TRRS plug. TRRS means tip, ring, ring, and sleeve. The fourth contact carries the microphone signal, although wiring can vary between standards and brands.
When I inspect a failed pair, I first check the cable and jack together. Replacing the jack will not fix a broken wire farther up the cable. This small check can save time and avoid damaging the earcup.

Tools and Parts You Need
You do not need a full electronics workshop for this repair. Basic tools are enough, but good tools make the job safer and cleaner.
Gather these items:
• A replacement 3.5 mm audio jack that matches your headphones
• A soldering iron rated around 20 to 40 watts
• Rosin-core electronics solder
• Desoldering braid or a solder sucker
• Small Phillips and flat-head screwdrivers
• Needle-nose pliers
• Wire cutters and wire strippers
• Heat-shrink tubing or electrical insulation
• A multimeter with continuity testing
• Tweezers or small clamps
• A bright work light
• Safety glasses
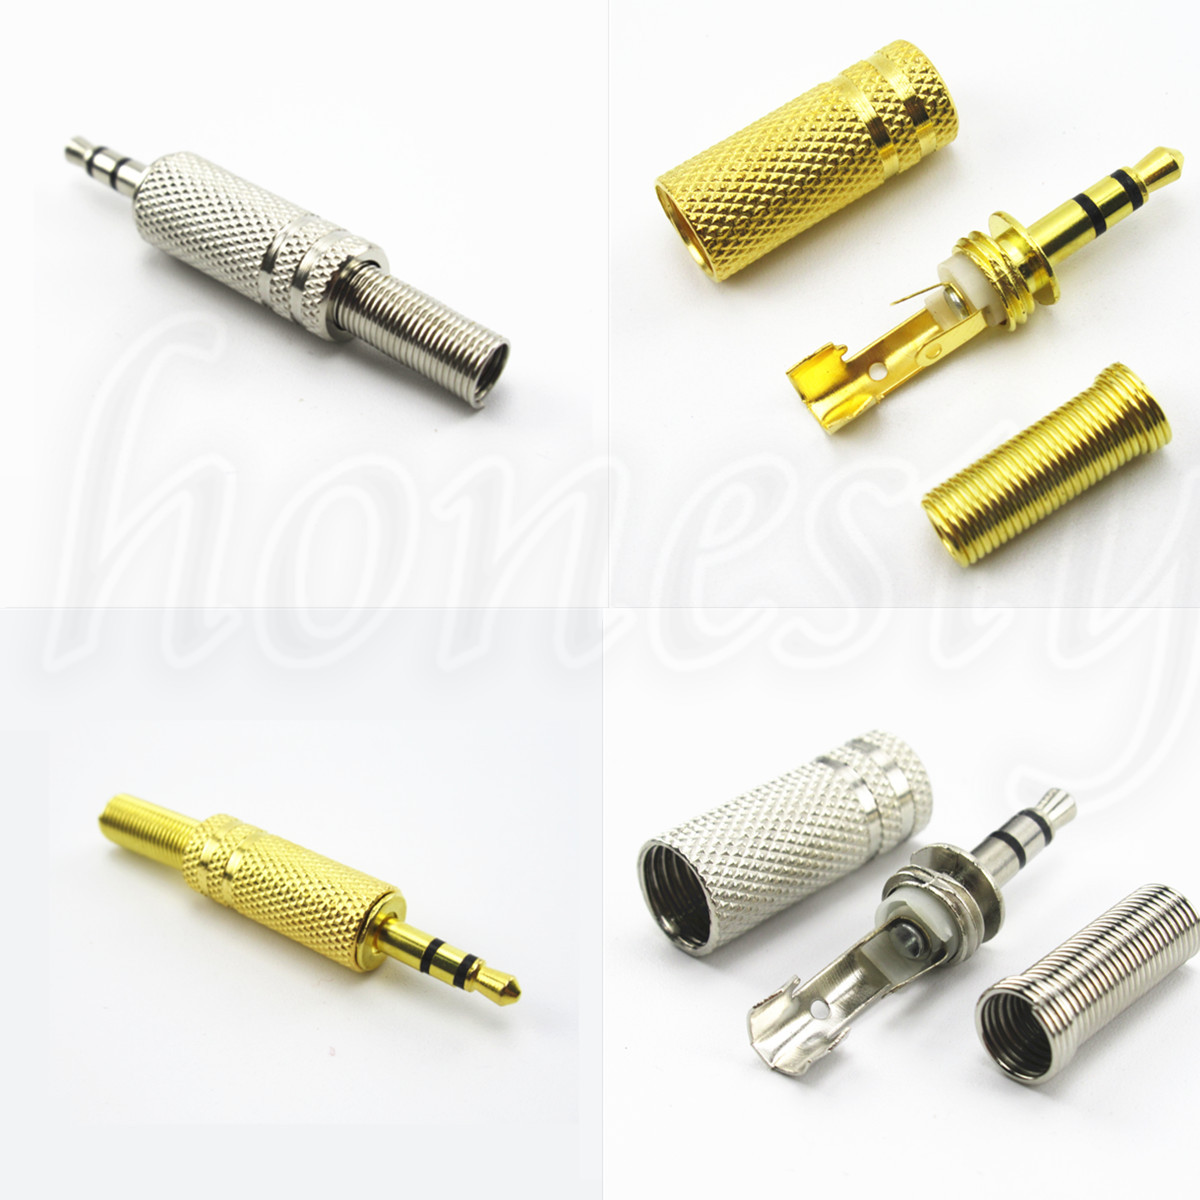
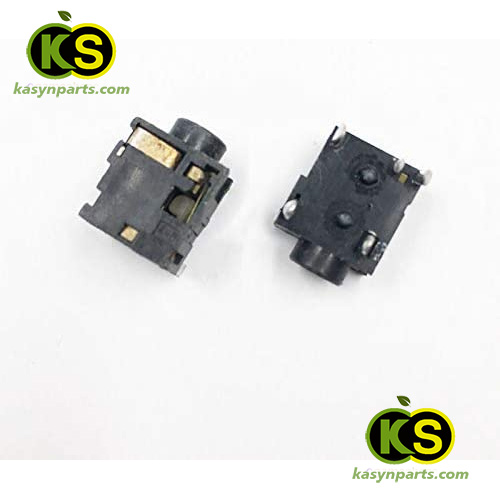
Choose a jack with the correct physical design. Some replacement jacks mount through a panel. Others mount directly to a circuit board. A stereo jack may have three terminals, while a headset jack may have four or five.
Check the following before ordering:
• Plug size, such as 3.5 mm or 6.35 mm
• Stereo or headset support
• Panel mount or circuit-board mount design
• Threaded barrel size
• Terminal layout
• Available space inside the earcup
A jack can look correct and still have the wrong terminal layout. Compare the new part with the old one before cutting any wires.
Use rosin-core solder made for electronics. Acid-based solder is meant for plumbing and can damage small electrical connections. A small, clean soldering tip also gives you better control.
Understand Headphone Jack Wiring
Understanding the terminals is the most important part of learning how to replace audio jack on headphones. The terminals are often labeled, but labels may be hard to see.
A standard stereo TRS connection usually works like this:
• Tip: left audio
• Ring: right audio
• Sleeve: common ground
A standard headset TRRS plug may use this layout:
• Tip: left audio
• Ring one: right audio
• Ring two: ground or microphone
• Sleeve: microphone or ground
The order can change. Two common TRRS wiring layouts are CTIA and OMTP. CTIA is widely used on modern phones, while OMTP appears on some older devices and products.
Do not trust wire colors alone. Manufacturers use different colors, and some wires have a clear enamel coating instead of normal plastic insulation.
Common wire colors may include:
• Red for the right channel
• Green or blue for the left channel
• Copper or bare wire for ground
• White, yellow, or another color for microphone wiring
These colors are only clues. Use the old jack, circuit board markings, or a multimeter to confirm each connection.
Before removing anything, take clear photos of the old wiring. Write down which wire connects to each terminal. This simple habit is one of the best ways to prevent reversed channels or a dead microphone.
How to Replace Audio Jack on Headphones
The repair has five main stages: open the headphones, identify the wires, remove the old jack, install the new jack, and test the result. Work slowly. Rushing can pull a wire from the driver or damage a thin plastic shell.
1. Disconnect the Headphones
Unplug the headphones from every device. If they have a battery, turn them off and remove the battery when possible.
Work on a clean table. Put small screws in a cup so they do not roll away. If the headphones are wireless, never solder near a swollen battery or damaged charging cell.
2. Open the Earcup or Control Housing
Look for screws under the ear pad, behind a plastic cover, or inside a small control box. Some ear pads twist off. Others are held by clips or adhesive.
Use a plastic opening tool when possible. A metal screwdriver can leave marks or break clips. Lift the cover slowly because short wires may connect the two sides.
Before pulling the housing apart, note how the wires are routed. Wires often pass through small clips that protect them from strain.
3. Identify and Label Every Wire
Take close-up photos before touching the solder joints. Label each wire with a small piece of tape if several wires look alike.
Find the jack terminals. They may be marked with letters such as L, R, G, or M. They may also have no markings at all.
Use a multimeter in continuity mode if the labels are unclear. Touch one probe to the plug contacts and the other probe to the jack terminals. The meter should beep when the correct connection is found.
Remember that the plug tip is usually the left channel, the first ring is usually the right channel, and the sleeve is usually ground on a stereo plug. Confirm this before soldering.
4. Remove the Old Jack
Heat one solder joint at a time. Pull the wire gently with tweezers or pliers as the solder melts.
Do not hold the iron on a small circuit-board pad for too long. Excess heat can lift the pad from the board. If the solder will not flow, add a tiny amount of fresh rosin-core solder before using desoldering braid.
If the jack is mounted in a plastic housing, remove its retaining nut or clip after the wires are free. Do not force it through a narrow opening.
5. Prepare the Wires
Cut away damaged wire ends. Strip only a few millimeters of insulation.
Some headphone wires use enamel-coated strands. Normal wire strippers may not remove this coating fully. You may need to scrape the enamel gently or heat the end with a small amount of solder until the coating burns away.
Twist loose strands together. Then tin each wire by applying a small amount of solder. Tinned wires are easier to attach and less likely to form a short circuit.
6. Install the New Jack
Place the new jack in the housing before soldering. Secure it with the nut, clip, or mounting bracket. This step matters because turning the jack after soldering can twist and break the new connections.
Attach each wire to the matching terminal. Heat the terminal and wire together, then add just enough solder to cover the joint.
A good joint looks smooth and shiny. A dull, cracked, or round blob may be a cold solder joint.
Keep the wires short but not tight. The connection should have a little slack. Add heat-shrink tubing or insulation where a bare wire could touch another terminal.
7. Test Before Closing the Housing
Plug the headphones into a safe audio source. Use low volume and play a stereo test track.
Check these functions:
• Left sound comes from the left earcup
• Right sound comes from the right earcup
• Both channels play without crackling
• The microphone works if the headphones include one
• Moving the plug does not interrupt sound
• The cable does not pull on the solder joints
If the left and right channels are reversed, turn the power off and swap those two wires. If there is no sound, check the ground connection first.
Once the test passes, close the housing and replace every screw. Make sure no wire is trapped between the shell halves.

Common Problems After Replacing the Jack
Even careful repairs can fail for simple reasons. Most problems come from wiring errors, poor solder joints, or damage that existed before the repair.
Only One Side Works
This usually means one channel wire is disconnected or attached to the wrong terminal. It can also indicate a broken wire near the earcup or a damaged driver.
Check continuity from the plug to each driver. A multimeter can show whether the signal path is complete.
Both Sides Are Silent
A missing ground connection can silence both channels. A short between the signal terminals can also stop normal playback.
Inspect the solder joints with a bright light. Look for loose strands touching nearby terminals.
Sound Is Very Quiet
Low volume may result from a weak solder connection, high resistance, or a damaged driver. It can also happen if the plug does not fully enter the replacement jack.
Test the headphones with another source. Then measure continuity and compare the result with the original wiring.
Left and Right Channels Are Reversed
The left and right wires are connected to the wrong terminals. This is not dangerous, but it makes stereo music sound incorrect.
Swap the two channel wires after unplugging the headphones. Do not swap the ground wire.
The Microphone Does Not Work
The new jack may support stereo audio but not a microphone. The wiring may also use CTIA instead of OMTP.
Check the replacement jack specification and compare it with the original. A four-contact headset jack is usually needed for microphone support.
The Connection Crackles When the Plug Moves
This points to a loose joint, a weak replacement jack, or a damaged cable. A jack that moves inside the housing can place stress on the solder points.
Tighten the mounting nut and add strain relief. If the cable is damaged, replace the cable section as well.
How to Improve the Repair
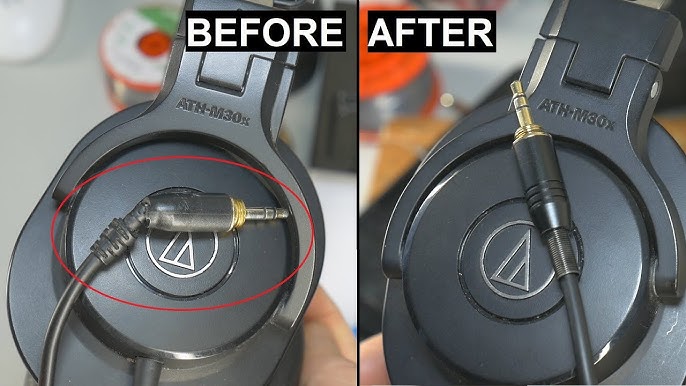
Knowing how to replace audio jack on headphones is useful, but a strong repair also needs mechanical protection. Solder alone should not carry the force of daily use.
Use these techniques:
• Add heat-shrink tubing over exposed joints.
• Keep the jack firmly attached to the housing.
• Leave a small service loop in the wires.
• Route wires through the original clips.
• Add flexible adhesive around the jack mount if the design allows it.
• Avoid hot glue near moving parts or heat-sensitive components.
• Use a right-angle plug when the headphones are used with a phone or portable player.
A common mistake is making the solder joints perfect but leaving the jack loose. The first hard pull then transfers force to the tiny wires. Think of strain relief as a seat belt for the connection.
Another mistake is using too much solder. Large solder blobs can touch nearby terminals and create a short. Small, clean joints are stronger and easier to inspect.
In my repair work, the best results have come from taking more photos than seemed necessary. A photo of the wire path, terminal labels, and screw locations can prevent several errors during reassembly.

Safety Tips and Repair Limitations
Soldering irons can cause burns and start fires. Keep the iron in a stable stand, clear flammable items from the work area, and wash your hands after handling solder.
Work in a ventilated space. Avoid breathing solder fumes directly. Do not touch the metal tip, even after switching the iron off, because it stays hot for several minutes.
Battery-powered headphones need extra care. Do not puncture, heat, or crush a lithium-ion battery. If the battery is swollen, stop the repair and take the device to a qualified electronics recycling or repair center.
This repair may not be worth doing when:
• The headphones have severe water damage
• The driver is also damaged
• The replacement jack costs nearly as much as new headphones
• The housing cannot be opened without major damage
• The product is still under warranty
• You lack a multimeter or safe soldering setup
Some premium headphones use a custom connector or a small circuit board. In those cases, replacing the entire jack board may be safer than wiring a generic part.
Electrical safety guidance consistently recommends using proper ventilation, suitable tools, and care around powered equipment. Headphones use low voltage, but low voltage does not make hot tools or lithium batteries harmless.

How to Choose a Replacement Audio Jack
The best replacement jack matches the original in both electrical function and physical size. A part that fits the cable may not fit the earcup.
Look for these details in the product listing:
• 3.5 mm or 6.35 mm size
• TRS or TRRS contact count
• Stereo or microphone support
• Panel-mount or board-mount design
• Threaded or snap-in installation
• Compatible terminal spacing
• Metal housing and secure mounting
A stereo headphone jack usually needs three electrical contacts. A headset with a microphone needs at least four contacts. Some products use extra contacts for switching or detection.
Avoid choosing a part based only on a product photo. Read the technical drawing when available. Terminal positions can differ even when two jacks look almost identical.
If the original jack is molded into a cable, replacing the entire cable may be easier. If the jack is mounted inside an earcup, a panel-mount replacement may work well.
Is Replacing the Jack Better Than Buying New Headphones?
Replacing a jack can be a smart choice when the headphones are comfortable, durable, or expensive. It also reduces electronic waste and lets you keep a familiar product.
The repair is usually worthwhile when:
• The drivers still sound clear
• The headband and ear pads are in good shape
• The jack is the only failed part
• A compatible replacement costs little
• You enjoy learning basic electronics
Buying new headphones may be better when the battery, drivers, hinges, and cable all show wear. A successful jack repair cannot restore parts that are already failing.
The environmental benefit also depends on the product. Extending the life of a usable device generally avoids the materials and manufacturing impact of replacing it, but damaged electronics should still be recycled through an approved program.
Frequently Asked Questions About How to Replace Audio Jack on Headphones
Can I replace a headphone jack without soldering?
Most internal headphone jack repairs require soldering because the wires are attached to small terminals. A replacement cable with a preinstalled plug may avoid soldering if the headphones use a removable cable.
How do I know which wire goes to each headphone jack terminal?
Check the old jack, circuit-board labels, and wire continuity with a multimeter. Wire colors are not universal, so do not rely on color alone.
Can I use any 3.5 mm jack for headphones?
No. The jack must match the required contact count, mounting style, and terminal layout. A stereo TRS jack may not support a headset microphone that needs a TRRS connection.
Why do my headphones work on one side after the repair?
One channel wire may be loose, attached to the wrong terminal, or broken near the earcup. Inspect the joints and test continuity from the plug to each driver.
Is it safe to repair wireless headphones?
It can be safe if you disconnect power and protect the battery from heat. Do not solder near a swollen or damaged lithium-ion battery.
How long does a headphone jack replacement take?
A simple repair may take 30 to 60 minutes, including testing. The first attempt can take longer if the housing is difficult to open or the wiring is unclear.
Conclusion
Learning how to replace audio jack on headphones is a practical repair that combines careful testing, basic wiring knowledge, and clean soldering. Confirm that the jack is truly faulty, photograph the original connections, match the replacement part, and test every function before closing the housing.
The most important lessons are simple: do not trust wire colors, protect the solder joints from strain, and work safely around heat and batteries. Start with an inexpensive or nonessential pair if this is your first electronics repair.
With patience, a multimeter, and the right jack, you may be able to restore a favorite pair in one afternoon. Share your repair experience, explore more electronics guides, and keep useful devices working longer.

Everett Ashford is a tech reviewer at mytechgrid.com specializing in SSDs, cameras, TVs, earbuds, headphones, and other consumer electronics. He provides honest, data-driven reviews based on hands-on testing and real-world performance analysis. Everett simplifies complex tech details to help readers make smart, confident buying decisions.