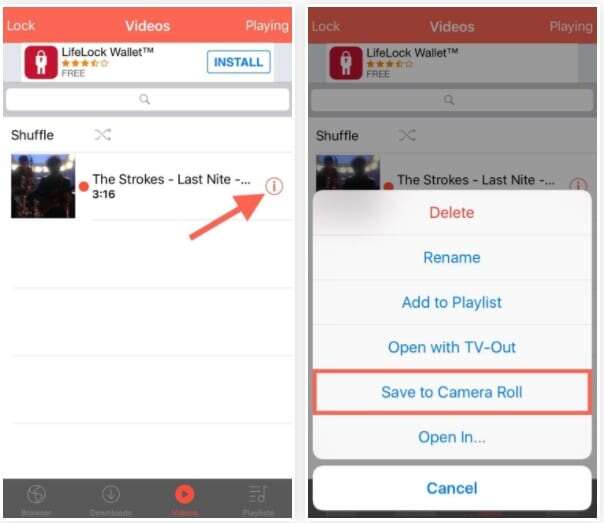
Use iPhone screen recording or download the file on a computer and transfer to Photos.
I’ve spent years working with mobile video workflows and helping creators move clips from platforms into personal libraries. This guide explains how to save YouTube clips to Camera Roll clearly and safely. You’ll get step-by-step methods for iPhone, desktop transfers, and creator-friendly options, plus legal and practical tips so your process is fast, repeatable, and compliant.
Why saving YouTube clips to Camera Roll is tricky
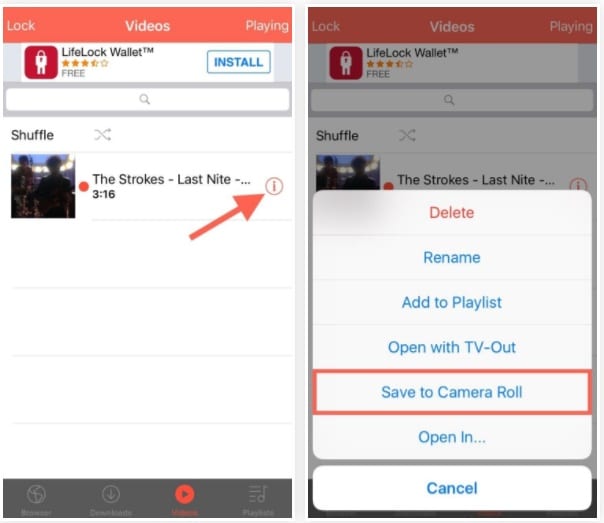
YouTube protects video content. The app and site do not offer a direct “save to Camera Roll” button for most videos. This protects creators and follows copyright rules. It also means common workarounds are needed when you want a local copy on your iPhone Photos app.
Understanding the limits helps you pick the best method. You can screen record, download legally owned content, or use desktop tools for files you have permission to save. Each choice balances ease, legality, and quality.
:max_bytes(150000):strip_icc()/youtubedownload-android1-5bb1b7504cedfd002672ee5b.jpg)
Safe and legal methods to save YouTube clips to Camera Roll
Focus on methods that respect rights and keep your device safe. Here are the most trustworthy options:
- Use iPhone screen recording for short clips you’re allowed to keep. This needs no apps.
- Download your own videos from YouTube Studio and transfer to Camera Roll.
- Use a desktop downloader for videos you own or have permission to use, then transfer to the iPhone via AirDrop, Finder, or iCloud.
- Use YouTube’s “Download” feature while online with YouTube Premium for offline viewing inside the app (not Camera Roll).
I recommend screen recording for speed and desktop transfer for best quality. Both respect safety when you only save permitted content.
Step-by-step: Screen recording on iPhone (best simple method)
Screen recording is built into iOS. It’s quick and works for most short clips when you have permission.
- Enable the Control Center recording button: Open Settings > Control Center > Add Screen Recording.
- Open YouTube and cue the clip you want to save.
- Swipe to open Control Center and tap the screen record button. Wait for the 3-second countdown.
- Play the clip in full. When finished, tap the red status bar or the Control Center record button to stop.
- Open Photos, find the recording, and tap Edit to trim start/end so only the clip remains.
- Save the trimmed clip. It now lives in Camera Roll.
Pros: No extra software, fast, legal for fair use and personal copying when permitted.
Cons: Quality equals playback resolution and you may capture UI elements.
Personal tip: Mute unnecessary overlays and set video to highest quality in YouTube before recording for the best result.

Step-by-step: Download via desktop and transfer to iPhone
If you need full quality, download on a desktop and transfer. Use this method only for videos you own or have explicit permission to download.
-
Download the video on desktop with a legal tool you trust or via YouTube Studio for your own uploads.
-
Edit or convert the file as needed (MP4 is best for iPhone).
-
Transfer methods:
- AirDrop: On Mac, right-click the file > Share > AirDrop > choose your iPhone. Accept on the iPhone to save to Files or Photos.
- Finder (macOS Catalina and later): Connect iPhone with cable > open Finder > drag the video to the iPhone’s “Files” or sync to the Photos app.
- iCloud Drive: Upload the file to iCloud Drive, open Files on iPhone, and move to Photos.
- iTunes (Windows/macOS Mojave): Add the file to iTunes and sync, or use the File Sharing feature for some apps.
-
On iPhone, open Files or Photos to confirm the clip is in Camera Roll. Trim if needed.
Pros: Best quality and control. Cons: Extra steps and requires a computer.
Saving your own YouTube videos and creator options
If you are the uploader, you have great options.
- YouTube Studio: Sign in, go to Content, choose a video, and click the three dots to download your own file.
- Export high-res master files from your editing app and transfer directly to iPhone via AirDrop or iCloud.
- For short clips or Shorts you created, check the YouTube app’s share settings—some creators can enable direct downloads.
As a creator I often export final MP4 files and AirDrop them to my phone for quick posting and backups. That keeps the original resolution and metadata intact.

Tips, pitfalls, and troubleshooting when you try to save YouTube clips to Camera Roll
Practical tips and common traps to watch for:
- Respect copyright: Don’t save or share copyrighted videos without permission. YouTube terms generally forbid downloading unless allowed.
- Watch audio: Screen record picks up system audio and notifications unless Do Not Disturb is enabled. Turn on Focus mode to avoid interruptions.
- File formats: iPhone works best with MP4 (H.264/AAC). Convert before transfer if necessary.
- Quality loss: Screen recording reduces quality versus original files. For high fidelity, download the source file and transfer.
- Third-party apps: Many apps claim to download YouTube videos. They can be risky and violate rules. Use trusted desktop tools and avoid unknown mobile apps.
- Storage: Videos use space. Trim and compress when appropriate before saving to Camera Roll.
My mistake once was using an unknown app on an iPhone that later caused crashes. Since then I only use built-in tools or vetted desktop apps. That saved time and avoided data loss.

Frequently Asked Questions of how to save youtube clips to camera roll
How can I save a short YouTube clip to my iPhone Photos quickly?
Use the iPhone screen recording feature: enable it in Control Center, start recording, play the clip, then trim the recording in Photos to keep only the clip. This is the fastest method for short clips.
Can YouTube Premium save videos directly to Camera Roll?
No. YouTube Premium allows offline downloads but only inside the YouTube app. Those files are not exported to Camera Roll.
Is it legal to download YouTube videos to Camera Roll?
Downloading copyrighted videos without permission may break YouTube’s terms and copyright law. Only download videos you own or have permission to use.
How do I transfer downloaded desktop videos to Camera Roll?
Use AirDrop, Finder, iCloud Drive, or iTunes. Convert files to MP4 if needed, transfer, then open the file on iPhone and save it to Photos.
Are third-party downloader apps safe for saving YouTube clips to Camera Roll?
Many are not safe and can violate terms. Prefer built-in screen recording, official exports, or trusted desktop tools and only save content you have rights to.
Conclusion
You can save YouTube clips to Camera Roll by using iPhone screen recording for quick jobs or by downloading and transferring files for full quality. Stick to legal, safe methods: save your own content, get permission, or use recording for personal, allowed use. Try screen recording first—it's fast and built into iOS—and use desktop transfers when you need better quality.
Take action today: test a short screen-recorded clip, then practice a desktop transfer with a video you own. If this guide helped, leave a comment or subscribe for more practical mobile video workflows.

Everett Ashford is a tech reviewer at mytechgrid.com specializing in SSDs, cameras, TVs, earbuds, headphones, and other consumer electronics. He provides honest, data-driven reviews based on hands-on testing and real-world performance analysis. Everett simplifies complex tech details to help readers make smart, confident buying decisions.