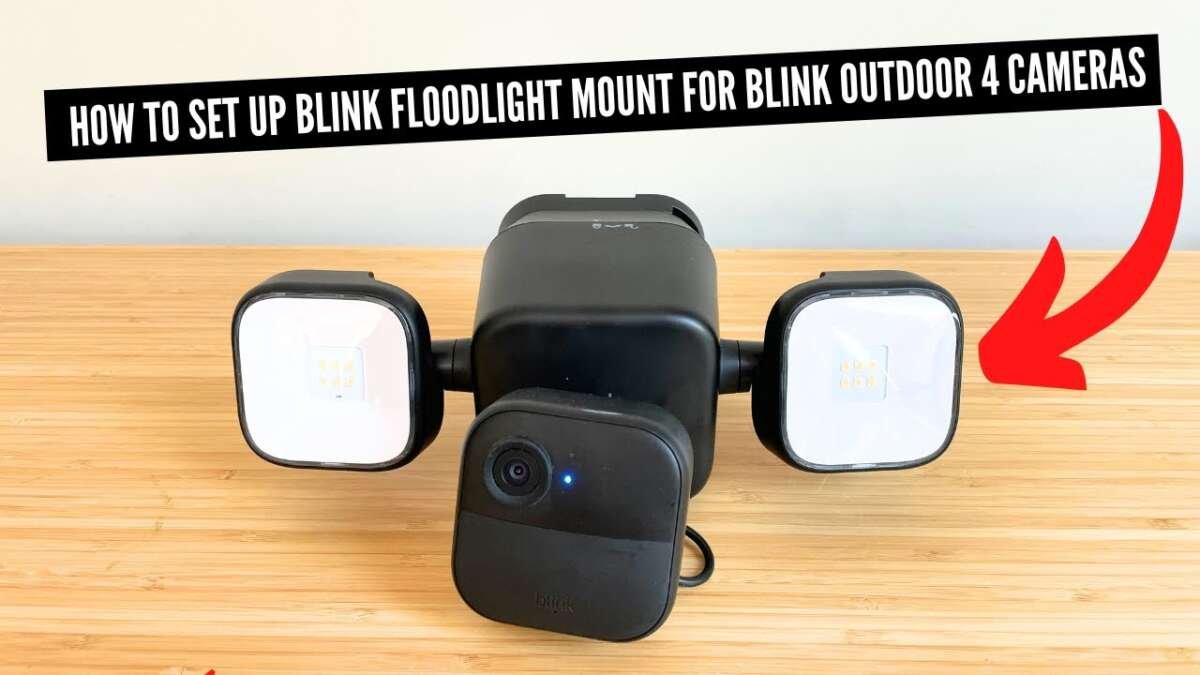
Mounting a Blink Outdoor 4 camera takes about 20–30 minutes with basic tools and clear placement.
I have installed and tested Blink outdoor cameras for home projects and client sites. This guide shows exactly how to mount Blink Outdoor 4 camera step by step, where to place it, power and sync options, weatherproofing tips, and how to avoid common mistakes. Read on for practical instructions, real-world tips, and troubleshooting help so your Blink Outdoor 4 camera works reliably from day one.

Why proper mounting matters
A well-mounted camera gives clear views, fewer false alarms, and longer hardware life. How to mount Blink Outdoor 4 camera affects coverage, battery life, and reliability. Poor placement can cause blind spots, sun glare, or frequent battery drain.
From my experience, the same camera can feel useless or invaluable depending on mounting choices. Planning and the right tools matter more than fancy brackets. Follow these steps and your Blink Outdoor 4 camera will protect the areas you care about.

Tools, parts, and pre-install checklist
Before you start, gather everything to save time and prevent mistakes.
- Blink Outdoor 4 camera kit including screws and mount
- Drill with masonry and wood bits
- Pencil or marker for alignment
- Level or small bubble level
- Screwdriver or drill driver
- Tape measure
- Ladder or stable step stool
- Optional: silicone sealant, exterior-rated cable clips, solar panel or extra batteries
Preparation steps:
- Charge or insert fresh batteries into the camera if required.
- Update the Blink app and add the camera to your system indoors first.
- Decide mounting height and angle, and test live feed to confirm coverage.
My tip: test angles with the app before drilling. I once drilled two holes then moved the camera 6 inches for a wider view—save yourself that extra hole.

Step-by-step: how to mount Blink Outdoor 4 camera
Follow these clear steps to install your camera securely.
-
Plan the spot and height
- Aim for 7 to 10 feet high for good facial detail and tamper resistance.
- Avoid direct sun or bright lights that point into the lens.
- Consider field of view and likely motion paths.
-
Test on location first
- Power the camera and connect in the Blink app while holding it where you plan to mount.
- Check live view and set motion sensitivity.
- Adjust angle until the desired coverage is visible.
-
Mark mounting points
- Use the mount plate to mark screw locations with a pencil.
- Double-check level and spacing.
-
Drill holes and insert anchors
- For wood: drill pilot holes.
- For masonry or stucco: use a masonry bit and wall anchors designed for exterior use.
-
Attach the mount
- Secure the mount plate with exterior screws and anchors.
- Tighten screws until snug but avoid overtightening plastic parts.
-
Mount the camera
- Slide or snap the camera into the mount per the Blink instructions.
- Adjust tilt and tightness so the camera holds position.
-
Final app checks
- Reopen the camera feed and confirm motion zones and sensitivity.
- Set any schedules or notifications in the Blink app.
-
Weatherproof final touches
- Apply a small bead of silicone around holes if needed to prevent water entry.
- Use cable clips if you run a solar panel cable to keep things tidy.
I always leave the camera in the app live view for 24 hours to confirm no glare or false triggers before I declare the job done.

Best mounting locations and angles
Choosing the right location is as important as how to mount Blink Outdoor 4 camera. Here are reliable choices:
- Front door
- Mount above and angled down to capture faces at the door and porch area.
- Driveway or garage
- Place high to catch car plates and motion across the driveway.
- Back yard or side gate
- Aim to cover common entry paths and the yard center.
- Corner of the house
- Corner mounts give a wider sweep across two sides of the property.
Angle tips:
- Tilt down about 30–45 degrees to reduce sky and glare.
- Avoid pointing directly at shiny surfaces, glass, or reflective windows.
- If mounting under eaves, use the eave edge for protection and reduced weather exposure.
When you plan where to mount, think like a thief and a neighbor. Cover access points but avoid infringing on privacy.

Power options and Sync Module details
How to mount Blink Outdoor 4 camera also ties into your power setup. Blink Outdoor 4 is battery-powered, but you have options.
- Standard battery operation
- Insert included or recommended batteries. Battery life varies by motion activity.
- Solar panel
- You can use Blink-compatible solar panels to reduce battery swaps.
- Mount the solar panel in direct sun and route the cable neatly to the camera.
- Sync Module
- A Sync Module connects cameras to your Wi-Fi and stores local clips if you have a USB drive.
- Place the Sync Module centrally to maintain a strong wireless link to each camera.
Practical note: I found that heavy-motion areas need more frequent battery checks. Solar helps but only in good sunlight. If you plan many cameras, place the Sync Module in a location with minimal obstacles for best range.

Weatherproofing, maintenance, and long-term care
A secure mount must survive the elements. Follow these simple steps.
- Use exterior screws and anchors rated for outdoor use.
- Place cameras under eaves or overhangs whenever possible.
- Seal drilled holes with silicone to keep moisture out.
- Check battery health in the app monthly and replace batteries before they die.
- Clean the lens with a soft cloth quarterly to avoid blurry night footage.
- Re-check mount tightness after storms or high winds.
From my field work, loose screws are the most common failure point. Set a reminder to tighten mounts every six months.

Common mistakes and troubleshooting
Avoid these frequent errors when you learn how to mount Blink Outdoor 4 camera.
- Mounting too low
- Low mounts are easy to tamper with and show less useful wide views.
- Pointing at sun or bright lights
- This causes glare and false detections.
- Ignoring Wi-Fi strength
- Weak Wi-Fi leads to dropped video and missed alerts.
- Skipping app testing
- Always test in the app before finalizing installation.
Quick troubleshooting tips:
- If camera won’t connect, move the Sync Module closer and retest.
- If false alerts are frequent, lower motion sensitivity or adjust the field of view.
- If battery drains fast, check for constant night recording or heavy motion triggers.
When I troubleshoot, I start with placement and app settings before assuming hardware failure. Often the fix is a simple angle change or sensitivity tweak.

People ask (PAA-style questions)
Q: Will mounting height affect detection?
A: Yes. Height changes angle and detection range. Mounting 7–10 feet high gives the best balance of face detail and broad coverage.
Q: Can I mount on brick or stucco?
A: Yes. Use masonry bits and wall anchors rated for exterior use and seal around holes to prevent moisture.
Q: Will rain affect the camera?
A: Blink Outdoor 4 is weather-resistant. Still, place it under eaves if possible and seal holes to prolong life.

Frequently Asked Questions of how to mount blink outdoor 4 camera
How high should I mount a Blink Outdoor 4 camera?
Mount it between 7 and 10 feet high for good identification and tamper resistance. This height captures faces well while keeping the camera out of easy reach.
Do I need a Sync Module to mount the camera?
You can mount the camera without a Sync Module, but the Sync Module helps with reliable connectivity and local storage options. It improves range and stability when you have several cameras.
Can I use a solar panel with Blink Outdoor 4 camera?
Yes, a compatible solar panel works well to extend battery life. Mount the panel in direct sun and secure the cable to avoid strain on the camera port.
What screws and anchors should I use?
Use exterior-rated screws and anchors suited to the mounting surface—wood screws for wood, masonry anchors for brick or stucco. Use rust-resistant hardware for long life.
How do I prevent false motion alerts after mounting?
Adjust motion sensitivity and placement. Avoid pointing at roads, trees, or reflective surfaces. Test and tweak settings in the Blink app for best results.
Can I mount Blink Outdoor 4 camera under an eave?
Yes. Mounting under an eave gives extra weather protection and reduces glare. Ensure the camera still has a clear field of view for the target area.
What maintenance is needed after mounting?
Check battery levels monthly, clean the lens quarterly, and tighten mounts every six months. Re-seal holes if you notice moisture ingress.
Conclusion
Mounting your Blink Outdoor 4 camera the right way gives better coverage, fewer false alerts, and longer device life. Plan placement, gather the right tools, test with the app, and follow the step-by-step mounting process to get reliable protection. Small details—like height, angle, and weather sealing—make a big difference. Try the recommended placements, monitor battery and Wi-Fi performance, and tweak settings based on real-world results. If this guide helped, subscribe for more tips or leave a comment about your setup and questions.

Everett Ashford is a tech reviewer at mytechgrid.com specializing in SSDs, cameras, TVs, earbuds, headphones, and other consumer electronics. He provides honest, data-driven reviews based on hands-on testing and real-world performance analysis. Everett simplifies complex tech details to help readers make smart, confident buying decisions.