Test SSD performance with trusted benchmark tools, consistent settings, and repeatable read, write, latency, and temperature checks.
Learning how to test SSD performance is useful when you buy a new drive, upgrade an older computer, or troubleshoot slow file transfers. A proper test can show whether your SSD reaches its rated speed, stays cool, and performs well under real workloads. This guide explains safe methods for Windows, macOS, and Linux, along with practical tips for reading benchmark results correctly.
What SSD performance really means
SSD performance is more than one speed number. A drive can show excellent sequential read speed but feel slow when opening many small files. That happens because different tasks use different parts of the drive’s design.
The main performance measures include:
• Sequential read speed: How fast the SSD reads large, continuous files.
• Sequential write speed: How fast the SSD saves large, continuous files.
• Random read speed: How quickly the drive finds many small files in different locations.
• Random write speed: How quickly the drive saves small files across the drive.
• Input/output operations per second: Often called IOPS, this measures how many storage actions the SSD handles each second.
• Access time and latency: How long the drive takes to respond to a request.
• Sustained performance: How well the drive maintains speed during long transfers.
• Temperature: How hot the SSD becomes during testing and heavy use.
Think of sequential speed as the size of a highway. Random performance is more like traffic moving through many small streets. Both matter, but they describe different driving conditions.
Prepare your computer before testing
Good preparation makes SSD benchmark results more reliable. Close large apps, pause cloud backups, stop downloads, and let system updates finish. Background work can use the drive and make results look lower than they should.
Before you test SSD performance, check the drive’s condition and available space. Most SSDs need free space for internal maintenance, garbage collection, and wear leveling. A nearly full drive may perform worse than the same drive with plenty of unused space.
Use this preparation checklist:
• Back up important files before running any storage test.
• Keep at least 10% to 20% of the drive free when possible.
• Connect a laptop to AC power.
• Set the operating system to its normal or high-performance power mode.
• Let the SSD reach room temperature before testing.
• Run each benchmark at least three times.
• Record the average result, not only the best score.
• Do not test while a large file transfer is running.
One lesson I learned early was to avoid testing a new SSD immediately after cloning a full system image. The drive was still busy with background tasks, so the first results were much lower than later results. A quiet system gives you a cleaner baseline.
Choose the right SSD benchmark tool
The best tool depends on your operating system and the type of test you need. Use well-known programs that show both sequential and random results. A simple tool is often better than a complex tool used with the wrong settings.
Popular choices include:
• CrystalDiskMark for Windows: A simple tool for sequential speed, random speed, and queue depth tests.
• ATTO Disk Benchmark for Windows and macOS: Useful for seeing how speed changes across different file sizes.
• Blackmagic Disk Speed Test for macOS: Helpful for checking storage performance for video work.
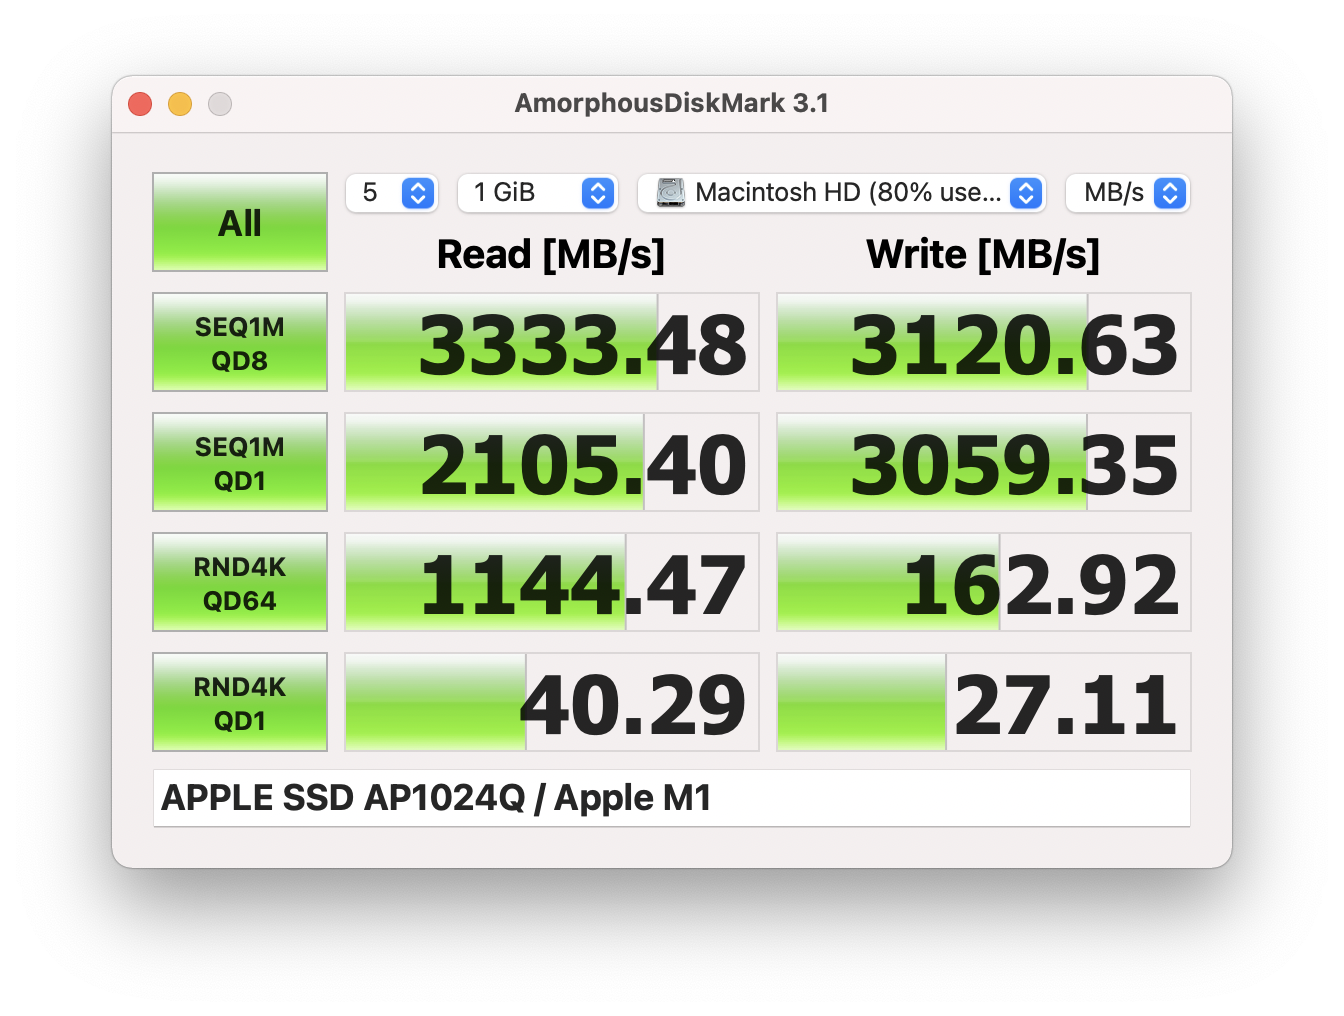
• AmorphousDiskMark for macOS: A familiar option for testing read and write speeds.
• fio for Linux, macOS, and advanced testing: A powerful command-line tool with many settings.
• GNOME Disks for Linux: Offers a basic graphical benchmark for many users.
• smartmontools: Checks drive health data but is not a full speed benchmark.
A benchmark result is only meaningful when you know the test settings. A 1 GiB test file may show a different result from a 64 GiB test file. Queue depth, thread count, file size, and test mode all affect the outcome.
How to test SSD performance on Windows
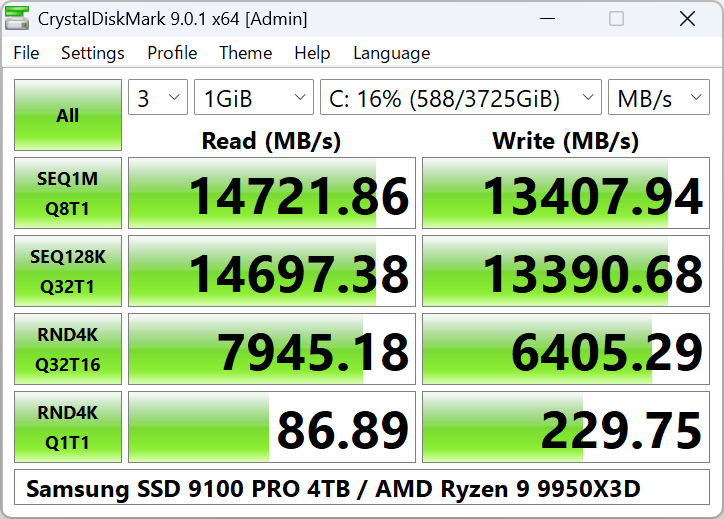
Windows users can get useful results with CrystalDiskMark. Download it from a trusted source, select the correct SSD, choose a moderate test size, and run the test. A 1 GiB test is quick, while a larger test gives a better view of sustained performance.
Follow these steps:
-
Close open programs and pause background downloads.
-
Open the benchmark tool with normal user permissions.
-
Select the SSD you want to test.
-
Choose a test count, such as five runs.
-
Choose a test size between 1 GiB and 8 GiB for a basic check.
-
Start the benchmark.
-
Record sequential read, sequential write, random read, and random write results.
-
Repeat the test after a few minutes and compare the averages.
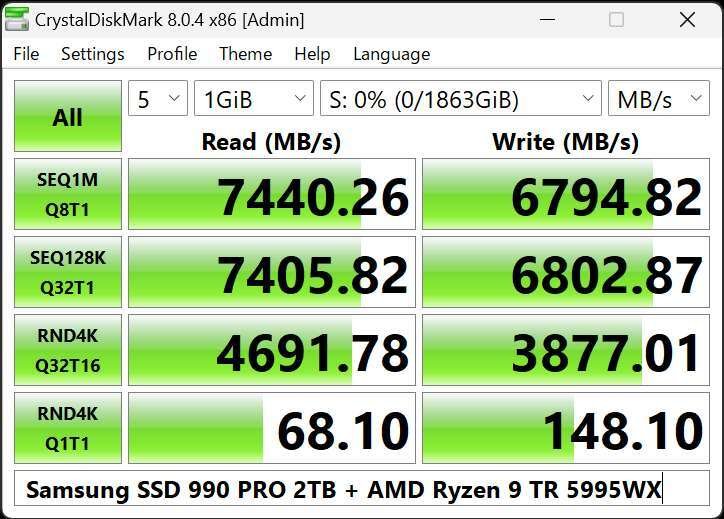
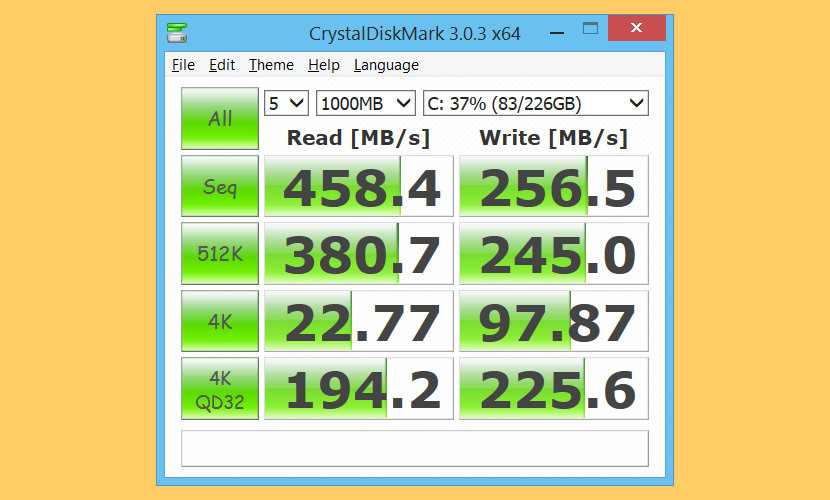
CrystalDiskMark often displays tests such as SEQ1M Q8T1 and RND4K Q1T1. The first part describes the block size. The Q value shows queue depth, and T shows the number of threads. Sequential results reflect large file work, while 4K random results are closer to everyday system activity.
For a more realistic test, copy a large folder that contains photos, documents, program files, and small configuration files. Watch the transfer speed over time. A drive that starts fast and then drops sharply may be running out of its fast cache or becoming too hot.
How to test SSD performance on macOS
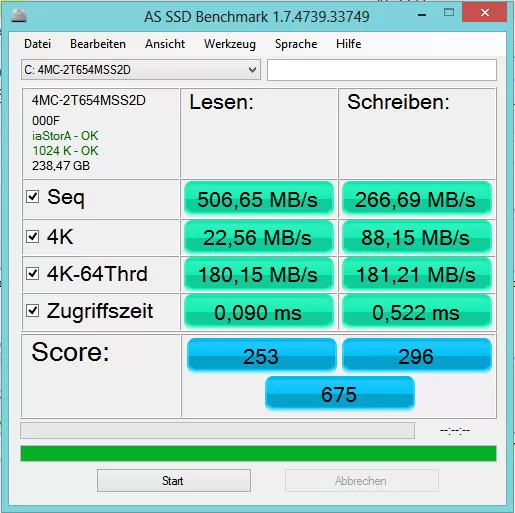
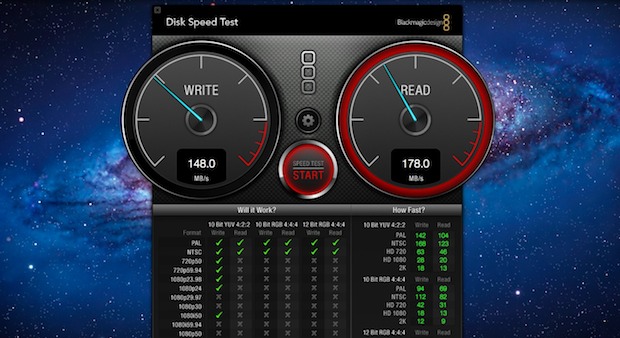
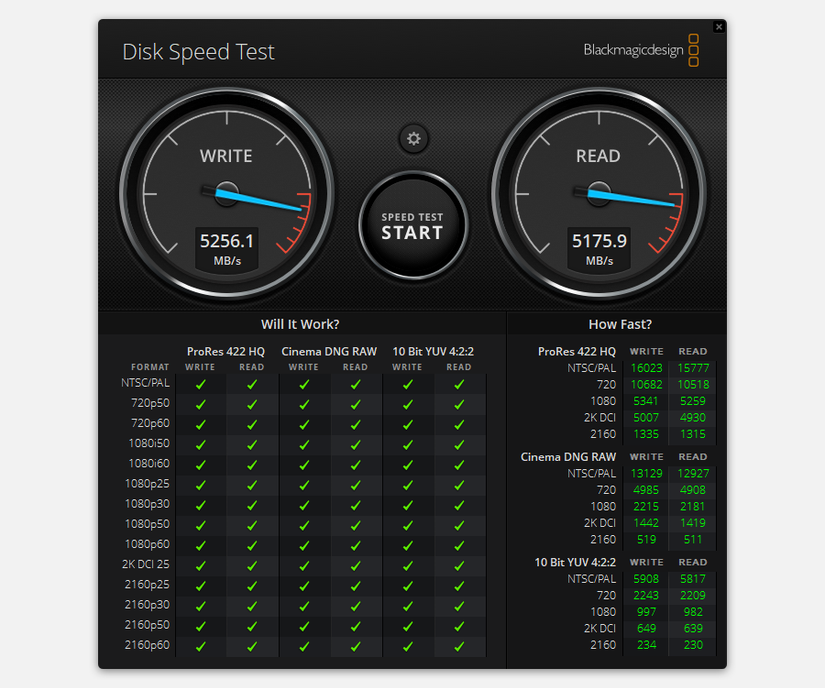
Mac users can test SSD performance with Blackmagic Disk Speed Test or AmorphousDiskMark. These tools are easy to use and provide clear read and write results. Before testing, close video editors, photo apps, browsers with many tabs, and backup software.
Blackmagic Disk Speed Test is especially useful for checking whether a drive can support common video workloads. It shows whether the storage may handle tasks such as recording or playing video at different formats. However, it does not provide the same detailed random performance data as some other tools.
To test SSD performance on a Mac:
-
Install a trusted benchmark app.
-
Select the target internal or external SSD.
-
Start with the default test size.
-
Run several test cycles.
-
Test again with a larger file size if sustained speed matters.
-
Compare the results with the drive maker’s rated speed.
External drives need extra care. A USB 3.2 Gen 2 enclosure may limit a fast NVMe SSD to around 1,000 MB/s in ideal conditions. A Thunderbolt enclosure can allow much higher speeds, but the cable, port, enclosure controller, and thermal design must all support that level.
How to test SSD performance on Linux
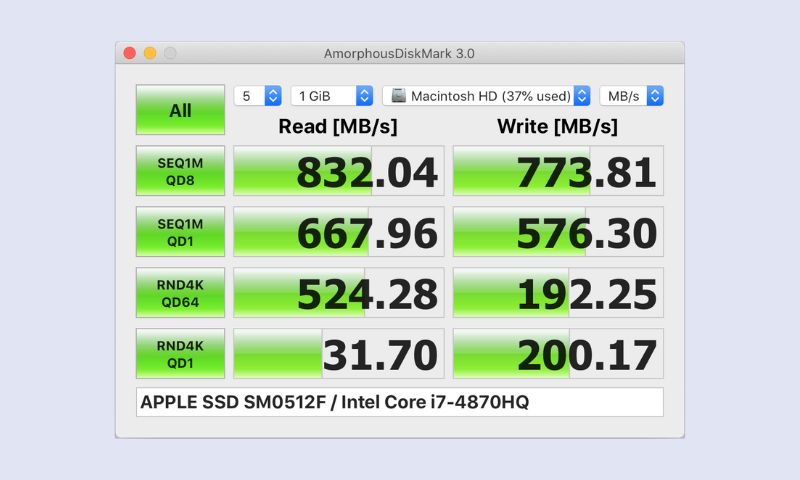
Linux offers both simple graphical tools and advanced command-line options. GNOME Disks can provide a quick benchmark for many desktop users. It usually shows average read and write performance along with access times.
For deeper testing, fio is widely used by storage professionals and system administrators. It can test sequential and random workloads with different block sizes, queue depths, and job counts. Because fio can write large amounts of data, use it carefully and target the correct drive.
A basic read test may look like this:
sudo fio --name=readtest --filename=/dev/nvme0n1 --direct=1 \
--rw=read --bs=1M --size=4G --numjobs=1 --runtime=60 --time_based
Do not run a destructive write command on a drive that contains important data. A raw-device test can overwrite files or damage the file system. When possible, test a large file on the SSD instead of targeting the entire device.
You can also inspect drive health with commands such as:
sudo smartctl -a /dev/nvme0
Health data may show temperature, percentage used, power-on hours, and warning signs. Health monitoring and speed benchmarking answer different questions, so use both when checking an older SSD.
How to test SSD performance with real-world file transfers
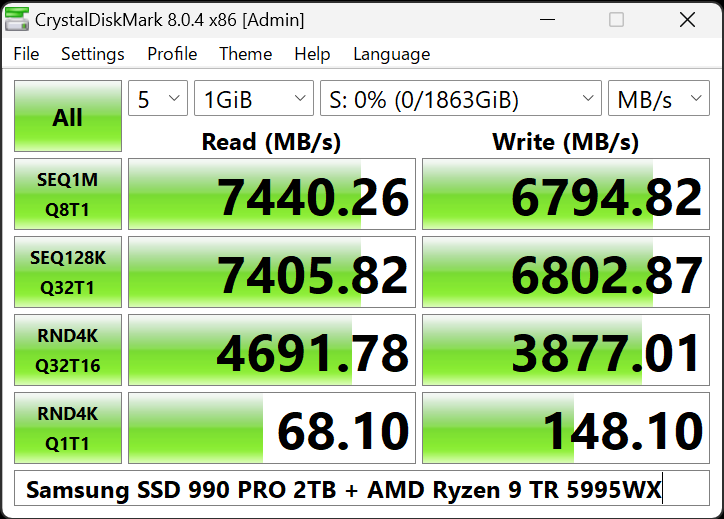
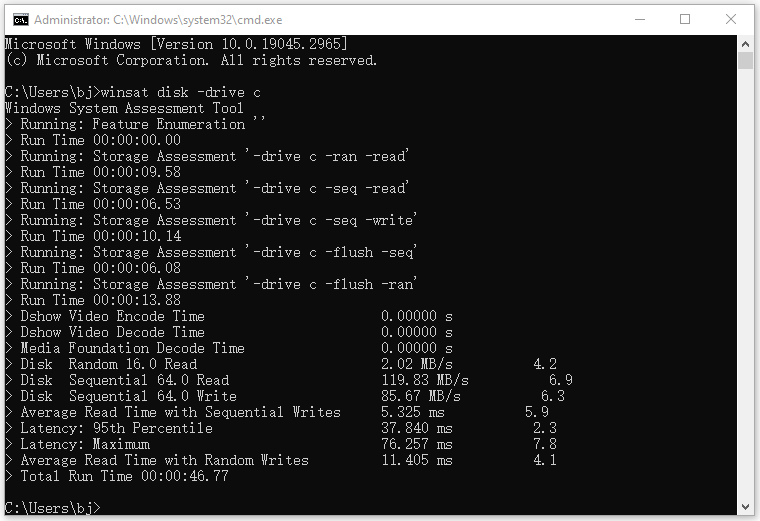
Synthetic benchmarks are useful, but real file work often tells a more practical story. A benchmark may use a clean, predictable workload. Your computer may copy mixed files, open apps, save small documents, and perform several tasks at once.
Create a test folder with a mix of files:
• One large video file between 10 GB and 50 GB.
• Several folders of photos.
• A software installation folder.
• Thousands of small documents or source files.
Copy the folder to another fast drive and measure the time. Then copy it back. Use the same source and destination for each test. The slower drive controls the result, so testing an SSD against a slow hard drive will not reveal the SSD’s full potential.
You can calculate average transfer speed with this formula:
Average speed = transferred data in megabytes ÷ time in seconds
For example, transferring 50,000 MB in 100 seconds equals about 500 MB/s. Real transfer speeds may change during the copy because of cache behavior, file size, encryption, temperature, and background activity.
In my own testing, mixed folders often gave lower results than benchmark apps. That was not a problem with the SSD. Small files create more overhead, and file system operations take longer than moving one large file. This is why both synthetic and real-world tests matter.
How to understand SSD benchmark results
The number on the product box usually describes an ideal peak condition. It may use a high queue depth, a fresh drive, and a large test file. Your daily workload may use low queue depth and many small files, so your results can be lower without indicating a fault.
Use these general guidelines:
• High sequential speed is valuable for video editing, large backups, and moving disk images.
• Strong random performance helps with operating system startup, app launches, and multitasking.
• Low latency makes the system feel more responsive.
• High IOPS matter most in demanding workloads with many simultaneous requests.
• Stable sustained speed matters during long writes.
• Moderate temperatures help the SSD maintain consistent performance.
Do not compare SATA and NVMe SSDs as if they were identical products. SATA drives usually connect through a much slower interface. NVMe drives use PCIe and can offer much higher bandwidth, but the actual result depends on the PCIe generation, number of lanes, controller, NAND type, and cooling.
Also check whether the test reports megabytes per second or mebibytes per second. These units are close but not identical. Marketing pages may use decimal units, while some software uses binary units. A small difference is normal.
Test SSD temperature and thermal throttling
Heat can reduce SSD performance. When an SSD reaches its thermal limit, its controller may lower speed to protect the hardware. This behavior is called thermal throttling.
Monitor the temperature during a long benchmark or file transfer. Many SSD tools show temperature data, and operating system utilities can provide more detail. Compare the idle temperature with the peak temperature after several minutes of work.
Watch for these patterns:
• Speed remains steady and temperature stays moderate: The cooling setup is likely adequate.
• Speed drops after a few minutes while temperature rises: Thermal throttling may be involved.
• Performance falls even at low temperatures: The issue may involve cache limits, background activity, or a connection problem.
• The drive reports warnings or critical temperature events: Stop heavy testing and inspect airflow or the heatsink.
Laptop SSDs can run warmer because they have little room for airflow. Desktop users should confirm that the motherboard heatsink has its thermal pad installed correctly. Remove any protective film from the pad before installation. That small mistake is surprisingly common.
Check SSD health before and after testing
A speed test does not prove that an SSD is healthy. A drive can deliver normal speed while its flash memory is wearing out or its controller is reporting errors. Use a health tool that reads S.M.A.R.T. or NVMe health data.
Check for:
• Available spare capacity.
• Percentage used.
• Media and data integrity errors.
• Unsafe shutdowns.
• Critical warnings.
• Temperature history.
• Total data read and written.
The exact fields vary by drive maker and interface. A high percentage used does not always mean immediate failure, but it means the drive has consumed part of its rated endurance. Keep current backups when health data shows warnings.
Avoid repeatedly filling and erasing an SSD just to make a benchmark look better. Modern SSDs manage data internally, and unnecessary write cycles add wear. One or two careful test runs are enough for most home users.
Common reasons SSD results look low
Low benchmark results do not always mean the SSD is defective. Several system factors can limit performance.
Common causes include:
• The SSD is connected through a slower SATA or USB port.
• The external enclosure uses an older USB standard.
• The cable cannot support the expected speed.
• The drive is nearly full.
• The test file is too small to measure sustained performance.
• The SSD is hot and throttling.
• The operating system is running background tasks.
• The drive is using an encrypted or compressed file system.
• The benchmark uses a low queue depth.
• The motherboard shares PCIe lanes with another device.
• The SSD has a small dynamic cache and the test exceeds it.
Check the connection first. A fast NVMe drive installed in a PCIe x2 slot will not reach the same result as one installed in a PCIe x4 slot. For external drives, the slowest part of the chain controls the outcome: drive, enclosure, cable, port, or computer.
Mistakes to avoid when testing SSD performance
Testing an SSD is simple, but poor methods can create misleading results. The most common mistake is to run one benchmark and treat the highest score as the truth.
Avoid these errors:
• Testing the wrong drive.
• Running a benchmark on a nearly full SSD.
• Comparing results from different tools without checking settings.
• Using a small test that fits entirely inside the drive’s cache.
• Ignoring temperature during long tests.
• Testing while antivirus software scans the drive.
• Writing directly to a disk that contains important data.
• Comparing a fresh drive with a drive that is almost full and heavily used.
• Expecting a real file copy to match a manufacturer’s peak rating.
Run consistent tests instead. Use the same tool, test size, power mode, connection, and workload each time. Save screenshots or record results in a simple table. This makes it easier to see real changes after a firmware update or hardware upgrade.
A simple SSD performance testing plan
If you want a reliable answer without spending all day testing, use this three-part plan.
- Check health data
Confirm that the SSD reports no critical warnings. Note its temperature, percentage used, and total data written.
- Run a synthetic benchmark
Use a trusted tool and record sequential read, sequential write, random read, and random write results. Run the test three times and calculate the average.
- Run a real-world transfer
Copy a large file and a mixed folder between fast drives. Measure the time, watch the speed curve, and check the SSD temperature.
This process gives you a balanced view. The synthetic test shows the drive’s capability, while the real-world test shows how it behaves in your computer. If the results differ, investigate the connection, workload, cache, and temperature before assuming the SSD has failed.
Frequently Asked Questions About How to Test SSD Performance
How often should I test SSD performance?
Test SSD performance when you install a new drive, notice unusual slowdowns, or change the enclosure or connection. Routine benchmarking is not needed because repeated writes add small amounts of wear.
What is a good SSD read and write speed?
A SATA SSD may reach roughly 500 to 560 MB/s in ideal sequential tests. NVMe SSD speeds vary widely, from around 1,500 MB/s to more than 12,000 MB/s, depending on the PCIe generation and model.
Why is my SSD slower than the advertised speed?
Advertised speed is usually a peak result under controlled conditions. A slower interface, low queue depth, full drive, high temperature, background activity, or exhausted write cache can reduce your measured speed.
Does benchmarking damage an SSD?
Normal benchmark use is unlikely to cause meaningful damage, but write-heavy tests do add data to the drive. Use moderate test sizes, avoid unnecessary repeated runs, and never run a destructive test on a drive with important files.
Should I test an SSD when it is empty?
An empty or lightly used SSD often shows its best performance. For a more realistic view, test the drive at its normal capacity level and keep at least 10% to 20% free for maintenance.
Is CrystalDiskMark accurate for SSD testing?
CrystalDiskMark is useful for repeatable comparisons when you use the same settings. It does not represent every real-world workload, so pair it with a file transfer test and temperature check.
Can I test an external SSD in the same way as an internal SSD?
Yes, but the cable, enclosure, USB port, and controller can limit the result. Identify the connection standard before comparing the external SSD with an internal drive.
Conclusion
Learning how to test SSD performance helps you separate real storage problems from normal differences in workload, connection, and temperature. Use a trusted benchmark, test sequential and random speeds, check drive health, and confirm the result with real file transfers.
Keep your testing consistent, leave free space on the drive, and monitor temperature during long workloads. With these steps, you can make better upgrade choices and spot problems before they become serious. Try the process on your SSD, record the results, and share your experience or questions in the comments.

Everett Ashford is a tech reviewer at mytechgrid.com specializing in SSDs, cameras, TVs, earbuds, headphones, and other consumer electronics. He provides honest, data-driven reviews based on hands-on testing and real-world performance analysis. Everett simplifies complex tech details to help readers make smart, confident buying decisions.