The best thermal camera for home use combines clear heat imaging, easy controls, useful alarms, and dependable battery life.
A cold room, a warm outlet, or a hidden HVAC leak can waste money and cause real trouble. A thermal camera helps you see heat patterns that normal eyes miss. I use these tools to check insulation, breakers, pipes, appliances, windows, and heating vents before small faults grow. The models below cover simple home checks, detailed inspections, and mobile-phone use. I also explain what each camera does well, where it falls short, and which buyer will get the most value.
GT14S Thermal Camera with Edge Enhancement
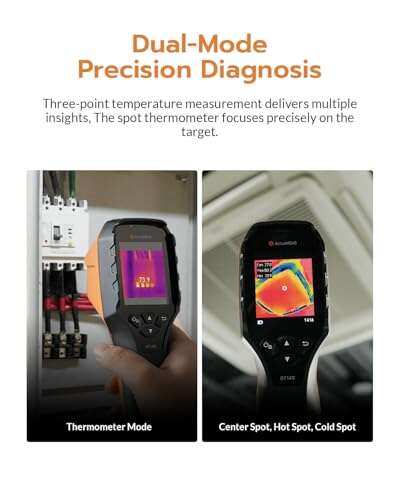
The GT14S is a practical handheld thermal camera for routine home checks. Its edge enhancement feature helps make walls, vents, pipes, and other shapes easier to understand on screen. That matters because a plain thermal image can sometimes look like a soft cloud of colors. The thermometer mode also gives a more direct way to investigate a suspicious hot or cold spot.
I see this model fitting homeowners who want a stand-alone tool rather than a phone attachment. It can help trace uneven heating, locate draft areas, and screen electrical panels from a safe distance. As with any infrared camera, the temperature reading depends on surface type, distance, and reflected heat. Use it as an inspection aid, not as a replacement for a licensed electrician or HVAC technician.
Pros:
- Edge enhancement makes targets easier to identify
- Thermometer mode supports quick spot checks
- Handheld design feels natural during room inspections
- Useful for HVAC, insulation, and electrical screening
- Does not require a separate smartphone to operate
Cons:
- Advanced image controls may take time to learn
- Infrared readings can vary on shiny metal surfaces
- Not intended to replace professional diagnostic equipment
My Recommendation
The GT14S is best for homeowners who want simple, direct thermal testing. I would choose it for checking drafty windows, cold corners, warm outlets, and radiator performance. Its edge enhancement gives the image a useful visual lift, while thermometer mode adds practical value for quick checks. If you want the best thermal camera for home use without a phone-based setup, this model deserves a close look.
| Best for | Why |
|---|---|
| Home energy checks | It helps reveal uneven heat and possible insulation gaps. |
| New thermal camera users | Handheld controls feel less dependent on a phone app. |
| Quick temperature screening | Thermometer mode makes spot checks simple. |
Flagfront 240 x 240 TISR Thermal Camera

The Flagfront thermal camera targets home inspection work with a stated 240 x 240 TISR resolution. More pixels can make small heat patterns easier to separate, especially when you inspect a wall, ceiling, or electrical component from several feet away. The camera is designed for more than a quick novelty scan. It gives homeowners a stronger starting point for finding missing insulation, overloaded connections, and HVAC balance problems.
I like this type of resolution for users who want to save images and study them later. A clear thermal pattern can help you show a contractor where the issue appears instead of pointing at a vague feeling of cold air. Still, resolution does not solve every measurement problem. Reflective surfaces, glass, air movement, and changing outdoor temperatures can affect what the camera sees.
Pros:
- 240 x 240 TISR resolution supports clearer thermal detail
- Well suited to home inspection tasks
- Useful for larger walls, ceilings, and HVAC zones
- Higher detail can help separate nearby heat sources
- Handheld format is convenient for room-to-room work
Cons:
- More features may feel excessive for one-time users
- Thermal clarity still depends on distance and conditions
- Users should learn emissivity basics before trusting readings
My Recommendation
I recommend the Flagfront to serious DIY homeowners and property inspectors who want more image detail than a basic entry model. It is a good match for checking insulation, water-related cold areas, HVAC output, and electrical panels. The 240 x 240 TISR specification gives it a useful edge when the target is small or far away. For many buyers, this is a strong candidate for the best thermal camera for home use when image detail matters most.
| Best for | Why |
|---|---|
| Detailed home inspection | The 240 x 240 TISR image can show more useful thermal structure. |
| Contractor discussions | Clearer images make suspected problems easier to explain. |
| Large homes | Extra detail helps when scanning broad surfaces and distant targets. |
HF96 Thermal Camera with AI Detection

The HF96 combines thermal imaging with AI scene detection and a laser pointer. The laser can help you aim at a specific pipe, vent, breaker, or appliance part without guessing where the center of the image falls. Its listed temperature range of -4°F to 1,022°F covers common home tasks and many light workshop checks. The AI scene feature may also help organize or adjust the view for different inspection situations.
This is the kind of camera I would bring into a busy utility room. A pointer makes it easier to match a hot area on the display with the real object in front of you. The broad range is helpful, but a wide range alone does not guarantee laboratory-level accuracy. Keep a safe distance from live electrical equipment and treat any unusual pattern as a reason for further testing.
Pros:
- AI scene detection can simplify common inspection views
- Laser pointer helps identify the target area
- Wide listed range suits cold and hot household checks
- Useful for electrical, HVAC, plumbing, and workshop tasks
- Good fit for users who want guided features
Cons:
- AI suggestions should not replace user judgment
- Laser use may be restricted around certain equipment or people
- Many settings can require a short learning period
My Recommendation
The HF96 is best for DIY users who want extra guidance while scanning. I would pick it for home maintenance, workshop work, and owners who often inspect several types of targets. The laser pointer is more useful than it may sound because it reduces confusion in crowded spaces. If you want the best thermal camera for home use with smart scene support and a broad listed temperature range, the HF96 is a capable option.
| Best for | Why |
|---|---|
| Guided inspections | AI scene detection may make common tasks easier to start. |
| Electrical and HVAC work | The pointer helps you identify the exact area under review. |
| Mixed temperature tasks | The listed range covers many household and workshop needs. |
Thermal Master P1 USB-C Thermal Camera

The Thermal Master P1 takes a different approach from the handheld cameras in this guide. It connects through USB-C to a compatible iOS or Android device and uses the phone as its screen. Its stated 320 x 240 resolution is attractive for users who want detailed thermal images in a small package. A phone-based camera can also make it easier to share pictures, save reports, and compare scans over time.
The P1 is a smart pick for people who already carry a good smartphone everywhere. It takes up little space and can turn a phone into a useful home inspection tool. Before buying, check device compatibility, USB-C support, app access, and phone case clearance. The phone battery also becomes part of the setup, so long inspection days may need a power bank.
Pros:
- Compact design is easy to carry in a tool bag
- 320 x 240 resolution offers strong image detail on paper
- Uses a familiar phone display
- Simple sharing can help with repair records
- Useful for home, vehicle, camping, and hobby checks
Cons:
- Requires a compatible USB-C phone and app
- Phone battery life affects inspection time
- A bulky phone case may interfere with the connector
My Recommendation
I recommend the Thermal Master P1 to mobile users, renters, technicians, and homeowners who want high detail in a small form. It is especially useful if you already organize repair photos on your phone. The 320 x 240 specification gives it a strong image advantage for a compact accessory. For phone-first buyers, it may be the best thermal camera for home use because it combines portability, sharing, and useful resolution.
| Best for | Why |
|---|---|
| Phone-based inspections | It uses a compatible iOS or Android device as the display. |
| Portable tool kits | The small camera takes up very little space. |
| Sharing thermal photos | Phone storage and apps make image sharing convenient. |
AccuMEMS GT14S Lightweight Thermal Camera

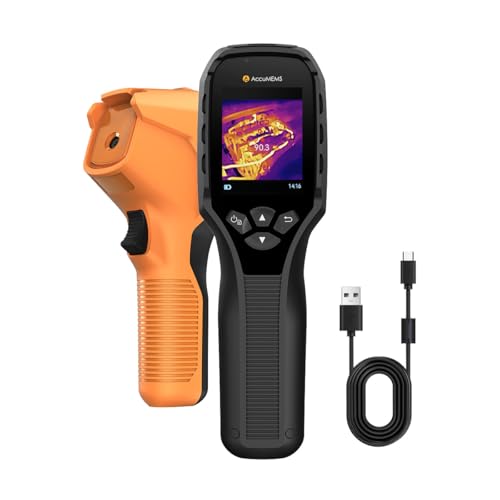
The AccuMEMS GT14S focuses on low weight and easy handling. Its listed weight is only 240 grams, which can make a difference when you hold a camera above your head to inspect a ceiling or crawl into a tight space. It also includes a thermometer mode for simple temperature checks. This design suits users who value comfort as much as raw specifications.
I find lightweight tools easier to use well because fatigue can lead to rushed scans. The GT14S should work nicely for checking windows, air vents, radiators, fuse boxes, and appliance surfaces. It is still important to pause and confirm a pattern from more than one angle. A small thermal camera is a helpful flashlight for heat, but it does not show the full cause of a problem.
Pros:
- Ultra-light 240-gram design reduces hand fatigue
- Thermometer mode supports fast temperature checks
- Easy to carry during long home inspections
- Good match for overhead and tight-space scanning
- Useful for renters and occasional DIY users
Cons:
- Light weight may come with fewer advanced controls
- Temperature readings need careful surface assessment
- Not the strongest choice for formal inspection reports
My Recommendation
The AccuMEMS GT14S is best for users who dislike heavy tools or often inspect several rooms at once. I would choose it for basic home energy checks, appliance scans, and quick maintenance work. Its light frame makes it less tiring than a bulky imager. If comfort and ease matter most, this could be the best thermal camera for home use in a compact handheld format.
| Best for | Why |
|---|---|
| Long scanning sessions | The 240-gram body should be easier to hold for extended periods. |
| Tight spaces | A light camera is easier to move near pipes and cabinets. |
| Simple home checks | Thermometer mode supports quick, direct screening. |
MILESEEY TR10 192 x 192 Thermal Camera

The MILESEEY TR10 offers a stated 192 x 192 infrared resolution and a 25Hz refresh rate. That refresh rate can help the image feel smoother when you move across a wall, floor, vent, or machine. Smooth movement makes it easier to follow a heat trail instead of watching a choppy display. This is useful for homeowners who want a balanced camera for regular maintenance.
The TR10 is not built around one narrow task. I see it as a general home tool for spotting odd heat patterns before deciding what to do next. It can support checks for insulation, HVAC output, electrical loads, and plumbing temperature changes. Remember that a smooth image does not automatically mean a precise measurement, so verify important findings with suitable test tools.
Pros:
- 192 x 192 infrared resolution suits common home checks
- 25Hz refresh rate supports smoother movement
- Versatile choice for HVAC, electrical, and plumbing scans
- Good middle ground for casual and serious DIY users
- Handheld design is practical for routine maintenance
Cons:
- It may show less detail than 240 x 240 or 320 x 240 models
- Users must learn how reflections affect readings
- Not a full substitute for a professional inspection camera
My Recommendation
I recommend the TR10 to buyers who want a flexible all-around thermal camera. Its 25Hz refresh rate is useful when scanning quickly, and its resolution should cover most basic home tasks. It makes sense for a homeowner who wants one tool for several types of maintenance. In a broad search for the best thermal camera for home use, the TR10 stands out as a balanced and approachable option.
| Best for | Why |
|---|---|
| General home maintenance | It handles many common inspection tasks without a narrow focus. |
| Moving scans | The 25Hz refresh rate can make motion look smoother. |
| DIY beginners | It offers a practical balance of detail and everyday use. |
HP96 Thermal Camera with Touch Screen
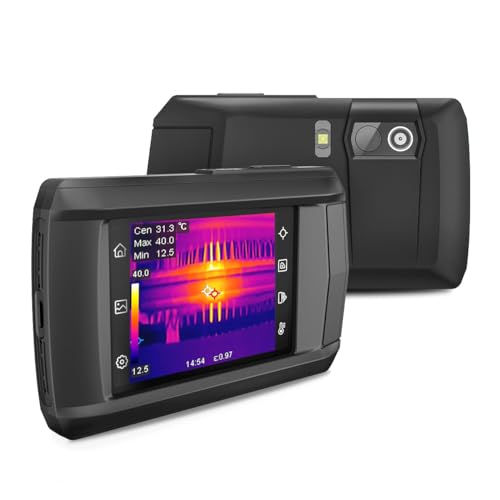
The HP96 adds a 3.5-inch touch screen and intelligent scene detection to the inspection process. A larger display can make thermal patterns easier to read, especially for users who do not want to squint at a small panel. Touch controls may also feel more familiar than a group of physical buttons. That combination gives the HP96 an approachable design for home maintenance.
I would consider this camera for a household where more than one person may use it. The screen gives a clearer view when you show a family member or contractor what you found. Intelligent scene detection may help adjust the display for different subjects, but I still prefer to review the image with basic thermal knowledge. The camera can point to a clue; it cannot tell you the complete story behind it.
Pros:
- 3.5-inch touch screen improves viewing comfort
- Intelligent scene detection can simplify operation
- Good choice for shared household use
- Touch controls may reduce menu frustration
- Useful for HVAC, insulation, appliance, and electrical checks
Cons:
- Larger screens can increase overall camera size
- Touch controls may be less convenient with gloves
- Scene detection does not replace manual review
My Recommendation
The HP96 is best for users who value a clear display and simple interaction. I would choose it for older homeowners, families, landlords, and anyone who wants to share images during an inspection. Its large touch screen can make the experience less intimidating. For comfortable viewing and easy operation, it has a strong claim as the best thermal camera for home use for shared households.
| Best for | Why |
|---|---|
| Easy viewing | The 3.5-inch display gives thermal patterns more room on screen. |
| Shared use | Family members and contractors can view the image more easily. |
| Simple controls | Touch operation may feel familiar to smartphone users. |
Dual-Light 240 x 240 Thermal Camera

This dual-light thermal camera pairs infrared imaging with a visible-light view. That combination can help you understand both the heat pattern and the physical scene around it. The listed 240 x 240 TISR resolution adds useful detail for wall, ceiling, and equipment checks. In practice, the visible image works like a map while the thermal layer works like a heat overlay.
I find dual-light designs valuable when several pipes, wires, or components sit close together. The infrared picture may show the problem, while the visible view helps identify the exact object. It is useful for electrical panels, HVAC cabinets, engine spaces, and dark utility areas. Even so, never open or touch a dangerous system just because the camera makes the target easier to see.
Pros:
- Dual-light design adds visible scene context
- 240 x 240 TISR resolution supports detailed thermal views
- Helpful in crowded utility spaces
- Useful for electrical, HVAC, and plumbing inspections
- Visible and infrared views can reduce target confusion
Cons:
- More imaging modes may require extra setup
- Dual-light features can increase power use
- Users still need safe electrical inspection practices
My Recommendation
This model is best for homeowners who need context as well as heat data. I would select it for basements, utility rooms, garages, and areas with many nearby components. The 240 x 240 TISR detail and dual-light design make it easier to connect an unusual thermal mark to a real object. It is a smart best thermal camera for home use choice for complex spaces where a simple heat-only view may confuse you.
| Best for | Why |
|---|---|
| Busy utility rooms | The visible view helps identify objects near a thermal hotspot. |
| Electrical checks | Thermal and visual context can make panel scans easier to understand. |
| Low-light areas | Dual-light imaging can provide more scene information. |
H128 Handheld Thermal Camera

The H128 is built for users who want a rugged handheld tool. Its listed features include 240 x 240 TISR resolution, a 25Hz infrared image, a 24-hour battery claim, temperature alarms, and IP65 protection. Those attributes make it appealing for long inspection days, workshop use, and demanding home maintenance. The listed temperature range of -4°F to 842°F also covers most residential tasks.
A long battery claim can be useful for landlords, property managers, and people working through many rooms. The alarm feature may help draw attention to a hot electrical connection or an unexpected pipe temperature. IP65 protection adds peace of mind around dust and light water exposure, though it does not make the camera safe for every wet environment. I would still store it carefully and follow the maker’s limits.
Pros:
- 240 x 240 TISR resolution supports detailed scanning
- 25Hz refresh rate suits moving inspections
- Listed 24-hour battery life supports extended use
- Temperature alarm can flag unusual readings
- IP65 protection adds useful job-site durability
Cons:
- Rugged features may be more than casual users need
- The battery claim can vary with screen and mode use
- IP65 protection does not mean full waterproofing
My Recommendation
The H128 is best for landlords, serious DIY users, and anyone who checks several properties or rooms in one day. Its battery, alarm, refresh rate, and protection rating give it a practical work-tool feel. I would choose it when durability and long operation matter more than the smallest size. Among these choices, it is a strong best thermal camera for home use for extended inspections and regular maintenance.
| Best for | Why |
|---|---|
| Long inspection days | The listed battery life is designed for extended operation. |
| Rugged home maintenance | IP65 protection helps with dust and light water exposure. |
| Temperature alerts | An alarm can draw attention to unusual heat conditions. |
GH192 Thermal Camera with Fusion Imaging
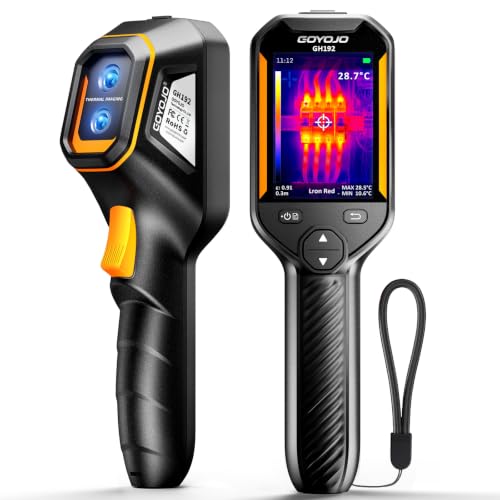
The GH192 combines a 240 x 240 thermal image with a listed 2MP visual camera and fusion imaging. Fusion can blend thermal and visible details, helping the user see heat information in the shape of the real scene. It also includes a 25Hz handheld thermal imager and an alarm for inspection work. This feature set targets homeowners who want a more complete record of what they find.
I would use a camera like this when an image may need to guide a later repair. A fused picture can help you remember which pipe, wire, vent, or breaker showed the unusual pattern. It also supports mechanical maintenance and HVAC checks around the house. Keep in mind that a visual camera adds context, not magical accuracy; proper distance, focus, and surface conditions still matter.
Pros:
- 240 x 240 thermal resolution provides useful detail
- Listed 2MP visual camera adds scene context
- Fusion imaging can connect heat marks to real objects
- 25Hz refresh rate supports smooth movement
- Alarm feature helps flag unusual thermal conditions
Cons:
- Fusion settings may take practice to use well
- More features can make the camera less simple
- Visual detail does not remove infrared measurement limits
My Recommendation
The GH192 is best for users who want images that are easy to explain later. It suits home HVAC work, mechanical checks, electrical screening, and detailed repair notes. I especially like it for homeowners who plan to share findings with a contractor. If clear context is your priority, the GH192 may be the best thermal camera for home use in this group.
| Best for | Why |
|---|---|
| Repair documentation | Fusion imaging can make the location of a heat pattern clearer. |
| HVAC inspection | Thermal and visual views help compare vents and equipment. |
| Contractor communication | A combined image can be easier to discuss than colors alone. |
How I Choose a Thermal Camera for Home Use
Choosing a thermal camera is not just about picking the largest temperature range. I start with the jobs I need to do. A camera for checking insulation has different needs from one used to inspect a hot motor or electrical panel. For most homes, image clarity, safe operation, battery life, and simple controls matter more than extreme heat capability.
I also look at the infrared resolution. A higher number of pixels can help show smaller targets and finer heat changes. Still, resolution is only one part of the picture. The lens, distance, focus, refresh rate, image palette, and software all affect how useful the final image feels.
Resolution and Image Detail
Thermal resolution describes the number of infrared pixels in the image. A 192 x 192 camera gives a useful 36,864 thermal pixels. A 240 x 240 model gives 57,600 pixels, while a 320 x 240 model gives 76,800. More pixels can help when you inspect small circuit parts, narrow pipes, or distant wall sections.
However, do not assume that more pixels always mean a better temperature reading. The camera must still measure the target correctly. If the target is too small in the frame, the surrounding surface can affect the result. I prefer to move closer when safe, fill more of the screen with the target, and compare the pattern from several angles.
Temperature Range and Accuracy
A wide temperature range looks impressive in a product listing. For home use, most tasks involve a much smaller span. You may inspect a cold window, a warm vent, a water pipe, or an electrical connection. A range that includes normal room temperatures and common hot surfaces is often more useful than a very wide range that you never use.
Surface type also matters. Painted walls usually behave more predictably than polished metal. Glass can reflect nearby heat rather than show the temperature behind it. The U.S. Department of Energy and other building experts use infrared inspection as part of a wider process, not as a stand-alone answer. I follow the same rule: use the thermal image to find clues, then confirm important faults with the right test method.
Refresh Rate
Refresh rate tells you how often the camera updates the image. A 25Hz model can look smoother as you move across a room. That helps when you track a warm pipe or scan a long wall. A slower rate can still work for still targets, but the image may feel less fluid.
A smooth image also makes the camera more comfortable to use. You spend less time waiting for the display to catch up. If you inspect moving targets or scan large areas, I would give refresh rate serious attention.
Thermal Palettes and Visual Modes
Most thermal cameras offer more than one color palette. Rainbow colors can make strong differences stand out, while white-hot or black-hot views may look easier to read. No palette is always best. I switch between them when a pattern is hard to understand.
Edge enhancement, dual-light views, and fusion imaging add context. These features can act like labels on a map. They help you connect a thermal shape with a wall outlet, pipe, vent, or machine part. The best thermal camera for home use should show heat clearly without turning every inspection into a puzzle.
Battery Life and Charging
Battery life matters more than many first-time buyers expect. A quick check may take ten minutes, but a full house inspection can last much longer. Bright screens, wireless features, recording, and high refresh rates can reduce run time. If you inspect rental properties or several rooms, look for a model that can last through the job.
Phone attachments use the phone’s battery, which can be both good and bad. You avoid charging another device, but the phone may lose power faster. A small power bank can help. For a stand-alone camera, I like a simple charging port and a battery indicator that gives enough warning before power runs out.
Safety Rules for Home Thermal Scans
A thermal camera does not see through walls. It sees infrared energy from the surface. It may reveal a warm patch where a pipe runs, but it cannot confirm the pipe’s condition inside the wall. It may show a hot electrical breaker, but it cannot prove whether the breaker itself or the connected wire caused the heat.
Never remove an electrical panel cover unless you have the training and permission to do so. Keep a safe distance from live equipment. Do not point a laser at people, cars, aircraft, or reflective surfaces. Follow OSHA-style electrical safety practices and use a qualified professional when the issue involves fire risk, live wiring, gas, structural damage, or high voltage.
Common Home Uses
Homeowners use thermal cameras for many simple checks. You can compare supply vents in different rooms, find cold air near windows, check a refrigerator seal, and look for unusual heat near a breaker. You can also inspect radiant floor areas, water lines, attic insulation, and appliance motors.
Water leaks can create cool areas when moisture changes the surface temperature. Yet the camera may not show a leak if the surface is covered, dry, or at the same temperature as its surroundings. I use thermal imaging to narrow the search, then confirm with moisture tools or a professional inspection.
Tips for Getting Better Thermal Images
Start with a simple scan. Let the camera adjust to the room before you judge the colors. Hold it steady and avoid standing too far away. A thermal image is more useful when the target fills a good part of the display.
Do not scan through a window and expect to read the outdoor surface accurately. Glass reflects infrared energy. Shiny metal can do the same. If you must inspect metal, change your angle and compare the area with a known surface nearby.
Look for patterns, not one bright pixel. A single spot can come from a reflection, a small defect, or a measurement error. A line of cold air near a window, a group of warm breakers, or one vent that differs from all others is more meaningful. I take a normal visual photo as well as a thermal photo so I can remember the location.
Temperature alarms can help, but choose sensible limits. A low alarm may be useful for finding cold areas in a home. A high alarm may help spot an unusually warm connection. Set the alarm based on the task, then confirm the result before taking action.
FAQs Of best thermal camera for home use
What is the best thermal camera for home use?
The best choice depends on your task. The Flagfront and GH192 offer strong detail and useful inspection features. The Thermal Master P1 is better for phone users, while the H128 suits long or rugged inspections.
Can a thermal camera see through walls?
No. A thermal camera reads infrared energy from the surface. It may show heat patterns caused by pipes, wiring, air leaks, or insulation behind a wall, but it cannot see through the wall.
Can I use a thermal camera to find water leaks?
Yes, it can help locate temperature changes linked to moisture. It cannot confirm every leak, especially when the surface is dry or covered. Confirm important findings with a moisture meter or a qualified professional.
Are thermal cameras safe for electrical inspections?
They can support a visual screening from a safe distance. Never touch live equipment or remove a panel cover without proper training. A hot spot needs a qualified person to diagnose the cause.
Is higher thermal resolution always better?
Higher resolution can show smaller details, but it does not guarantee perfect accuracy. Distance, focus, emissivity, reflections, and software also affect results. Choose resolution based on the size of the targets you plan to inspect.
Final Verdict: Which Should You Buy?
For most homeowners, I would start with the GH192 because its 240 x 240 thermal view, visual camera, fusion imaging, and alarm offer a strong mix. The Thermal Master P1 is my compact pick for phone users.
The best thermal camera for home use should make hidden heat patterns easy to understand. Choose the model that fits your tasks, safety needs, and comfort level, then use every reading as a clue—not a final diagnosis.

Everett Ashford is a tech reviewer at mytechgrid.com specializing in SSDs, cameras, TVs, earbuds, headphones, and other consumer electronics. He provides honest, data-driven reviews based on hands-on testing and real-world performance analysis. Everett simplifies complex tech details to help readers make smart, confident buying decisions.