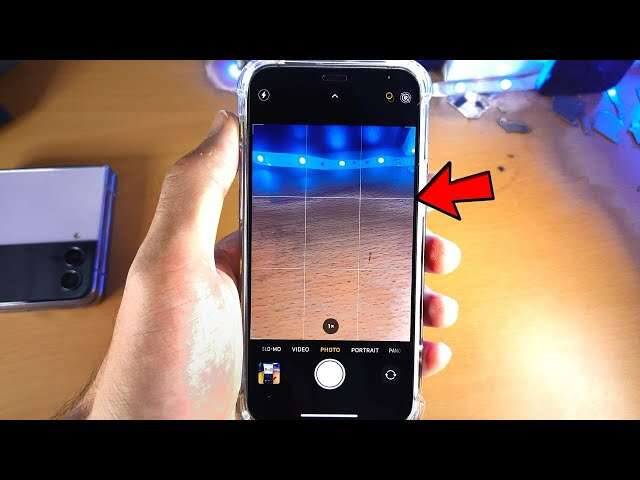
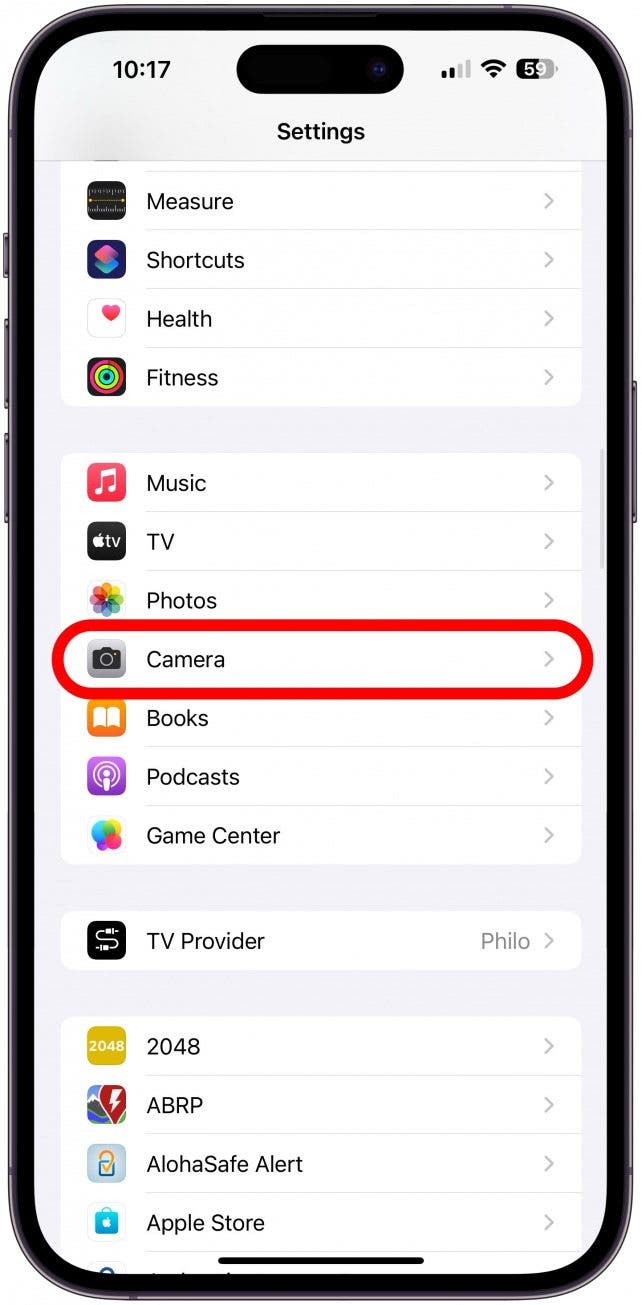
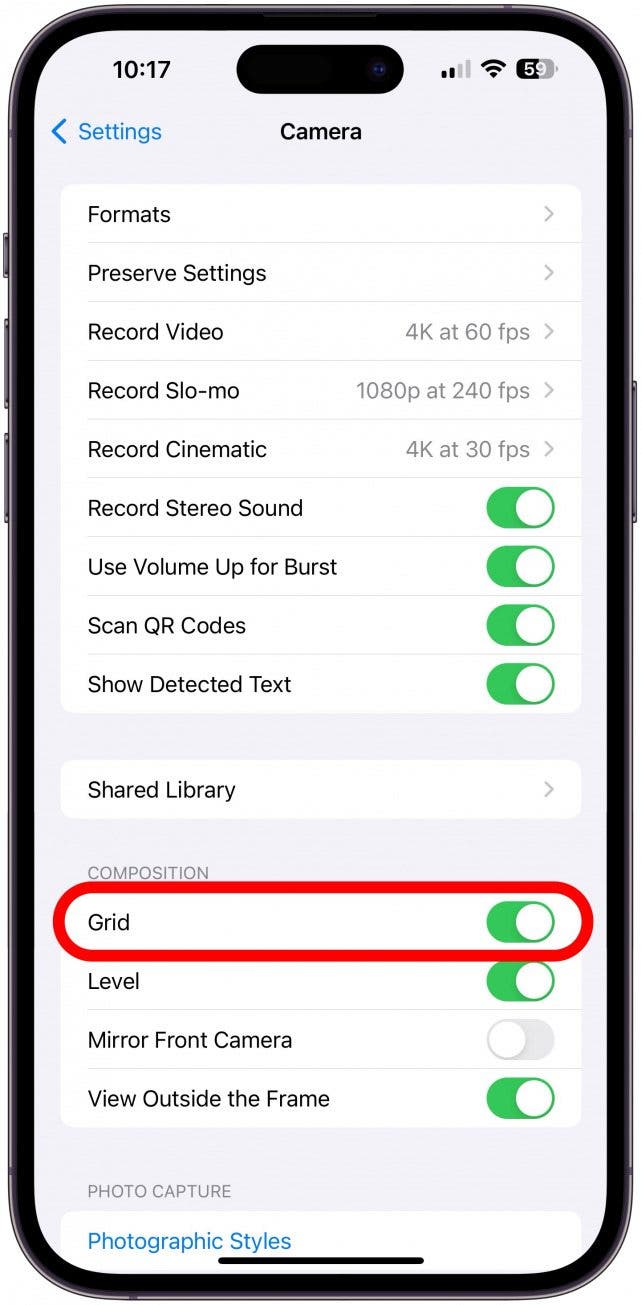
Go to Settings > Camera and toggle Grid to put the grid on your iPhone camera.
I’ve taught and coached photographers on iPhone basics for years, and I’ll walk you through how to put the grid on iPhone camera step by step. This guide explains the setting, shows practical use, fixes common problems, and shares real tips I learned from teaching shoots and editing photos. Read on to quickly apply the grid and improve your shots today.
Why use the grid on your iPhone camera?
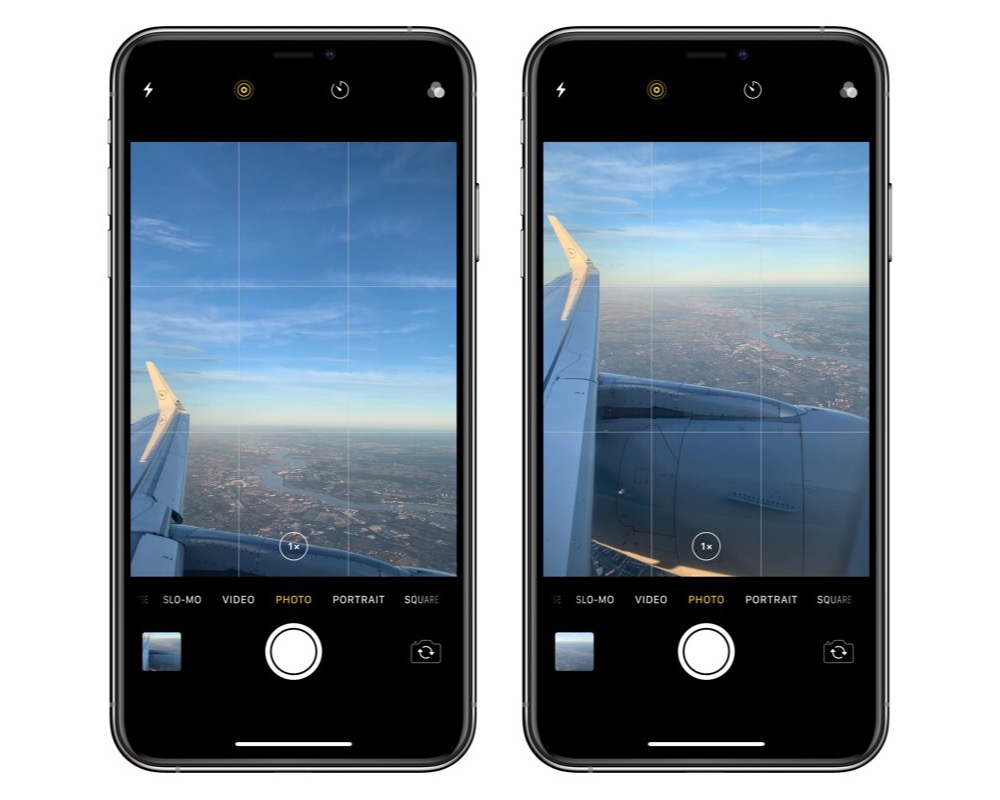
The grid helps you follow the rule of thirds and keep horizons straight. It makes composition faster and more consistent for photos and video. I use the grid when I shoot landscapes and portraits. It saves time in editing and helps learners see composition in real time.
Benefits of using the grid
- Improves framing and balance.
- Makes horizon lines and verticals easier to level.
- Helps place subjects at natural focal points.
How the grid works
- Splits the camera view into thirds horizontally and vertically.
- Gives clear reference lines to align subjects and lines.
- Works in the native Camera app without extra tools.
How to put the grid on iPhone camera — step-by-step
Follow these short steps to enable the grid. These steps work on most modern iOS versions.
- Open Settings on your iPhone.
- Scroll down and tap Camera.
- Toggle Grid on. The switch turns green when active.
- Open the Camera app to see the grid overlay.
Tips for quick access
- Use the Settings search bar and type Camera to jump to the right page.
- Turn the grid on before a shoot so you don’t forget.
- Remember the grid only appears in the live view; it won’t show in saved images as a line.
How to put the grid on iPhone camera note
- If you update iOS, check the Camera setting again. Updates can reset preferences.
- If the Camera app is restricted, the grid may not appear.

Practical uses and composition tips with the grid
The grid is simple, but it unlocks better images fast. I use it to frame horizons, place eyes on intersecting points for portraits, and align buildings in street shots.
Common ways to use the grid
- Align horizons with the top or bottom horizontal line to keep the scene balanced.
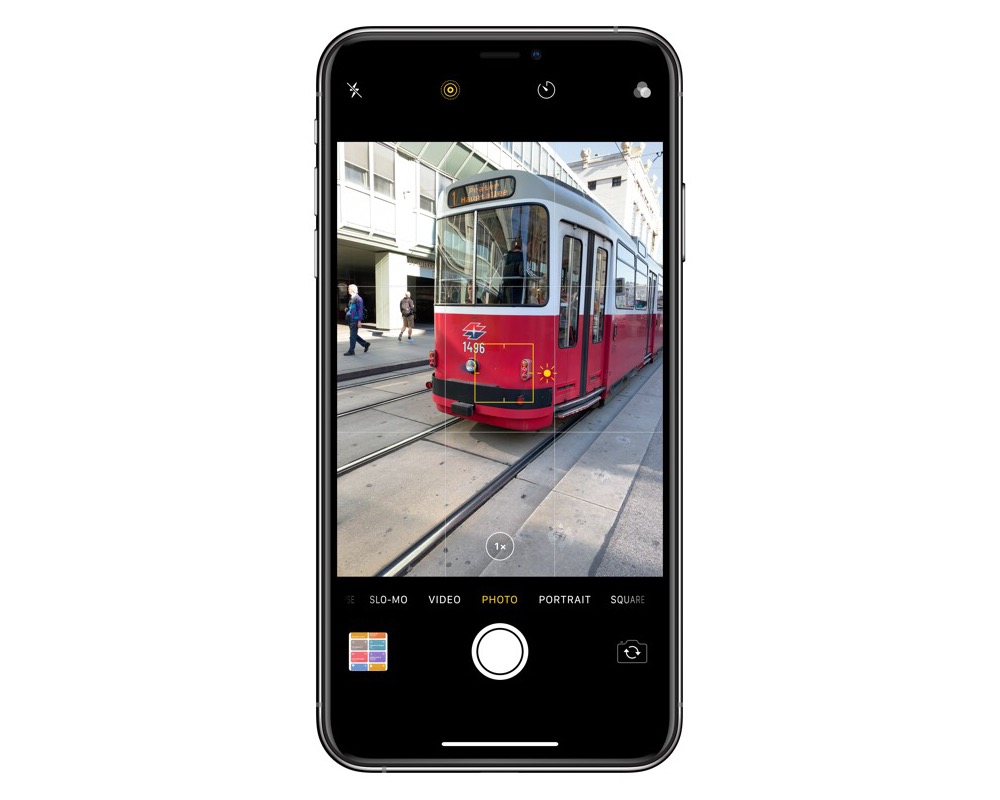
- Place subjects at one of the four intersecting points to follow the rule of thirds.
- Use vertical lines to align trees, lamp posts, and architecture.
Examples from my experience
- On a beach shoot, the grid reduced cropping time by half. I set the horizon on the lower line to show more sky.
- For portraits, I place the subject’s eyes near the top-left or top-right intersection. It creates a natural focal point.
Composing with the grid and creativity
- Use the grid as a guide, not a rule. Break it when the scene benefits.
- Combine the grid with leading lines for stronger depth.
- Try both centered and off-center compositions to see what fits the mood.
Troubleshooting: grid not showing and common issues
If you don’t see the grid, try these checks. I encountered a few odd cases and these fixes worked every time.
Quick checks
- Make sure Grid is turned on in Settings > Camera.
- Restart the Camera app by swiping it closed from the app switcher.
- Restart your iPhone if toggling Grid has no effect.
Other reasons the grid might not appear
- Some third-party camera apps do not honor the system grid. Open the native Camera app to confirm.
- Guided Access or Screen Time restrictions could limit Camera features.
- Very old iOS versions may have different menu names. Update iOS if possible.
PAA-style questions (brief answers)
What if the grid still won’t show?
- Restart the phone and ensure the Camera app has permission. Update iOS if needed.
Can I use the grid for video too?
- Yes. The grid toggled in Settings appears in both Photo and Video modes in the native Camera app.

Advanced tips and alternatives
If you want more control than the default grid gives, try these ideas. I often use overlays and apps during professional shoots.
Use grid with Live Photos and Portrait
- The Grid helps frame shots in Live Photo and Portrait modes without extra steps.
- For Portrait lighting adjustments, the grid keeps the subject balanced.
Third-party apps and overlays
- Many camera apps provide 3×3, 4×4, or golden ratio overlays.
- Use editing apps to add custom guides if you need finer control.
When to disable the grid
- Turn the grid off when you want distraction-free shooting.
- For abstract or centered compositions, the grid can get in the way.
Frequently Asked Questions of how to put the grid on iphone camera
How do I enable the grid on older iPhones?
Open Settings, tap Camera, and toggle Grid on. Very old models use the same path, though menu labels may differ slightly.
Will the grid appear in my saved photos?
No. The grid is an on-screen guide only. It doesn’t show up in exported or saved images.
Does the grid affect video recording?
The grid appears in the Camera app for both photo and video modes. It’s a guide only and won’t show in the final footage.
Can I change the grid style or size on iPhone?
The native Camera app has only a 3×3 grid. For other styles, use third-party camera apps or editing overlays.
Why can’t I find Camera settings on iOS?
Use the Settings search at the top and type Camera. If Settings or Camera is restricted, check Screen Time or device management profiles.
Conclusion
Turning on the grid is a tiny step that yields big improvements in composition and speed. Try how to put the grid on iPhone camera now, and use it for a few shoots to build an eye for balance and framing. Apply the tips here, experiment, and let the grid become a helpful habit.
Take action: enable the grid, shoot a few frames, and compare your edits. Share your results or questions in the comments to learn faster.

Everett Ashford is a tech reviewer at mytechgrid.com specializing in SSDs, cameras, TVs, earbuds, headphones, and other consumer electronics. He provides honest, data-driven reviews based on hands-on testing and real-world performance analysis. Everett simplifies complex tech details to help readers make smart, confident buying decisions.