Export camera tracking as an FBX (or Live Link) and import into Sequencer, matching frame rate and lens.
I’ve spent years building virtual production shots and teaching teams how to import tracked camera to Unreal Engine. This guide walks you through the full workflow: planning, exporting from tracking software, importing into Unreal Engine, matching lens and frame data, using Live Link for real-time tracking, and troubleshooting common problems. Read on to get practical steps, pro tips, and examples so your tracked camera lines up perfectly in Unreal every time.

Why import a tracked camera into Unreal Engine?
Importing a tracked camera into Unreal Engine lets you combine real camera moves with CG worlds. You get accurate perspective, parallax, and real-world camera behavior inside your scene. That makes compositing, previs, and virtual production feel real and repeatable.
Benefits include
- Matchmove accuracy for live-action shots.
- Real camera focal length and sensor data in Unreal cameras.
- Faster iteration when plate and CG align in the same virtual space.
how to import tracked camera to unreal engine is the core skill for virtual production and VFX work. Get this right and your plates will sit in the CG world without manual fudging.

Prerequisites and planning
Before you import a tracked camera to Unreal Engine, plan these details. Good prep cuts errors and editing time.
Checklist
- Tracking software that exports camera data to FBX, Alembic, or supports Live Link.
- A baked camera solve with per-frame keys and no procedural nodes.
- Matching frame rate and timecode between plate and Unreal project.
- Lens data: focal length, film back (sensor size), and any distortion/undistortion info.
- A consistent units system (meters vs centimeters) and coordinate convention.
Pro tip: Always bake your camera animation into keyframes in the tracking app. Don’t rely on expressions or constrained rigs when you export. This simplifies import into Unreal.
how to import tracked camera to unreal engine starts with matching FPS, units, and baked keys. If those match, the rest is mostly import and minor adjustments.
Exporting tracked camera from your tracking software
Most workflows use FBX for camera animation export. Some teams use Alembic or USD for geometry plus camera. Live Link or dedicated hardware integrations work for real-time setups.
Common export formats
- FBX
- Exports camera transform, focal length, and keyframes.
- Works with After Effects, Blender, Maya, 3ds Max, PFTrack, SynthEyes.
- Alembic (ABC)
- Mostly for geometry caches; some tools can export camera animation.
- Use when you need both camera and geometry caches in one file.
- USD
- Good for complex pipelines that share assets between apps.
- Live Link / Protocols
- For live camera feeds from mocap rigs and tracking hardware.
Export steps (generic)
- Bake the camera animation to per-frame keys.
- Set export FPS to match your plate and Unreal project.
- Include focal length and film back if possible.
- Export with a stable origin or known offset (record any origin transform).
- If the tracking app provides undistorted plate and distortion maps, export those for compositing.
how to import tracked camera to unreal engine works best with FBX files exported at the same FPS and units as your Unreal project. I always double-check frame rate before exporting.

Importing the camera into Unreal Engine (step-by-step)
This step-by-step uses FBX import into Sequencer and adding a CineCameraActor. It covers common pitfalls and fixes.
Step 1 — Project settings
- Set Project > Editor Preferences > Level Editor > Viewport to the same FPS as your plate.
- Set New Level Sequence’s frame rate to match.
Step 2 — Import FBX camera
- Content Browser > Import > choose FBX.
- In FBX Import Options, enable Import Cameras and uncheck Import Meshes if not needed.
- Import into a folder named “Cameras” for clarity.
Step 3 — Create a CineCameraActor
- Place a CineCameraActor in the level and select it.
- In Sequencer, create or open a Level Sequence.
- Right-click the imported camera in the Content Browser > Add to Sequencer or drag the FBX camera into Sequencer.
Step 4 — Transfer animation to CineCameraActor
- If the FBX imported as a camera asset, add it to the Sequencer track and copy keys to your CineCameraActor.
- If you imported a transform animation, paste keys or use an animation blueprint to bind transforms.
Step 5 — Match lens and sensor
- Enter CineCamera settings. Set Filmback to the same sensor size from tracking data.
- Set Focal Length to the exported focal length curve or static value.
- If you have per-frame focal data, import focal animation into the camera’s Lens Settings.
Step 6 — Timecode and offset tweaks
- If the camera is shifted in time, use the Sequencer track offset controls.
- If the origin is offset, adjust the camera parent actor transform.
Quick checklist for success
- Frame rate matches perfectly.
- Camera has baked keys (no constraints).
- CineCamera filmback and focal values set.
- Any scale or rotation offsets corrected.
how to import tracked camera to unreal engine successfully often requires copying focal length curves and matching filmback. If you skip lens matching, perspective will be wrong.

Using Live Link and real-time camera tracking
Live Link is used for real-time virtual production. It lets you stream camera transform and lens data into Unreal.
Common Live Link sources
- Tracking rigs (optical or inertial sensors).
- Camera encoders on set (e.g., lens metadata).
- Mo-cap systems that output camera transforms.
How to set up Live Link
- Install and enable the Live Link plugin in Unreal.
- Connect the tracking source to the same network and verify endpoints.
- In Live Link Panel, add the subject and map it to a CineCameraActor.
- Stream lens metadata if available and map to camera properties.
Important tips
- Use a stable network and dedicated subnetwork for lower latency.
- Stream timecode where possible to keep Unreal and plate sync.
- Record or bake Live Link streams into a Level Sequence after a take.
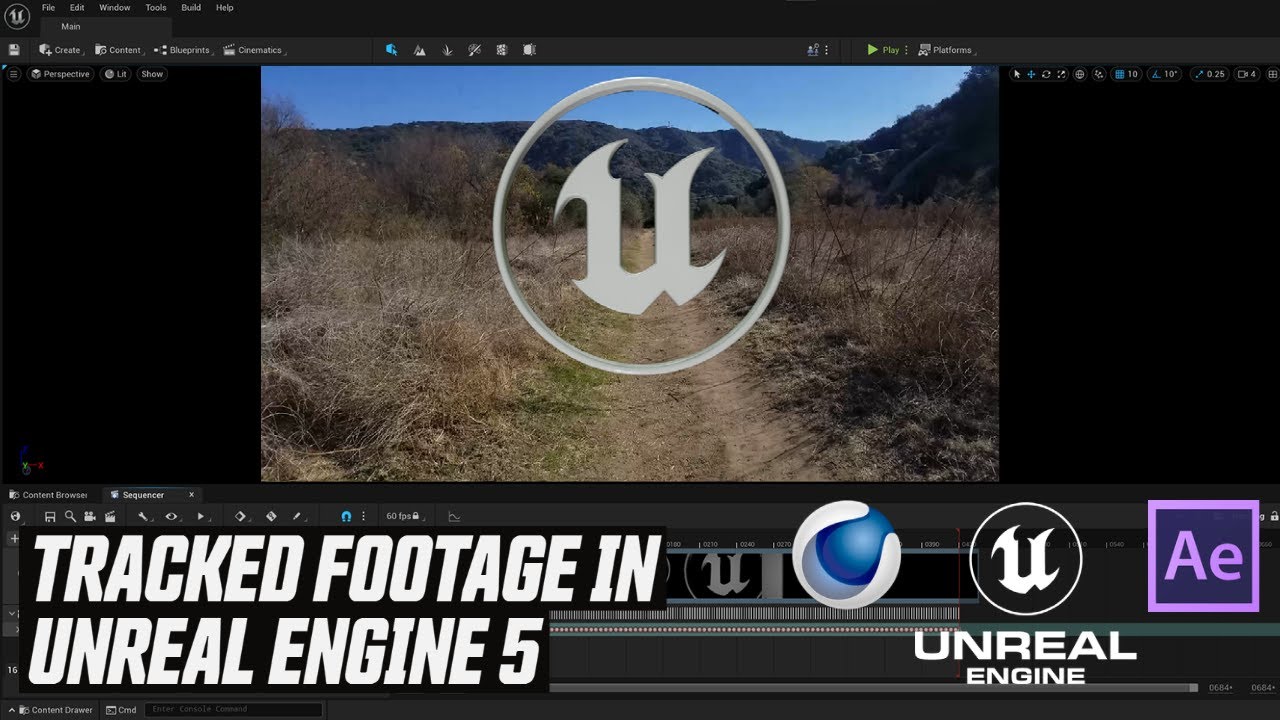
how to import tracked camera to unreal engine in real-time uses Live Link instead of file import. I’ve used Live Link on stage and recommend always recording the stream to a sequence for post work.
Troubleshooting, tips, and common pitfalls
Even simple imports can show errors. Here are common problems and fixes.
Problem: Camera is rotated 90 degrees or mirrored
- Cause: Different coordinate systems (Y-up vs Z-up) or negative scale.
- Fix: Rotate the camera parent or apply a transform correction during import.
Problem: Focal length mismatch
- Cause: Missing focal animation or incorrect filmback.
- Fix: Import focal length curve or set filmback manually to match camera sensor.
Problem: Motion looks jittery
- Cause: Unbaked keys or mismatched FPS.
- Fix: Re-bake keys in the tracker and ensure FPS matches.
Problem: Plate and CG do not line up
- Cause: Wrong units or origin offsets.
- Fix: Convert units/export scale or apply the offset recorded during tracking.
Practical tips from my experience
- Always keep a text file with export settings (FPS, origin offset, units). It saves hours.
- Export a locator or ground plane from the tracking software. It helps align the scene in Unreal.
- Use reference geometry in Unreal to check scale quickly (1m cube or grid).
- If you can undistort the plate before tracking, do it. Distortion will break pixel-perfect alignment.
how to import tracked camera to unreal engine becomes routine if you standardize export settings and keep a short checklist for each shot. I once lost half a day due to a wrong FPS — don’t let that be you.
PAA-style questions (People Also Ask)
Q: How do I match focal length when importing a tracked camera to Unreal?
A: Export the focal length curve or static focal value from your tracking app and import it to the CineCamera’s Lens settings. Also set the filmback sensor size to match the real camera.
Q: Can I import camera distortion data into Unreal?
A: Unreal does not use lens distortion on the CineCamera by default. Undistort the plate before tracking or use post-process shaders or compositing to reapply distortion.
Q: Is FBX or Alembic better for camera import?
A: FBX is the most common for camera transforms and focal animation. Use Alembic if you need geometry caches plus camera data together.
Q: How do I fix a camera import that is offset in position?
A: Apply the recorded origin offset to the camera parent in Unreal. Alternatively, import a locator from your tracking file and snap the camera to that locator.
Q: Do I need to bake animation before export?
A: Yes. Bake keys per-frame to avoid missing data and to ensure reliable import into Unreal.
Frequently Asked Questions of how to import tracked camera to unreal engine
How do I import an FBX camera into Unreal and keep focal animation?
Import the FBX with cameras enabled in FBX import options. Add the camera to Sequencer and copy the focal animation keys into the CineCameraActor’s Lens settings.
What if my tracking software doesn’t export filmback?
If filmback is missing, find the camera’s sensor size from the camera metadata or manufacturer spec sheet and set it in the CineCameraActor manually.
Can I import multiple tracked cameras into one level?
Yes. Import each camera FBX separately, add them to Sequencer tracks, and label them clearly. Use layered sequences if you need to toggle cameras.
How do I ensure plate frames match the Unreal sequence?
Set your Unreal Level Sequence frame rate to the plate FPS and use timecode if available. Double-check export and project FPS before import.
Does Unreal support lens distortion maps?
Unreal does not natively reapply complex lens distortion to live cameras. Undistort before tracking or handle distortion in compositing or with custom post-process tools.
Conclusion
You now have a clear, practical workflow for how to import tracked camera to Unreal Engine. Start by baking and exporting camera data with matching FPS, then import into Sequencer, set filmback and focal values, and correct any origin or unit offsets. For live setups, use Live Link and always record streams to sequences. My best advice: create a short checklist for each shot and verify frame rate, units, and lens data before you export. That small habit saves days.
Take action now: export a simple test camera from your tracking app, import it into Unreal, and follow the steps above. If you run into specific errors, save your export settings and include them when you ask for help so others can reproduce the issue. Leave a comment with your setup or subscribe for deeper tutorials on lighting, compositing, and lens tools.

Jamie Lee is a seasoned tech analyst and writer at MyTechGrid.com, known for making the rapidly evolving world of technology accessible to all. Jamie’s work focuses on emerging technologies, product deep-dives, and industry trends—translating complex concepts into engaging, easy-to-understand content. When not researching the latest breakthroughs, Jamie enjoys exploring new tools, testing gadgets, and helping readers navigate the digital world with confidence.