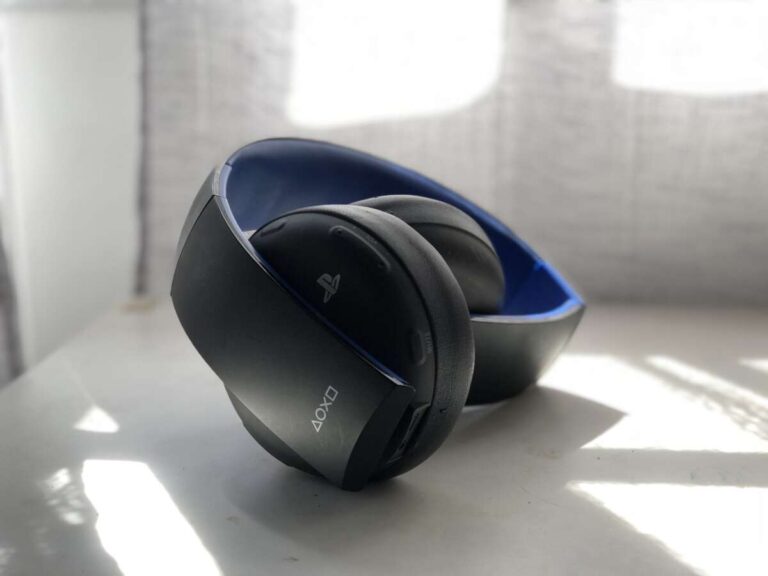
To put JBL headphone pads back on, align the cushion, stretch its lip over the earcup, and press it into place.
Replacing a loose JBL ear pad is usually simple, but the method depends on whether your model uses a removable lip, plastic mounting ring, or adhesive. This guide explains how to put headphone pads back on JBL headphones without tearing the cushion, blocking the sound port, or damaging the earcup. You will also learn how to check the fit, fix common problems, and know when replacement pads are the better choice.
Check your JBL headphone pad and earcup
Before learning how to put headphone pads back on JBL headphones, inspect the pad and the earcup. Turn off the headphones and disconnect the charging cable. Work on a clean table with good light.
Most JBL over-ear pads attach in one of three ways:
• A fabric or leatherette lip stretches around a groove on the earcup.
• A plastic mounting ring clips into the earcup.
• Adhesive holds the pad in place.
Many JBL Tune and Live models use a stretched lip or mounting ring. Some JBL Quantum gaming headsets use a more secure ring or model-specific attachment system. The exact design can vary, so do not force the pad until you see how it was attached.
Look for these signs of damage:
• Torn stitching around the pad
• Crushed or missing foam
• A broken plastic ring
• Loose wires or a damaged speaker grille
• Sticky, dried, or weak adhesive
If the foam is flat or the synthetic leather is peeling, putting the old pad back may only be a short-term fix. In that case, a replacement pair made for your exact JBL model will usually feel and seal better.

Tools you may need
How to put headphone pads back on JBL headphones often requires no special tools. Your fingers are safer than a sharp object because the earcup, speaker mesh, and pad surface can be easy to damage.
Gather these items:
• A clean, dry microfiber cloth
• A plastic guitar pick or plastic pry tool
• A small flashlight
• A replacement mounting ring, if your model uses one
• Manufacturer-approved replacement pads, if the old pads are damaged
Avoid using a knife, screwdriver, scissors, or metal tweezers. A metal tool can scratch the plastic or pierce the pad. It can also slip into the speaker opening.
If the pad has adhesive, use only a small amount of suitable contact adhesive made for foam, fabric, or synthetic leather. Do not use super glue. Super glue becomes hard when dry and can damage foam, plastic, and the soft pad edge.

How to put headphone pads back on JBL step by step
The safest process is slow and even. Think of the pad lip like a fitted bedsheet. One corner goes on first, but the rest must sit evenly around the edge.
1. Turn off and inspect the headphones
Power off the JBL headphones. Remove the audio cable if your model has one. Wipe dust from the earcup and check for broken clips or loose parts.
If you see a thin speaker grille in the center, keep it covered. Do not press the grille or place tools near it.
2. Find the pad’s attachment edge
Run your finger around the back of the ear pad. You may feel a thin fabric, leatherette, or rubber lip. This lip normally fits into a narrow groove around the earcup.
If you see a separate plastic ring, check whether the pad is attached to that ring. Some pads come off with the ring, while others leave the ring clipped to the earcup.
Take a quick photo before removing or repositioning anything. This simple step can prevent confusion about the correct direction.
3. Match the pad to the earcup
Place the pad over the earcup without pressing it down. Align any seams, angled sections, or thicker rear sections with the original position.
The opening in the pad must sit over the speaker grille. If the pad has a wider and narrower side, the wider side often faces the back of the headphone, but confirm this by matching the shape of the earcup.
Correct alignment matters. A pad that is turned slightly can feel uncomfortable and may create an uneven seal.
4. Secure one small section
Start at the top of the earcup. Use one hand to hold the pad and your other hand to tuck a short section of the pad lip into the groove.
Do not try to stretch the entire pad over the cup at once. A small section at a time gives you better control and reduces stress on the stitching.
This is the key part of how to put headphone pads back on JBL headphones. Keep the first section in place while moving only a few inches at a time.
5. Work around the earcup
Move from the top toward one side. Stretch the pad gently and tuck the lip into the groove with your fingertip. Continue around the bottom and then up the other side.
Use even pressure. If one area becomes too tight, go back and loosen the last section rather than pulling harder.
For a plastic mounting ring, line up the ring’s tabs with the slots in the earcup. Press around the ring until each tab clicks into place. You should hear or feel a soft click, not a loud snap.
6. Smooth and check the seal
Run your finger around the entire pad. The lip should sit inside the groove with no folded fabric, gaps, or loose areas.
Look at the pad from all sides. It should be level with the earcup and should not lean to one side. Press lightly around the edge to confirm that it stays attached.
Put on the headphones and move your head gently. The pad should not slide, pop out, or create a sharp pressure point.
7. Test sound and controls
Play music at a low volume first. Check both left and right channels. Listen for a sudden change in bass, rattling, or a blocked sound.
A good pad seal can improve bass response and passive noise isolation. If one side sounds much thinner, the pad may not be seated evenly. Remove it and repeat the fitting process rather than increasing the volume.
How to reinstall a JBL pad with a mounting ring
Some JBL headphone pads attach to a removable plastic ring. This design can seem difficult because the pad and ring may come off together.
First, identify the ring’s tabs. They are small plastic points that fit into matching slots on the earcup. Place the ring inside the pad’s rear lip, then work the lip around the ring until the fabric or leatherette sits evenly.
Next, place the ring against the earcup. Align every tab before applying pressure. Press around the ring in small sections until it is secure.
When using this method for how to put headphone pads back on JBL headphones, never press only in the center. Center pressure does not engage the tabs and may push against the speaker grille.
If a tab will not fit, remove the ring and check its direction. A reversed ring may look close to correct but will not lock into place.

What to do if the JBL pad keeps coming off
A pad that pops off after installation usually has a specific cause. The most common issue is that part of the lip is outside the groove.
Remove the pad and inspect the edge. Look for stretched fabric, torn stitching, or a warped plastic ring. Clean dust and old adhesive from the earcup with a dry microfiber cloth.
Try these fixes:
• Reseat the pad from the top and work around the cup slowly.
• Make sure the full lip is inside the groove.
• Check that the mounting ring is facing the correct way.
• Replace a broken ring instead of forcing it.
• Replace the pad if the edge has torn.
• Use adhesive only when the original design clearly requires it.
Do not apply glue to a pad that normally clips into place. Glue can make future replacement difficult and may prevent the pad from sitting flat.
In my experience, rushing is the main reason a JBL pad fails to stay attached. When someone stretches one side too far, the opposite side usually slips out. Slow, balanced pressure works much better.

Common mistakes to avoid
Knowing how to put headphone pads back on JBL headphones also means knowing what not to do. Small mistakes can affect comfort, sound, and the life of the headset.
Avoid these problems:
• Pulling hard on the leatherette surface
• Using a sharp tool near the speaker grille
• Twisting the pad while installing it
• Covering a microphone opening or air vent
• Mixing left and right mounting rings
• Using too much adhesive
• Testing the headphones at high volume before checking the fit
The pad should never feel stretched like a drum. A little tension is normal, but extreme tension can split the seam. If the pad seems too small, it may be the wrong replacement model.
JBL headphones can look similar across product lines, yet their ear pads may use different sizes and attachment systems. Check the model name printed on the headband, earcup, packaging, or Bluetooth settings before buying replacement pads.

How to care for JBL headphone pads
Once you know how to put headphone pads back on JBL headphones, simple care can help them stay attached longer. Sweat, skin oil, heat, and friction can weaken synthetic leather and fabric.
Wipe the pads with a soft, slightly damp cloth after long listening sessions. Do not soak the foam or spray cleaner directly onto the earcup. Let the pads dry fully before storing the headphones.
Store the headset in a cool, dry place. Avoid leaving it in a hot car, direct sunlight, or a tightly packed bag. Heat can soften adhesive and speed up peeling.
Replace the pads when they become flat, cracked, or difficult to clean. Fresh pads can restore comfort and improve the seal, but they cannot repair a damaged speaker or broken hinge.

When to replace the ear pads instead
Reattaching a pad makes sense when the pad is still in good condition and only slipped out. Replacement is better when the material has failed.
Choose new pads if:
• The outer coating is peeling across a large area
• The foam no longer returns to its shape
• The stitching is open
• The pad smells musty after cleaning
• The mounting lip is stretched or torn
• The pad no longer seals around your ear
Use pads listed for your exact JBL model. Universal pads may fit physically, but they can change the sound, comfort, and noise isolation. For active noise cancellation models, an uneven seal may also affect how well the headphones reduce outside noise.
JBL’s product support information is the best place to confirm model compatibility and service options. If the earcup itself is cracked or the speaker grille is loose, professional service is safer than further home repair.

Frequently Asked Questions
Can I put JBL headphone pads back on without tools?
Yes. Many JBL pads can be reattached with your fingers by stretching the rear lip into the earcup groove. A plastic pry tool may help with a tight section, but avoid metal tools.
Why will my JBL ear pad not stay attached?
The pad lip may not be fully inside the groove, or the mounting ring may be misaligned. A torn lip, broken clip, or wrong-size replacement pad can also cause repeated detachment.
Can I use super glue on JBL headphone pads?
Super glue is not recommended because it dries hard and can damage foam, plastic, or synthetic leather. If adhesive is required, use a small amount of a flexible product designed for the pad materials.
How do I know which replacement pads fit my JBL headphones?
Find the exact model name and compare the replacement pad’s size and attachment method. Similar JBL models can use different rings, clips, or pad dimensions.
Will new ear pads change JBL headphone sound?
Yes. Pad thickness, foam density, and the quality of the seal can change bass, treble, comfort, and passive noise isolation. Pads made for the exact model are the safest choice for keeping the original sound close.
Can I wash JBL headphone pads?
Do not machine-wash or soak most JBL ear pads. Wipe them with a lightly damp cloth, use mild soap only when suitable for the material, and let them dry completely before reattaching them.
Conclusion
Learning how to put headphone pads back on JBL headphones is mostly a matter of careful alignment and gentle pressure. Check the attachment style, start with one small section, work evenly around the earcup, and inspect the full seal before testing the sound.
Do not force a damaged pad or use strong glue as a quick fix. If the foam, stitching, or mounting ring has failed, model-specific replacement pads are usually the cleaner and more comfortable solution. Try the steps above, check your exact JBL model, and share your experience or questions in the comments.

Everett Ashford is a tech reviewer at mytechgrid.com specializing in SSDs, cameras, TVs, earbuds, headphones, and other consumer electronics. He provides honest, data-driven reviews based on hands-on testing and real-world performance analysis. Everett simplifies complex tech details to help readers make smart, confident buying decisions.