ISO speed on a camera measures how sensitive the camera sensor is to light during exposure.
Understanding what is ISO speed on a camera helps you take brighter photos in dark scenes without changing your shutter speed or aperture. It also helps you control image noise, preserve detail, and make better choices when light changes fast. Once you see ISO as part of the exposure triangle, camera settings become far less confusing.
What Is ISO Speed on a Camera?
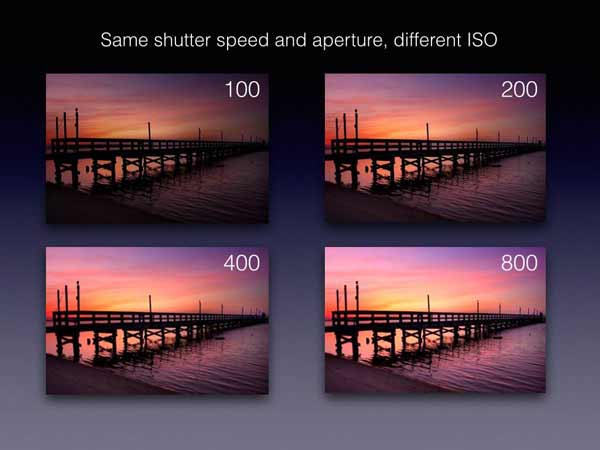
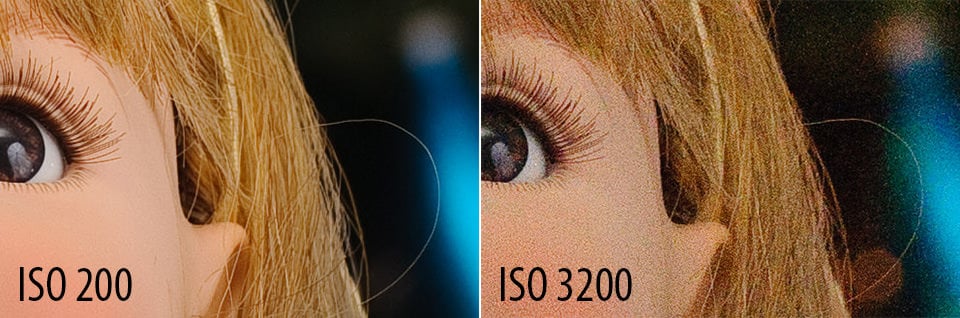
ISO speed is the camera setting that controls how strongly the camera responds to light. A low ISO, such as ISO 100, needs more light but usually gives a cleaner image. A high ISO, such as ISO 3200, makes the image brighter in low light but may add visible grain or digital noise.
The term comes from the International Organization for Standardization. In digital photography, ISO does not literally change the physical sensitivity of the sensor in the same way film speed describes film sensitivity. Instead, the camera increases the signal created by the light reaching the sensor.
A simple way to understand what is ISO speed on a camera is to compare it with your eyes. In bright sunlight, your eyes need little help to see detail. In a dark room, your pupils open wider, and your vision becomes more sensitive. ISO gives your camera a similar kind of boost, although the result can include more noise.
A camera often offers settings such as:
• ISO 100 or ISO 200 for bright outdoor scenes
• ISO 400 to ISO 800 for shade, interiors, or cloudy weather
• ISO 1600 to ISO 6400 for concerts, sports, and evening scenes
• ISO 12,800 and higher for very dark conditions, with more visible noise
ISO is only one part of exposure. Shutter speed controls how long the sensor receives light, while aperture controls how much light passes through the lens.
How ISO Fits Into the Exposure Triangle
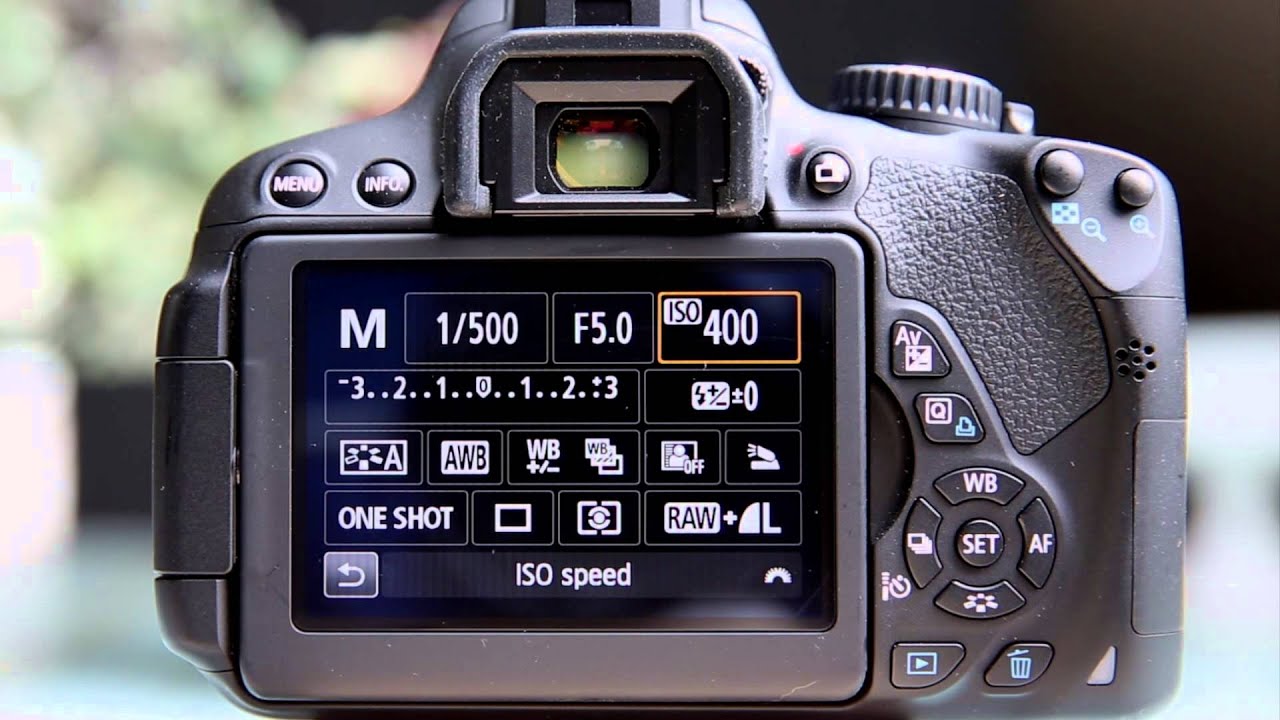
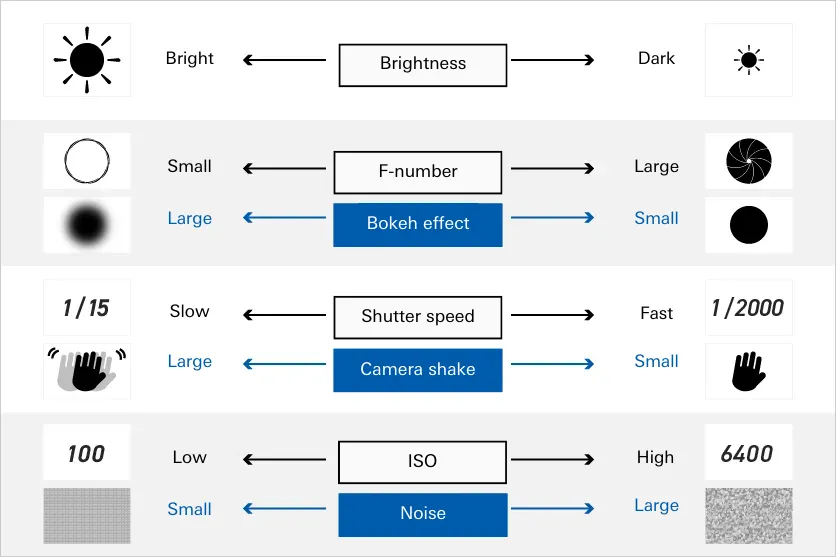
The exposure triangle includes aperture, shutter speed, and ISO. These three settings work together to create a correctly exposed photograph.
Suppose you photograph a person indoors. You can make the image brighter by opening the aperture, slowing the shutter speed, or raising ISO. Each choice solves the light problem but changes the photo in a different way.
Aperture
Aperture is the opening inside the lens. A wide aperture, such as f/1.8, lets in more light and creates a softer background. A narrow aperture, such as f/11, lets in less light but keeps more of the scene sharp.
Shutter speed
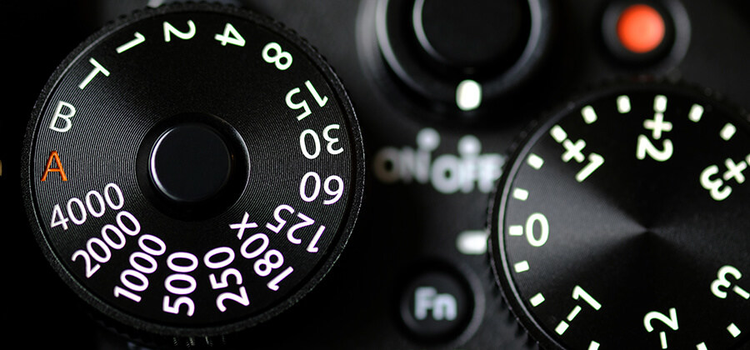
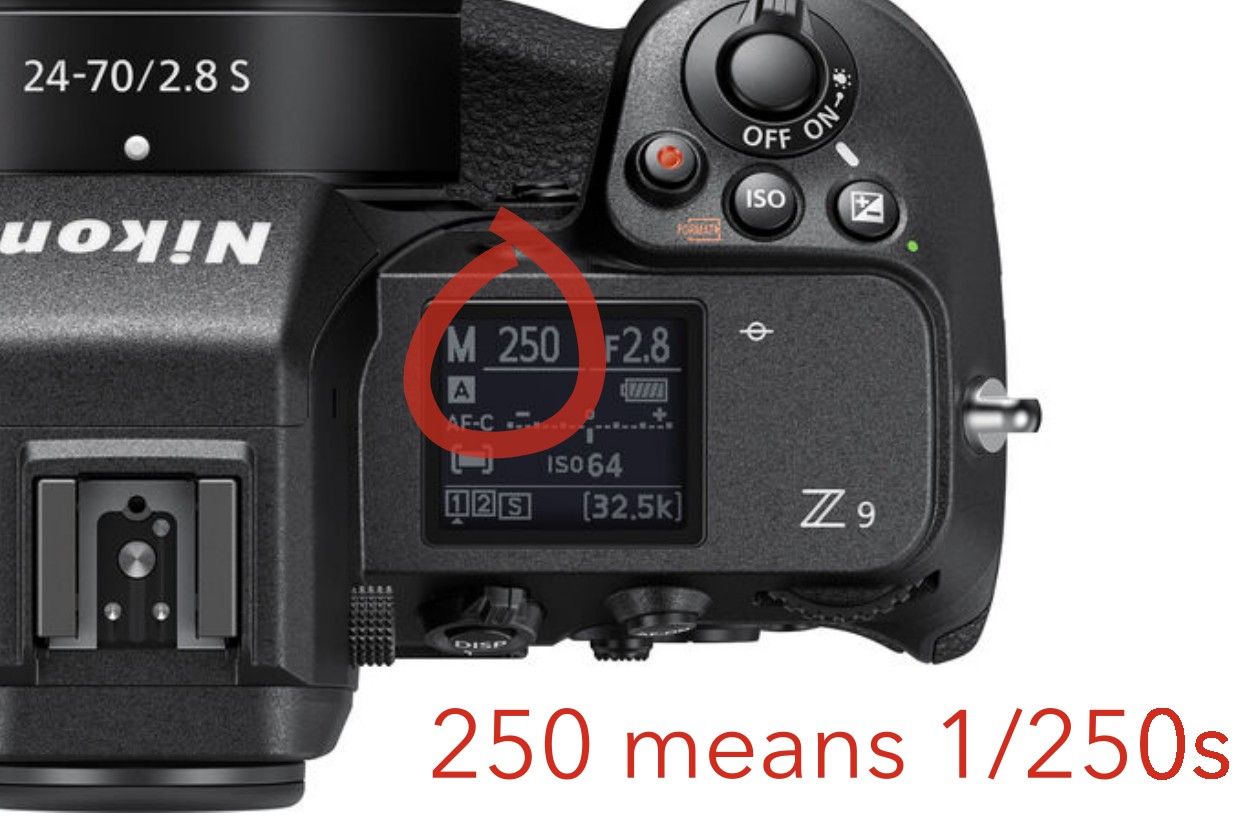
Shutter speed controls how long the camera records light. A fast speed, such as 1/1000 second, can freeze a moving athlete. A slow speed, such as 1/30 second, lets in more light but may cause blur from camera shake or subject movement.
ISO
ISO changes the brightness of the recorded signal. It does not freeze motion or create background blur. This is why learning what is ISO speed on a camera matters: ISO can help you keep the aperture and shutter speed you need.
For example, imagine these settings:
- ISO 100, f/4, and 1/250 second produce a properly exposed outdoor photo.
- A cloud covers the sun, making the scene darker.
- You could raise ISO to 200, keep f/4, and retain 1/250 second.
- The exposure stays similar, but the photo may show slightly more noise.
This balance is the heart of manual exposure. You are not searching for one perfect ISO. You are choosing the best compromise for the scene.
What Do Low and High ISO Settings Mean?
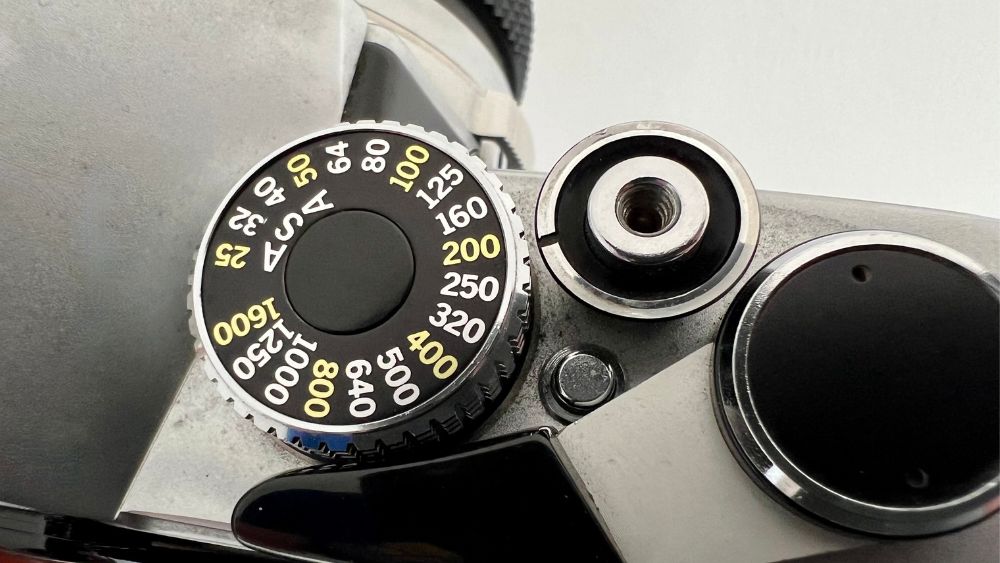
A low ISO setting means the camera uses a weaker signal gain. It needs more light, but it usually produces better image quality. A high ISO setting increases brightness when the sensor receives less light, but it can reduce detail and color accuracy.
Low ISO settings
ISO 100 is often the base ISO on many cameras. Some models use ISO 64, ISO 125, or another value as their lowest native setting.
Low ISO is useful for:
• Landscapes in bright daylight
• Studio portraits with controlled lighting
• Product photography
• Long exposures with a tripod
• Scenes where maximum detail matters
Low ISO can also help you use a slower shutter speed in bright light. For example, a landscape photographer may use ISO 100, a small aperture, and a tripod to create smooth water.
High ISO settings
High ISO is useful when you cannot get enough light through the aperture or shutter speed. It is often better to accept some noise than to produce a dark, blurry photo.
High ISO is useful for:
• Indoor events
• Weddings and receptions
• Night street photography
• Wildlife at dawn
• Sports in a gym
• Handheld photography after sunset
The right question is not “How do I avoid high ISO?” The better question is “What ISO gives me a sharp, useful photo for this situation?”

ISO Speed, Noise, and Image Quality
Digital noise is the rough or speckled pattern that may appear in photos taken at high ISO. It can look like colored dots, grain, or loss of fine detail. Noise becomes more noticeable in shadows and in images that have been brightened heavily during editing.
High ISO is not the only cause of noise. Underexposure also matters. A dark photo taken at ISO 100 and brightened several stops may look noisier than a properly exposed photo taken at ISO 800.
This leads to an important practical lesson about what is ISO speed on a camera: ISO can brighten the captured signal, but it cannot replace missing light or restore detail that the sensor never recorded.
Noise depends on several factors:
• Sensor size
• Sensor design
• Pixel count and pixel size
• Exposure level
• Temperature
• In-camera noise reduction
• Raw or JPEG capture
• Software used for editing
A full-frame camera often handles high ISO better than a smaller sensor camera, but this is not an absolute rule. Modern cameras from different brands can perform very differently. A newer crop-sensor camera may produce cleaner images than an older full-frame model.
Noise reduction software can help. However, too much noise reduction may remove skin texture, hair, leaves, or other fine detail. It is usually better to expose carefully and apply moderate editing later.
Native ISO, Extended ISO, and Auto ISO
Your camera may show a wide ISO range, but not every setting works in the same way. Native ISO values are produced through the camera’s normal sensor and signal system. Extended ISO values may be created by digitally pushing or pulling the image beyond the camera’s standard range.
For example, a camera may list ISO 50 as an extended low setting. It may provide a small benefit in bright scenes, but it can reduce highlight protection. Extended high settings may create a brighter file with less useful detail than a normal high ISO.
Native ISO
Native ISO is the range where the camera is designed to provide its main performance. The lowest native value is often called base ISO. At base ISO, the camera usually offers its best dynamic range and lowest noise.
Auto ISO
Auto ISO lets the camera choose the ISO based on the light and your other settings. It is helpful when the light changes quickly, such as during a wedding, hike, or outdoor sports event.
Many cameras let you set limits for Auto ISO:
• Minimum ISO
• Maximum ISO
• Minimum shutter speed
• Preferred shutter speed range
A useful setup for handheld portraits is Auto ISO with a minimum shutter speed of about 1/125 second. For a moving child, you may need 1/250 second or faster. The exact value depends on focal length, subject movement, and your ability to hold the camera steady.
When learning what is ISO speed on a camera, Auto ISO can seem less manual. In practice, it is a smart tool that lets you control the settings that matter most.
When Should You Raise or Lower ISO?
Raise ISO when you need a faster shutter speed or a smaller aperture and the scene does not provide enough light. Lower ISO when you have plenty of light and want the cleanest file or the widest dynamic range.
A practical decision process looks like this:
- Choose the shutter speed needed to prevent subject or camera movement.
- Choose the aperture needed for depth of field and lens performance.
- Raise ISO only as much as needed for a good exposure.
- Check the image at full size if detail and noise are important.
- Adjust your settings if the highlights are clipped or shadows are too dark.
For a stationary landscape on a tripod, use a low ISO and a slower shutter speed. For a bird in flight, use a fast shutter speed first, then raise ISO as needed. For a portrait in dim light, choose an aperture that gives the background you want, set a safe shutter speed, and let ISO fill the gap.
A common beginner mistake is keeping ISO too low at all costs. This often produces blurry photos because the shutter speed becomes too slow. A sharp image with some noise is usually more valuable than a clean image with motion blur.
Another mistake is raising ISO before checking the aperture. If your lens is set to f/8 indoors, opening it to f/2.8 may give you four times more light. That may let you use a lower ISO without losing sharpness.
ISO Settings for Common Photography Situations
There is no universal ISO chart because light, camera models, lenses, and creative goals vary. Still, these starting points can help.
Bright sunlight
Use ISO 100 or ISO 200. This range gives excellent detail and helps protect highlights in strong light.
Cloudy weather
Try ISO 200 to ISO 800. The best value depends on your shutter speed and aperture.
Indoor portraits
Use ISO 400 to ISO 1600. A wide aperture and a fast enough shutter speed may let you stay near the lower end.
Concerts and events
ISO 800 to ISO 6400 is common. Stage lighting changes quickly, so a high ISO may be necessary to freeze performers.
Sports
Use ISO 800 to ISO 6400 or higher, depending on the venue. A shutter speed of 1/500 second or faster may be needed for active subjects.
Night photography
Use ISO 100 to ISO 800 on a tripod for buildings, stars, or light trails. Handheld night scenes may require ISO 1600 or more.
Wildlife
Use the lowest ISO that still allows a fast shutter speed. Wildlife often moves without warning, so sharpness usually matters more than perfectly clean shadows.
These values are starting points, not strict rules. Learning what is ISO speed on a camera means learning to read the scene rather than trusting a fixed number.
ISO for Film and Digital Cameras
With film cameras, ISO describes the light sensitivity of the film stock. You choose a roll rated at ISO 100, ISO 400, or ISO 800. Once the roll is loaded, you normally cannot change the ISO between individual frames.
Digital cameras offer much more flexibility. You can change ISO for every shot, and many cameras can adjust it automatically. This makes digital ISO a control over signal amplification rather than a permanent change to the sensor.
Film and digital images also show different types of grain and noise. Film grain is linked to the physical crystals in the emulsion. Digital noise comes from the electronic recording process and may include luminance noise, color noise, and pattern noise.
The visual result can be creative. Some photographers add grain to digital images because it creates a classic look. Others prefer a smooth, clean image. Neither approach is automatically better; the right choice depends on the subject and the mood.
Does ISO Affect Dynamic Range?
Yes, ISO can affect dynamic range, although the exact effect depends on the camera’s sensor and signal design. Dynamic range is the span between the darkest detail and the brightest detail a camera can record.
At base ISO, many cameras capture their widest dynamic range. This gives you more flexibility when recovering shadows and highlights from a raw file. At higher ISO values, highlight headroom may decrease, and bright areas can clip sooner.
Some modern cameras use dual-gain or dual-native-ISO systems. These cameras can switch to a different signal path at certain ISO levels, which may improve noise performance. The improvement is model-specific, so consult your camera manual or reliable laboratory tests for exact figures.
You should still expose with care. ISO does not make a sensor unlimited. If a bright window is already clipped, lowering ISO may help, but it cannot recover detail that was never recorded.
ISO and Raw Versus JPEG Files
Raw files store much more original sensor information than JPEG files. They generally give you greater control over exposure, white balance, noise reduction, and shadow recovery.
JPEG files are processed inside the camera. The camera applies sharpening, contrast, color adjustments, and noise reduction before saving the image. This can make high ISO photos look smoother, but it may also remove fine detail.
At high ISO, raw files may look rough when first opened. Good editing software can reduce noise while preserving important detail. JPEG files may look ready to share but offer less flexibility if exposure is wrong.
For important work, such as a once-in-a-lifetime event, photographing in raw or raw plus JPEG can provide a safer workflow. Always check your storage space and backup plan before a long shoot.
Common ISO Mistakes to Avoid
Learning what is ISO speed on a camera becomes easier when you know the most common errors.
• Using ISO 100 indoors without a tripod can create blur.
• Choosing a very high ISO in bright light can reduce highlight detail.
• Brightening a badly underexposed image too much can reveal heavy noise.
• Assuming every camera has the same high-ISO quality can lead to poor settings.
• Forgetting to reset ISO after a night shoot can cause noisy daylight photos.
• Using Auto ISO without setting a maximum can produce unexpectedly noisy files.
• Judging noise only on the camera’s small screen can be misleading.
• Confusing lens stabilization with subject-motion control can result in blurry images.
Image stabilization can help you use a slower shutter speed for a still subject. It does not stop a moving person, animal, or vehicle. In those cases, you need a faster shutter speed, which often requires a higher ISO.
A Simple Way to Practice ISO
You can learn what is ISO speed on a camera with one short home exercise. Place a still object near a window and photograph it at ISO 100, ISO 400, ISO 1600, and ISO 6400.
Keep the aperture and shutter speed consistent if possible, or adjust them so each frame has a similar brightness. Review the images at 100 percent magnification, then view them at the size you normally share or print.
Look for:
• Shadow noise
• Loss of fine detail
• Changes in color
• Highlight clipping
• Differences in skin or surface texture
• The highest ISO that still looks good to you
This test teaches you more than a generic ISO chart because it shows how your own camera performs. Repeat it with a moving subject so you can see the practical value of faster shutter speeds.
A useful field lesson is to check your first few photos at the start of every shoot. Look at the histogram, focus, shutter speed, and ISO. This small habit prevents many avoidable mistakes.
Frequently Asked Questions About What Is ISO Speed on a Camera
Is ISO the same as camera brightness?
ISO affects the brightness of the recorded image, but it does not create real light. It amplifies the signal captured by the sensor, which can also increase noise.
What is the best ISO setting for a camera?
The best ISO is the lowest setting that still allows the shutter speed and aperture you need. ISO 100 is often ideal in bright light, while darker scenes may require ISO 800, 1600, or higher.
Does a higher ISO make a photo better?
A higher ISO does not automatically make a photo better. It can help prevent blur in low light, but it may add noise and reduce fine detail.
Should I always use the lowest ISO?
No. Using the lowest ISO can force a shutter speed that is too slow or an aperture that does not suit your subject. A sharp photo at ISO 1600 is often better than a blurry photo at ISO 100.
What ISO should I use at night?
Use a low ISO with a tripod for still scenes and long exposures. For handheld photos or moving subjects, raise ISO until you can use a safe shutter speed.
Does ISO affect shutter speed?
ISO does not directly change shutter speed, but raising ISO lets you use a faster shutter speed while keeping a similar exposure. This is useful for sports, wildlife, and handheld photos in dim light.
Is high ISO better on a full-frame camera?
Many full-frame cameras produce less noise at high ISO than smaller sensors, but performance varies by model and generation. Lens aperture, exposure, lighting, and editing also affect the final result.
Conclusion
ISO speed is the camera control that adjusts the strength of the light signal in your image. Low ISO usually gives cleaner files and more dynamic range, while high ISO helps you capture sharp photos when light is limited. The best setting depends on your shutter speed, aperture, subject movement, and camera performance.
Start by choosing the shutter speed and aperture that fit your subject. Then raise ISO only as much as needed. Practice with your own camera, test its usable ISO range, and review your results in real shooting conditions. Explore your camera manual, try the exercises above, and share your questions or results with other photographers.

Everett Ashford is a tech reviewer at mytechgrid.com specializing in SSDs, cameras, TVs, earbuds, headphones, and other consumer electronics. He provides honest, data-driven reviews based on hands-on testing and real-world performance analysis. Everett simplifies complex tech details to help readers make smart, confident buying decisions.