
Connect an SSD to your motherboard by matching its type, installing it in the right slot, and securing every cable or screw.
Learning how to connect SSD to motherboard components is easier than it first seems. The key is knowing whether you have a 2.5-inch SATA SSD, an M.2 SATA drive, or an M.2 NVMe drive. This guide explains each method, shows what to check before installation, and helps you avoid common setup errors.
Identify Your SSD Type
Before learning how to connect SSD to motherboard hardware, identify the SSD format. The physical shape and connector type determine the correct installation method.
Most consumer SSDs use one of these three designs:
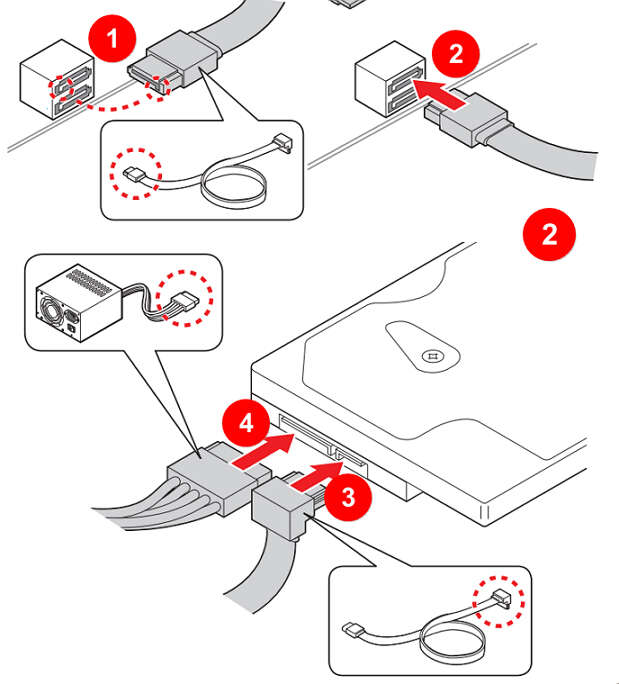
• 2.5-inch SATA SSD: A flat, rectangular drive that uses a SATA data cable and a SATA power cable.
• M.2 SATA SSD: A slim circuit board that fits into an M.2 slot but uses the slower SATA protocol.
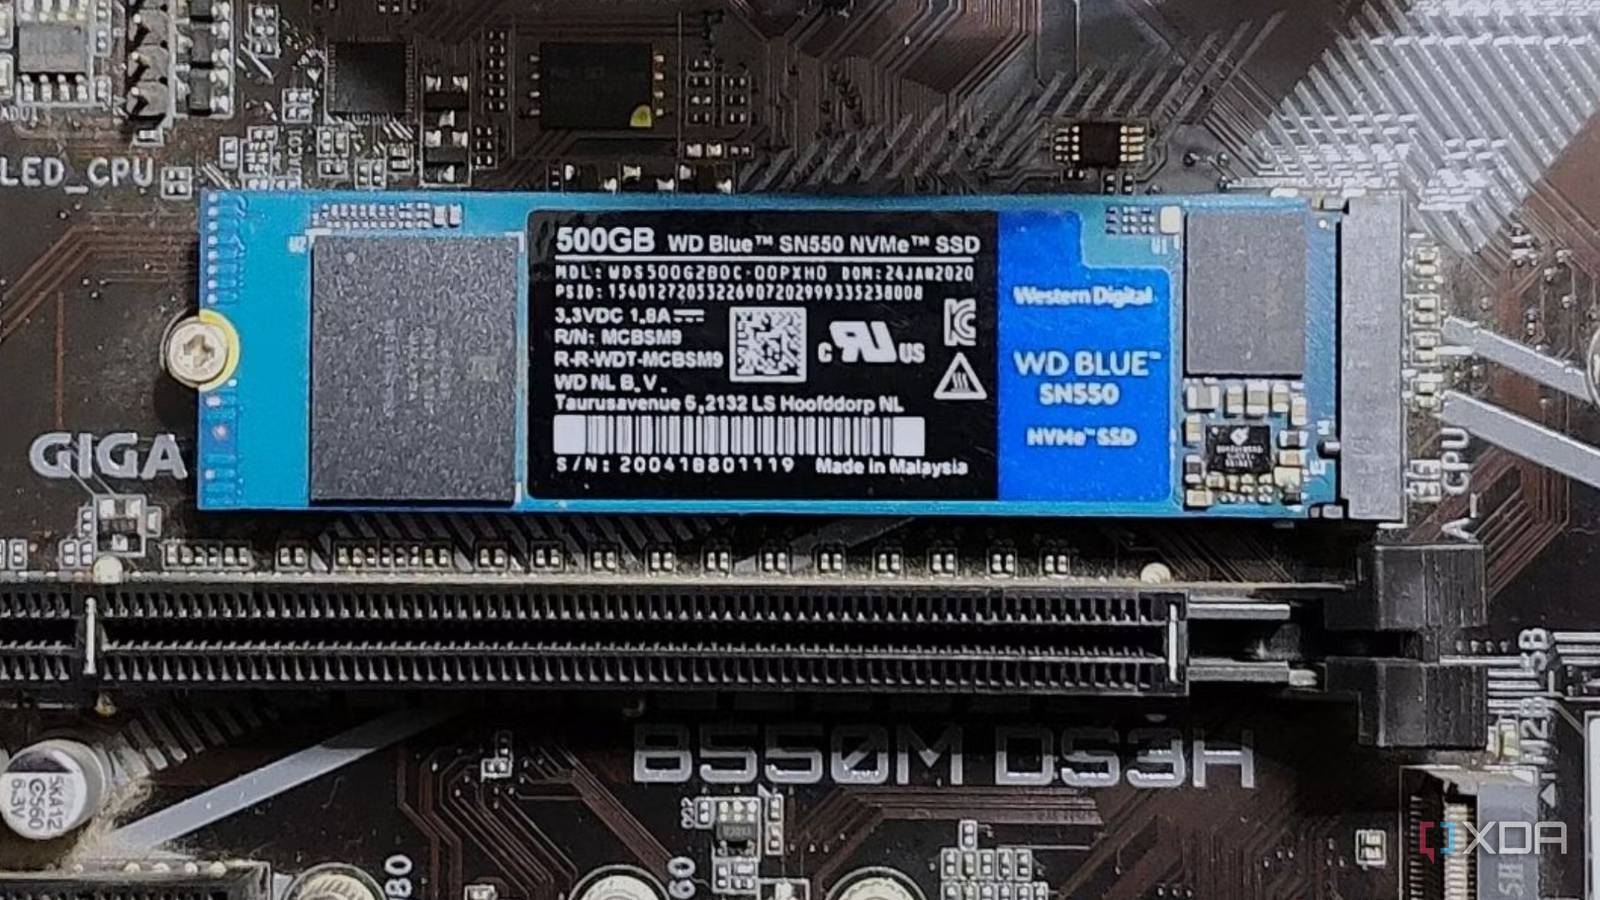
• M.2 NVMe SSD: A slim drive that fits into an M.2 slot and uses the faster PCIe protocol.
A 2.5-inch SATA SSD looks similar to a small laptop hard drive. It needs two connections. One cable carries data to the motherboard, while the other brings power from the power supply.
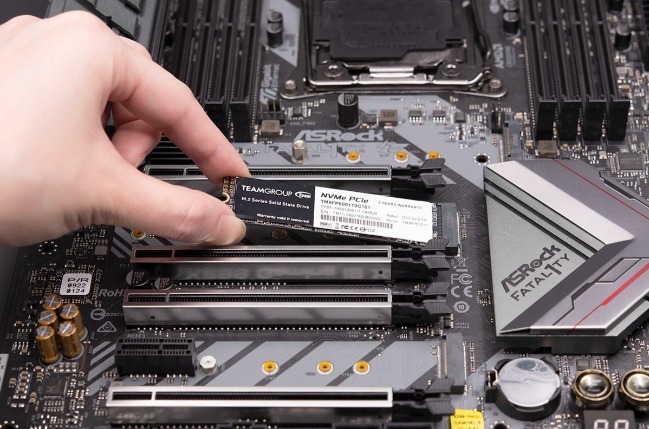
An M.2 SSD looks like a stick of gum. It slides directly into an M.2 slot on the motherboard. It does not need separate data or power cables.
Check the label on the SSD and the motherboard manual. The manual will show which M.2 slots support SATA, NVMe, or both. This step matters because not every M.2 slot supports every SSD type.

Check Compatibility Before Installation
A few quick checks can prevent most installation problems. Always shut down the computer, turn off the power supply, and unplug the power cord before opening the case.
Review these items first:
• Motherboard slot: Confirm that your motherboard has a compatible SATA port or M.2 slot.
• SSD protocol: Make sure an NVMe drive goes into an M.2 slot with PCIe support.
• M.2 key type: The notch on the SSD must match the slot. Most modern NVMe drives use an M key.
• Available SATA ports: Some motherboards disable certain SATA ports when specific M.2 slots are occupied.
• Power supply cables: A 2.5-inch SATA SSD needs an available SATA power connector.
• Operating system support: Modern versions of Windows, Linux, and macOS support SSDs well, but older systems may need special drivers.
Motherboard manuals often include a storage table. It may state that using an M.2 slot disables SATA ports 5 and 6, for example. This is normal. It is not a fault with the drive.
If you are adding the SSD as a boot drive, check whether your system uses UEFI mode. UEFI works best with modern NVMe drives and operating systems. Older legacy BIOS settings can sometimes create boot or partition problems.
How to Connect a 2.5-Inch SATA SSD
A 2.5-inch SATA SSD is one of the simplest drives to install. It uses a thin SATA data cable and a wider SATA power connector.
Follow these steps:
-
Shut down the computer and disconnect the power cable.
-
Press the power button for a few seconds to discharge leftover power.
-
Remove the computer case panel.
-
Find an open 2.5-inch drive bay or mounting bracket.
-
Place the SSD in the bay with its connectors facing the cable openings.
-
Secure the SSD with the correct screws.
-
Connect one end of the SATA data cable to the SSD.
-
Connect the other end of the SATA data cable to a SATA port on the motherboard.
-
Connect a SATA power plug from the power supply to the SSD.
-
Close the case, reconnect the power cable, and start the computer.
The SATA data cable has a small, L-shaped connector. Do not force it. The connector fits in only one direction.
The SATA power connector is wider than the data connector. It also has an L-shaped design. Push it in gently until it sits firmly.
When deciding how to connect SSD to motherboard systems, remember that the data cable connects to the motherboard, but the power cable comes from the power supply. Connecting only one cable will not make the drive work.
A loose SATA cable is a common problem. In builds I have checked, the SSD was often installed correctly, but the data cable had not fully clicked into the motherboard port. Reseating both ends usually fixed the issue.

How to Connect an M.2 NVMe or SATA SSD
M.2 installation is faster because the drive connects directly to the motherboard. There are no SATA data or power cables to manage.
Use this process:
-
Turn off the computer and unplug the power cable.
-
Remove the case panel.
-
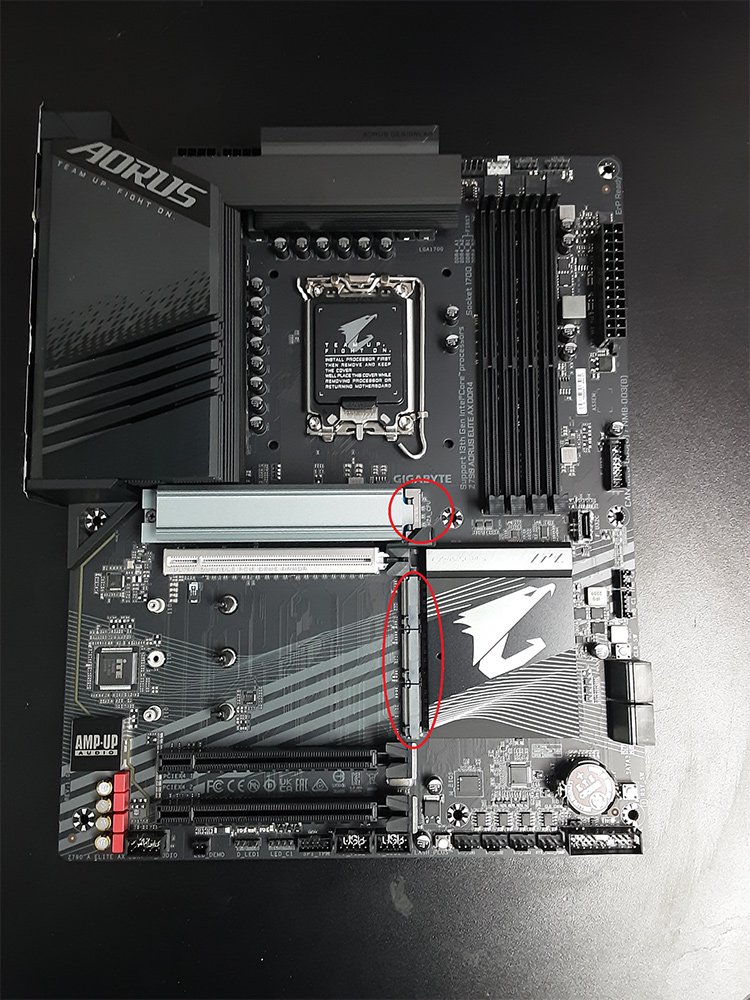
Find the M.2 slot on the motherboard.
-
Check the motherboard manual for the correct slot.
-
Remove the small M.2 mounting screw or heatsink cover.
-
Hold the SSD by its edges.
-
Align the notch on the SSD with the key in the M.2 slot.
-
Insert the SSD at about a 25 to 30 degree angle.
-
Press the free end of the SSD down toward the motherboard.
-
Secure the drive with the M.2 screw.
-
Replace the heatsink if your motherboard includes one.
-
Start the computer and check whether the drive appears in the firmware setup.
Do not push the M.2 SSD straight down into the slot. Insert it at an angle first. The gold contacts should slide smoothly into the connector.
The drive may look slightly raised before you install the screw. That is normal. The screw holds the far end down and keeps the drive stable.
If your motherboard includes an M.2 heatsink, remove the protective plastic from its thermal pad before replacing it. Forgetting this plastic can reduce heat transfer.
When learning how to connect SSD to motherboard hardware, many people confuse an M.2 SATA SSD with an M.2 NVMe SSD. Both may fit the same physical slot, but the motherboard must support the drive’s protocol.

Understand M.2 Slots and PCIe Lanes
M.2 slots can differ greatly between motherboards. Some support PCIe NVMe drives only. Others support both NVMe and SATA M.2 drives.
Your motherboard may have several M.2 slots:
• The top slot often connects directly to the CPU and may provide the highest speed.
• A lower slot may connect through the motherboard chipset.
• Some slots support PCIe 4.0 or PCIe 5.0.
• Older slots may support only PCIe 3.0.
A PCIe 5.0 NVMe SSD can usually work in a PCIe 4.0 slot, but it will run at the lower slot speed. The same backward compatibility applies to many older NVMe drives.
Speed also depends on the SSD controller, NAND memory, cooling, and workload. A faster interface does not always create a noticeable improvement during web browsing or office work.
Some motherboards share bandwidth between M.2 slots, graphics slots, and SATA ports. For example, installing a drive in one M.2 slot may reduce a graphics slot from x16 mode to x8 mode. This is not common on every board, so consult the manual before installation.
Knowing these limits makes how to connect SSD to motherboard systems much less confusing. The slot’s shape is only part of the answer. The slot’s electrical support matters too.
Install an SSD as a New Storage Drive
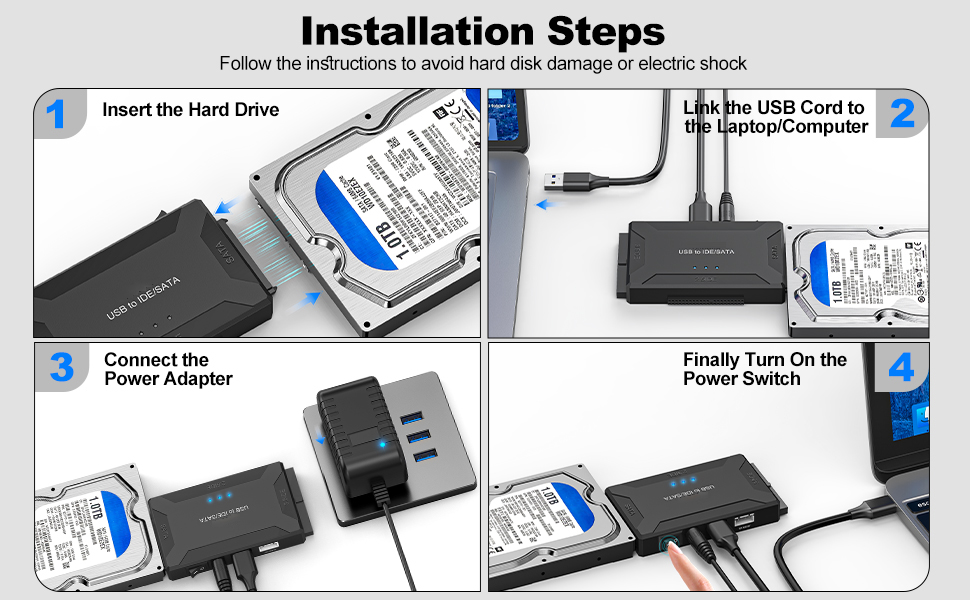
If you want the SSD for extra storage, you can keep your current operating system on its existing drive. After physical installation, Windows or Linux may need to initialize and format the new SSD.
In Windows, use these steps:
-
Right-click the Start button.
-
Open Disk Management.
-
Find the new drive by checking its capacity.
-
Initialize it if Windows asks.
-
Choose GPT for modern UEFI systems.
-
Create a new simple volume.
-
Assign a drive letter.
-
Format the volume with NTFS.
Do not format a drive until you are certain it is the new SSD. Formatting the wrong disk can erase important files.
Linux users can use tools such as GNOME Disks or command-line utilities. macOS users can use Disk Utility. The same rule applies on every system: verify the drive’s size and identity before changing partitions.
A new SSD may not appear in File Explorer immediately. This does not always mean the installation failed. The drive may simply need partitioning and formatting.

Move Windows to the New SSD
Many people install an SSD to replace a slow hard drive. You can perform a clean Windows installation or clone the old drive.
A clean installation gives you the best chance of avoiding old drivers, unwanted files, and damaged system settings. However, you must reinstall programs and restore personal files.
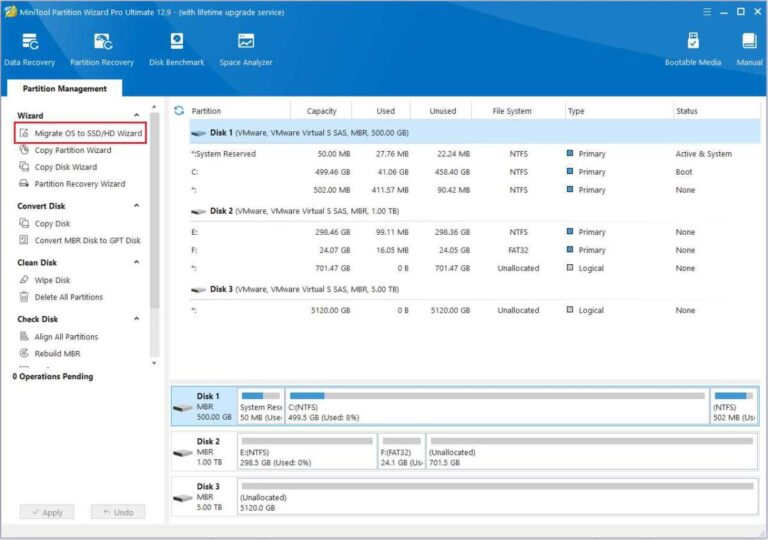
Cloning copies the old drive to the new SSD. It can save time, but the destination drive must have enough usable capacity for the data being copied.
Before cloning:
• Back up important files to another drive or cloud storage.
• Check whether the old system uses GPT or MBR.
• Confirm that the computer boots in UEFI or legacy mode.
• Install the cloning software from a trusted provider.
• Disconnect unnecessary external drives to reduce confusion.
After cloning, enter the motherboard firmware settings and select the new SSD as the first boot device. If the computer still boots from the old drive, change the boot order or temporarily disconnect the old drive.
A common mistake I have seen is cloning a drive but leaving the old drive connected during the first boot. The computer may start from the old installation, making the clone appear unsuccessful. Setting the new SSD as the first boot device solves this in many cases.
Configure the SSD in BIOS or UEFI
After you learn how to connect SSD to motherboard components, check whether the firmware detects the drive. Restart the computer and press the setup key during startup. Common keys include Delete, F2, F10, or F12, depending on the manufacturer.
Look for a section named Storage, NVMe Configuration, SATA Information, or Boot. The SSD model and capacity should appear there.
If the drive is visible in BIOS or UEFI but missing from Windows, the issue is usually related to initialization, partitioning, or formatting. If the drive is missing from the firmware too, inspect the physical installation first.
Try these checks:
• Reseat the M.2 drive.
• Test another M.2 slot if the motherboard supports it.
• Use a different SATA data cable.
• Try another SATA motherboard port.
• Confirm that the SATA power connector is attached.
• Update the motherboard firmware when appropriate.
• Check whether the M.2 slot supports your SSD type.
Avoid changing advanced settings without a clear reason. Switching storage modes can prevent an existing operating system from booting. If Windows was installed in AHCI mode, changing to another mode may cause an error.
Keep the SSD Cool and Secure
Heat can reduce sustained SSD performance. This is most important with high-speed NVMe drives that transfer large files or run demanding applications.
Use the motherboard’s M.2 heatsink when available. Make sure the thermal pad touches the SSD controller and memory chips as designed by the manufacturer.
Good airflow also helps. Keep cables away from intake fans and make sure dust does not block the case vents.
For a 2.5-inch SATA SSD, cooling is usually less difficult. Still, mount the drive securely. Do not leave it hanging from its cables inside the case.
Never touch the gold contacts on the SSD. Hold the device by its edges. Static electricity is less dangerous than many people think with modern hardware, but grounding yourself before handling components is still a wise habit.
Common Problems and Practical Fixes
When how to connect SSD to motherboard installation does not work, the cause is often simple. Start with physical checks before changing software settings.
The SSD does not appear
Make sure the drive is fully inserted and secured. For a SATA SSD, check both the data cable and the power cable. For an M.2 SSD, verify that the slot supports the drive’s protocol.
The SSD appears in BIOS but not Windows
Open Disk Management and look for an unallocated disk. Initialize the disk, create a volume, and format it only after confirming that it is the correct drive.
The computer will not boot
Check the boot order in UEFI. If you cloned an operating system, confirm that the clone uses the same partition style and that the new SSD contains the required EFI boot files.
The SSD runs slowly
Check the interface speed, thermal conditions, and available free space. Some SSDs also slow down during long transfers when their temporary write cache is full.
The M.2 screw is missing
Motherboards often include the screw in a small accessory box. Use the correct M.2 screw and standoff. Do not substitute a long screw, since it may damage the drive or motherboard.
The SATA port stops working
Review the motherboard manual. Some M.2 slots disable selected SATA ports when occupied. Move the SATA cable to an available port listed in the manual.
Safety and Maintenance Tips
Good installation habits protect both the SSD and the motherboard. Work slowly, use the right tools, and never force a connector.
Keep these tips in mind:
• Shut down and unplug the computer before opening it.
• Touch the metal case frame before handling internal parts.
• Hold the SSD by its edges.
• Keep screws away from the motherboard.
• Never bend an M.2 drive.
• Do not overtighten the mounting screw.
• Keep a current backup of important files.
• Monitor SSD health with a trusted drive utility.
• Leave some free space on the SSD for normal operation.
A backup is especially important before cloning, formatting, or changing partitions. Even careful work can go wrong if the wrong disk is selected.
Modern SSDs include wear management and error correction. Still, no storage device should be treated as a permanent backup. Use at least one separate backup for photos, documents, and other valuable files.
Frequently Asked Questions About How to Connect SSD to Motherboard
Can I connect any SSD to any motherboard?
No. A 2.5-inch SATA SSD needs a SATA data port and SATA power connection. An M.2 SSD needs a compatible M.2 slot, and the slot must support the SSD’s SATA or NVMe protocol.
Does an M.2 SSD need a cable?
No. An M.2 SSD connects directly to the motherboard and uses the slot for data and power. You only need the correct M.2 slot and mounting screw.
Which cable connects a SATA SSD to the motherboard?
A SATA data cable connects the 2.5-inch SSD to the motherboard. A separate SATA power cable from the power supply provides electricity to the drive.
Can I install an NVMe SSD in a SATA M.2 slot?
Usually not. A SATA-only M.2 slot may not recognize an NVMe drive, even if the SSD physically fits. Check the motherboard manual before installation.
Should I use the top M.2 slot?
Often, yes. The top slot may connect directly to the processor and support the highest PCIe speed. However, the motherboard manual is the final authority because slot layouts vary.
Why is my new SSD not showing in File Explorer?
The SSD may need to be initialized, partitioned, and formatted. Check Disk Management and confirm the drive’s capacity before making changes.
Conclusion
Connecting an SSD to a motherboard is mainly a matter of matching the drive type to the correct connection. A 2.5-inch SATA SSD needs data and power cables, while an M.2 SSD installs directly into a compatible motherboard slot.
Check the manual, install the drive gently, confirm detection in BIOS or UEFI, and initialize the SSD in your operating system when needed. Take a few extra minutes to check compatibility and create a backup before changing drives.
Now that you know how to connect SSD to motherboard systems, you can upgrade your computer with confidence. Share your build or explore more storage guides to get the most from your new SSD.

Everett Ashford is a tech reviewer at mytechgrid.com specializing in SSDs, cameras, TVs, earbuds, headphones, and other consumer electronics. He provides honest, data-driven reviews based on hands-on testing and real-world performance analysis. Everett simplifies complex tech details to help readers make smart, confident buying decisions.



One Comment